Repair L-shaped Magsafe connector
Like many macbook users in my life, the moment came when my MagSafe connector stopped working correctly (only at a certain angle), and then stopped charging altogether.
After a bit of searching on the Internet, I found several instructions for repairing old MagSafe adapters, there was really nothing to repair the L-shaped. I decided to repair it myself, since the cost of the new is around $ 80.
To summarize: I made my own and later 2 more bought for $ 15 for each (one is now at work, the 2nd which was almost new presented). A small repair manual below:
I needed a repair, a soldering iron, pliers, a knife, a scalpel (optional), an insulating material.
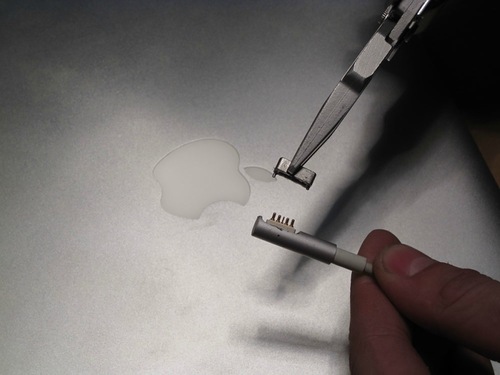
First you need to remove the magnet from the socket in the connector, I’ll say this is not so easy, although it is unlikely to break anything. I acted with pliers (clamped the magnet) and slipped a screwdriver between the cylinder (connector body) and pliers and acted as a lever (I realized this not immediately (I tried to simply pull out the magnet), so the magnet in the photo is in this condition, subsequent patients are almost not damaged) .
')

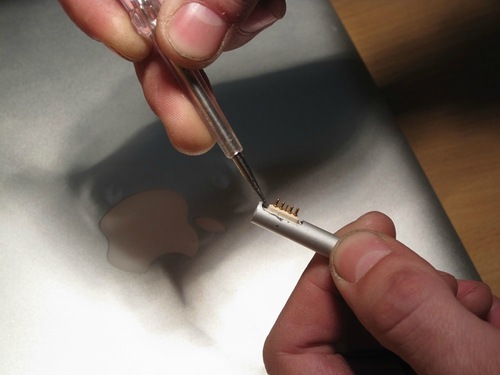
Then gently cut the glue around the edges and move the entire structure inside the cylinder (you need to gently pull the wire and then pull it out). After the connector has come out of the tongue we pull over (pull it out of the shell), as a result, the entire filling of the connector should be pulled out.
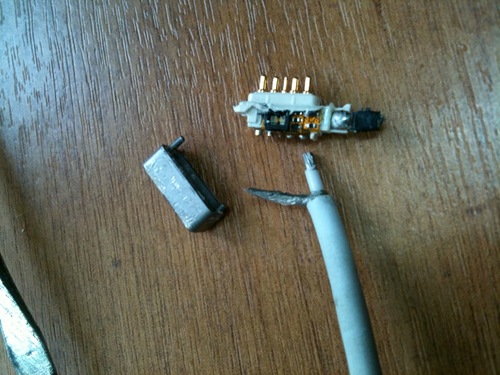
After the filling of the connector was outside, the problem became visible (in the photo, if you look closely you can see that the "outer" wire broke (it was also with the following two)):

Cut and prepare the ends of the wire:
We unsolder the remnants of the wire from the connector and solder it to where it was before (I will not describe the soldering process, I myself am not an expert in this, but everyone who has a desire will cope with this, in which case you can always ask someone for help).
Insulate the wires with heat shrink (tape) or other insulating material.
After that, you can already test the functionality of the connector (connecting to the beech).
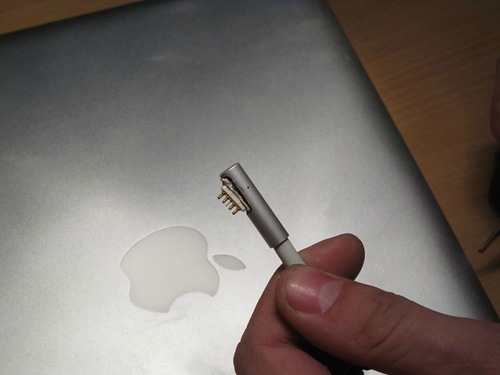
Putting it all in reverse order (I hope the aluminum case with the wire you did not remove). I added a little glue (so much so that it could be disassembled again, in which case).
I hope this post was useful to someone. Sori for the quality of the photo part I took on iphone 3gs, with artificial lighting, and did not think that I would ever publish them.
Thank you for your attention, I hope the article was useful to someone and he was able to treat his pet.
After a bit of searching on the Internet, I found several instructions for repairing old MagSafe adapters, there was really nothing to repair the L-shaped. I decided to repair it myself, since the cost of the new is around $ 80.
To summarize: I made my own and later 2 more bought for $ 15 for each (one is now at work, the 2nd which was almost new presented). A small repair manual below:
I needed a repair, a soldering iron, pliers, a knife, a scalpel (optional), an insulating material.
First you need to remove the magnet from the socket in the connector, I’ll say this is not so easy, although it is unlikely to break anything. I acted with pliers (clamped the magnet) and slipped a screwdriver between the cylinder (connector body) and pliers and acted as a lever (I realized this not immediately (I tried to simply pull out the magnet), so the magnet in the photo is in this condition, subsequent patients are almost not damaged) .
')
Then gently cut the glue around the edges and move the entire structure inside the cylinder (you need to gently pull the wire and then pull it out). After the connector has come out of the tongue we pull over (pull it out of the shell), as a result, the entire filling of the connector should be pulled out.
After the filling of the connector was outside, the problem became visible (in the photo, if you look closely you can see that the "outer" wire broke (it was also with the following two)):
Cut and prepare the ends of the wire:
We unsolder the remnants of the wire from the connector and solder it to where it was before (I will not describe the soldering process, I myself am not an expert in this, but everyone who has a desire will cope with this, in which case you can always ask someone for help).
Insulate the wires with heat shrink (tape) or other insulating material.
After that, you can already test the functionality of the connector (connecting to the beech).
Putting it all in reverse order (I hope the aluminum case with the wire you did not remove). I added a little glue (so much so that it could be disassembled again, in which case).
I hope this post was useful to someone. Sori for the quality of the photo part I took on iphone 3gs, with artificial lighting, and did not think that I would ever publish them.
Thank you for your attention, I hope the article was useful to someone and he was able to treat his pet.
Source: https://habr.com/ru/post/139737/
All Articles