Google Chrome Extension: We are printing articles with habrahabr
One evening, leaving work, I came across an interesting article here. Since I like to read the printed version, and the time was already late — I wanted to go home, but I also wanted to read — I decided to print it and read it on the road.
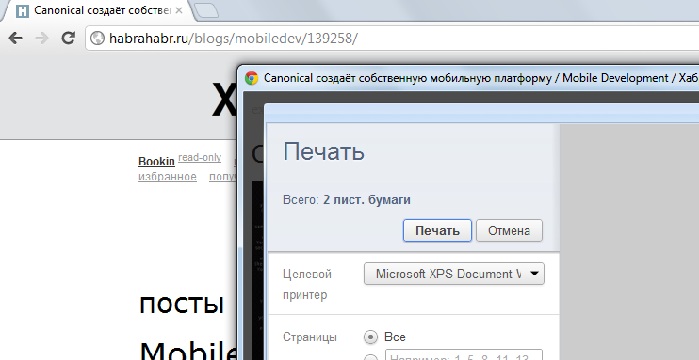
Well, I got to print, the browser offered me to print more than 35 pages, but where could there be 20 pages from? The fact is that the seal went along with all the elements, which makes the post narrow, respectively long, that and also the comments that same.
I started looking for other options, I was new to habrahabr, I could not find it, but I was looking for something like a print version, I did not find it, I decided to go another way, I saved the article in evernote , and then print it, the print pages decreased, but not much, and the comments remained, and the text was still narrow, in the end I came to the conclusion that it was necessary to print an article from this site in one click.

This is how the Google Chrome browser extension, HabraPrint, was born .
All you have to do is press one button and print.
This is my first expansion, as well as the first post, I hope to fix me where I was wrong.
And so what we have inside:
')
Create a folder with the name of our extension, where we will save the following files.
Next, first create the manifest file:
Here we indicate to the browser what it puts and with what permissions.
Specify:
name - extension name
version - current version
description - descriptions of your extension
icons - specify paths to the extension icons < key / size>: < value / image path>


minimum_chrome_version - specify the minimum browser version
permissions - here we indicate what you need access to
background_page - specify the path to the page that will be executed in the background
content_scripts - specify the paths to the files that will be embedded in the page
page_action - this property indicates that the extension button will be placed in the address bar of the browser, specify the path to the icon and the name
options_page - the path to the settings page
a detailed description of the file can be found in the documentation.
This file is required for each extension, as well as all the files listed in it.
Now we will move through the list.
I split the files relative to their type into folders for usability.
Next file create background_page :
As you can see here there is only a page frame, and a javascript connection of the script that is responsible for the actions in the background.
background.js
In this file, we hang up event handlers to create and update tabs, check the url for our domain and numbers (use verification totheoretically determine whether a user is on a page with a post or not), based on which I display or hide the extension icon. Thus, the extension is theoretically displayed only on the page with the post.
Next, we hang up the handler to click on the button of our application and, based on the settings of our extension, perform the action.
In the settings, you can choose to print in the same window or in a pop-up, but more on that later.

Since I only allowed the pop-up window to execute this file (background_page), here is the function responsible for displaying that window itself.
Here I shortened the function a bit more clearly. As you can see the usual window.open is used and html is sent to it from the page with the text of the post. To get the text, send the request, with the name of the action, to the content script, in response we get the innerHTML post and write it to the wnd.document.write () window.
Next, write our content script:
Here we place the request listener, and when we receive it, we perform the action specified in the parameters.
There are only two actions either to give the html post, the previous script, or execute the function that is responsible for printing. In this function, I use styles for printing, that is, I specify in styles what to print and what to hide.
And at the end write the settings page.
In options.html we make the page frame
There are only a couple of radio buttons that set the print mode and the save button, the styles are listed in css / options.css , I will not describe here.
A total page like this came out:

In the options.js file we write javascript which will be responsible for saving the settings.
We hang up the handler at the click of the save button, and on it we enter the value into the localStorage object.
localStorage is an associative array storing pairs of "name", "value". To save the value is enough to write:
That is, in principle, and everything remains to load our extension into the browser.
Go to the tab "Manage extensions" (Tools-> Extensions), turn on "Developer Mode", and load the unpacked extension.
In order to use the extensions, open any post on habrahabr and click on the extension icon that appears in the address bar of the browser.
Problems:
I noticed that when I first loaded the extension, I got an error like “You are not allowed to use the functions for tabs check the manifest”, which is why I didn’t figure it out, if I explain anything, I’m grateful.
Sources:
Google Chrome Extension FAQ
Creating an extension for Google Chrome
Expansion:
Download
PS Unfortunately, my meager knowledge in writing extensions does not allow me to describe the creation process in more detail, but I hope that this extension will be useful to someone.
I would also like to hear suggestions, edits and comments. Thank you all in advance.
UPD : at the request of bo883 , added syntax highlighting, and added a substrate for the code (for now it works only in “In a pop-up window”, I will soon add it when printing in the same window). When implemented, I ran into a problem that the background added via css does not print Chrome, but it prints pictures (<img ...>) perfectly, based on this we add a picture to the block with code, set its width and height to the size of the code block, by stretching it all over the whole block, and changing the z-index with it, which would be put under the picture code, as a result, when we print, the area of the code has a substrate. ( extension updated)
Well, I got to print, the browser offered me to print more than 35 pages, but where could there be 20 pages from? The fact is that the seal went along with all the elements, which makes the post narrow, respectively long, that and also the comments that same.
I started looking for other options, I was new to habrahabr, I could not find it, but I was looking for something like a print version, I did not find it, I decided to go another way, I saved the article in evernote , and then print it, the print pages decreased, but not much, and the comments remained, and the text was still narrow, in the end I came to the conclusion that it was necessary to print an article from this site in one click.
This is how the Google Chrome browser extension, HabraPrint, was born .
All you have to do is press one button and print.
This is my first expansion, as well as the first post, I hope to fix me where I was wrong.
And so what we have inside:
')
Create a folder with the name of our extension, where we will save the following files.
Next, first create the manifest file:
Here we indicate to the browser what it puts and with what permissions.
{ "name": "HabraPrint", "version": "0.1", "description": " habrahabr.ru", "icons": { "128": "img/icon_128.png", "64": "img/icon_64.png", "48": "img/icon_48.png", "32": "img/icon_32.png", "16": "img/icon_16.png" }, "minimum_chrome_version":"6.0", "permissions": [ "tabs","http://habrahabr.ru/*", "https://habrahabr.ru/*"], "background_page": "background.html", "content_scripts": [ { "js": [ "js/jquery-1.7.1.min.js","js/content.js" ], "css": ["css/content.css"], "run_at": "document_end", "matches": [ "http://habrahabr.ru/*", "https://habrahabr.ru/*" ] } ], "page_action": { "default_icon": "img/icon_19.png", "default_title": "HabrPrint" }, "options_page": "options.html" } Specify:
name - extension name
version - current version
description - descriptions of your extension
icons - specify paths to the extension icons < key / size>: < value / image path>
minimum_chrome_version - specify the minimum browser version
permissions - here we indicate what you need access to
background_page - specify the path to the page that will be executed in the background
content_scripts - specify the paths to the files that will be embedded in the page
page_action - this property indicates that the extension button will be placed in the address bar of the browser, specify the path to the icon and the name
options_page - the path to the settings page
a detailed description of the file can be found in the documentation.
This file is required for each extension, as well as all the files listed in it.
Now we will move through the list.
I split the files relative to their type into folders for usability.
Next file create background_page :
<!DOCTYPE html> <html> <head> <script src="js/background.js"></script> </head> </html> As you can see here there is only a page frame, and a javascript connection of the script that is responsible for the actions in the background.
background.js
chrome.tabs.onCreated.addListener(function(tab){ urlDetected(tab.id, null, tab); }); chrome.tabs.onUpdated.addListener(function(tabId, changeInfo, tab){ if(changeInfo.status=='complete'){ urlDetected(tabId, changeInfo, tab); } }); function urlDetected(tabId, changeInfo, tab){ chrome.tabs.getSelected(null,function(tab) { var re=/.+habrahabr.+\/(\d+)\//; if(re.test(tab.url)){ chrome.pageAction.show(tabId); }else{ chrome.pageAction.hide(tabId); } }); } chrome.pageAction.onClicked.addListener(function(tabId) { // if(!localStorage["radio"]||localStorage["radio"]=='popup'){ PrintIt(); }else if(localStorage["radio"]=='same'){ chrome.tabs.getSelected(null, function(tab) { chrome.tabs.sendRequest(tab.id, { type:'print-same' }); }); } }); In this file, we hang up event handlers to create and update tabs, check the url for our domain and numbers (use verification to
Next, we hang up the handler to click on the button of our application and, based on the settings of our extension, perform the action.
In the settings, you can choose to print in the same window or in a pop-up, but more on that later.
Since I only allowed the pop-up window to execute this file (background_page), here is the function responsible for displaying that window itself.
function PrintIt(){ if(wnd){ wnd.close(); } stext=''; chrome.tabs.getSelected(null, function(tab) { chrome.tabs.sendRequest(tab.id, { type:'returnHtml' }, function(response) { stext=response.html; wnd=window.open("", "habrPrint", 'statusbar=no,toolbar=no,scrollbars=yes,resizable=yes''); wnd.document.write("<!DOCTYPE html>\ <html lang='ru'>\ <head>\ <meta content='text/html; charset=utf-8' http-equiv='Content-Type'>\ <meta content='ru' name='language'>\ <title>"+response.title+"</title>\ <link href=\"/css/print.css\"rel=\"stylesheet\"type=\"text/css\" media=\"all\"/></style>\ </head>\ <body onclick=\"window.close()\">\ <div class='post'>"); wnd.document.write(stext); wnd.document.write("</div><body></html>"); wnd.document.close(); setTimeout(function(){ wnd.print(); wnd.close(); }, 100) }); }); } Here I shortened the function a bit more clearly. As you can see the usual window.open is used and html is sent to it from the page with the text of the post. To get the text, send the request, with the name of the action, to the content script, in response we get the innerHTML post and write it to the wnd.document.write () window.
Next, write our content script:
var getElementsByClassName = function(getClass){ if(document.querySelectorAll) { return document.querySelectorAll("." + getClass); } else if(document.getElementsByClassName) { return document.getElementsByClassName(getClass); } else { var list = document.getElementsByTagName('*'), i = list.length, classArray = getClass.split(/\s+/), result = []; while(i--) { if(list[i].className.search('\\b' + classArray + '\\b') != -1) { result.push(list[i]); } } return result; } }; function pageCleaner(){ $('body *').removeClass('habrNoPrint').removeClass('habrPrint'); } function printSame(){ $('body *').addClass('habrNoPrint'); $('#layout, .content_left, .company_post, .post, .post *').removeClass('habrNoPrint'); $('.content_left').addClass('habrPrint'); window.print(); window.setTimeout(pageCleaner, 0); } chrome.extension.onRequest.addListener(function(request, sender, sendResponse) { if(request.type == 'print-same'){ printSame(); } if(request.type == 'returnHtml'){ var elem=getElementsByClassName('post')[0]; var title=document.getElementsByTagName('title')[0]; sendResponse({'html':elem.innerHTML,'title':title.innerHTML}); } }); Here we place the request listener, and when we receive it, we perform the action specified in the parameters.
There are only two actions either to give the html post, the previous script, or execute the function that is responsible for printing. In this function, I use styles for printing, that is, I specify in styles what to print and what to hide.
And at the end write the settings page.
In options.html we make the page frame
<!DOCTYPE html> <html lang='ru' xml:lang='ru' xmlns='http://www.w3.org/1999/xhtml'> <head> <meta content='text/html; charset=utf-8' http-equiv='Content-Type'> <meta content='ru' name='language'> <style>@import "css/options.css";</style> <script src="js/options.js"></script> </head> <body> <header> <h3>:</h3><span id="options_callback"></span> </header> <div id='habrPrint_options'> <form name="habr_options_form"> <div class='options_form'> <div> <input id="radio_popup" type="radio" name="window" value='popup' checked="checked"/> <label id="append-label"> </label> <p> </p> </div> <div> <input id="radio_same" type="radio" name="window" value='same' /> <label id="append-label"> </label> <p> , , 5- </p> </div> </div> </form> <div class="button"> <div class="button_blue"> <button id="save"></button> </div> </div> </div> </body> </html> There are only a couple of radio buttons that set the print mode and the save button, the styles are listed in css / options.css , I will not describe here.
A total page like this came out:
In the options.js file we write javascript which will be responsible for saving the settings.
function getRadioGroupValue(radioGroupObj) { for (var i=0; i < radioGroupObj.length; i++) if (radioGroupObj[i].checked) return radioGroupObj[i].value; return null; } function readProperty(property, defValue) { if(localStorage[property] == null) { return defValue; } return localStorage[property]; } window.addEventListener("load", function(){ chrome.tabs.getSelected(null, function(tab) { var save = document.getElementById("save"); if(localStorage["radio"]){ document.getElementById("radio_"+localStorage["radio"]).checked =readProperty("radio", false); } save.addEventListener("click", function(){ var radio_value = getRadioGroupValue(document.habr_options_form.window); localStorage["radio"] = radio_value; if(localStorage["radio"]){ var sum=document.getElementById('options_callback'); sum.innerHTML=' ' } }); }); }); We hang up the handler at the click of the save button, and on it we enter the value into the localStorage object.
localStorage is an associative array storing pairs of "name", "value". To save the value is enough to write:
localStorage["radio"] = radio_value; That is, in principle, and everything remains to load our extension into the browser.
Go to the tab "Manage extensions" (Tools-> Extensions), turn on "Developer Mode", and load the unpacked extension.
In order to use the extensions, open any post on habrahabr and click on the extension icon that appears in the address bar of the browser.
Problems:
I noticed that when I first loaded the extension, I got an error like “You are not allowed to use the functions for tabs check the manifest”, which is why I didn’t figure it out, if I explain anything, I’m grateful.
Sources:
Google Chrome Extension FAQ
Creating an extension for Google Chrome
Expansion:
Download
PS Unfortunately, my meager knowledge in writing extensions does not allow me to describe the creation process in more detail, but I hope that this extension will be useful to someone.
I would also like to hear suggestions, edits and comments. Thank you all in advance.
UPD : at the request of bo883 , added syntax highlighting, and added a substrate for the code (for now it works only in “In a pop-up window”, I will soon add it when printing in the same window). When implemented, I ran into a problem that the background added via css does not print Chrome, but it prints pictures (<img ...>) perfectly, based on this we add a picture to the block with code, set its width and height to the size of the code block, by stretching it all over the whole block, and changing the z-index with it, which would be put under the picture code, as a result, when we print, the area of the code has a substrate. ( extension updated)
Source: https://habr.com/ru/post/139427/
All Articles