Lightpack 6. Review backlight for the monitor
Very little time passed after the opening of the pre-order and the sale of the 6th Lightpack. Just the other day I received the cherished package with the latest revision of the device. In short, Lightpack is the backlight of a monitor or TV. On sale there are 2 types of backlighting, this is the version for the monitor and the version for the TV. The TV version has a separate power supply and instead of 10 individual LEDs, 30 LEDs are used on the strips. The result is 3 diodes per channel, and due to this, the illumination area increases. I put the backlight on the monitor with a diagonal of 24 ". In the future I plan to buy TV for movies, so I took the version for TV with a margin. For Lightpack, you must have a computer!
')
The device is sold in a small box in order to open it, you must cut a sticker with a description and a complete set.

The entire kit is packaged in a bubble film. The fee lies in a separate anti-static package.

Included:
There is no documentation included, all in electronic form. On the box there is a link to the documentation. On the one hand, this is correct, the project is developing, information is updated regularly.


The new controller has a nice appearance. Now it’s not just an open circuit board, but a pretty transparent acrylic box. Developers do not call it a body. In fact, this is protection, curved acrylic, and inside on two hidden bolts is mounted a board. Holes everywhere are chosen in such a way that the nuts themselves do not have any effort. They are mostly decorative. Thus, access to all connectors on the board remains: USB, power, diodes and firmware upgrade button. Very original approach, stylish and functional.

Mini USB and 12V power.


New connectors for diodes have become more convenient. Now you do not need to clean up and fasten.

In order to achieve illumination around the entire monitor, I decided to hang it on the wall.
Initially, I wanted to fix the monitor on a thin mount. On the one hand, this is a plus - a small distance between the wall and the monitor, but for Lightpack it turned out to be a minus. For a smoother dispersion of light, the distance between the monitor and the wall should be greater than 10-15 cm. I had to put a mount that allows you to change this distance.

Before you fix everything, pre-calculate the correct location for the placement of the diodes. On the website in the documentation section there are many options for the placement of diodes.

For the test, I fixed the diodes at the top and on the right side. On a thin mount, the distance to the wall is minimal, about 3-4 cm. The light does not dissipate well and dark voids form between the diodes.


The diode tape has a sticky surface. Before glueing carefully clean the surface of the monitor.

Having calculated everything in the lineup, I get this configuration.

The USB connectors on the side of the monitor are a bit messed up. But the result was not reflected.

At the bottom of the monitor there are simple speakers. Although the diodes are arranged differently, the lighting is uniform.

We put all the wires so that nothing hangs and there is no load on the diodes. A lot of wires, the length of each 70 cm, and in the version for monitors 50 cm. This kit is designed for large TVs. There are definitely not enough 2 screeds in the kit. The adhesive backing of the diode tape did not adhere very tightly to the monitor, possibly due to the glossy plastic. I had to slightly modify the design.


With the help of the utility testing the monitor, we look what happened.


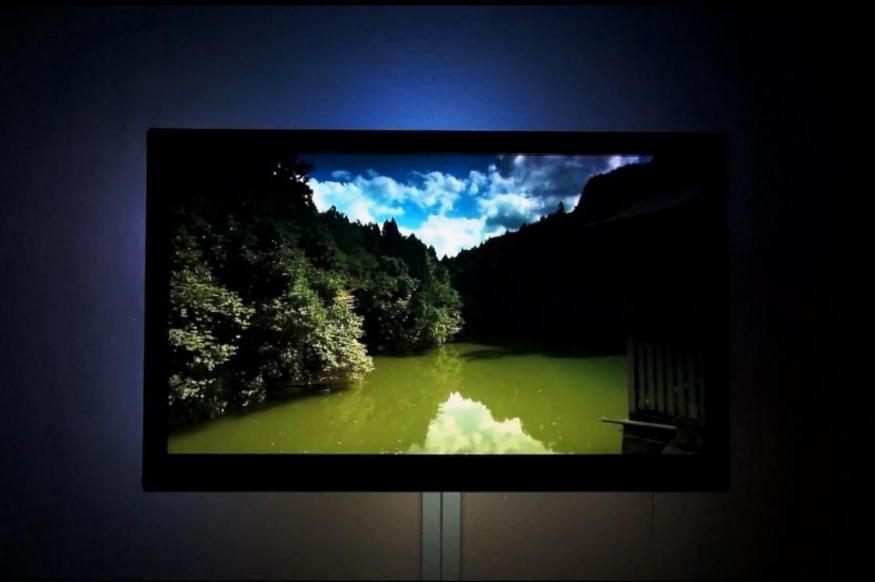
The result is something like this. Of course, for complete happiness, I would like to remove the cable channel with wires, but I don’t want to make my own wall.

A controller connected to a computer is defined as a regular HID device. We put the program from the site and start setting.
When you start the program appears 10 color digital blocks. Each block is a capture zone. The program several dozen times per second analyzes the image that falls into this zone, calculates its average color and sends it to the device, which already causes the corresponding block of three LEDs to glow in the desired color. Blocks are capture areas. They can be moved around the screen and resized. The larger the size of the capture area, the higher the load on the processor. But for films, in fact, it is easier to set the dimensions in the form of narrow strips along the edges of the monitor. So, it is almost always useless to score zones with 100% of the desktop. To heighten the effect in the movies, some areas should be placed overlap.

In fact, everything is very simple. The default settings are acceptable and you don’t have to dig into them again.

Lightpack has another mode of operation, similar to Philips LivingColors lamps, the backlight will smoothly change colors with a customizable speed, or not change the selected color at all.
In games, the backlight also works, but not in all. In DirectX 9, everything is fine, but in 10 and 11 there are problems . In any case, ongoing work is underway to finalize Lightpkak: there is already a community of users and developers who are constantly solving problems and adding new functions. There is an API for developers, for example, there is a plug-in for Winamp, which I will show in the end on video.
The resulting result met my expectations. Watching movies with this effect is really nice. Immersion is certainly not 3D, but also spectacular. What to say, look at the video.
Posts on the topic:
Thank you for attention.
')
The device is sold in a small box in order to open it, you must cut a sticker with a description and a complete set.
The entire kit is packaged in a bubble film. The fee lies in a separate anti-static package.
Included:
- Master card Lightpack 6 in protective glass 70x70x17 mm
- 10 segments of RGB light tape (each 10 cm long and contains 3 LEDs)
- The power supply unit from a network 110-240B (length of a cord is 1.8 m)
- USB cable Am / Bm mini 1.8 m
- A pair of mounting racks and screeds
There is no documentation included, all in electronic form. On the box there is a link to the documentation. On the one hand, this is correct, the project is developing, information is updated regularly.
The new controller has a nice appearance. Now it’s not just an open circuit board, but a pretty transparent acrylic box. Developers do not call it a body. In fact, this is protection, curved acrylic, and inside on two hidden bolts is mounted a board. Holes everywhere are chosen in such a way that the nuts themselves do not have any effort. They are mostly decorative. Thus, access to all connectors on the board remains: USB, power, diodes and firmware upgrade button. Very original approach, stylish and functional.
Mini USB and 12V power.
New connectors for diodes have become more convenient. Now you do not need to clean up and fasten.
In order to achieve illumination around the entire monitor, I decided to hang it on the wall.
Initially, I wanted to fix the monitor on a thin mount. On the one hand, this is a plus - a small distance between the wall and the monitor, but for Lightpack it turned out to be a minus. For a smoother dispersion of light, the distance between the monitor and the wall should be greater than 10-15 cm. I had to put a mount that allows you to change this distance.
Before you fix everything, pre-calculate the correct location for the placement of the diodes. On the website in the documentation section there are many options for the placement of diodes.
For the test, I fixed the diodes at the top and on the right side. On a thin mount, the distance to the wall is minimal, about 3-4 cm. The light does not dissipate well and dark voids form between the diodes.
The diode tape has a sticky surface. Before glueing carefully clean the surface of the monitor.
Having calculated everything in the lineup, I get this configuration.
The USB connectors on the side of the monitor are a bit messed up. But the result was not reflected.
At the bottom of the monitor there are simple speakers. Although the diodes are arranged differently, the lighting is uniform.
We put all the wires so that nothing hangs and there is no load on the diodes. A lot of wires, the length of each 70 cm, and in the version for monitors 50 cm. This kit is designed for large TVs. There are definitely not enough 2 screeds in the kit. The adhesive backing of the diode tape did not adhere very tightly to the monitor, possibly due to the glossy plastic. I had to slightly modify the design.
With the help of the utility testing the monitor, we look what happened.
The result is something like this. Of course, for complete happiness, I would like to remove the cable channel with wires, but I don’t want to make my own wall.
A controller connected to a computer is defined as a regular HID device. We put the program from the site and start setting.
When you start the program appears 10 color digital blocks. Each block is a capture zone. The program several dozen times per second analyzes the image that falls into this zone, calculates its average color and sends it to the device, which already causes the corresponding block of three LEDs to glow in the desired color. Blocks are capture areas. They can be moved around the screen and resized. The larger the size of the capture area, the higher the load on the processor. But for films, in fact, it is easier to set the dimensions in the form of narrow strips along the edges of the monitor. So, it is almost always useless to score zones with 100% of the desktop. To heighten the effect in the movies, some areas should be placed overlap.
In fact, everything is very simple. The default settings are acceptable and you don’t have to dig into them again.
Lightpack has another mode of operation, similar to Philips LivingColors lamps, the backlight will smoothly change colors with a customizable speed, or not change the selected color at all.
In games, the backlight also works, but not in all. In DirectX 9, everything is fine, but in 10 and 11 there are problems . In any case, ongoing work is underway to finalize Lightpkak: there is already a community of users and developers who are constantly solving problems and adding new functions. There is an API for developers, for example, there is a plug-in for Winamp, which I will show in the end on video.
The resulting result met my expectations. Watching movies with this effect is really nice. Immersion is certainly not 3D, but also spectacular. What to say, look at the video.
Posts on the topic:
- Lightpack 6 is available for pre-order.
- AmbilightUSB
- Lightpack: Prokachan and open
- Lightpack 5.5 published
Thank you for attention.
Source: https://habr.com/ru/post/139407/
All Articles