2 in 1: sound amplifier and "home" power supply
Simple and useful conversion of a computer power supply unit.
Prehistory, purely artistic
When I entered college 6 years ago, I wanted to poke around at electronic devices, computers, in general live together and be friends with a soldering iron. Entered, and in the process of studying I realized that I had gotten a little past. It turned out the specialty Electrical installation does not provide for picking electronic equipment. Unfortunately, no one enlightened me before entering this. Well, what to do, I had to finish college, instill a love for the profession and enter the university well, the same specialty. But the craving for small parts with legs and a soldering iron lived with me all these years, and a small amount of knowledge in this field and electricity in general did not allow it to open up.
What is a university after college? - This is a lot of free time, in connection with rebinding almost half of the subjects in the first courses and a confident feeling in their knowledge, compared with people after school, as a result of which even new disciplines are given easily, half-wordly, to understand the teacher. And it was precisely in the presence of free time that it was time to unleash that very burden. At first there was a homemade lamp with LEDs, then powering the wall clock from the outlet, then a headphone amplifier for the communicator, then a clock on the MC. I will not say that everything that I did, I did consciously. Naturally, all the schemes / manuals were taken on the Internet and repeated. but at the same time, slowly but surely, I understood what the hands were doing. Well, okay, enough of the lyrics.
')
Background, closer to the topic
For the above reasons of inexperience, but the desire to get more and better in the kit to the home speakers C-90 were acquired by the youngest C-30, and thrown in parallel to the larger. As you understand, nothing good came of it, since the boom has remained a whole, although its rare unpredictable attenuations and noises make this fact questionable (to be honest, there is no desire to pick around it). At the same time, a desktop was purchased for a computer. For some reason, its width turned out to be small for me, and my eyes constantly got tired of the monitor (LCD), even at the highest resolution. No, I do not have farsightedness, just a table is only 60 cm wide, minus a small indent from the edge, minus the thickness of the monitor, and only 50 cm remains. And moving the chair away from the table is also not an option - the keyboard is too far away. It would seem to what it all? And here I remembered about dusting C-30s, which, placed on each other, were perfectly equal to the height of the table. And added this pyramid monitor. That's how it all stood for 4 years. But as time went on, cheap plastic computer speakers became very short. They came to the shift is not much more expensive, but already wooden (although the fiberboard, but not plastic) from the broken music. center, which were mounted on the wall above the monitor. Some time has passed, and they also began to seem insufficient. And what about the C-90, you might ask. The answer is: firstly, because of the bad behavior described above, the amp didn’t really want to listen to them, although sometimes they are included for a couple of hours, and secondly, they are too powerful for ordinary people to listen to constantly. Well, they are both on the same side from the computer, so that the entire load on one ear is not ice. Ability to rearrange absent.
Well, actually, it was the turn to tell about the future fate of the C-30.
Main part, technical
The first of two
Prices for factory amplifiers were recognized long ago, and did not seem acceptable. Therefore, it was decided to assemble my own, the more I knew that it would not necessarily be a bandura with a bunch of transistors, capacitors and radiators, like stationary amps. This was facilitated by the experience of assembling a headphone amp for a communicator, when I learned about the existence of microcircuits in general, and in particular amplifiers (maybe someone is interested, the TDA7050 was used for the headphones, according to the circuit from the data board, with separate power).
Actually mikruha was found quickly, there are not so many of them, the more good option for C-30 was long ago defined: TDA8560. I do not go into technical details, all the frequency response, etc. professional characteristics, knowledgeable people who really need it, will look in data protection. And the more I do not attribute myself to such. Prsto say that mikruha gives a maximum of 40 watts per channel, at 4 ohms. Yes, can you tell why for the C-30 with their 10 watts as much as 40? Yes, you are right, it is a lot, but just other mikruhi with less power do not give such a sound quality. Judging by reviews experienced. And I can already say from my own experience that I like the sound on the 8560, and to change something even thoughts did not arise. In addition, the C-30 is not eternal, who knows when they bother me, and I want something else ...
The second
You may want to blame me for too much prehistory, about all these my undertakings. I hasten to stop you.
Every radio fan needs a power supply. Since I am a beginner, I usually managed by charging, power supply from old radiotelephones, and banks for getting 5V. This is what I will do next, but I thought that 5 and 12V at hand will never interfere. In addition, for power TDA8560 need 12V. It was immediately decided to acquire an old computer power supply unit, the benefit of their heap flea markets, and at reasonable prices.
Design
The amplifier circuit fits on a 35x45 mm board, and if you prefer, you can do less (I’ll just say: I don’t provide an amp scheme, who needs it - look at the data sheet, today it’s not difficult at all, and if you’re a beginner, it's time to find out what a datasheet is and figure out for what they need). For the spaces inside the power supply, this is just very acceptable. So I decided: why make a few boxes, if everything can fit in one, especially ready. The work took almost a whole day. The benefit of the experience of etching and soldering boards available. It is not interesting to cut holes for buttons and connectors in the PSU case due to the lack of a suitable tool. So everything was done with a drill and a file. Long, tedious, but it turned out pretty well. Next photo with some explanations and Conclusion.
Amp:
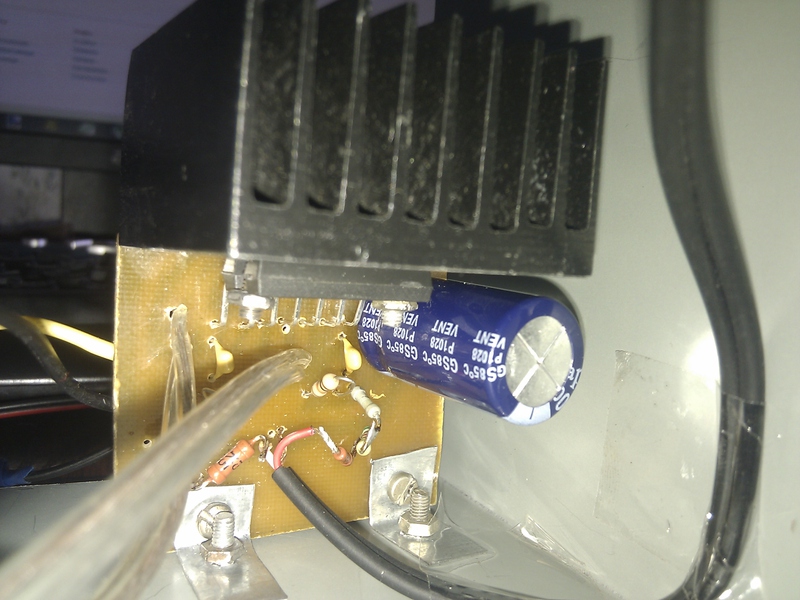
Extra conclusions of all the pros and cons just cut, pozagibal so as not to short-circuited, and forgot for them

Next, a short-circuit protection was constructed, though only for the 5-volt output. The scheme is found on the Internet, and a little corrected for themselves.

At the output, the green diode did not set, I do not need it there. The job description is in short: in the normal mode, there is no voltage drop on the field operator, with short circuits, about the same 5 volts that come to it appear. They are also used to light a red LED. I did not set the R2 resistor, although it could be used as a safety net for the field man.
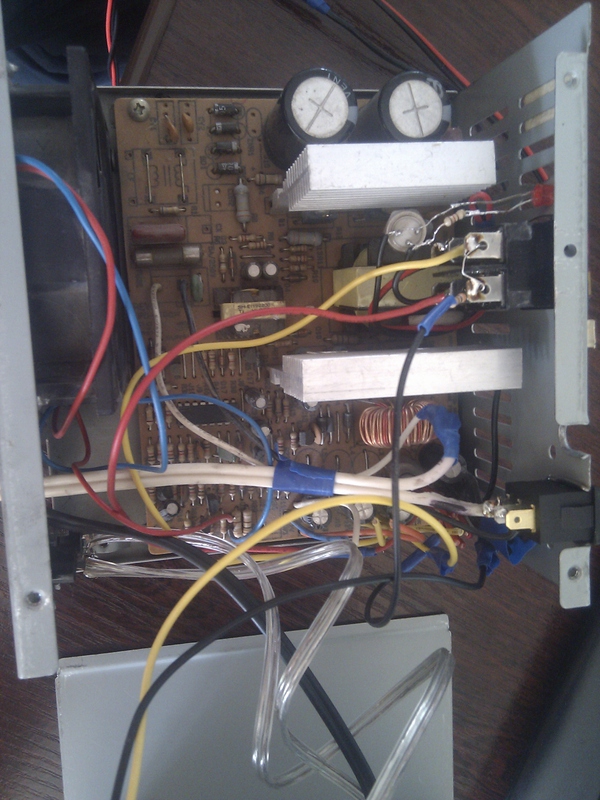
Almost assembled
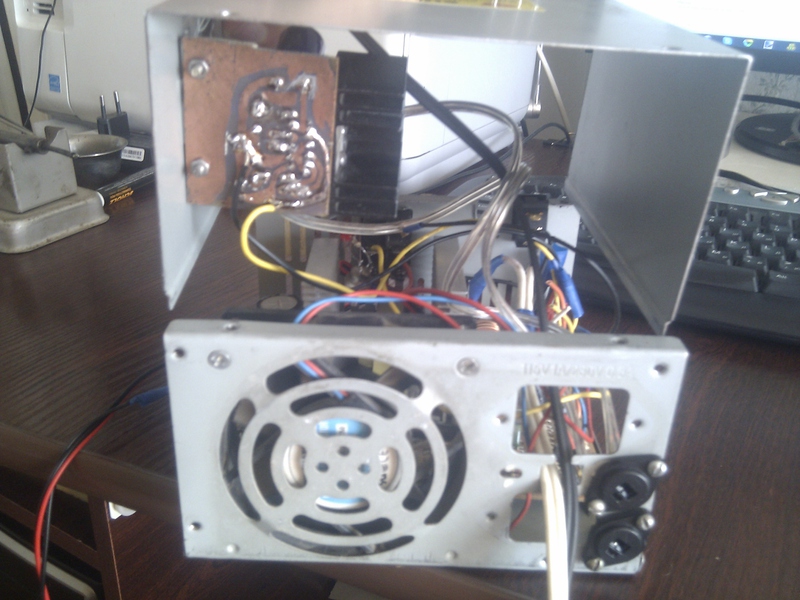
The box is located on the system unit, so everything is at hand. He placed foam under it for some kind of cooler vibration suppression.

This photo shows the situation with KZ 5V (yellow and black crocodiles), while the LED lights up to the right of the switches, the cooler starts to work a little louder, which serves as an audible alarm :)
The green switch turns on the entire unit and immediately the amplifier, respectively, and the yellow and red - 5 and 12V as needed. On all three ends of the crocodiles of the corresponding colors.
By the way, I did not immediately think that the buttons have LEDs that light up when turned on. I hooked up to the 3rd output of the buttons minus through a 300 Ohm resistor, now it looks great.
Addition
The radiator on the TDA-shke should be 200 cm2, to be honest, I do not know my area, but judging by the sensations it suffices, besides, it soothes under the BP cooler. Although I plan to turn off the cooler if I get tired of its constant hum. And maybe I will make it automatically depending on the temperature sensor on the radiator, on the MK it is not at all difficult to implement. I also wanted to set the volume control, but I thought that I would get entangled in them, since there is already one regulator of wall speakers, and it is enough to adjust the sound from the C-30 programmatically.
You may also have a question about the interference to the amp in view of its location in the BP itself. I answer: there is no interference. There is a small high-frequency noise from high-frequency dynyaks, but these are interferences in the sound card (I am sure that it is there, because when you connect the player / phone to the amplification there is no interference at all), and there is no desire to deal with them. In addition, they are minimized by installing 10 + 15 kΩ resistors at the input of the amplifier.
Conclusion
Cost:
TDA8560 - 5.4 $ (43 Ukr. UAH)
Switches (green and double) - $ 1.5
KP903 field-effect transistor - $ 1.2
Audio cable - 0.38 $ / meter
BP - $ 4 (30 UAH), but you can find cheaper
Column connectors - $ 1
Time - with the availability of tools and some skills - on the strength of half a day, it took me a whole day.
Well, as always, the pleasure of the work done is priceless.
Total, almost $ 13, we get a good amp + power supply. For comparison, the factory amp for the C-30, naturally used, would cost around $ 18.
Thank you for your attention, constructive criticism is accepted.
Source: https://habr.com/ru/post/138938/
All Articles