IOS widget development widget
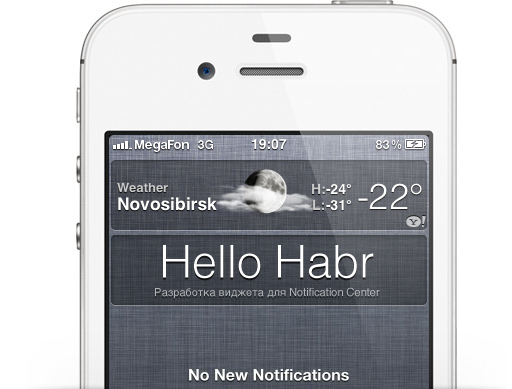
Notification Center is a convenient and easy-to-use feature in iOS, but it is limited only by standard widgets. It's no secret that jailbreak lovers have long been using third-party tweaks, but there is practically no information about their development. In this article I will try to fix it and describe the process of creating a widget to check the balance of my Internet provider using the example.
To develop a widget, we need Xcode, an experimental device with iOS 5.x and access to its file system, and we will use iOSOpenDev as a template for the widget, detailed instructions for installing it are on the developer’s website.
')
If everything is ready, proceed!
Launch Xcode and create a new project:
Open iOSOpenDev item in the iOS category and select NotificationCenter Widget.

So, we have the code of the ready (but empty) widget. We can already compile it by clicking Cmd + Shift + I (or selecting Product> Build for> Build for profiling in the menu), as a result of which we will get the installation .deb file, which is located in the Our Project / Packages directory.
In the properties of the project, you can make the file immediately installed on the device, you need SSH and Wi-Fi, but this article was written where there was no wireless network, so we need any iOS file manager (for example, iExplorer) installed on iFile device
We copy our (yet empty) widget to the device at any place convenient for you, and install it via iFile, then do Respring or reboot the device, it is necessary that the Notification Center see our widget.
Now, if you open Notification Center, then ... the widget will not be there, it still needs to be turned on. Open Settings> Notifications> Your Widget and turn it on!
On this introduction is over.
Start writing a balance check widget!
Officially, my provider does not provide an API to check the status of an account, but I spied the necessary code in the Windows gadget.
The process is quite simple, https opens, the address of which contains the login and password, and xml is answered.
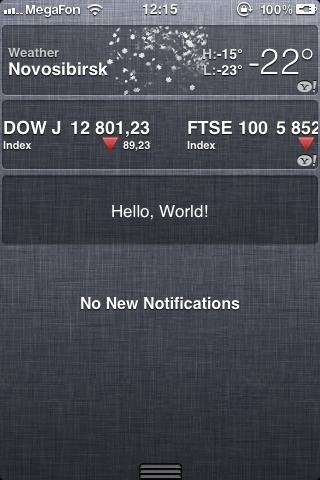
The standard weather widget has an interesting feature; you can “flip through” it to view the weather for a week; we will take this idea to place two UITextFiled (login / password).
Add the following code to the .h file:
UIScrollView *sv; UIView *balanceView, *settingsView; UITextField * loginField; UITextField * passField; And in the .m file, add a few UILabel and fix the code for this one:
- (UIView *)view { if (_view == nil) { _view = [[UIView alloc] initWithFrame:CGRectMake(0, 0, 320, 71)]; UIImage *bg = [[UIImage imageWithContentsOfFile:@"/System/Library/WeeAppPlugins/balance.bundle/WeeAppBackground.png"] stretchableImageWithLeftCapWidth:5 topCapHeight:71]; UIImageView *bgView = [[UIImageView alloc] initWithImage:bg]; bgView.frame = CGRectMake(2, 0, 316, 71); UIImageView *bgSet = [[UIImageView alloc] initWithImage:bg]; bgSet.frame = CGRectMake(6, 0, 316, 71); sv = [[[UIScrollView alloc] initWithFrame:CGRectMake(0, 0, 320, 71)] autorelease]; sv.contentSize = CGSizeMake(2 * 320, 71); sv.pagingEnabled = YES; sv.delegate = self; for (int i = 0; i < 1; i++) { balanceView = [[UIView alloc] initWithFrame:CGRectMake(i * 316, 0, 316, 71)]; [balanceView addSubview:bgView]; lblName = [[UILabel alloc] initWithFrame:CGRectMake(9, 5, 285, 15)]; lblName.backgroundColor = [UIColor clearColor]; lblName.textColor = [UIColor whiteColor]; lblName.font = [UIFont systemFontOfSize: 12.0]; lblName.text = @" "; lblName.alpha = 1; [balanceView addSubview:lblName]; [lblName release]; lblText = [[UILabel alloc] initWithFrame:CGRectMake(9, 18, 75, 15)]; lblText.backgroundColor = [UIColor clearColor]; lblText.textColor = [UIColor whiteColor]; lblText.font = [UIFont systemFontOfSize: 12.0]; lblText.text = @" :"; lblText.alpha = 0.6; [balanceView addSubview:lblText]; [lblText release]; lblDate = [[UILabel alloc] initWithFrame:CGRectMake(9, 38, 114, 28)]; lblDate.backgroundColor = [UIColor clearColor]; lblDate.textColor = [UIColor whiteColor]; lblDate.font = [UIFont systemFontOfSize: 12.0]; lblDate.numberOfLines = 2; lblDate.text = @" 0 "; lblDate.alpha = 0.6; [balanceView addSubview:lblDate]; [lblDate release]; lblBalance = [[UILabel alloc] initWithFrame:CGRectMake(135, 22, 175, 45)]; lblBalance.backgroundColor = [UIColor clearColor]; lblBalance.textColor = [UIColor whiteColor]; lblBalance.font = [UIFont fontWithName: @"Helvetica-Light" size: 45.0]; lblBalance.textAlignment = UITextAlignmentRight; lblBalance.text = @"0.0"; lblBalance.alpha = 1; [balanceView addSubview:lblBalance]; [lblBalance release]; [sv addSubview:balanceView]; [balanceView release]; } for (int i = 1; i < 2; i++) { settingsView = [[UIView alloc] initWithFrame:CGRectMake(i * 316, 0, 316, 71)]; [settingsView addSubview:bgSet]; loginField = [[UITextField alloc] initWithFrame:CGRectMake(330, 7, 300, 25)]; loginField.borderStyle = UITextBorderStyleRoundedRect; loginField.textColor = [UIColor blackColor]; loginField.font = [UIFont systemFontOfSize:14.0]; loginField.placeholder = @""; loginField.backgroundColor = [UIColor whiteColor]; loginField.autocorrectionType = UITextAutocorrectionTypeNo; loginField.keyboardType = UIKeyboardTypeDefault; loginField.returnKeyType = UIReturnKeyNext; loginField.clearButtonMode = UITextFieldViewModeWhileEditing; loginField.keyboardAppearance = UIKeyboardAppearanceAlert; loginField.delegate = self; loginField.tag = 999; [sv addSubview:loginField]; passField = [[UITextField alloc] initWithFrame:CGRectMake(330, 39, 300, 25)]; passField.borderStyle = UITextBorderStyleRoundedRect; passField.textColor = [UIColor blackColor]; passField.font = [UIFont systemFontOfSize:14.0]; passField.placeholder = @""; passField.secureTextEntry = TRUE; passField.backgroundColor = [UIColor whiteColor]; passField.autocorrectionType = UITextAutocorrectionTypeNo passField.keyboardType = UIKeyboardTypeDefault; passField.returnKeyType = UIReturnKeyDone; passField.clearButtonMode = UITextFieldViewModeWhileEditing; passField.keyboardAppearance = UIKeyboardAppearanceAlert; passField.delegate = self; [sv addSubview:passField]; [sv addSubview:settingsView]; [settingsView release]; } [bgView release]; [_view addSubview:sv]; [[loginField superview] bringSubviewToFront:loginField]; [[passField superview] bringSubviewToFront:passField]; [sv setShowsHorizontalScrollIndicator:NO]; [sv setShowsVerticalScrollIndicator:NO]; } return _view; } Thus, we created a UIScrollView, added 2 normal Views to it, assigned them a background and placed not the first several labels, but on the second two UITextFields to enter the login and password.
Next, we will add functionality to our UITextField, make a transition from the Login field to the Password field via the Next button and save the data to the Done button on the keyboard:
-(BOOL)textFieldShouldReturn:(UITextField *)textField { if (textField.tag == 999) { [passField becomeFirstResponder]; } else { NSUserDefaults *prefs = [NSUserDefaults standardUserDefaults]; [prefs setObject:loginField.text forKey:@"login"]; [prefs setObject:passField.text forKey:@"pass"]; [prefs synchronize]; [textField resignFirstResponder]; } return YES; } And it is also necessary to make the keyboard hide if the user changes his mind to enter data:
- (void) scrollViewDidScroll: (UIScrollView *) aScrollView { [loginField resignFirstResponder]; [passField resignFirstResponder]; } Now we will start the parser, at the beginning we will do so that the widget's activity does not begin when the user only starts opening NC, but after a certain time. Use the timer. Run it at the time of opening NC:
- (void)viewWillAppear { [NSTimer scheduledTimerWithTimeInterval:1 target:self selector:@selector(getBalance) userInfo:nil repeats:NO]; } And in one second we execute getBalance:
- (void)getBalance { NSUserDefaults *prefs = [NSUserDefaults standardUserDefaults]; NSString *gnLookup = [NSString stringWithFormat: @"https://billing.novotelecom.ru/billing/user/api/?method=userInfo&login=%@&password=%@", [prefs objectForKey:@"login"], [prefs objectForKey:@"pass"]]; NSXMLParser *gnParser = [[NSXMLParser alloc] initWithContentsOfURL: [NSURL URLWithString:gnLookup]]; [gnParser setDelegate:self]; [gnParser parse]; } - (void)parser:(NSXMLParser *)parser didStartElement:(NSString *)elementName namespaceURI:(NSString *)namespaceURI qualifiedName:(NSString *)qualifiedName attributes:(NSDictionary *)attributeDict { if ([elementName compare:@"name"] == NSOrderedSame) { ntkUser = [[NSMutableString alloc] initWithCapacity:4]; } if ([elementName compare:@"days2BlockStr"] == NSOrderedSame) { ntkUpToDate = [[NSMutableString alloc] initWithCapacity:4]; } if ([elementName compare:@"balance"] == NSOrderedSame) { ntkBalance = [[NSMutableString alloc] initWithCapacity:4]; } } - (void)parser:(NSXMLParser *)parser foundCharacters:(NSString *)string { if (ntkUser && string) { [ntkUser appendString:string]; } if (ntkUpToDate && string) { [ntkUpToDate appendString:string]; } if (ntkBalance && string) { [ntkBalance appendString:string]; } } - (void)parser:(NSXMLParser *)parser didEndElement:(NSString *)elementName namespaceURI:(NSString *)namespaceURI qualifiedName:(NSString *)qName { if ([elementName compare:@"name"] == NSOrderedSame) { lblName.text = [NSString stringWithFormat:@"%@", ntkUser]; } if ([elementName compare:@"days2BlockStr"] == NSOrderedSame) { lblDate.text = [NSString stringWithFormat:@"%@", ntkUpToDate]; } if ([elementName compare:@"balance"] == NSOrderedSame) { lblBalance.text = [NSString stringWithFormat:@"%@", ntkBalance]; } } Click Cmd + Shift + I, copy deb, install and do respring (you need it every time if you install the widget through the deb file).


On this, perhaps, everything, the widget can and should be improved, add a check for internet connection, improve the display of textfields, add a shadow to the labels, etc., both visual and software. But the essence of the article is to push people to write widgets, and maybe, one day, Apple will open us the API Notification Center.
GitHub Code
Successes!
Source: https://habr.com/ru/post/138032/
All Articles