Tair-3C + K-1 Converter. Nikon Infinity
In this article we will talk more likely not about the Tair-3C lens, but about how
to remake the K-1 teleconverter to infinity on the Nikon system.
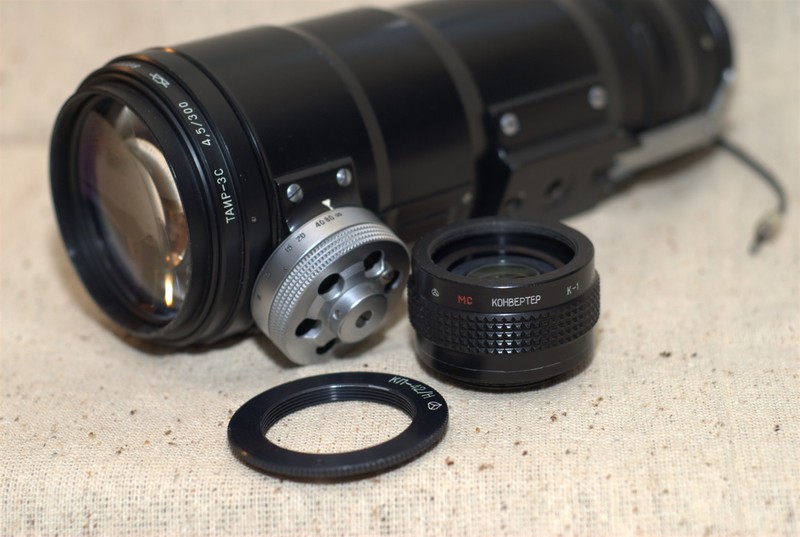
Tair-3C, K-1 MS, KP-42 \ N
I had an idea to use Soviet lenses with an M42 thread and a K-1 MC teleconverter with an M42 threaded connection on a Nikon camera in conjunction with a KP-42 \ N adapter.
')
The question was: How to remake the teleconverter so that there is infinity?
The lens inside looks like a monolithic glass with three lenses, controls and an electrical circuit for transmitting the aperture value to the Zenit camera's exposure meter. To achieve the result (infinity), you need to bring the lens with the KP-A adapter \ 42 and KP-42 \ N closer to 3 mm, and for this you need to grind off 3mm A-type cup and 3 mm KP-A adapter \ 42. This is the wrong move. Cutting the sleeve A will not work for two reasons: (once) no adapters will be attached to the lens, (two) we will not be able to tighten the KP-A \ 42 adapter with screws, since we sharpen 3mm to the middle of the holes for these screws and they will fall out.

Tair-3C. Mounting type A
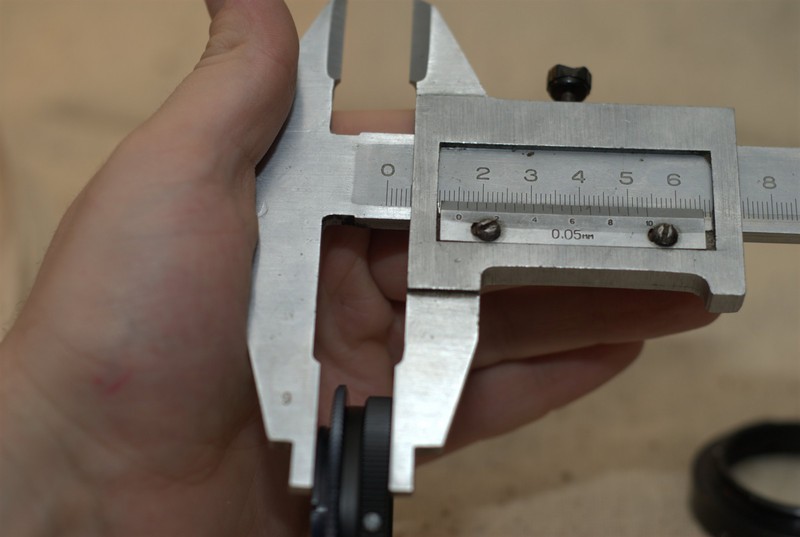
Began to measure the width of the adapters and found a difference of 2mm.

KPAAH
KP-A \ 42, KP-42N
In other words, we need to reduce the width of the converter by 2-3 mm, depending on the thickness of the adapter used.
For reference: The thinnest adapter is Chinese, medium in thickness is the Soviet KP-42 \ N, the thickest is made of stainless steel (it can be homemade or Chinese).
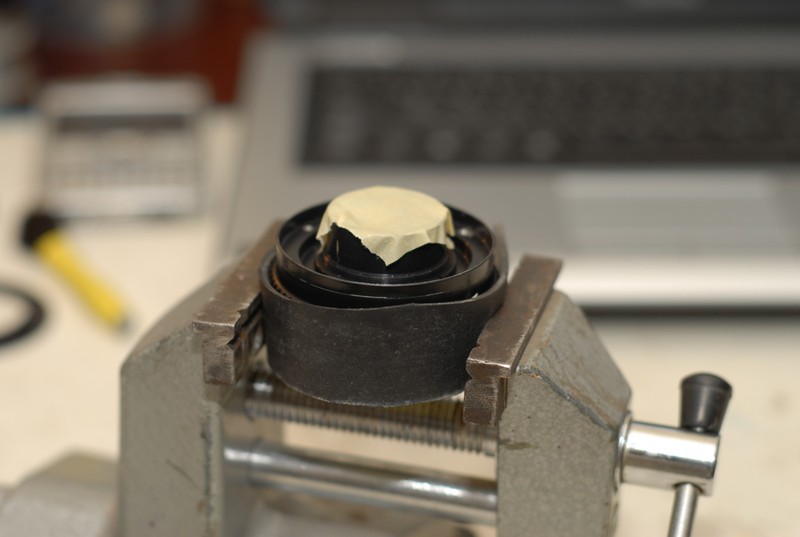
Started to look like and what can be reduced in the converter to bring it closer by 3 mm. It turned out you can grind off a 3 mm bead into which an M42 threaded bushing is inserted.
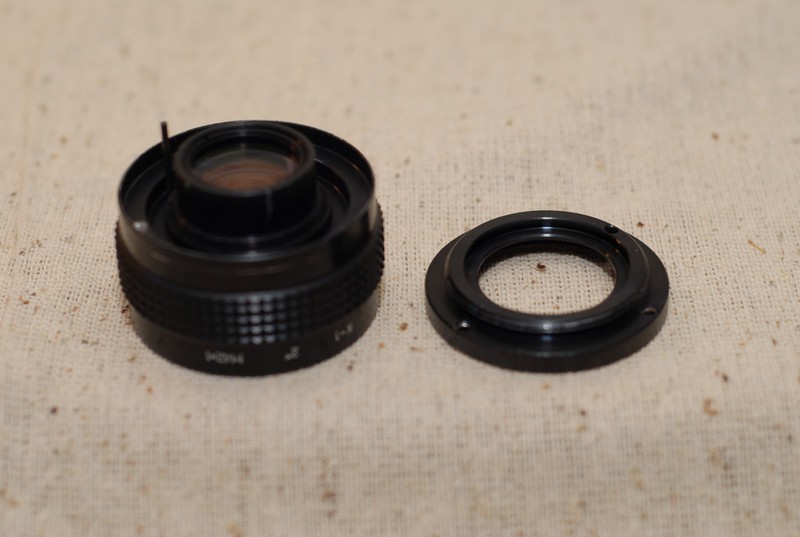
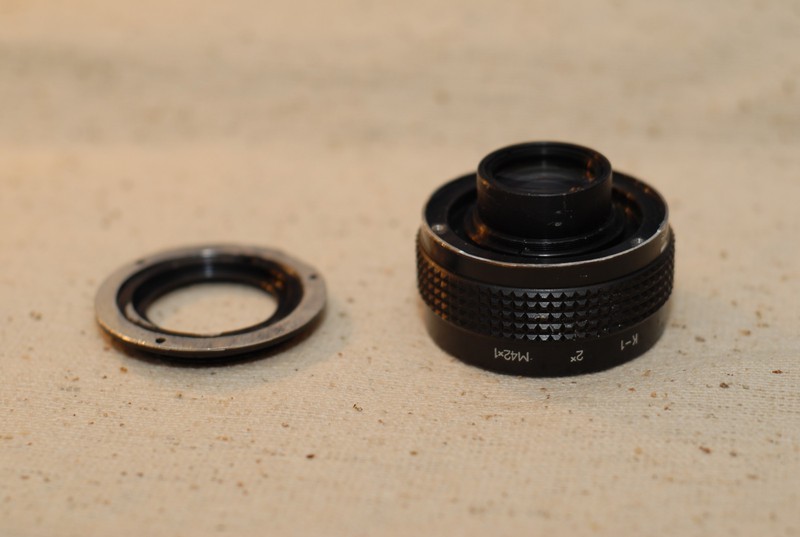
Converter and sleeve M42

3mm cut
3mm cut
The mark can be put with the sharp end of the compass-compass, previously set to 3 mm. It is necessary to fasten firmly so that the part does not jump out of the vice when working with it, you should also hide the converter lens from metal dust.
It was possible to cut the converter board independently and without any problems, but with the M42 sleeve I turned to the turners with a request to cut off 3mm cases, because at home it didn’t neatly and beautifully because of the lack of a machine or a grinding tool, and a file.
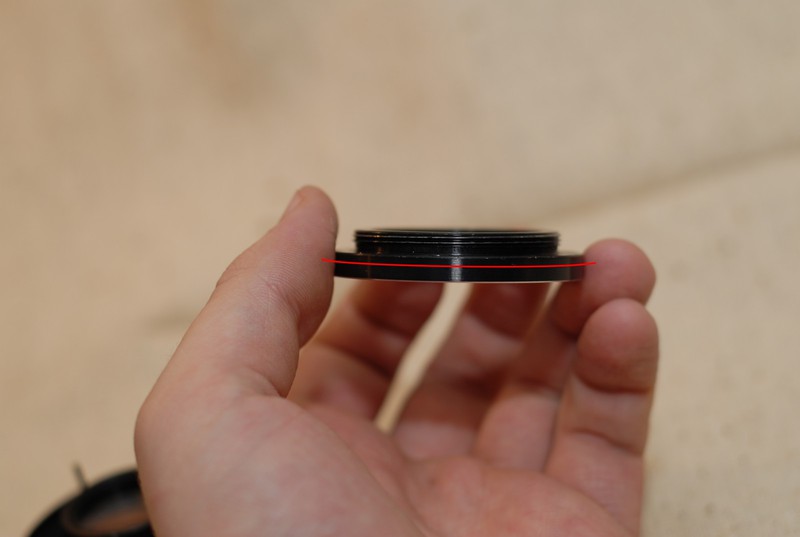
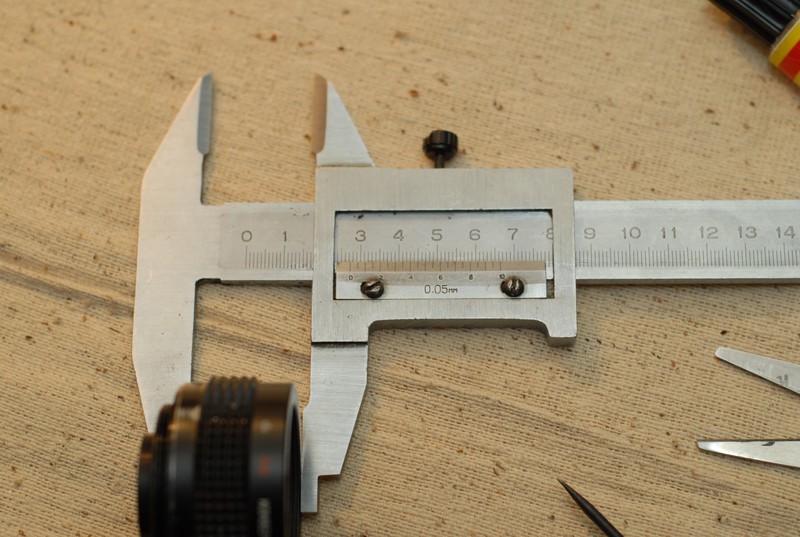
After reducing the details of the converter: the M42 sleeve and the bead, you need to make sure that the width is the same on all sides. This can be done with the help of a caliper.
If the width of one of the sections is smaller, then it is recommended to lay a gasket. You can fix it with glue.

After installing the gasket (s), fasten the bushing with screws. If necessary, clean the part from dust and glue.
To give a beautiful view and hide the traces of our work, the open metal area can be painted. For this matte spray paint is suitable.
Warning: it is necessary to work with paint in a well ventilated, uninhabited room, having previously protected hands (gloves), exposed parts of the body (bathrobe), airways (mask) and eyes (glasses). Spray paint should be applied in layers at a distance of at least 30 cm from the part. The period of drying paint from 10 minutes to 24 hours. To dry the item should be in non-residential premises.

painting site

after painting
After painting work it is necessary to allow the paint to dry.
When the paint is dry, we can proceed to the final phase of the operation: fenichki and testing parts.
To reduce the time to search for the working position of the parts, you can mark the points, then drill (shallow, 0.5–7 mm) holes and paint them with red acrylic paint.
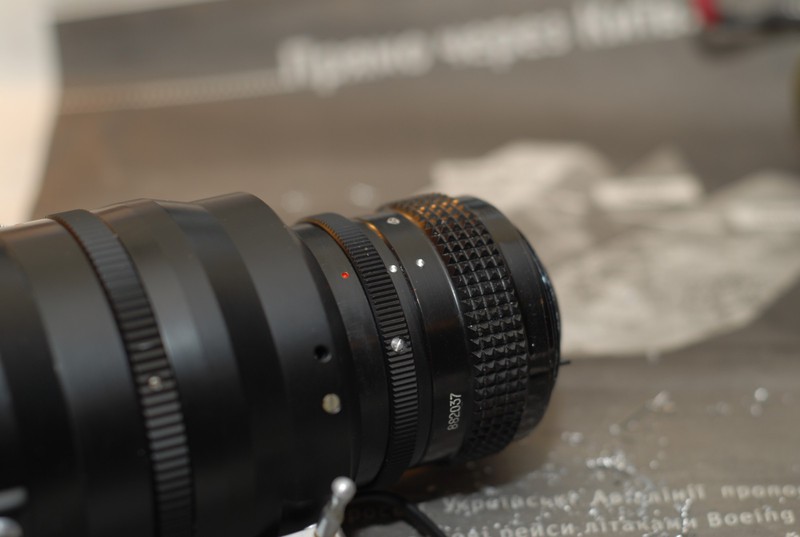
label preparation

finished label
Paint holes with rubber gloves. Remove paint residues with a cloth and smears with a cloth moistened with water.
Testing is the final stage. For example, a frame taken with a camera with a Nikkor 50mm lens and a frame taken with a Tair-3C lens, a K-1 MS Teleconverter and a Butt Photosigniper-12.

view from the window, Nikkor 50mm

view from the window, Tair-3C + TK-1
By the way, we achieved infinity using the TK-1 teleconverter and any lens with an M42 threaded connection on the Nikon system. Hooray!
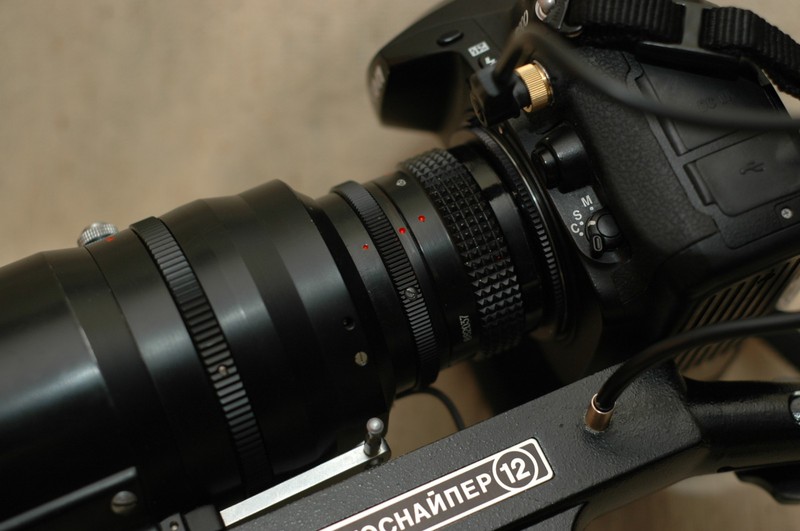
Several photos of the Nikon D200 + Tair-3C + TK-1 kit + photo sniper-12 butt.

Embodiments of ideas!
to remake the K-1 teleconverter to infinity on the Nikon system.
Tair-3C, K-1 MS, KP-42 \ N
I had an idea to use Soviet lenses with an M42 thread and a K-1 MC teleconverter with an M42 threaded connection on a Nikon camera in conjunction with a KP-42 \ N adapter.
')
The question was: How to remake the teleconverter so that there is infinity?
The lens inside looks like a monolithic glass with three lenses, controls and an electrical circuit for transmitting the aperture value to the Zenit camera's exposure meter. To achieve the result (infinity), you need to bring the lens with the KP-A adapter \ 42 and KP-42 \ N closer to 3 mm, and for this you need to grind off 3mm A-type cup and 3 mm KP-A adapter \ 42. This is the wrong move. Cutting the sleeve A will not work for two reasons: (once) no adapters will be attached to the lens, (two) we will not be able to tighten the KP-A \ 42 adapter with screws, since we sharpen 3mm to the middle of the holes for these screws and they will fall out.
Tair-3C. Mounting type A
Began to measure the width of the adapters and found a difference of 2mm.
KPAAH
KP-A \ 42, KP-42N
In other words, we need to reduce the width of the converter by 2-3 mm, depending on the thickness of the adapter used.
For reference: The thinnest adapter is Chinese, medium in thickness is the Soviet KP-42 \ N, the thickest is made of stainless steel (it can be homemade or Chinese).
Started to look like and what can be reduced in the converter to bring it closer by 3 mm. It turned out you can grind off a 3 mm bead into which an M42 threaded bushing is inserted.
Converter and sleeve M42
3mm cut
3mm cut
The mark can be put with the sharp end of the compass-compass, previously set to 3 mm. It is necessary to fasten firmly so that the part does not jump out of the vice when working with it, you should also hide the converter lens from metal dust.
It was possible to cut the converter board independently and without any problems, but with the M42 sleeve I turned to the turners with a request to cut off 3mm cases, because at home it didn’t neatly and beautifully because of the lack of a machine or a grinding tool, and a file.
After reducing the details of the converter: the M42 sleeve and the bead, you need to make sure that the width is the same on all sides. This can be done with the help of a caliper.
If the width of one of the sections is smaller, then it is recommended to lay a gasket. You can fix it with glue.
After installing the gasket (s), fasten the bushing with screws. If necessary, clean the part from dust and glue.
To give a beautiful view and hide the traces of our work, the open metal area can be painted. For this matte spray paint is suitable.
Warning: it is necessary to work with paint in a well ventilated, uninhabited room, having previously protected hands (gloves), exposed parts of the body (bathrobe), airways (mask) and eyes (glasses). Spray paint should be applied in layers at a distance of at least 30 cm from the part. The period of drying paint from 10 minutes to 24 hours. To dry the item should be in non-residential premises.
painting site
after painting
After painting work it is necessary to allow the paint to dry.
When the paint is dry, we can proceed to the final phase of the operation: fenichki and testing parts.
To reduce the time to search for the working position of the parts, you can mark the points, then drill (shallow, 0.5–7 mm) holes and paint them with red acrylic paint.
label preparation
finished label
Paint holes with rubber gloves. Remove paint residues with a cloth and smears with a cloth moistened with water.
Testing is the final stage. For example, a frame taken with a camera with a Nikkor 50mm lens and a frame taken with a Tair-3C lens, a K-1 MS Teleconverter and a Butt Photosigniper-12.
view from the window, Nikkor 50mm
view from the window, Tair-3C + TK-1
By the way, we achieved infinity using the TK-1 teleconverter and any lens with an M42 threaded connection on the Nikon system. Hooray!
Several photos of the Nikon D200 + Tair-3C + TK-1 kit + photo sniper-12 butt.
Embodiments of ideas!
PS I'm not the author of the post. I publish at the request of my friend, areal photo-maniac,who does not have an account on Habré, if someone suddenly has a desire, then you can send an invitation to the author of the topic by mail nautilus.is.back [at] gmail.com
Source: https://habr.com/ru/post/137122/
All Articles