Budget server solution all-in-one
 Small companies usually face the same problem: the desire to develop IT infrastructure rests on a limited budget. As a result, from the entire desired set - a failover cluster of servers, data storage, etc. - you have to choose one thing, eventually introducing other components. However, as they say, even if you ate, you have two choices.
This article describes the process of creating a virtualization farm based on a Hyper-V cluster deployed on the modular server Depo Storm 5306M . The server is good because it combines all the necessary infrastructure: computing modules, storage, network switch - a kind of data-center-in-a-box. And as the operating system will be used free Hyper-V Server 2008 R2 .
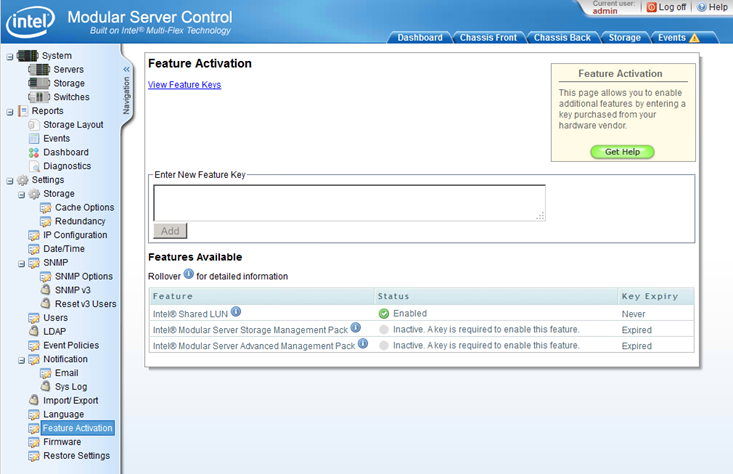
Let's start with the storage configuration. By default, the chassis web interface is located at 192.168.150.150
In order for one LUN to be assigned to multiple servers, it is necessary to activate 'Intel Shared LUN'.
')
Further in the section System \ Storage (button 'Create Storage Pool') we create storage pools. In the window for selecting disks participating in the pool, select the required media, set the name and click the 'Create' button.

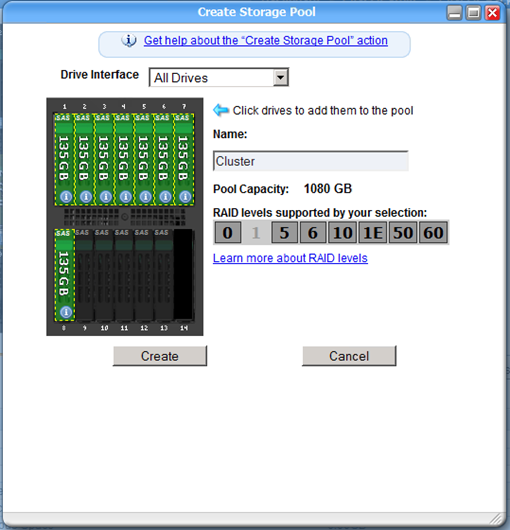
The first pool - System - for disks on which OS will be put. The second pool, Cluster, is for the quorum and shared storage of the cluster.
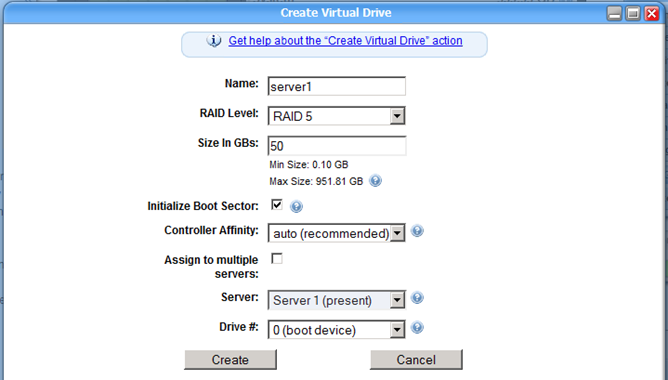
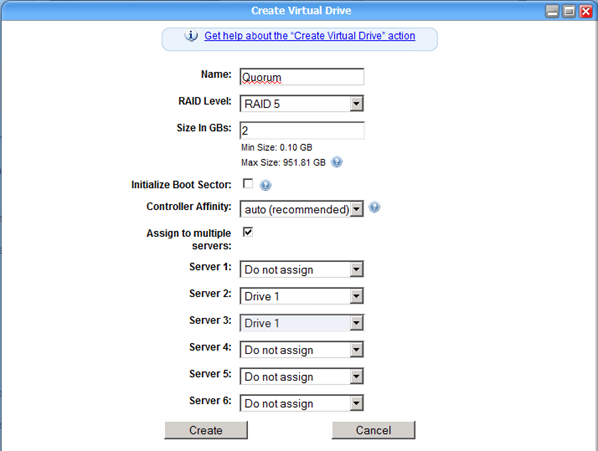
First we create virtual disks for the system. Select the desired pool and click 'Create Virtual Drive' in the right menu. In the window that opens, specify the name of the disk, raid level, disk size (the maximum size is automatically recalculated depending on the raid level selected), be sure to tick the 'Initialize Boot Sector'. Assign the disk to the server you need and select the disk number 0 (boot device). As a result, you should get something like this:
We create and assign disks for all servers. For the time being, we leave the Cluster pool unallocated - we will create and mount disks after installing the OS on all servers, which we will proceed to.
We connect the USB drive to the front panel of the server (you can, of course, connect to the control module at the back of the chassis, this will eliminate the need to include the drive in each blade, but according to personal feelings, it is put a little faster through the front USB connector of Windows).

Go to the 'Servers' section and start the server with the 'Power On' button.
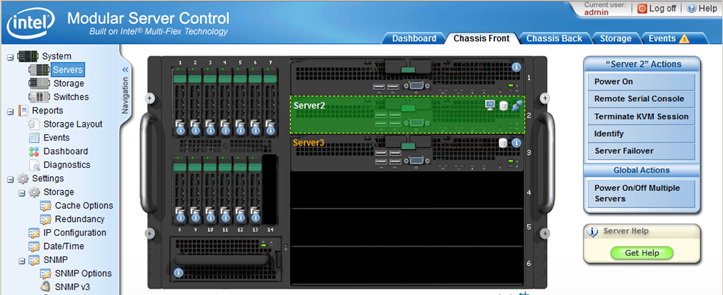
When the server is turned on, press the 'Remote KVM & CD' button and open the server console (for this, Java Runtime Environment 6 or later must be installed on the computer). In the opened window, click the 'Apply' button.
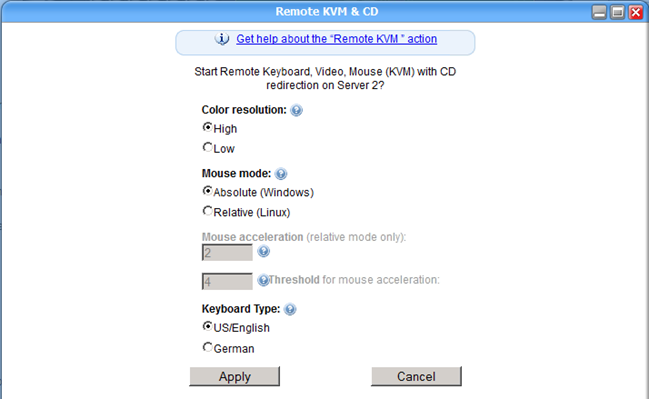
A window like this will appear:
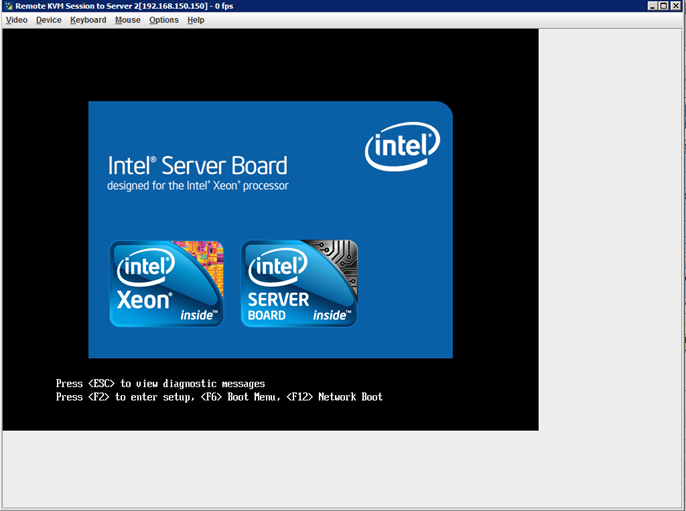
Then everything is like with a regular computer: go to the boot-menu, select the boot from the connected drive, install the Hyper-V Server 2008 R2 OS.
After installation, the 'sconfig' console will open (in paid editions, the console is started with the 'sconfig' command):
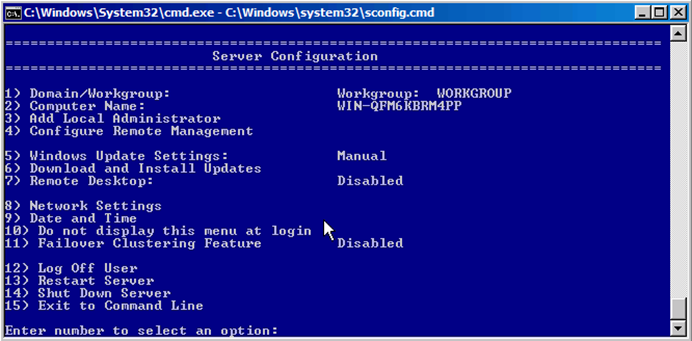
First select the item '8) Network Settings':
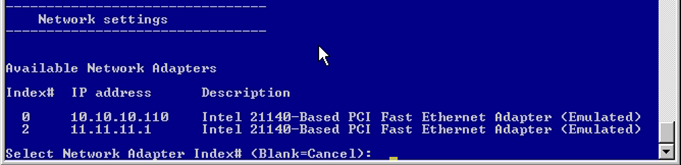
We assign the first adapter the address from the network in which the cluster will work (do not forget about DNS), the second is set up for heartbeat.
Further in the section '1) Domain / Workgroup' we enter the computer into the domain and rename it.

Reboot, log in to the system under the domain administrator account and enter the command 'netsh advfirewall set allprofiles state off' (note, this command disables all firewall profiles).
Go back to sconfig and select '4) Configure Remote Management:
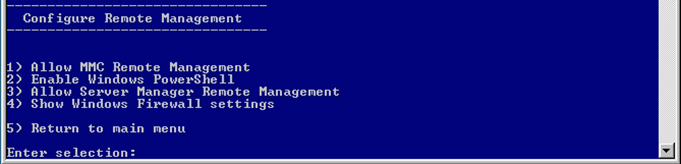
Activate items 1, 2, 3 and reboot again.
Activate the option '11) Failover Clustering Feature '. We proceed to the configuration of shared storage in the web interface of the chassis. In the pool Cluster create 2 drives: Quorum (2 GB) and Data. We tick the 'Assign to multiple servers' checkbox and assign servers for which the disk will be shared.
Let's start the initialization of disks on the cluster nodes. To do this, we need a computer in the domain with a full-featured Windows server 2008r2 or Windows 7 installed with RSAT. Connect to the servers through the MMC console, add the Disk Management snap-in.
We transfer all the disks to online mode, initialize them and format (New Simple Volume) to NTFS. We transfer disks to offline mode. Repeat the procedure on all nodes of the cluster (already without formatting).
Now we launch the 'Failover Cluster Manager' snap-in on the management server (if not, then install via the Server Manager or the 'start / w ocsetup FailoverCluster-FullServer' command). Click the 'Validate a Configuration ...' button to check the cluster for operability.
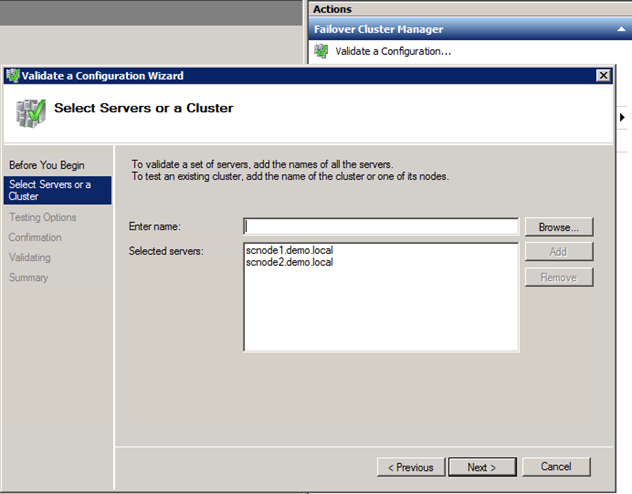
Specify the cluster members and select 'Run All Tests (recommended)'. We study the results and if nothing serious is found, click on 'Create a Cluster ...'. Enter the nodes and assign the name and IP address of the cluster.
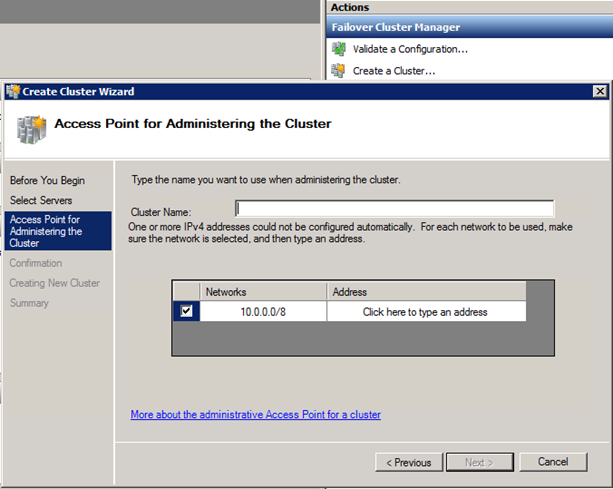
Next Next, Next and see the result.
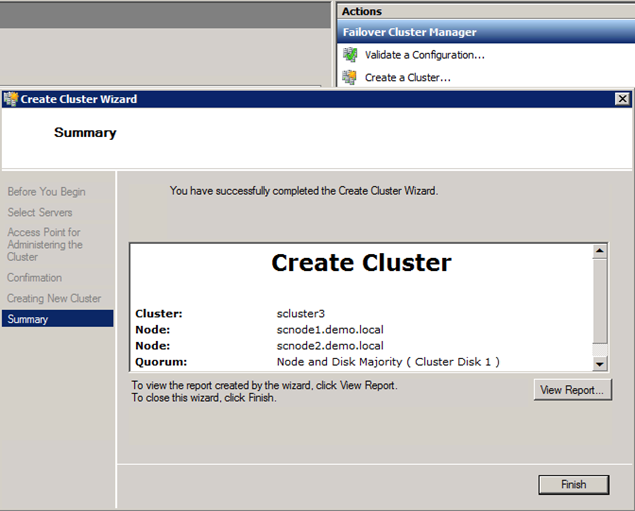
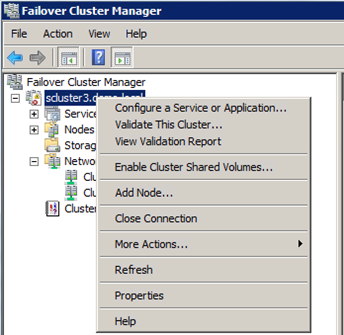
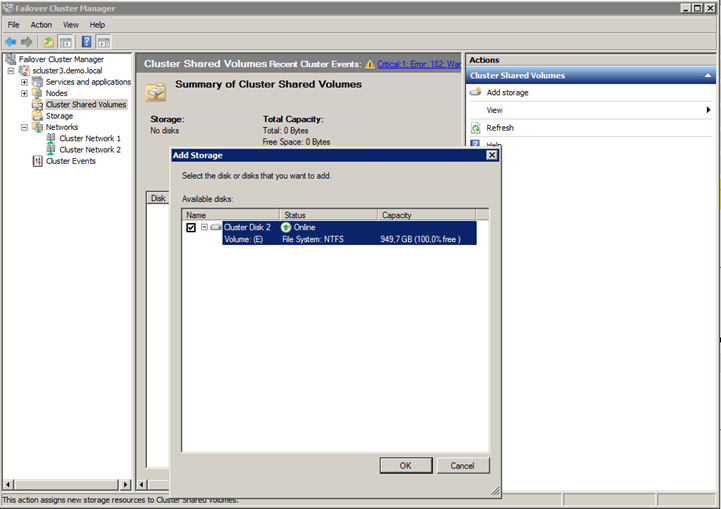
Enable the option 'Enable Cluster Shared Volumes ...'
... and we add a general disk there, it should remain with us alone. A 2GB partition is automatically assigned to the quorum cluster.
The result should be something similar:
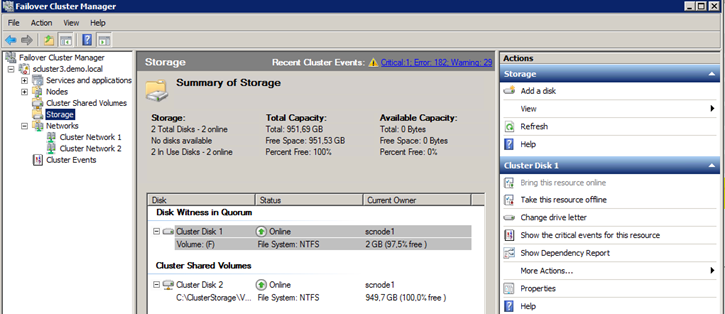
So you can easily and naturally deploy a multifunctional fault-tolerant server solution.
Masamasa ,
Systems Engineer DEPO Computers
Source: https://habr.com/ru/post/136005/
All Articles