Configure Synology Server: Web Server
Greetings habrachiteli!
In today's post, I want to share the experience of setting up the Synology web server on DiskStationManager (DSM) v3.2-1955.
This instruction, in my opinion, is suitable for any model of Synology NAS-server with all the differences only in hardware. The software part is spinning on the DSM, which is regularly updated.
')
I recently purchased a SynologyDS 712+ NAS server.

The motivation for writing the post was a series of obscure problems for me when raising the web server. I want to systematize the knowledge and experience gained in this post.
It all started with the fact that after setting up the server, according to the manual enclosed on the CD, I couldn’t pick up the virtual hosts and, as a result, achieve the performance of several sites on one server that I needed.
If you plan to “tie up” your websites to the database (DB), I recommend immediately installing phpMyAdmin (PMA) for the convenience of working with the database (I don’t need a database yet because of the specificity of the task I need):
Thank you for attention.
PS I am waiting for constructive criticism and updates to the post.
In today's post, I want to share the experience of setting up the Synology web server on DiskStationManager (DSM) v3.2-1955.
This instruction, in my opinion, is suitable for any model of Synology NAS-server with all the differences only in hardware. The software part is spinning on the DSM, which is regularly updated.
')
Introduction
I recently purchased a SynologyDS 712+ NAS server.
The motivation for writing the post was a series of obscure problems for me when raising the web server. I want to systematize the knowledge and experience gained in this post.
Start
It all started with the fact that after setting up the server, according to the manual enclosed on the CD, I couldn’t pick up the virtual hosts and, as a result, achieve the performance of several sites on one server that I needed.
Install phpMyAdmin
If you plan to “tie up” your websites to the database (DB), I recommend immediately installing phpMyAdmin (PMA) for the convenience of working with the database (I don’t need a database yet because of the specificity of the task I need):
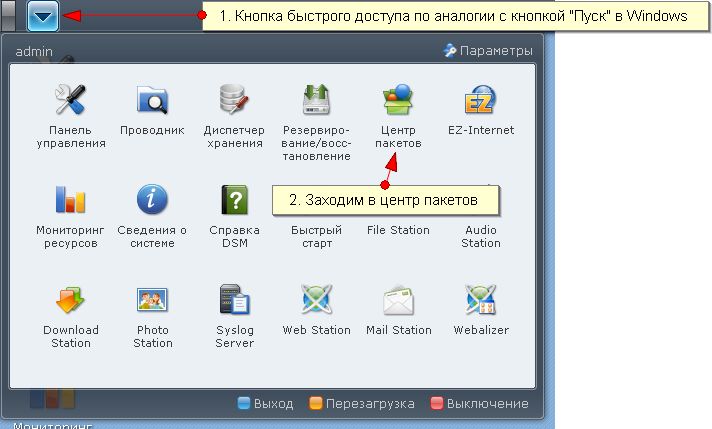
- Click the quick access button at the top of the DSM workspace and open the "Package Center"
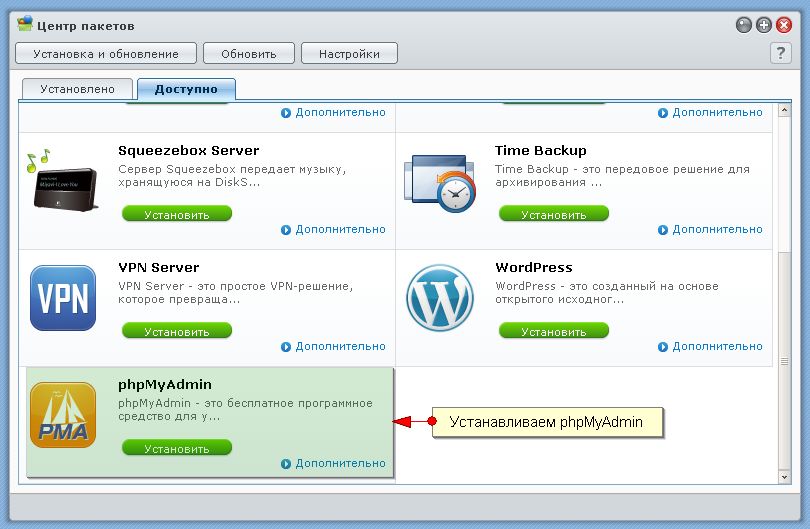
- In the Package Center, select the “Available” tab and find / install PMA
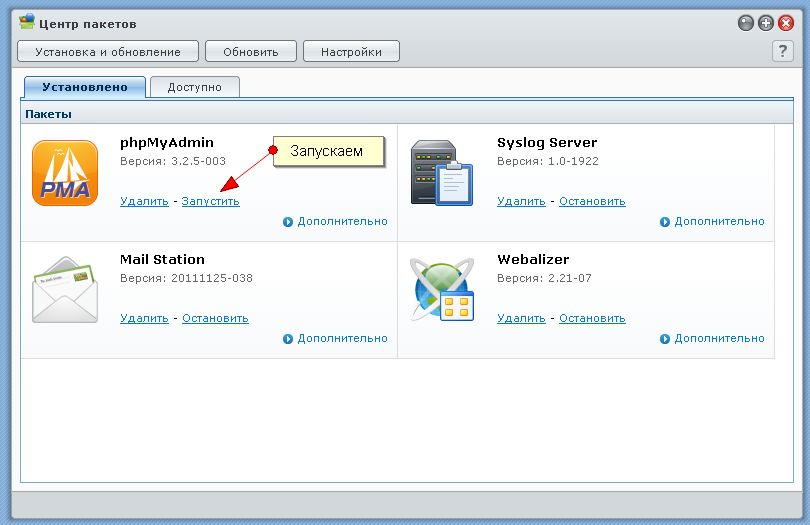
- After installing PMA, go to the Installed tab of the Package Center and launch PMA
- Check PMA - we go by our external IP server, or by local 192.168.. and then we add in the address / phpMyAdmin /, i.e. how it is with me: 192.168.1.39/phpMyAdmin/ - by default, the login is root, the password is left blank;
- We see such a picture

- Of course, the root password after that needs to be changed and, if necessary, new database users with their own rights are created - all this is already done in PMA.
Start and configure the web server
- Go to the "Control Panel" → "Web Services"

- Activate the checkboxes "Enable Web Station" and "Enable MySQL"

- Click on the “Virtual Host” button and create virtual hosts for your sites.
 :
:- “Subfolder name” - the name of the subfolder in the “web” folder in which your site will be located;
- "Host Name" is the name of the host where your site will be accessed:
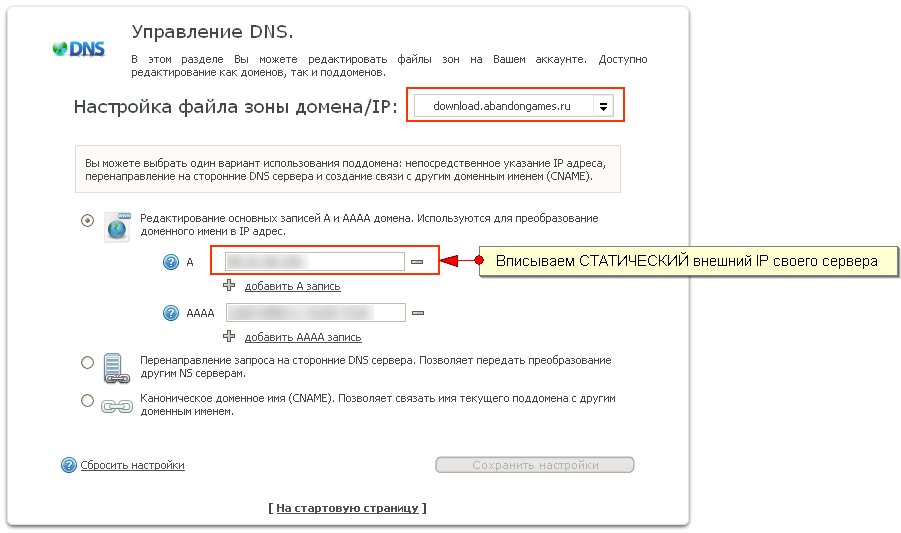
- In my case, I created a subdomain download.abandongames.ru at my hosting provider;
- For him, in the settings / management of the DNS, he edited the A-record by registering the STATIC external IP of his server;
- After some time (up to several hours), DNS records will be updated and queries will be sent to your server from your domain / subdomain;
- Link for clarity
- If you do not have STATIC IP, but there is a dynamic one that the Internet provider issues to you every time you connect to the Internet, then the “Control Panel” → “DDNS” will help you.
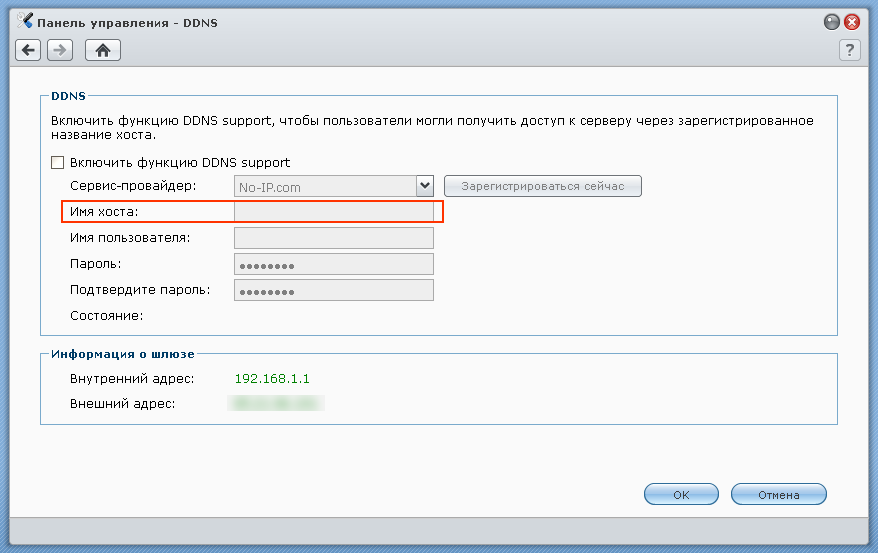
- register, specify the host name for DDNS and enter this name in the field of virtual hosts; - "Protocol" and "Port" can not touch, if you do not need it.
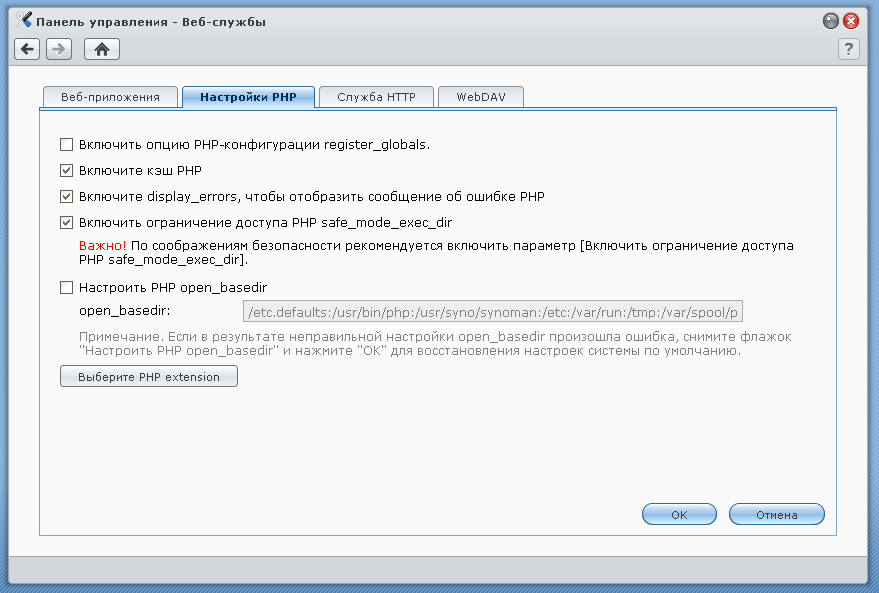
- For additional settings, go to the tab “PHP Settings” and tune options and PHP extensions “to the needs”
- Everything. The web server is up and running.
Website launch
- We go to the server, for example, by local IP through:
- Windows Explorer;
- File manager;
- By DSM (Explorer)
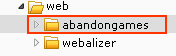
- We see something like this file structure

- the “web” folder is important for us; - Go to the folder “web” and see the very subfolder (in my case, abandongames), which we registered in virtual hosts in the field “Name of subfolders”
- In it you and you will fill your future site. And for starters, just fill in the test file index.php with a code like:
<?
print ' ';
?> - We go in the browser by domain / subdomain, which we specified in the virtual hosts and see our message. We rejoice and wave. :) Everything. The server is configured and you can start working on your / your website / sites.
FTP access
- “Control Panel” → “FTP”
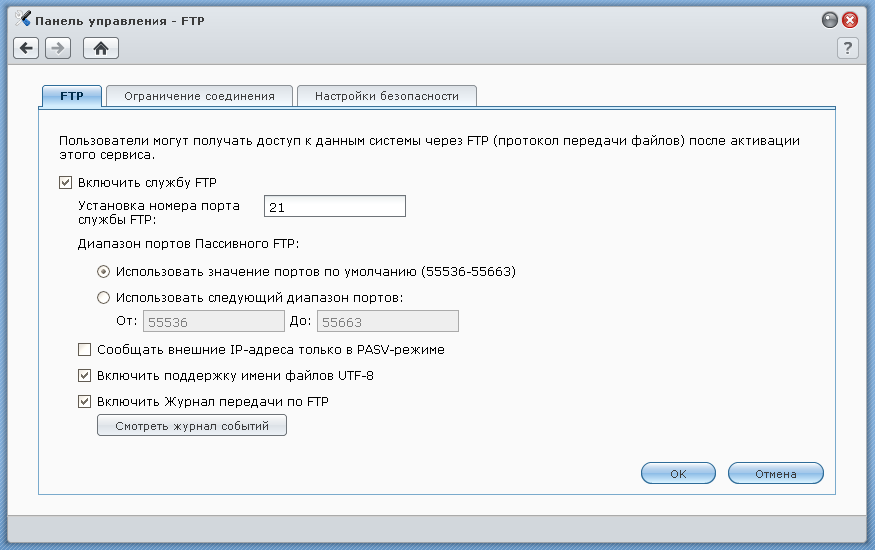
- Activate the checkbox "Enable FTP service";
- I recommend to activate the checkboxes "Enable UTF-8 file name support" and "Enable FTP transfer log";
- Adjust the constraints as you need. I have so:
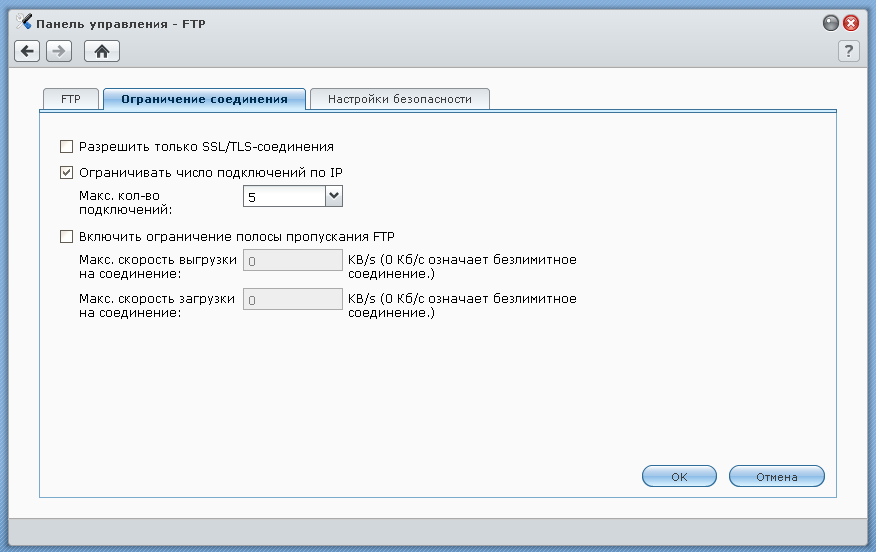
- Everything. FTP access is activated.
Subtleties that are worth paying attention to
- The most important thing is that you don’t need to create “www” subfolders in folders with sites that will have our index.php, as it is written in the manual to the server! Those. in / web / abandongames / www / - the “www” folder is not needed!
- The shared folder “web” may also contain index.htm, index.html or index.php, in this case the “www” subfolder is also not required;
- To generate your error pages, you need to put the missing.html, missing.htm or missing.php files in the root of the “web” public folder. Most likely, this rule is also applicable to subfolders with sites, i.e. /web/abandongames/missing.php;
- It is forbidden to create in the shared folder “web” subfolders “blog”, “photo”, “photosrc”, “webdefault”;
Some recommendations
- Close port 5000, if you don’t manage the server remotely, and if you’re managing it, register in the settings of the router only the allowed IPs from which you plan to log into DSM;
- When installing PMA, you need to change the root access password and, if necessary, create new database users (in PMA) with their own rights;
- When manipulating site files, you need to work in binary mode (FTP);
- If something on the site does not work (some functionality not dependent on curved hands), you first need to check the permissions on the site file / folder in FTP mode and set the corresponding permissions;
- Forward ports on the router

In this case, my FTP 20 port is forwarded to one server, port 21 to another, so do not be surprised.
Thank you for attention.
PS I am waiting for constructive criticism and updates to the post.
Source: https://habr.com/ru/post/135719/
All Articles