Extend the life of power tool batteries
I think all DIY lovers having a cordless tool know that batteries are short-lived.
And buy a replacement is not so easy. And the point is often not in price (although the price of batteries for a professional tool may not be childish at all), but in that it is unrealistic to find the right model.
I myself faced this problem after two years of operation of a professional screwdriver with 18V batteries at 1.5A * h.
Despite the fact that I had prudently bought 2 additional batteries in the kit for the two that were included in the kit, recently all 4 began to work indecently little and the question came upright. The matter was complicated by the fact that the Italian manufacturer, alas, went bankrupt a couple of years ago. The brand was sold to the Chinese, and the professional product line itself was discontinued. So the simple solution "to throw out and buy new ones" did not pass.
Caution - a lot of photos.
After analyzing the battery, it turned out that:
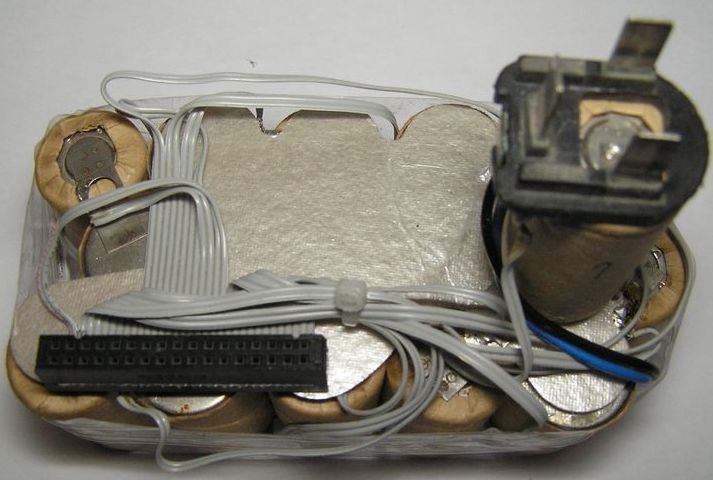
- The battery consists of 15 nickel-cadmium (judging by the marking on the battery case) "cans" with a capacity of 1500 mAh * h connected in series
- The measurement of the voltage on the “banks” showed that out of 15 cans, there are only two problems (0.2V and 0.8V, while the other 1.1-1.2V has so little, because I was picking up a discharged battery)
Of course, it was possible to simply crush one battery for parts by restoring 3 workers. But I thought that was not enough. Since it does not eliminate the cause - but a consequence.
And the essence of the problem is that neither the battery nor the charger contain so-called. "Balancer" (as well as the balancing connector). Who does not know - it is easy to google what “battery balancing” is.
In general, I decided to fix the manufacturer’s flaw on my own.
What is needed:
- Charger suitable for charging single items. I searched with a charge current equal to the element capacity (1.5A) - this is the “passport” mode for this battery, charging for one hour. Of course, it would be even better to immediately find a 15 NiCd cell balancer - but I didn’t even try. Not in our city ...
- A good soldering iron (40-60W) Large power is needed, oddly enough, so as not to overheat the banks when soldering.
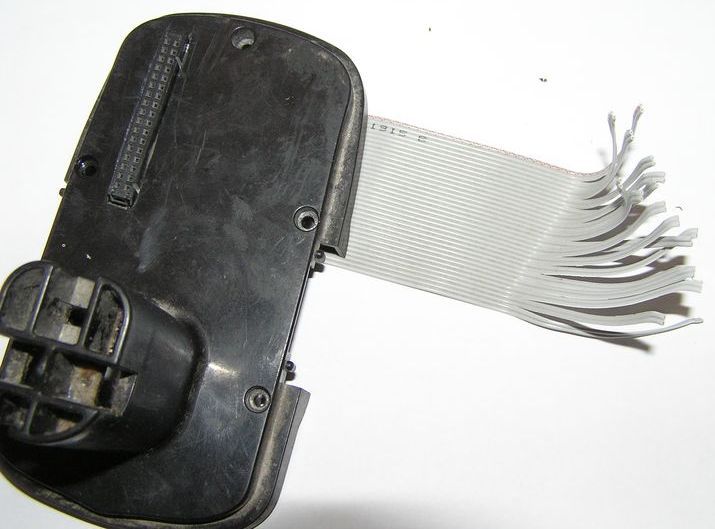
- Suitable connector. Most of the time it took to search for a suitable connector - in the photo you will understand why ... I came up with a cable from the floppy (yeah, I am a sysadmin and a programmer).
- Every small things
The process will not describe in detail - everything is clear from the photos.
I will note only a few points.
Firstly - safety precautions . Be extremely careful!
Remember, the battery thing is quite dangerous, because even when discharged contains the remnants of energy that can cause a fire with a short circuit and quite aggressive chemicals.
With excessive heating, the soldering iron of the bank may well explode after splashing out all this chemistry in your face. And I immediately warn you - do not even try to do this with lithium batteries !
Secondly - in my case, a gasket is glued to the banks above and below, as it turned out, mica and very fragile.
Thirdly, there is very little space inside for wiring (which, by the way, must withstand 1.5A without heating). Worse, the stiffeners that press the cans are quite capable of transferring the wiring. So their stacking around the ribs turned out to be rather dreary. By the way, the photo is not obvious - but the wires in the cable and connector are connected in pairs (doubled), since the number of pins is more than required. For batteries with a lower charging current, you can bite off the excess part of the connector, saving space, and laying the wires will be easier.
The process itself:
1. “original” battery condition
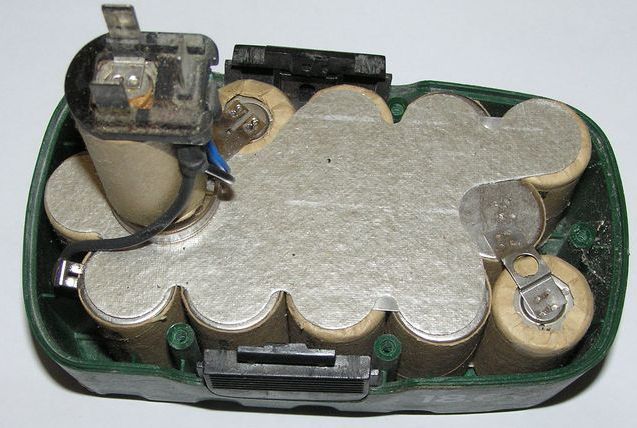
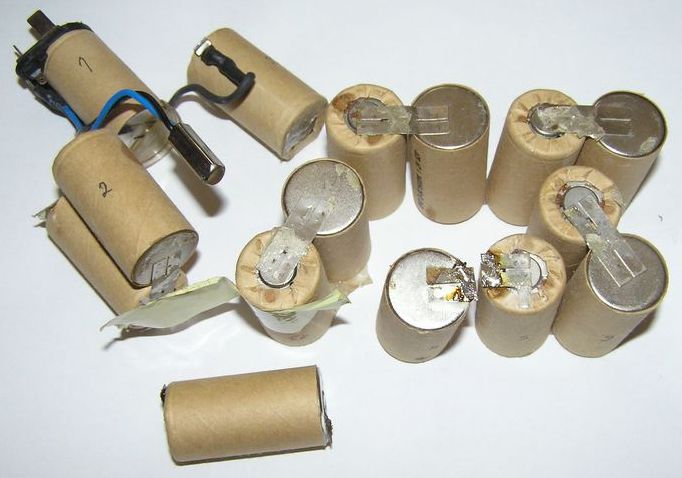
2. Disassembled battery with cut out "problem" banks (in the end, I left them for now - having decided that they are recoverable and still serve). Pay attention to the numbering - banks are located in the battery quite intricately and without numbering in any way.
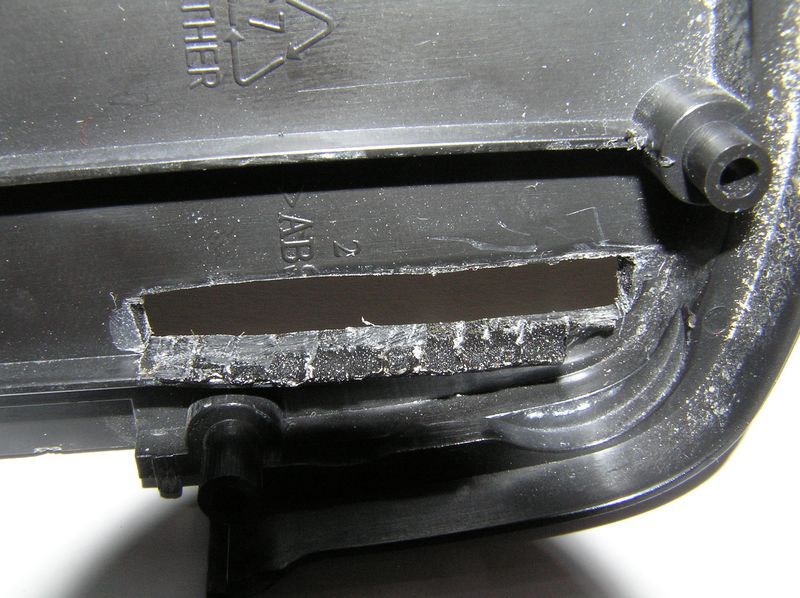
3.4. Cut-outs in the battery case and in the seat of the screwdriver - for the protruding part of the connector (ABS plastic - so that is melted by the tip of the soldering iron and cut off with a knife)
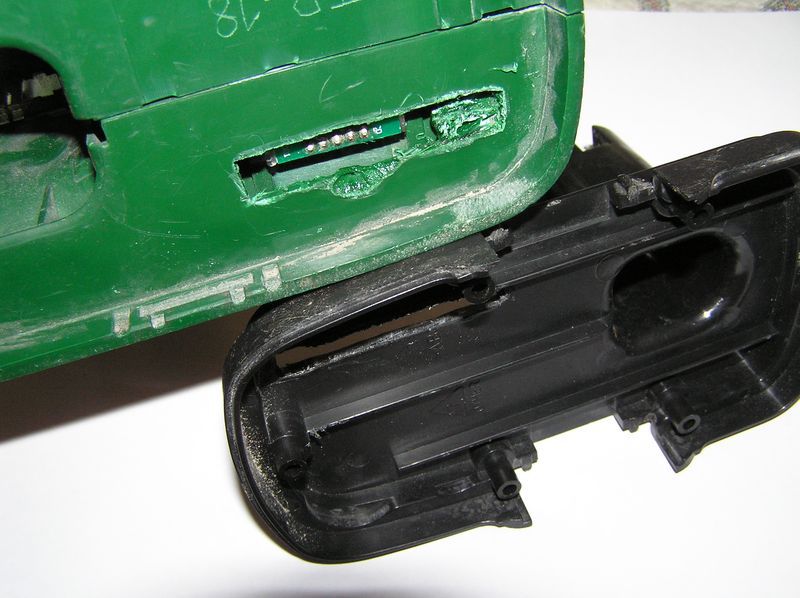
5. A cover with the inserted loop (fitting)
6. Already collected cans with unsoldered balancing connector
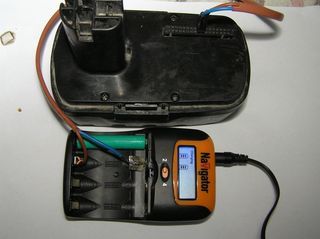
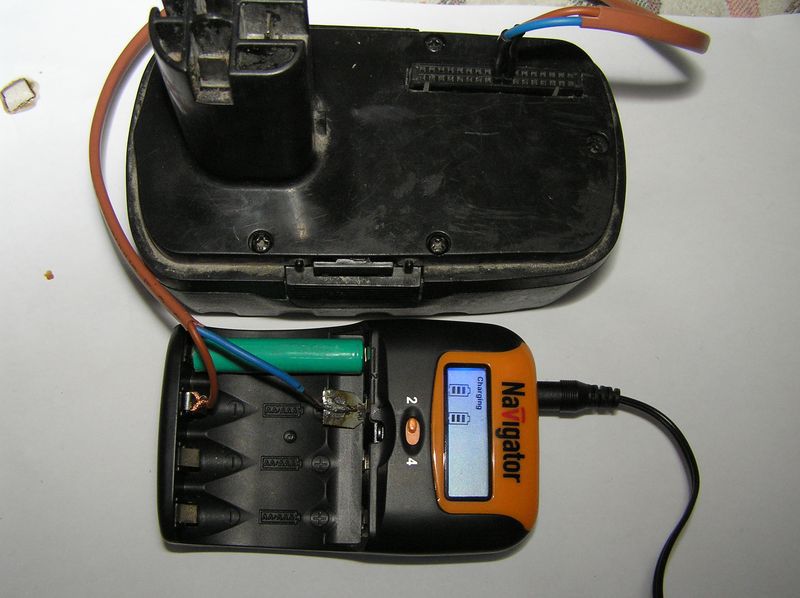
7. Charging the already assembled battery. Taki, yes, 15 hours - because of one bank. But this must be done once out of 5 or 10, in other cases, regular charging of the entire battery. However, you can charge the "regular" and then recharge the "problem" banks - which will be much faster. By the way, the problem that is not yet solved is visible here. This charger only works with a pair of batteries. I have not yet figured out how it works and just stuck the "left" battery into the second slot. Do not try to charge several cans of one battery at once in such a “multi-cavity” charger! Remember, they are connected inside the battery! And from 18 volts on their contacts, the charger can tell you everything that thinks of you. Loud.
I hope someone this article will help extend the life of the battery. And ecology is good, and wallet. And most importantly - there is something to occupy the hands and head.
Good luck!
')
Upd: Perezalil pictures on habrastorage.
Upd 2 - Part Two
Source: https://habr.com/ru/post/135213/
All Articles