Maps and location data on Windows Phone

Getting started with the Map control, which provides an interface to maps on Windows Phone. Let's create a new project from the Windows Phone Application template and call it ExploreMapControl.
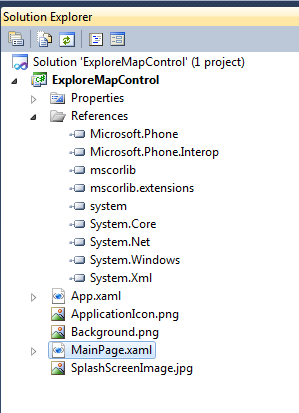
After the project is created, look at which libraries it refers to.
Next, expand the Toolbox, if it is collapsed, and drag the Map control into the application's interface designer.

Note that the project now refers to Microsoft.Phone.Controls.Map.
')

Double-click to the page MainPage.xaml and see what has changed in the XAML code. A Map control has been added from the my namespace:
<my:Map Height="50" HorizontalAlignment="Left" Margin="201,198,0,0" Name="map1" VerticalAlignment="Top" Width="100" /> Looking at the header of the XAML document you can see what kind of namespace it is:
xmlns:my="clr-namespace:Microsoft.Phone.Controls.Maps;assembly=Microsoft.Phone.Controls.Maps" Let's replace my with map so that the name of the namespace matches its content:
xmlns:map="clr-namespace:Microsoft.Phone.Controls.Maps;assembly=Microsoft.Phone.Controls.Maps" <map:Map Height="50" HorizontalAlignment="Left" Margin="201,198,0,0" Name="map1" VerticalAlignment="Top" Width="100" /> Edit the XAML code of the Map control or use the Properites panel so that the element takes up most of the free space and rename the element to MyMap:
<map:Map Name="MyMap"/> Run the application (F5) and see what the control looks like during execution.
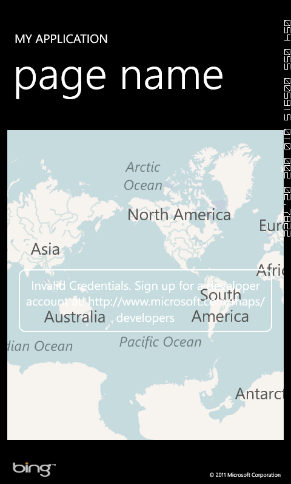
Notice the white banner in the center of the screen, which says that we have the wrong authorization data? This is because this control uses the Bing map service and requires registration to use it. You can register and receive the key on the Bing Maps portal: http://www.bingmapsportal.com .
At the end of the registration, the developer receives a string key, which must be specified in the CredentialsProvider property of the management tool; it can also be put into resources or data.
Add simple map controls: zoom in / out, change the map display mode.
<!--ContentPanel - place additional content here--> <Grid x:Name="ContentPanel" Grid.Row="1" Margin="12,0,12,0"> <map:Map Name="MyMap"> <Button Name="ZoomIn" Content="+" HorizontalAlignment="Center" VerticalAlignment="Bottom" Height="60" Width="60" Margin="-100,0,0,-5" Click="ZoomIn_Click" FontWeight="Bold" Padding="0,-9,0,0"/> <Button Name="ZoomOut" Content="-" HorizontalAlignment="Center" VerticalAlignment="Bottom" Height="60" Width="60" Margin="100,0,0,-5" Click="ZoomOut_Click" FontWeight="Bold" Padding="0,-9,0,0" /> <Button Name="LayoutChange" Content="L" HorizontalAlignment="Center" VerticalAlignment="Bottom" Height="60" Width="60" Margin="0,0,0,-5" FontWeight="Bold" Padding="0,-9,0,0" Click="LayoutChange_Click"/> </map:Map> </Grid> And we will process these events in the application code.
private void ZoomIn_Click(object sender, RoutedEventArgs e) { MyMap.ZoomLevel += 1; } private void ZoomOut_Click(object sender, RoutedEventArgs e) { MyMap.ZoomLevel -= 1; } private void LayoutChange_Click(object sender, RoutedEventArgs e) { if (MyMap.Mode is RoadMode) { MyMap.Mode = new AerialMode(true); } else { MyMap.Mode = new RoadMode(); } } Do not forget to add the following directive to the using block:
using Microsoft.Phone.Controls.Maps; Run the application (F5) and check that our controls work as intended. In accordance with the Metro-design, we would need to arrange the panel with buttons at the bottom of the application window as an Application Bar, only to simplify the example, we use a simpler version. As an independent exercise, you can try to remove the buttons, uncomment the sample Application Bar code in the XAML file and remake the application in accordance with the Metro style.
We now turn to geolocation services available on the phone. The service provides information using a combination of information received from Wi-Fi, cellular communication and data from a GPS receiver. Add now to our application the opportunities provided by geolocation services.
First, add the following directive to the using block:
using Microsoft.Devices.Sensors; Now we are ready to work with location / location services.
First, we will write a simple addition to our program, which will center the map in accordance with the geololocation data obtained from the services.
Add a variable definition of the GeoCoordinateWatcher type to the class, which will allow us to initialize geolocation services and retrieve data from them.
private GeoCoordinateWatcher myGeoWatcher; In the class constructor, immediately after the code related to the accelerometer, we add an initialization code and registration for service status change events (they may be unavailable, they may not be ready, etc.) and position change events.
yGeoWatcher = new GeoCoordinateWatcher(); myGeoWatcher.MovementThreshold = 100.0f; myGeoWatcher.StatusChanged += new EventHandler<GeoPositionStatusChangedEventArgs>(myGeoWatcher_StatusChanged); myGeoWatcher.PositionChanged += new EventHandler<GeoPositionChangedEventArgs<GeoCoordinate>>(myGeoWatcher_PositionChanged); A good application should correctly handle the statuses of geoservices, because they can not always produce data and can spend a lot of time on initialization. To begin with, we simply leave the handler empty, since we will be testing the application on the emulator, and there are no problems there.
Also, it would be more appropriate to place the launch of the geolocation service into a separate stream, so as not to slow down the loading of the application, in our first version of the application, taking into account the use of the emulator, for now we will start the service directly in the class constructor:
myGeoWatcher.TryStart(false, TimeSpan.FromSeconds(60)); If Visual Studio automatically generated the event handlers StatusChanged and PositionChanged, comment out or erase the code in these methods that causes the NotImplemented exception:
throw new NotImplementedException(); Add a code to the PositionChanged event handler to center the map when the position changes:
void myGeoWatcher_PositionChanged(object sender, GeoPositionChangedEventArgs<GeoCoordinate> e) { MyMap.Center = e.Position.Location; } Run the application (F5) and use the emulator's capabilities for emulating geolocation data to test the program. Zoom in to ensure that the positioning is correct.

The next step to improve our program may be to launch services in another stream, add a status bar to geolocation data, and create a point on the map that marks our location.
To use threads, add the following directive to the using block:
using System.Threading; In the constructor, before starting the services, add the code:
new Thread(startMyGeoWotcher).Start(); After that, we will create a function that does not accept or return values, with the name startMyGeoWotcher and transfer the service launch code to it:
void startMyGeoWotcher() { myGeoWatcher.TryStart(false, TimeSpan.FromSeconds(60)); } Now add a TextBlock control to display the status of geolocation services
<!--ContentPanel - place additional content here--> <Grid x:Name="ContentPanel" Grid.Row="1" Margin="12,0,12,0"> <StackPanel> <TextBlock Name="GeoStatus" HorizontalAlignment="Center" VerticalAlignment="Top" Text="Geo Status .." /> <map:Map Name="MyMap" Height="580"> <Button Name="ZoomIn" Content="+" HorizontalAlignment="Center" VerticalAlignment="Bottom" Height="60" Width="60" Margin="-100,0,0,-5" Click="ZoomIn_Click" FontWeight="Bold" Padding="0,-9,0,0"/> <Button Name="ZoomOut" Content="-" HorizontalAlignment="Center" VerticalAlignment="Bottom" Height="60" Width="60" Margin="100,0,0,-5" Click="ZoomOut_Click" FontWeight="Bold" Padding="0,-9,0,0" /> <Button Name="LayoutChange" Content="L" HorizontalAlignment="Center" VerticalAlignment="Bottom" Height="60" Width="60" Margin="0,0,0,-5" FontWeight="Bold" Padding="0,-9,0,0" Click="LayoutChange_Click"/> </map:Map> </StackPanel> </Grid> And we will add status output to the StatusChanged handler:
void myGeoWatcher_StatusChanged(object sender, GeoPositionStatusChangedEventArgs e) { switch (e.Status) { case GeoPositionStatus.Disabled: if (myGeoWatcher.Permission == GeoPositionPermission.Denied) { GeoStatus.Text = " "; } else { GeoStatus.Text = " "; } break; case GeoPositionStatus.Initializing: GeoStatus.Text = " "; break; case GeoPositionStatus.NoData: GeoStatus.Text = " "; break; case GeoPositionStatus.Ready: GeoStatus.Text = " "; break; } } Finally, add a point on the map to the position change event handler.
Add a Pushpin variable to the class:
private Pushpin myPushpin; Create it in the class constructor:
myPushpin = new Pushpin(); In the position change handler, set it to the current position and add it to the map if it is not there:
myPushpin.Location = e.Position.Location; if (!MyMap.Children.Contains(myPushpin)) MyMap.Children.Add(myPushpin); Run the application (F5) and use the emulator's capabilities for emulating geolocation data to test the program. Zoom in to ensure that the positioning and setting of the point is correct; also check the displayed status of geolocation services.
UPD : As correctly written in andrew_kane comments. Working with threads from a pool is a more straightforward practice.
Below I give the code that needs to be changed in order to work with threads from the pool, and not to call
new Thread(...).Start(); Instead
new Thread(startMyGeoWotcher).Start(); need to write the following code:
ThreadPool.QueueUserWorkItem(startMyGeoWotcher, myGeoWatcher); We are forced to transfer an object to a method, because using a pool requires a static method and we have 2 options, either to make the object static, or to pass it as a parameter.
Now you need to rewrite the method
startMyGeoWotcher It should now look like this: static void startMyGeoWotcher(object GeoWatcher) { ((GeoCoordinateWatcher)GeoWatcher).TryStart(false, TimeSpan.FromSeconds(60)); } Useful links:
Windows Phone Development Center on MSDN
Windows Phone SDK 7.1
Forums on development for Windows Phone in Russian
Source: https://habr.com/ru/post/134239/
All Articles