Introduction to Ruby / Tk. Part one
Good day!
Looking into my ToDo list today, I realized that I have no work for today. Sitting on the Internet and reading the news all day, too, you know, even the pleasure. We had to do something, namely, to write an application. Next weekend I wanted to introduce you to a bunch of Ruby + Qt, but since I did not install Qt binding yet, I had to look for a replacement. And I found it. Because together with Ruby supplied by Tk, it was my choice that fell on him.
Full name: Davydenko, Mikhail Yuryevich
Place of Birth:
In fact, it will not be about me, but about Tk .
Tk (from the English. Toolkit - “toolkit”, “toolkit”) is a cross-platform library of basic GUI elements that is distributed with open source.
')
Ruby (from the English. Ruby - "Ruby") is a dynamic, reflective, interpreted high-level programming language for fast and convenient object-oriented programming. The language has a multithreading implementation independent of the operating system, strict dynamic typing, garbage collector and many other features. In general, what we need now.
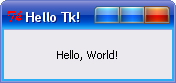
Namely, write Hello World. Where are we without him?
Its code will look something like this:
Now let's look at what is what.
First, we imported a library to work with it:
Next, we created a new window titled Hello Tk! , 50 pixels high and 15 pixels wide:
Then create an inscription with the text Hello World! with coordinates 100x100:
Here we met a pack unfamiliar to us. What is it?
A pack is a packer that arranges elements (in this case, a Label widget) in the parent window. There are also two more packers:
And, I completely forgot, that's what we did. It turned out the same?
Now I would like to touch on the topic of trapping events. Whether it is pressing a button or aiming the cursor on any of the widgets. There are several typical types of events in Tk, namely eight! Here they are:
I translated the types of events, not the events themselves. By saying this, I mean that we can use both the ButtonPress-1 event (clicking the left mouse button) and ButtonRelease-1 (release the left mouse button). It is also worth noting that we can use two mouse buttons (left and right). For example: " ButtonPress-1 " (left) and " ButtonPress-2 " (right).
Here, in fact, all available to us to intercept events.
You can catch an event like this:
Or so:
And also inside the ad itself widget. Like this:
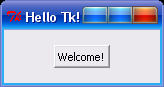
Let's consolidate our knowledge in practice and write just such a program:
When you start anything new for yourself, we will not find.
Until we move the cursor to our button. This is what we should get:
Now let's move the cursor and see that the button has said goodbye to us:

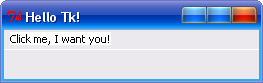
Now I propose to consolidate our knowledge of catching events and to get acquainted with the Menu widget that is new for us. The purpose of this application will be that we have to choose our favorite programming language in the menu. Further I will provide the code with nested comments. I think understanding the code will not cause you any difficulties. So, here it is:
Indeed, it is time to launch our program. Actually, here:
Now open our menu and click on “Java”. Here is what we will see:

That's all for today. The goal of this topic was to introduce you to the Tk graphic library, which, in my opinion, was successful, at least a little and superficially.
PS Next weekend we will delve into studying the typical and specific properties of widgets in Tk, find out what widgets are in Tk and consolidate our knowledge by writing a Jabber client that I wrote in 30 minutes.
See you soon!
Materials used:
Ruby - Wikipedia
Tk - Wikipedia
Ruby / TK Guide
Also, I would like to express my deep gratitude to my t3ns0r haberer for his introduction to Tkinter .
Introduction
Looking into my ToDo list today, I realized that I have no work for today. Sitting on the Internet and reading the news all day, too, you know, even the pleasure. We had to do something, namely, to write an application. Next weekend I wanted to introduce you to a bunch of Ruby + Qt, but since I did not install Qt binding yet, I had to look for a replacement. And I found it. Because together with Ruby supplied by Tk, it was my choice that fell on him.
We get acquainted with the patient
In fact, it will not be about me, but about Tk .
Tk (from the English. Toolkit - “toolkit”, “toolkit”) is a cross-platform library of basic GUI elements that is distributed with open source.
')
The doctor is already here
Ruby (from the English. Ruby - "Ruby") is a dynamic, reflective, interpreted high-level programming language for fast and convenient object-oriented programming. The language has a multithreading implementation independent of the operating system, strict dynamic typing, garbage collector and many other features. In general, what we need now.
Spread the fingers
Namely, write Hello World. Where are we without him?
Its code will look something like this:
require 'tk' app = TkRoot.new { title "Hello Tk!"; padx 50; pady 15 } TkLabel.new(app) { text "Hello, World!" pack { padx 100; pady 100; side "left" } } Tk.mainloop Debriefing
Now let's look at what is what.
First, we imported a library to work with it:
require 'tk' Next, we created a new window titled Hello Tk! , 50 pixels high and 15 pixels wide:
app = TkRoot.new { title "Hello Tk!"; padx 50; pady 15 } Then create an inscription with the text Hello World! with coordinates 100x100:
TkLabel.new(app) { text "Hello, World!" pack { padx 100; pady 100; side "left" } } Here we met a pack unfamiliar to us. What is it?
A pack is a packer that arranges elements (in this case, a Label widget) in the parent window. There are also two more packers:
- grid , which places widgets in a grid. This packer will be useful, for example, to create a table or buttons for a calculator, which we will write with you, but a little later;
- place , which allows you to place widgets in the specified coordinates, with the dimensions specified by us.
And, I completely forgot, that's what we did. It turned out the same?
Developments
Now I would like to touch on the topic of trapping events. Whether it is pressing a button or aiming the cursor on any of the widgets. There are several typical types of events in Tk, namely eight! Here they are:
- " 1 " or " ButtonPress-1 ", indicating that the widget was clicked with the left mouse button;
- " Enter " when the cursor hovers over our widget;
- " Leave " - the cursor was removed from our widget (works only after " Enter ";
- " Double-1 " - double click was made;
- " B3-Motion " - moved the cursor by pressing the right mouse button, from one position to another;
- " Control-ButtonPress-3 " - the right mouse button was pressed together with Ctrl ;
- " Alt-ButtonPress-1 " - the left mouse button was pressed together with Alt .
I translated the types of events, not the events themselves. By saying this, I mean that we can use both the ButtonPress-1 event (clicking the left mouse button) and ButtonRelease-1 (release the left mouse button). It is also worth noting that we can use two mouse buttons (left and right). For example: " ButtonPress-1 " (left) and " ButtonPress-2 " (right).
Here, in fact, all available to us to intercept events.
You can catch an event like this:
wdgt.bind('ButtonPress-1') { puts "LBM: I was pressed..." } Or so:
wdgt.bind('Control-ButtonPress-3', proc { puts "RBM + Ctrl: We was clicked..." }) And also inside the ad itself widget. Like this:
wdgt = TkButton.new(app) { text "Click me!" command proc { puts "Button of nowhere: I was clicked..." } } Let's consolidate our knowledge in practice and write just such a program:
require 'tk' app = TkRoot.new { title "Hello Tk!"; padx 50; pady 15 } but = TkButton.new(app) { text "Hello, World!" pack { padx 100; pady 100; side "left" } } but.bind("Enter", proc { but.text "Welcome!" }) but.bind("Leave", proc { but.text "Bye!" }) Tk.mainloop When you start anything new for yourself, we will not find.
Until we move the cursor to our button. This is what we should get:
Now let's move the cursor and see that the button has said goodbye to us:
Menu, please
Now I propose to consolidate our knowledge of catching events and to get acquainted with the Menu widget that is new for us. The purpose of this application will be that we have to choose our favorite programming language in the menu. Further I will provide the code with nested comments. I think understanding the code will not cause you any difficulties. So, here it is:
require 'tk' # app = TkRoot.new { # title "Hello Tk!"; padx 50; pady 15 # } lbl = TkLabel.new(app) { # text "Something wasn't clicked yet..." # pack { padx 100; pady 100; side "left" } # } java_clicked = Proc.new { # "Java" lbl.text "Java was liked..." } cs_clicked = Proc.new { # "C#" lbl.text "C# was liked..." } cpp_clicked = Proc.new { # "C++" lbl.text "C++ was liked..." } py_clicked = Proc.new { # "Python" lbl.text "Python was liked..." } rb_clicked = Proc.new { # "Ruby" lbl.text "Ruby was liked..." } menu = TkMenu.new(app) # menu.add('command', 'label' => "Java", 'command' => java_clicked) # "Java" menu.add('command', 'label' => "C#", 'command' => cs_clicked) # "C#" menu.add('separator') # menu.add('command', 'label' => "C++", 'command' => cpp_clicked) # "C++" menu.add('separator') # menu.add('command', 'label' => "Python", 'command' => py_clicked) # "Python" menu.add('command', 'label' => "Ruby", 'command' => rb_clicked) # "Ruby" bar = TkMenu.new # bar.add('cascade', 'menu' => menu, 'label' => "Click me, I want you!") # app.menu(bar) # Tk.mainloop # , ? Indeed, it is time to launch our program. Actually, here:
Now open our menu and click on “Java”. Here is what we will see:
Conclusion
That's all for today. The goal of this topic was to introduce you to the Tk graphic library, which, in my opinion, was successful, at least a little and superficially.
PS Next weekend we will delve into studying the typical and specific properties of widgets in Tk, find out what widgets are in Tk and consolidate our knowledge by writing a Jabber client that I wrote in 30 minutes.
See you soon!
Materials used:
Ruby - Wikipedia
Tk - Wikipedia
Ruby / TK Guide
Also, I would like to express my deep gratitude to my t3ns0r haberer for his introduction to Tkinter .
Source: https://habr.com/ru/post/133931/
All Articles