Amazon Kindle Fire - partial Russification
 Just yesterday, a courier called me and informed me about the parcel from the states. The long-awaited Fire has come, after a month of waiting for pre-order. We omit all the difficulties of ordering and shipping to Ukraine, since The tablet is already on sale in many domestic online stores.
I'll warn you right away that for me this is the first tablet and the first Android device. So there will be many, at first glance, banal things.
I will not say anything about native firmware, since about her already have a bunch of reviews on youtube. We turn to the most interesting, namely:
Getting root access;
Installing the Russian keyboard (in the standard package there is no possibility to change the layout);
Installing the Android market (by wish in the next article).
Getting root access to Amazon Kindle Fire
Step one: Download and install the Android SDK . You may need a JDK, but the installer will tell you where to get it. In the SDK, you need to install Android 2.3.3 (API10) and Google USB Driver Package.
Step Two: Go to the % Users folder % /% User name% /. Android (for Windows 7). We find the adb_usb.ini file there and write it to it at the very end of 0x1949 . After that, go to the folder where we installed the SDK, find there android_winusb.inf ( \ extra \ google \ usb_driver \ ) add the following text to the [Google.NTx86] and [GoogleNTamd64] sections :
;Kindle Fire
%SingleAdbInterface% = USB_Install, USB\VID_1949&PID_0006
%CompositeAdbInterface% = USB_Install, USB\VID_1949&PID_0006&MI_01
Step Three: Connect the tablet and feed the patched inf.
Step Four: Downloading Super One Click from shortfuse.org - I used version 2.2.
Step Five: Launch Super One Click and click Root. After several manipulations, the program will get you a tablet.
On this it seems like everything, but for me, for some reason, Superuser did not appear. The problem was solved quite simply ...
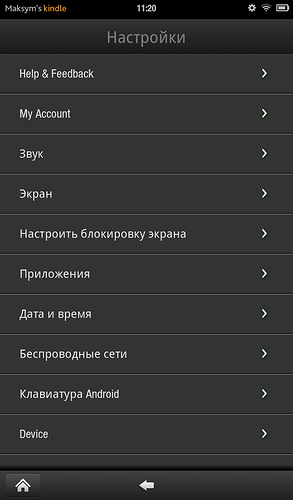
Go to the settings of the tablet, then Device, and allow installation from unknown sources (Allow Instalation of Applications From Unknow Sources). Next, in the built-in browser, we type root explorer apk (an application for an amateur is the first thing I found). Download, install and run. Go to the System \ App folder and run the Superuser.apk application there.
Voila - applications can now get root access to the system.
Installing the Russian keyboard and locale in Amazon Kindle Fire
In principle, when buying a Fire, I did not expect to see the Russian localization, but the hope of seeing the possibility of switching to the Russian layout died at the moment when the tablet already fell into my hands.
But having root access, changing the default keyboard is not a problem.
To get started, download a keyboard that supports changing layouts. Again, in the Amazon Market you will not find such joy, but a little googling I found Hacker's keybord apk. Unfortunately, after installing apk, nothing happened, as was the default application without changing the layout - and it remains. There is no opportunity to change the keyboard application by simply changing the settings.
To install the keyboard with the ability to change the layout, we need:
- Amazoon Kindle Fire with root access;
- The program on the tablet WiFi Transport (available in the Amazon market);
- The program on the tablet Root Explorer (where to get, see above);
- SQLite ;
- Hacker's keyboard apk .

Having established the above programs, we will start Russification.
Step one: Launch the Root Explorer, go to the /data/data/com.android.providers.settings/databases folder
and copy the settings.db file to the clipboard. Then go to the folder / sdcard / download and paste it there.
Step two: Launch WiFi Transport and connect via ftp to the tablet and copy the settings.db file to the computer.
Step Three: After saving a copy of settings.db, in a safe place, proceed to editing with SQLite. Go to the Browse Data tab, select the secure table. We need fields named enable_input_methods and default_input_method . By default there will be com.android.inputmethod.latin / .LatinIME . For Hacker's Keyboard, change the values to org.pocketworkstation.pckeyboard / .LatinIME . Save the file and upload it back to the tablet.
Here is another list of values for different keyboards (taken from xda):
Swiftkey ( ): com.touchtype.swiftkey/com.touchtype.KeyboardService
Swiftkey Tablet ( ): com.touchtype.swiftkey.tablet.full/com.touchtype.KeyboardService
Swype: com.swype.android.inputmethod/.SwypeInputMethod
SymbolsKeyboard & TextArt Pro: com.mobisters.textart.pro/.AsciiTextArtKeyboardPro
SlideIT: com.dasur.slideit/.SlideITIME
Graffiti Pro: com.access_company.graffiti_pro/.Graffiti
FlexT9: com.nuance.flext9.input/.IME
Beansoft Thumb Keyboard: com.beansoft.keyboardplus/.LatinIME
Hacker's Keyboard: org.pocketworkstation.pckeyboard/.LatinIME
Simeji: com.adamrocker.android.input.simeji/.OpenWnnSimeji
Step Four: In the same Root Explorer, copy the modified settings.db file into the /data/data/com.android.providers.settings/databases folder. Then we put to it the attributes rw-rw ---- (if this is not done, get a brick).
Step five - change the locale to Russian: Download the program MoreLocale 2 . By installing it, without special gestures, you can change the locale to Russian.
Step Six: Reboot the tablet and get a Russian keyboard and a partially Russified interface.

PS I express my sincere gratitude to the xda developers forum.
PPS If something does not work out - write, if possible, help you figure it out.
UPD: In some cases, after restarting the tablet, you can get a brick - the download freezes on the logo. Hard reset can help - hold the power button for about 20 seconds. If it does not help, watch this manual .
')
Source: https://habr.com/ru/post/133759/
All Articles