Introduction to Qt Quick3D
This post participates in the competition "Smart phones for smart posts"
Not so long ago, the Qt Quick framework acquired the Qt Quick3D add-on that allows you to fully work with 3D objects (import from 3D Max and Blender is supported), perform various transformations, animations, apply effects, and generally use the full capabilities of the underlying OpenGL. All this works under Symbian, MeeGo, Windows \ Linux \ MacOs (well, and generally everywhere, where Qt is). In this topic, we will try technology "to the tooth." I don’t want to write something complicated and serious, so we’ll make a habre-fridge from which a UFO will fly out on a click.
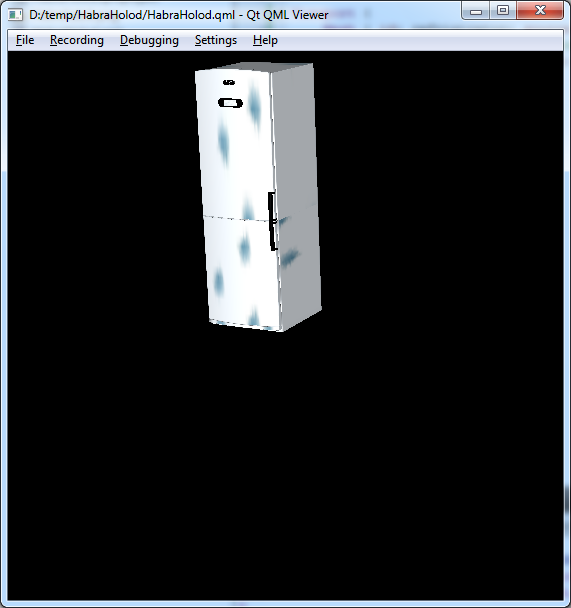
Immediately result:
Download and install Qt Creator , Qt library , Qt Quick3D and Blender . We will also need 3D models that we will use. I took this refrigerator and this flying saucer (all free). Well, the Habra logo shamelessly stole.
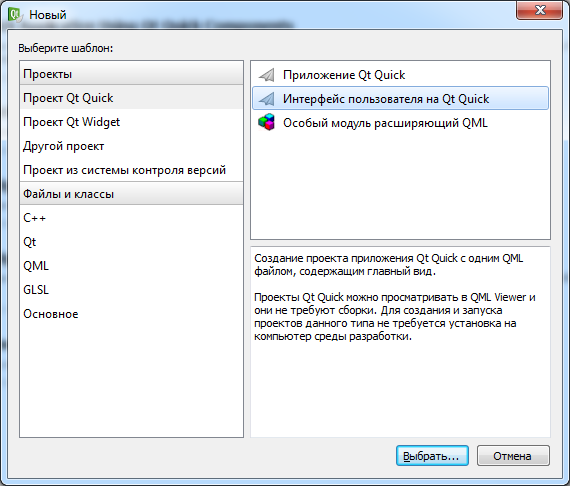
So, launch Qt Creator and create a new project: File-> New File or Project-> Qt Quick Project-> User Interface on Qt Quick .
')
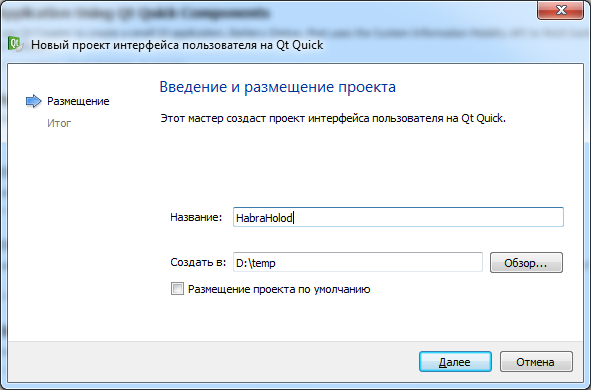
Enter the project name, folder location, all other options are left by default.
The newly created project looks something like this:
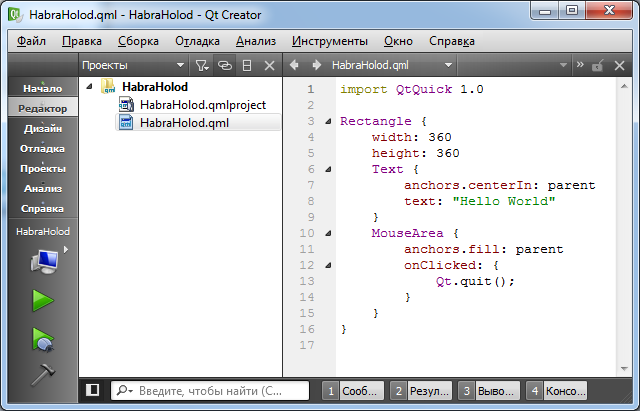
Leave it alone for now.
Open Blender and prepare in it the models that we will use. I will not describe in detail the work in Blender (after all, this is not a lesson from it, and I'm not special in Blender). In short, what we will do:
Go back to Qt Creator to our project. When creating it, the HabraHolod.qml file was written to itself “Hello world”, but it has nothing to do with Qt Quick3D, and therefore we will delete it. Let's start writing your qml-code from scratch. In the first iteration, it will be like this:
Let's go through the code. In the first line, we import the Qt3D package, which, if you installed everything correctly, should find and take on the job of displaying 3D objects. If you, like me, screwed up something at the installation stage (I had another version of Qt libraries installed), then this is a very sensible article describing what and where you need to put it with your hands so that everything works and another one explaining how to compile Qt Quick3D manually.
Next, we create a Viewport element - this is a container in which you can add 3D objects and set some parameters for displaying them (lighting, camera position, etc.). Next we import 3 of our 3ds files (each into a separate mesh) and create 3 Item3D elements (notice their combination with meshes by the id property).
If you press Ctrl + R (start), you can even see the result:

Something strange, huh? :) In fact, everything works correctly. The thing is that so far neither the window of our application, nor the parameters of the 3D scene are configured, and therefore we look at our objects in a tiny window from an incomprehensible position. If you manually make a bigger window and use scrolling, you will see our scene like this:
The beginning is not bad - in 10 lines of code we already have an application that somehow displays a group of 3D objects (well, how many lines will there be in it if you write it in C ++ \ Java \ .NET \ Your_language?).
So, our objects, of course, are displayed, but somehow not so, not there and are not moving yet. We will gradually improve this business. First, add the root element Rectangle to the code (to do this, we will have to import the QtQuick 1.0 module), which will allow us to set the window size:
For Rectangle, we set the initial sizes and color, and for Viewport - they said that it should be stretched to the full size of the parent. Result:
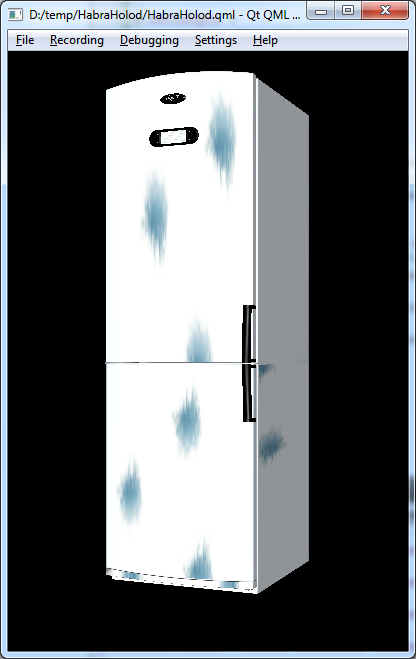
The window is the right size, but we are still looking at the object from somewhere below. Adjust the position of the camera. To do this, we apply the camera property of our Viewport:
Full code at this stage
The eye property determines where the camera is located, and the center the point it is looking at. Current result:
But already not bad! If we just wanted to look at the 3D object in Qt Quick3D, we could end it. But no! Our goal is movement.
So, we have a display model of the refrigerator, which is actually 3 models in one scene. We will try to make sure that the door opens and a UFO will fly out. First of all - the click handler. It's easy, add a MouseArea element to Viewport stretched to the full size of the parent. On the click, we will prescribe the output (just to check what works):
Full code at this stage
Run, click - the program ends. Works.
Let's start with the opening door. In order to open and close it, we need to do the following things:
1 . Create a Rotation3D element that describes how exactly (around which axes) an object will rotate.
2 Create a SequentialAnimation element, the essence of which will be in two calls of Rotation3D (one for opening the door, the second for closing) with different directions of rotation.
3 Bind the element Rotation3D to Item3D corresponding to our door.
4 Call an intermediate function from the click handler that will trigger the animation.
Full code at this stage
Run, click. Bingo!
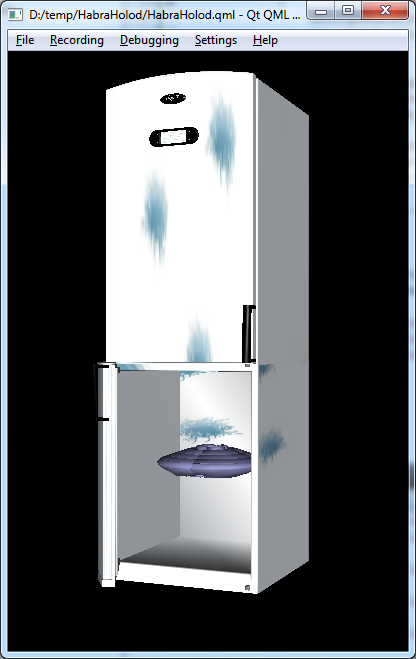
The door opens and shows inside our UFO (so far quite peacefully hanging). The task of animating a one-to-one UFO departure is similar to opening a door. Therefore, without unnecessary comments, the final code:
and once again the result:
All project sources can be found here .
Not so long ago, the Qt Quick framework acquired the Qt Quick3D add-on that allows you to fully work with 3D objects (import from 3D Max and Blender is supported), perform various transformations, animations, apply effects, and generally use the full capabilities of the underlying OpenGL. All this works under Symbian, MeeGo, Windows \ Linux \ MacOs (well, and generally everywhere, where Qt is). In this topic, we will try technology "to the tooth." I don’t want to write something complicated and serious, so we’ll make a habre-fridge from which a UFO will fly out on a click.
Immediately result:
What we need
Download and install Qt Creator , Qt library , Qt Quick3D and Blender . We will also need 3D models that we will use. I took this refrigerator and this flying saucer (all free). Well, the Habra logo shamelessly stole.
Go
So, launch Qt Creator and create a new project: File-> New File or Project-> Qt Quick Project-> User Interface on Qt Quick .
')
Enter the project name, folder location, all other options are left by default.
The newly created project looks something like this:
Leave it alone for now.
Model training
Open Blender and prepare in it the models that we will use. I will not describe in detail the work in Blender (after all, this is not a lesson from it, and I'm not special in Blender). In short, what we will do:
- Open the model of the refrigerator and UFO.
- Put the UFO in the fridge.
- Habra logo on the refrigerator.
- We export from Blender a separate UFO (which is now in the fridge), the fridge door (we need it separately so that it can be opened) and its body without a door. And we should have 4 files on output: ufo.3ds , door.3ds , refr.3ds + texture file . Copy all these files into the project folder.
Hello world
Go back to Qt Creator to our project. When creating it, the HabraHolod.qml file was written to itself “Hello world”, but it has nothing to do with Qt Quick3D, and therefore we will delete it. Let's start writing your qml-code from scratch. In the first iteration, it will be like this:
import Qt3D 1.0 Viewport { Mesh { id: refrigirator; source: "refr.3ds" } Mesh { id: ufo; source: "ufo.3ds" } Mesh { id: bottom_door; source: "door.3ds" } Item3D { mesh: refrigirator } Item3D { mesh: ufo;} Item3D { mesh: bottom_door; } } Let's go through the code. In the first line, we import the Qt3D package, which, if you installed everything correctly, should find and take on the job of displaying 3D objects. If you, like me, screwed up something at the installation stage (I had another version of Qt libraries installed), then this is a very sensible article describing what and where you need to put it with your hands so that everything works and another one explaining how to compile Qt Quick3D manually.
Next, we create a Viewport element - this is a container in which you can add 3D objects and set some parameters for displaying them (lighting, camera position, etc.). Next we import 3 of our 3ds files (each into a separate mesh) and create 3 Item3D elements (notice their combination with meshes by the id property).
If you press Ctrl + R (start), you can even see the result:
Something strange, huh? :) In fact, everything works correctly. The thing is that so far neither the window of our application, nor the parameters of the 3D scene are configured, and therefore we look at our objects in a tiny window from an incomprehensible position. If you manually make a bigger window and use scrolling, you will see our scene like this:
The beginning is not bad - in 10 lines of code we already have an application that somehow displays a group of 3D objects (well, how many lines will there be in it if you write it in C ++ \ Java \ .NET \ Your_language?).
Go ahead
So, our objects, of course, are displayed, but somehow not so, not there and are not moving yet. We will gradually improve this business. First, add the root element Rectangle to the code (to do this, we will have to import the QtQuick 1.0 module), which will allow us to set the window size:
import QtQuick 1.0 import Qt3D 1.0 Rectangle { color: "black" width: 400 height: 600 Viewport { anchors.fill: parent Mesh { id: refrigirator; source: "refr.3ds" } Mesh { id: ufo; source: "ufo.3ds" } Mesh { id: bottom_door; source: "door.3ds" } Item3D { mesh: refrigirator } Item3D { mesh: ufo;} Item3D { mesh: bottom_door; } } } For Rectangle, we set the initial sizes and color, and for Viewport - they said that it should be stretched to the full size of the parent. Result:
The window is the right size, but we are still looking at the object from somewhere below. Adjust the position of the camera. To do this, we apply the camera property of our Viewport:
camera: Camera { id: viewCamera eye: Qt.vector3d(15,10,40) center: Qt.vector3d(-2,10,0) } Full code at this stage
The eye property determines where the camera is located, and the center the point it is looking at. Current result:
But already not bad! If we just wanted to look at the 3D object in Qt Quick3D, we could end it. But no! Our goal is movement.
Click handler
So, we have a display model of the refrigerator, which is actually 3 models in one scene. We will try to make sure that the door opens and a UFO will fly out. First of all - the click handler. It's easy, add a MouseArea element to Viewport stretched to the full size of the parent. On the click, we will prescribe the output (just to check what works):
MouseArea { anchors.fill: parent onClicked: { Qt.quit(); } } Full code at this stage
Run, click - the program ends. Works.
Transformations and animations
Let's start with the opening door. In order to open and close it, we need to do the following things:
1 . Create a Rotation3D element that describes how exactly (around which axes) an object will rotate.
Rotation3D { id: doorOpen angle: 0 axis: Qt.vector3d(0, 1, 0) origin: Qt.vector3d(-3, 0, 0) } 2 Create a SequentialAnimation element, the essence of which will be in two calls of Rotation3D (one for opening the door, the second for closing) with different directions of rotation.
SequentialAnimation { id: doorOpenAndClose; NumberAnimation { target: doorOpen; property: "angle"; from: 0; to : -80.0; duration: 800; easing.type: Easing.OutBounce} NumberAnimation { target: doorOpen; property: "angle"; from: -80; to : 0.0; duration: 1200; easing.type: Easing.OutCubic} } 3 Bind the element Rotation3D to Item3D corresponding to our door.
Item3D { mesh: bottom_door; transform: [doorOpen] } 4 Call an intermediate function from the click handler that will trigger the animation.
MouseArea { anchors.fill: parent onClicked: { fullScene.openDoor(); } } ... Item3D { id: fullScene function openDoor() { doorOpenAndClose.loops = 1; doorOpenAndClose.start(); } ... } Full code at this stage
Run, click. Bingo!
The door opens and shows inside our UFO (so far quite peacefully hanging). The task of animating a one-to-one UFO departure is similar to opening a door. Therefore, without unnecessary comments, the final code:
import QtQuick 1.0 import Qt3D 1.0 Rectangle { color: "black" width: 400 height: 600 Viewport { anchors.fill: parent MouseArea { anchors.fill: parent onClicked: { fullScene.openDoor(); } } camera: Camera { id: viewCamera eye: Qt.vector3d(15,10,40) center: Qt.vector3d(-2,10,0) } Item3D { id: fullScene function openDoor(){ doorOpenAndClose.loops = 1; doorOpenAndClose.start(); ufoFlyOutAndTeleportBack.loops = 1; ufoFlyOutAndTeleportBack.start(); } Mesh { id: refrigirator; source: "refr.3ds" } Mesh { id: ufo; source: "ufo.3ds" } Mesh { id: bottom_door; source: "door.3ds" } Item3D { mesh: refrigirator } Item3D { mesh: ufo; transform: [ufoFlyOut]} Item3D { mesh: bottom_door; transform: [doorOpen] } // ------------------ Transform + Animations ------------------ Rotation3D { id: doorOpen angle: 0 axis: Qt.vector3d(0, 1, 0) origin: Qt.vector3d(-3, 0, 0) } Rotation3D { id: ufoFlyOut angle: 0 axis: Qt.vector3d(0, 3, -1) origin: Qt.vector3d(10, 0, 0) } SequentialAnimation { id: doorOpenAndClose; NumberAnimation { target: doorOpen; property: "angle"; from: 0; to : -80.0; duration: 800; easing.type: Easing.OutBounce} NumberAnimation { target: doorOpen; property: "angle"; from: -80; to : 0.0; duration: 1200; easing.type: Easing.OutCubic} } SequentialAnimation { id: ufoFlyOutAndTeleportBack; NumberAnimation { target: ufoFlyOut; property: "angle"; from: 0; to : 100.0; duration: 1700; easing.type: Easing.OutCurve} NumberAnimation { target: ufoFlyOut; property: "angle"; from: 100; to : 0.0; duration: 0; easing.type: Easing.OutCubic} } } } } and once again the result:
All project sources can be found here .
Useful materials on the topic
- Qt Quick3D view and download links for different platforms
- Cool tutorial on creating a model cars
- Official Qt Quick3D Documentation
Source: https://habr.com/ru/post/133126/
All Articles