Work with the SharePoint Foundation REST Interface using OData and jQuery

Web services in our time are becoming very popular. And this is understandable, they are universal. On their basis, you can write a cross-platform mobile application in HTML5, make a gadget for the Windows 7 desktop, or simply bring to the site a list of the latest news.
I would like to demonstrate how you can combine modern technologies, such as REST service, OData and jQuery, with SharePoint 2010 through its standard RESTful interface using the example of creating a small web part to search and view data about company employees. The main feature of my example is the absence of server-side programming.
')
SharePoint Foundation REST Interface
The SharePoint Foundation REST Interface is a new service that appeared in Microsoft SharePoint 2010.
The basic concept of this web service is that all lists and elements of SharePoint are represented as HTTP resources and are accessible remotely by URL. This is a full RESTful service. It has a standard set of operations: read, write, edit, and delete. The format of data output is possible both XML, and JSON. The web service supports the Open Data Protocol , which I will discuss below.
Due to all these possibilities, high flexibility and compatibility of the web service with any applications that can make HTTP requests is achieved.
My acquaintance with the SharePoint Foundation REST Interface happened relatively recently, but it immediately became clear how convenient it was to use it. I regretted not knowing about him before. Of course, this is not a tool for all occasions, but sometimes it makes life much easier.
The SharePoint Foundation REST Interface is available at:
http://{server_name}/_vti_bin/listdata.svcYou can use it immediately after installing Microsoft SharePoint Foundation 2010. It does not require any additional settings.
Following the link, you will see XML with all the available lists and libraries in SharePoint, both standard and created by the administrator. For example, the list of users is available at the URL:
http://{server_name}/_vti_bin/listdata.svc/UserInformationListOpen data protocol
Open Data Protocol is an open web protocol for querying and updating data. The protocol allows you to perform operations with resources using HTTP commands as requests and receive responses in JSON or XML formats.
After receiving a list of users from the web service, you will notice that it returns not only users, but also groups. They differ in the value of the ContentType element. ContentType users have the value “Person”. Now, in order to filter only users, we will use the opportunity of a web service to work with OData. You need to add the $ filter variable to the URI:
http://{server_name}/_vti_bin/listdata.svc/UserInformationList?$filter=ContentType eq 'Person'As a result, we get a list of all users.
The web part also uses dynamic substitution of usernames as you type. Therefore, you need to search including the user name and sort by it. Complicate the filtering condition:
http://{server_name}/_vti_bin/listdata.svc/UserInformationList?$filter=((ContentType eq 'Person') and (substringof(Name,'{query}')))&$orderby=NameNow in the results of the sample there are only users whose name contains the substring {query}.
As you will see, the web service returns a lot of information that is not always needed. Therefore, the size of the resulting file can be reduced by specifying which fields we want to receive. To do this, add the $ select variable:
http://{server_name}/_vti_bin/listdata.svc/UserInformationList?$filter=((ContentType eq 'Person') and (substringof(Name,'{query}')))&$orderby=Name&$select=Id,Name,ContentTypeNow the resulting file contains only three fields that we specified.
Well, I wasn’t talking about flexibility for good reason; a query with OData parameters can be anything complicated. So, at no cost, you can get data from any SharePoint sheet or library, whether it is news, a list of documents or anything else.
As I said at the very beginning, the SharePoint Foundation REST Interface allows you not only to receive data, but also to add, edit, and delete it. You can read more about how this can be done and other features of the Open Data Protocol here:
http://www.odata.org/developers/protocols/operations
No C #, use jQuery
Let's move on to the private use of the web service. Let's build a small web part based on it.
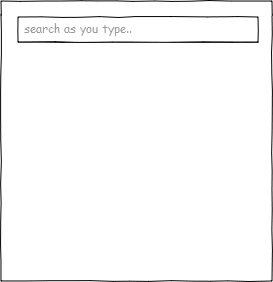
Schematically, the web part will look like this:
Initial state
We start to enter the username
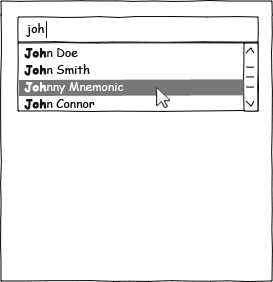
User selected

As mentioned earlier, we will not program anything on the server. Everything goes to the client side and will be executed using jQuery and $ .ajax (). Of course, one cannot do without creating a project in a studio and deployment, but the involvement of a specialized programmer is not required and can be managed by any web developer.
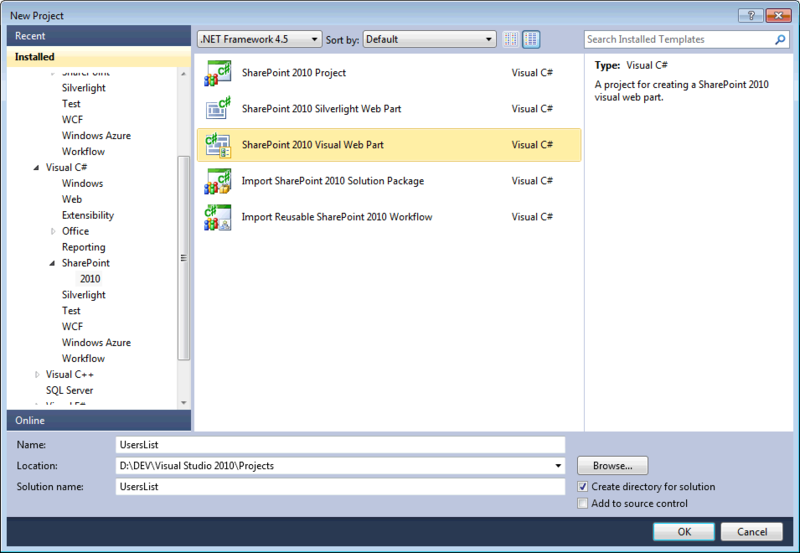
Create a web part project and add all the necessary files to it:
Create a web part
This is the structure of the project with all the files.

Now you need to connect the css and JavaScript files to the ascx control. Open EmployeesWebPartUserControl.ascx and paste the code:
// css jQuery Autocomplete <SharePoint:CssRegistration ID="jquery_autocomplete" Name="/_layouts/EmployeesWebPart/css/jquery.autocomplete.css" After="corev4.css" runat="server" /> // css , - <SharePoint:CssRegistration ID="webpart_base" Name="/_layouts/EmployeesWebPart/css/webpart.css" After="corev4.css" runat="server" /> // javascripts <script src="/_layouts/EmployeesWebPart/js/webpart.include.js" type="text/javascript"></script> Insert the HTML part of the web part into this file:
<div><input type="search" name="wpuser_search" id="wpuser_search" placeholder="Search users as you type..." /></div> <div> <div> <div id="wpuser_image"><img src="" /></div> <div> <div id="wpuser_name"></div> <div id="wpuser_position"></div> <div id="wpuser_departament"></div> <div id="wpuser_status"></div> </div> </div> <div> <div>Ask me about:</div> <div id="wpuser_asklist"></div> <ul> <li id="wpuser_phone"><span>Mobile:</span> <a href=""></a></li> <li id="wpuser_email"><span>Email:</span> <a href=""></a></li> </ul> </div> </div> This can be said to be the template of our web part. In empty divs with jQuery, we will enter the values obtained through $ .ajax ();
Actually, we finished the preparations, now we can proceed to writing the code itself.
The way to get the list of users is simple and clear:
// URL - var serviceUrl = "/_vti_bin/listdata.svc/UserInformationList?$filter=ContentType eq 'Person'&$orderby=Name"; // $.ajax({ 'type': 'GET', 'url': serviceUrl, 'dataType': 'json', 'success': function(data){ userSearch(data['d']['results']); } }); Do not forget to add a parameter:
'dataType': 'json' Without it, the web service will return XML instead of JSON.
In fact, I cheated a little and used the jQuery Autocomplete plugin
This plugin can take values not only in the form of a ready-made array of elements, but it can also handle the URL of the service itself, which returns JSON. Unfortunately, I could not get it to work directly with the SharePoint web service. The plugin gave some error when parsing the data, but I was too lazy to figure out what the problem was. In addition, it seemed to me best to load the entire list of users at once, and not to wait for a response from the server after each entered letter. Yes, and frequent requests to the server to anything. Therefore, my decision was as follows:
function userSearch(data){ $field = $("#wpuser_search"); // $field.autocomplete(data, { formatItem: function (item) { return item.Name }, matchContains: true }); $field.result(function (event, data, formatted) { userShowInfo(data); }); } The auto-substitute field is ready. It remains to show the remaining information about the user:
function showUserInfo(data) { // name $("#wpuser_name").text(data.Name); // email $("#wpuser_email a").text(data.WorkEMail).attr('href', 'mailto:' + data.WorkEMail); // phone $("#wpuser_phone a").text(data.MobilePhone).attr('href', 'callto:' + data.MobilePhone); // departament $("#wpuser_departament").text(data.Department); // picture $("#wpuser_image img").attr('src', data.Picture.split(", ")[0]); // position $("#wpuser_position").text(data.Title); // ask me abolut list $("#wpuser_asklist").text(data.AskMeAbout); } The function will fill our template with data from the web service.
That's all. As promised, no server-side programming was used in the development process. I simplified the code in order to make it as short and clear as possible. Immediately I will say that you need to take into account the path to the site collection and the path to the sub-site, where the page with the web part lies. This is necessary in order to form the path to the web service from exactly the same collection and the same sub-site.
I hope getting to know the SharePoint Foundation REST Interface was enjoyable, and you can use it correctly in your projects. Good luck!
The whole project can be downloaded here:
SVN http://users-list-webpart.googlecode.com/svn/trunk/
Additional links:
- Microsoft SharePoint 2010: sharepoint.microsoft.com
- SharePoint Foundation REST Interface: msdn.microsoft.com/en-us/library/ff521587.aspx
- Open Data Protocol: odata.org
- What is a RESTful service: ru.wikipedia.org/wiki/REST
- jQuery asynchronous HTTP (Ajax) request: api.jquery.com/jQuery.ajax
Source: https://habr.com/ru/post/133117/
All Articles