Relocation of the soul: linux on android tablet
Good day to all.
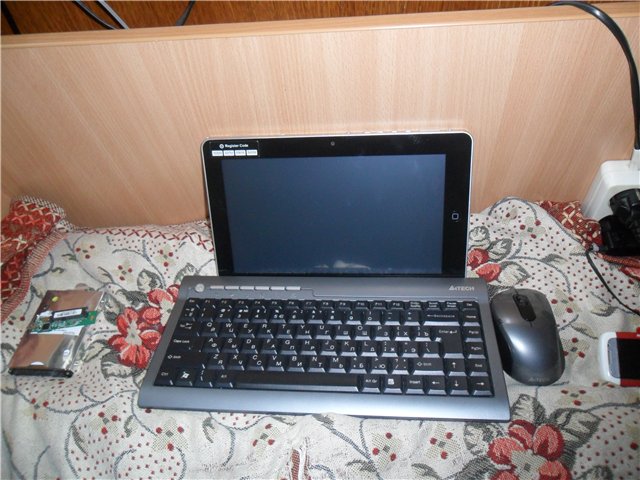
My story begins with a reading of this article , after which I decided to purchase the miracle of Chinese tablet construction: the superpad. This tablet was taken as a toy for “poking around a little”, concurrently, a reading room, playing a couple and looking at the long way ... I note right away that I have two usb hard drives with 500 GB and 1 TB, on which all the most important things for a fun life are stored , and they are broken in ntfs and ext4. And, of course, the tablet does not see them.
Here is my volunteer
')
That's the first reason to dig deeper. After viewing the 200 pages of the forum at xda-developers.com, certain
At this stage, all attempts to open this tablet have been put on hold. Until the glorious time for the student - session. And since at the session the students are doing absolutely everything, just not on the subject, then the funny nightly gatherings on the Internet on the obviously bourgeois websites resumed. And there came a brilliant idea to put an Orthodox linux on this tablet, in my case - ubuntu.
What came of it, see below.
It is clear that just so take and install will not work ... well, where we did not disappear ...
we will need:
As you can see, the differences begin with the init step.
Its the easiest way to change.
I will honestly write, thinking that you can only use Adroid init and that it is tightly bolted to the core. And even having received an example of a working ramdisk from another tablet , I did not think that it would start ...
bin dev etc home init init.rc lib linuxrc mnt newroot opt proc root sbin sys tmp usr var
In / bin is a busybox, in / sbin - switch_root is a link to it.
Ramdisk init code from zt-180
It remains to flash ramdisk into memory (I used burntool under xp) and - voila, the boot phase. Yes, I stitched instead of recovery, so to start Linux you have to hold down the keys at startup.
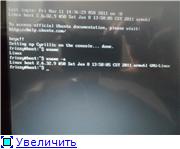
So, the boot phase has been passed and you have to be patient, since the console does not show signs of life, and everything loads rather slowly.
In /etc/init/tty1.conf we replace the last line with
He was definitely not my friend with the touchscreen, xorg.conf and xterm ... removed the synaptic driver, threw the following into ~ / .xinitrc:
I wanted to put kde, since I am madly in love with drawing graphics by the qt library. I must say: yes, it was set and started, but HOW ...
First, I set up autologin right away:
in / etc / kde4 / kdm / kdmrc we find and change the following for ourselves
and, as it is written, we do chmod 600 kdmrc in the console under the root, so that bad people do not spy on our password.
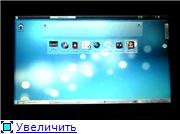
Secondly, at the entrance the screen saver hung suspiciously for a long time, and I, having doubted, called startkde from the console. After a long and tedious display of various errors, the plasma in the netbook mode finally loaded. The graphic effects are turned off, as we sit under the framebuffer, and the wildest brakes are observed in places, but still this is kde and it has loaded!
Everyone has their own, I haven’t done the optimization so far, but there is a lot to be done: to speed up the load, optimize the workspace. I look in the direction of a more lightweight wm - e16 - but so far I have not done a major one. You also need to calibrate the touchscreen, the benefit is that the virtual keyboard is already in kde.
I look towards openbox + razor-qt .
I connected the debian 6 repositories. The sound does not work point-blank, the touch screen and the workspace are not configured. There are very few kernel modules, so I’ll try to assemble and screw ...
Many services and politicians have been shot down, it only goes to the Internet as root, but the Internet is set up and it pleases.
Ps: Yes, without kernel modules, only partitions in fat and ext2 are connected, which is not encouraging.
A usb keyboard + mouse will be very valuable when debugging and configuring.
ramdisk from zt-180
burntool
Set for repacking ramdisk . Binaries need to be thrown into your PATH.
My story begins with a reading of this article , after which I decided to purchase the miracle of Chinese tablet construction: the superpad. This tablet was taken as a toy for “poking around a little”, concurrently, a reading room, playing a couple and looking at the long way ... I note right away that I have two usb hard drives with 500 GB and 1 TB, on which all the most important things for a fun life are stored , and they are broken in ntfs and ext4. And, of course, the tablet does not see them.
Here is my volunteer
')
That's the first reason to dig deeper. After viewing the 200 pages of the forum at xda-developers.com, certain
| minuses | pros |
|---|---|
| we need the appropriate linux kernel modules | firmware upgrade to 2.2, carefully collected by folk craftsmen from glass and cardboard + superpad 2 firmware |
| cunning Chinese do not give the source codes of the kernel for this device and in every possible way prevent them from being obtained ... |
At this stage, all attempts to open this tablet have been put on hold. Until the glorious time for the student - session. And since at the session the students are doing absolutely everything, just not on the subject, then the funny nightly gatherings on the Internet on the obviously bourgeois websites resumed. And there came a brilliant idea to put an Orthodox linux on this tablet, in my case - ubuntu.
What came of it, see below.
It is clear that just so take and install will not work ... well, where we did not disappear ...
we will need:
- Linux - I have kubuntu
- windows - xp easiest
- Consciousness assimilation of two phrases: “just for fun!” and “calm, only calm”.
- linux image, here to see how to create your own ; I need to create an image for my processor architecture, I have an arm11 processor with an arm6 architecture, so ubuntu is above 9.10 - a dream ...
If you have an arm cortex, then you are lucky and the glorious possibilities of the latest ubuntu and unity sharpened for tablets open up for you. - microsd flashcard, formatted in three sections: fat, ext2, where the image is written, and swap

consider the main stages of downloading android and linux
| 1. Power on and boot ROM code execution | Power on and boot ROM code execution |
| 2. The boot loader | The boot loader |
| 3. The Linux kernel | The linux kernel |
| 4. The init process | The init process |
| 5. Zygote and Dalvik | console (bash, zsh ...) / wm (kde, gnome ...) |
| 6. The system server | Boot completed |
| 7. Boot completed |
As you can see, the differences begin with the init step.
Its the easiest way to change.
I will honestly write, thinking that you can only use Adroid init and that it is tightly bolted to the core. And even having received an example of a working ramdisk from another tablet , I did not think that it would start ...
ramdiska content
bin dev etc home init init.rc lib linuxrc mnt newroot opt proc root sbin sys tmp usr var
In / bin is a busybox, in / sbin - switch_root is a link to it.
Ramdisk init code from zt-180
#!/bin/sh echo Starting from initram image. Echo Waiting for SD-CARD wake up... sleep 3 echo "Mounting new rootfs" mount -t ext2 /dev/mmcblk0p2 /newroot && echo OK echo Hold on, switching root... exec switch_root /newroot /sbin/init echo hrm, have a shell instead exec /bin/ash It remains to flash ramdisk into memory (I used burntool under xp) and - voila, the boot phase. Yes, I stitched instead of recovery, so to start Linux you have to hold down the keys at startup.
So, the boot phase has been passed and you have to be patient, since the console does not show signs of life, and everything loads rather slowly.

Configure autologin on the first console
In /etc/init/tty1.conf we replace the last line with
exec /bin/login -f Yor_Login < /dev/tty1 > /dev/tty1 2>&1 then in your ~ / .bashrc you can write commands that will start with automatic loginWe struggle with the X-server
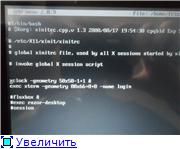
He was definitely not my friend with the touchscreen, xorg.conf and xterm ... removed the synaptic driver, threw the following into ~ / .xinitrc:
#!/bin/bash # $Xorg: xinitrc.cpp,v 1.3 2000/08/17 19:54:30 cpqbld Exp $ # /etc/X11/xinit/xinitrc # # global xinitrc file, used by all X sessions started by xinit (startx) # invoke global X session script #. /etc/X11/Xsession xclock -geometry 50x50-1+1 & exec xterm -geometry 80x66+0+0 -name login 
Struggling with the working environment
I wanted to put kde, since I am madly in love with drawing graphics by the qt library. I must say: yes, it was set and started, but HOW ...
First, I set up autologin right away:
in / etc / kde4 / kdm / kdmrc we find and change the following for ourselves
AutoLoginEnable=true # If true, auto-login after logout. If false, auto-login is performed only # when a display session starts up. # Default is false #AutoLoginAgain=true # The delay in seconds before automatic login kicks in. # Default is 0 AutoLoginDelay=3 # The user to log in automatically. NEVER specify root! # Default is "" AutoLoginUser=Login # The password for the user to log in automatically. This is NOT required # unless the user is logged into a NIS or Kerberos domain. If you use this # option, you should "chmod 600 kdmrc" for obvious reasons. # Default is "" AutoLoginPass=Password and, as it is written, we do chmod 600 kdmrc in the console under the root, so that bad people do not spy on our password.
Secondly, at the entrance the screen saver hung suspiciously for a long time, and I, having doubted, called startkde from the console. After a long and tedious display of various errors, the plasma in the netbook mode finally loaded. The graphic effects are turned off, as we sit under the framebuffer, and the wildest brakes are observed in places, but still this is kde and it has loaded!

Fine adjustment of everything and everything for themselves
Everyone has their own, I haven’t done the optimization so far, but there is a lot to be done: to speed up the load, optimize the workspace. I look in the direction of a more lightweight wm - e16 - but so far I have not done a major one. You also need to calibrate the touchscreen, the benefit is that the virtual keyboard is already in kde.
I look towards openbox + razor-qt .
"Enjoy!"
Results
I connected the debian 6 repositories. The sound does not work point-blank, the touch screen and the workspace are not configured. There are very few kernel modules, so I’ll try to assemble and screw ...
Many services and politicians have been shot down, it only goes to the Internet as root, but the Internet is set up and it pleases.
Ps: Yes, without kernel modules, only partitions in fat and ext2 are connected, which is not encouraging.
A usb keyboard + mouse will be very valuable when debugging and configuring.
Now that can be used in the process
ramdisk from zt-180
burntool
Set for repacking ramdisk . Binaries need to be thrown into your PATH.
Thanks for attention
Source: https://habr.com/ru/post/132448/
All Articles