Work with isometric maps in cocos2d
Hello to all readers of the site habrahabr.ru
Recently I decided to start developing games for iOS, the reason was a read post on the site . This occupation helps not to waste your time and I think in the future will bring a good salary supplement. At first I read a book on Objective-C and began to look for a good, but free engine for writing a game, since I did not want to use pure OpenGL. The choice fell on cocos2d , here and a friend advised and found many good reviews on the site about him, plus more than once he heard that developers often answer questions on the forums.
The game will be an economic strategy, as I love this line of games. Any of these games uses a map on which the player can move and build different buildings or something like that. So I decided to start my game by creating such a card. I began to look for information on creating isometric maps, but there is not a lot of it on the Internet and I have not met more than one article in Russian. Therefore, I decided to write my own. I think some novice developers will be interesting and useful to read it.
Perhaps enough entry. Let's start!
There are two types of cards, they are “isometric” and “orthogonal”. At the moment I will describe my work with an "isometric" card, as it suits me more to the game.
')
What are isometric maps and what do they give us?
Using an isometric map, we get the best using 2-dimensional graphics to achieve a 3-dimensional view. It is for this reason that isometric games are so popular. They allow you to create believable game worlds, which, we think, have spatial depth with relatively simple graphics. Not to mention the fact that 2D-graphics require much less device power than 3D games.
Isometric map design.
Isometric maps use axonometric projections to create the impression that we are looking at scenery from a corner, thereby creating visual depth. Axonometric projections are a technical term for designing, turning a three-dimensional object on a two-dimensional plane. The image becomes distorted, but our mind accepts it as a three-dimensional object.
From the point of view of tilemaps, if you look at “Figure 1,” you will see concrete steps for creating an isometric view. The area of the first is rotated 45 degrees and then scaled down along its Y axis to give it its typical isometric shape.
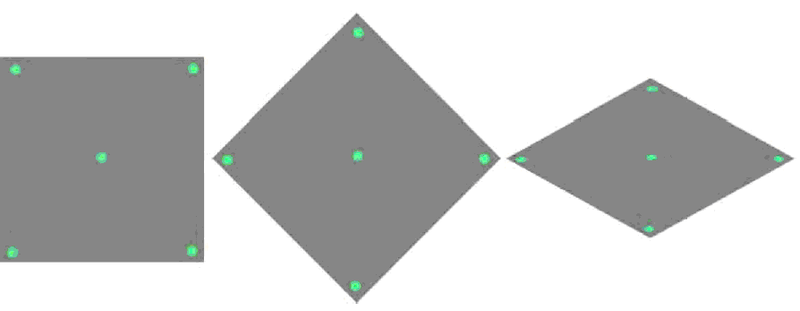
"Figure 2" shows several uniformly colored isometric tiles located next to each other, creating a ground floor pattern. The tiles on the ground floor are not impressive, and look very flat. However, they are important as the background layer of the game world.

To add the actual visual depth to an isometric map, we need to have a tile object that goes beyond the diamond shape. The most commonly used approach is to develop three-dimensional objects, as if they were viewed at a 45-degree angle. As a rule, such objects are no more than one tile higher. It gives a sense of visual depth. Similarly, if you create isometric tile objects that are much higher than the height of two tiles, then it will be very difficult to create a convincing 3D view if the objects appear very high, because the player will only see part of the tilemap.
It was a small introduction, now let's move on to the most important thing - creating a map. To do this, we need an editor that allows us to work with isometric maps. We will use the Tiled Map Editor . It is free and there are often updates, I think it will not be difficult to find it on the developers site, plus there is a version for Windows and Mac.
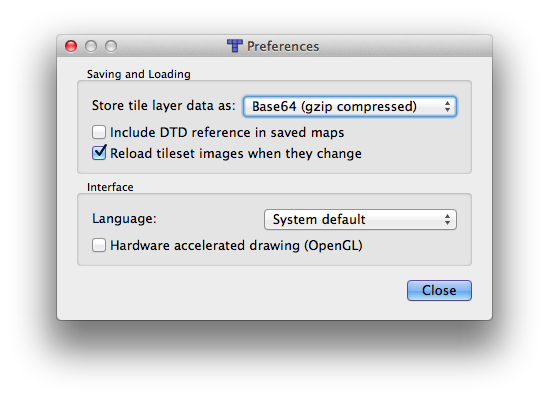
Let's start creating the map itself. Open the application and make some settings so that the cocos2d parser itself does not swear on our map, find the “Preferences” menu item and set “Store tile layer data as” in Base64 (gzip compressed) , you can see it in the figure below.
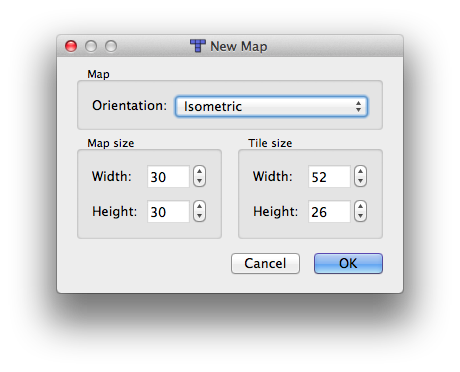
We continue . Select File ➤ New to open a dialog called New Map . Orientation, isometric should be set and the map size (Map size) is 30 plates wide and 30 plates high, I think this is enough for us. It seems strange here the width of the tile and height (Tile size). The size of the diamond shape, which we must consider when laying the tile, is 54x27 pixels. Nevertheless, the size of the tiles set 52x26 .
The goal of this offset is (-2, -1) so that we then have straight lines along the edges of the tilemap and avoid having the bottom black layer to show us. This is necessary because it is impossible to create ideal forms that are located at the same distance from each other and do not overlap.
If you made a mistake and chose the wrong offset, and you don’t want to create a tilemap in a new way that you just spent a lot of time on, or if you have other reasons and want to adjust the size of the tilemap or tileset, there is an easy way to do it. Select the TMX file in your project in Xcode, and you will see that it is an XML text file . At the beginning of the file you will find the section map:
<map version="1.0" orientation="isometric" width="30" height="30" tilewidth="54" tileheight="27"> You can also edit the tilewidth and tileheight parameters until we find the correct offset for the tilemap. Similarly, if you have problems determining the tile size of the isometric tile set you are using, you can change the tile set parameters such as tilewidth and tileheight:
<tileset firstgid="1" name="dg_iso32" tilewidth="54" tileheight="49"> <image source="dg_iso32.png"/> </tileset> Then you just need to make sure that the TMX file in Tiled is updated after you have made any changes manually, because Tiled will not automatically update the file.
Create a new isometric Tileset
Next we need to load the tile containing isometric tiles. We will use the image dg_iso32.png . In Tiled , select Map ➤ New Tileset ... and go to the dg_iso32.png file.
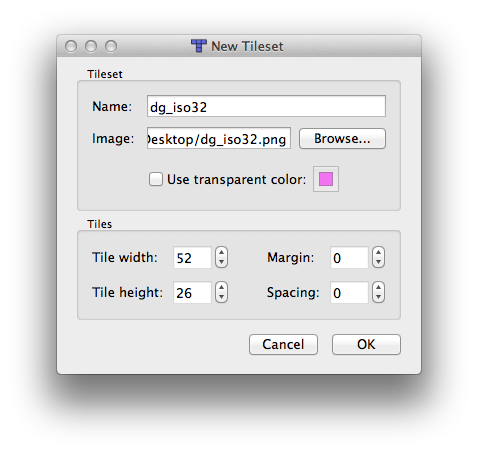
Please note that in Tiled it will set the default tile width and height according to the settings in the New Map dialog box, which we set before. For isometric tilemaps, the default will always need correction due to the overlap of the isometric tile. As I mentioned earlier, the tileset dg_iso32.png uses tiles that are 54 pixels wide and 49 pixels high. Please note that you will have to use the entire height of the web of an isometric tile, and not the height of the rhombus which is 27 pixels. The picture above shows how to configure everything.
I want to say about some rules about which you should not forget.
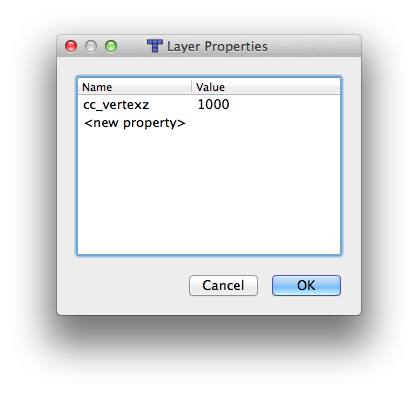
The most important rule for designing isometric maps is that you need at least two layers in order for game characters to follow certain objects (tiles). One layer for flat objects, earth and similar ground plates, and another layer for other objects that either overlap other tiles or that are not completely opaque. We will have the first layer of land and it should be placed on the first floor, on this layer we will then place the second, on which there will be mountains, trees, houses, etc. Objects that the player can not pass.
In the past version of cocos2d there were problems with the correct display of game characters and other sprites behind partially transparent tiles. Part of the solution is to add special properties called cc_vertexz to our layers. To do this, we need to select a layer of earth and add “Layer properties” to it. Press another key or with Ctrl on the Mac. Add a new property named cc_vertexz and set its value to -1000. Do the same with the “Objects” layer but enter the string “automatic” (without quotes), as shown in the figure below.
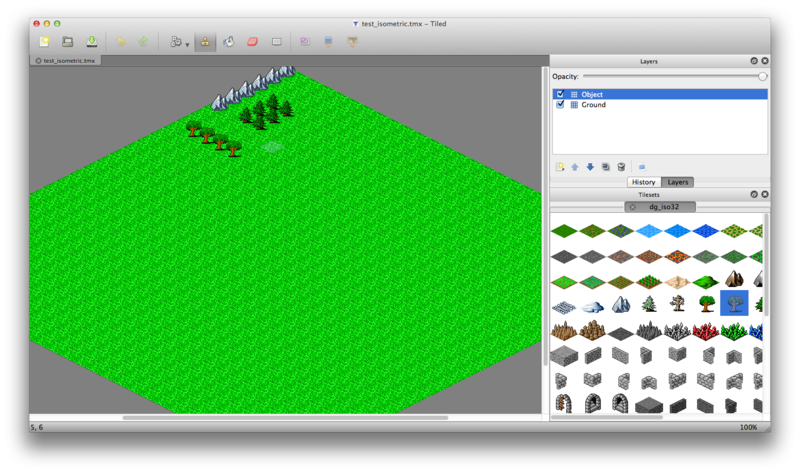
On the map you can place any objects and build any map. Since this is for example, I have sketched a simple map that consists of a couple of trees and a small number of mountains.
Then we save everything that we have done, the name to which we will give isometric.tmx.
Isometric Tilemap Loading in Cocos2d
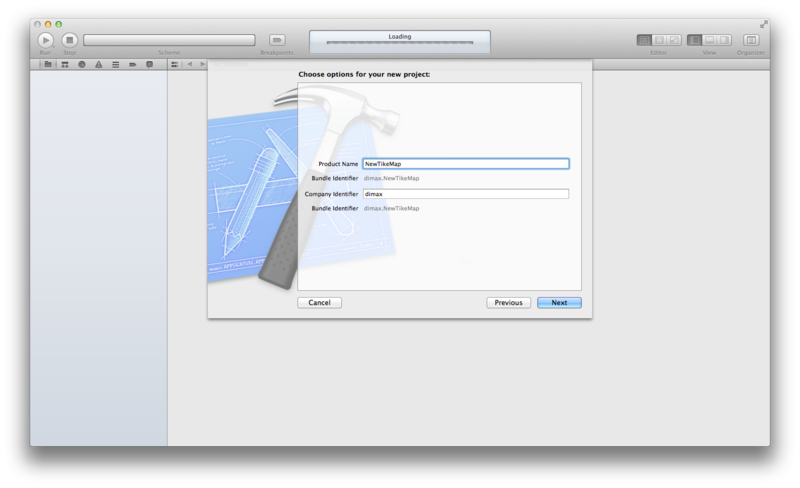
Next, open our Xcode and create a new project.
Call it what you like. I called my NewTileMap.
Then we drag our map into our project that we have just created.
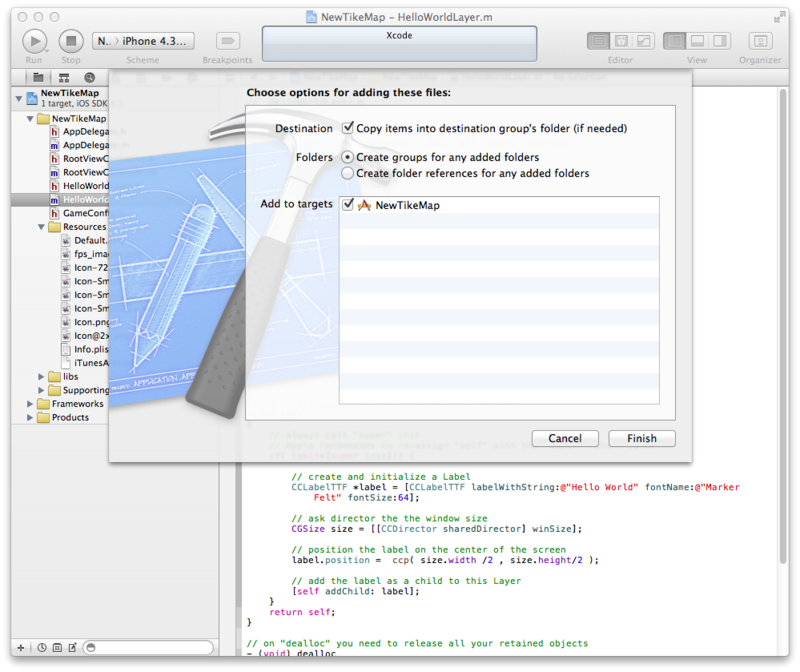
Do not forget to tick off that we only copy objects.
Go to the file HelloWorldLayer.m and start coding, today is not much, then there will be more.
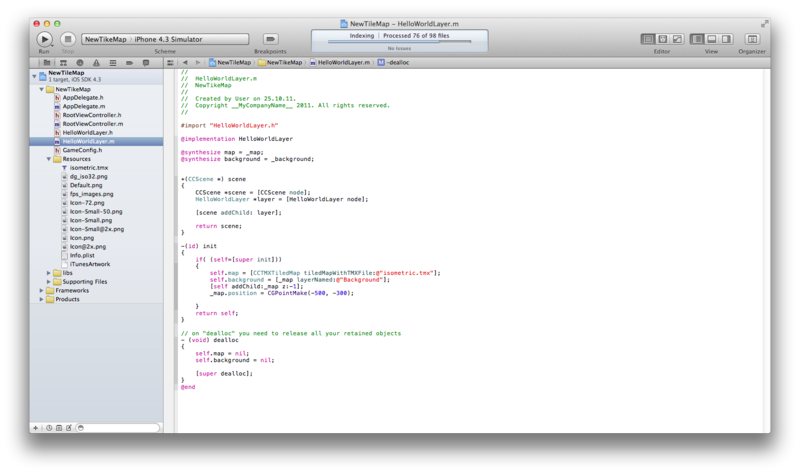
In the init method, we erase everything that is there and write our code.
self.map = [CCTMXTiledMap tiledMapWithTMXFile:@"isometric.tmx"]; self.background = [_map layerNamed:@"Background"]; [self addChild:_map z:-1]; _map.position = CGPointMake(-500, -500); Since we placed our objects in the upper right corner, we immediately need to go there, for this we change our position.
Well, perhaps you can run our game. And what do we see?
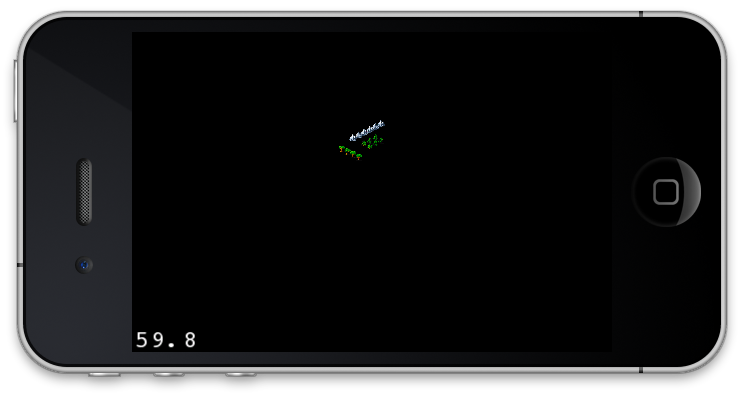
This is not what we wanted to see! I do not know for what reasons, but cocos2d somehow does not correctly display isometric maps with a standard project creation template. Well, nothing corrected. Smart people said it was worth a little fix CC_DIRECTOR_INIT which is defined in ccMacros.h. I did just that, but it did not help me, I had to completely replace the folder in the project "\ libs \ cocos2d" and then I still need to edit the AppDelegate.m file a bit
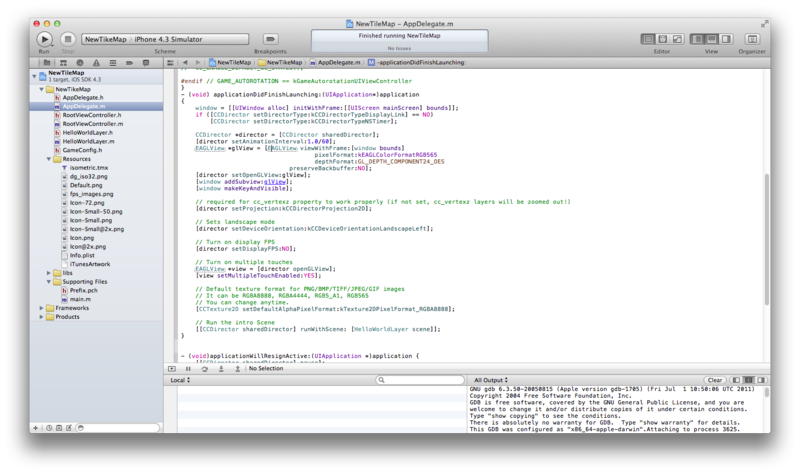
All corrected and try to run our little game.
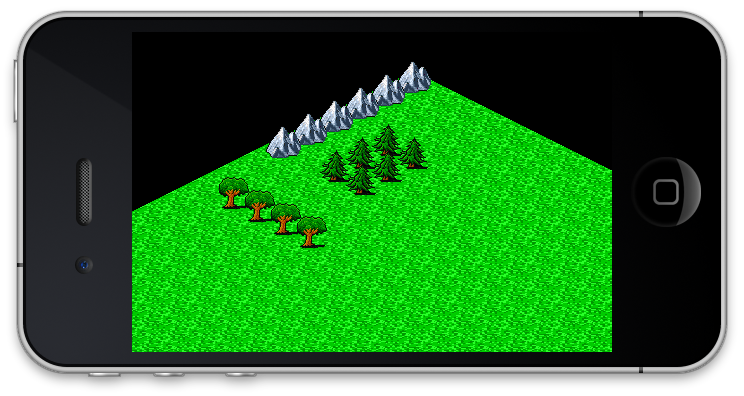
Now everything is as it should be! Everything is displayed correctly.
I think so far this is enough, in the next chapter we will continue to work with the map.
The article on Steffen Itterheim - Cocon2D Game Development - Learn iPhone and iPad
To whom the source code will be gentle, write, I will send.
Source: https://habr.com/ru/post/131755/
All Articles