How to use C ++ AMP from C #

In the Visual Studio 11 Developer Preview , C ++ AMP allows you to speed up your applications using heterogeneous hardware, such as a GPU.
If you are a .NET developer, you can still use C ++ AMP in your applications. Most of the code will be written in C #, only a few sections using C ++ AMP to execute it on the GPU, then use your favorite interop mechanism for binding. This post will explain how to do this through P / invoke.
However, before attempting to call C ++ AMP from C #, make sure that C ++ AMP is running on your machine. Post VS 11 Developer Preview along with Daniel Moth C ++ AMP explains how to do this. I note that C ++ AMP can be used from both Visual Studio 11 Express and Visual Studio 11 Ultimate, however, in this article we will use the latter option.
Short cut
As soon as C ++ AMP works on your system, the easiest way to start using it is to open the sample project in Visual Studio 11 Ultimate and start experimenting with it.
A long way
If you have a ready-made application that you want to change to be able to use C ++ AMP, or you want to understand how the above example was created, then follow the steps below. In short, you will need to do the following:
- Step 1: Open or create a C # project in Visual Studio 11.
- Select the target platform as X86 (if you plan to write 32-bit C ++ AMP code).
- Allow the use of unsafe code in the project.
- Step 2: Add a C ++ project to the solution.
- Create a Win32 DLL, which will contain the C ++ AMP code.
- Step 3: Add the project build step to copy the Win32 DLL to the binaries of the managed project.
- Step 4: Add dependencies between projects.
- Step 5: We write C ++ AMP and C # code.
- C # code will use P / invoke for the C ++ AMP code.
So, we proceed to a more detailed description of the necessary steps.
')
Step 1: Open or create a C # project in Visual Studio 11
First of all, you need to open or create a C # project. The rest of the article will assume that it is named as HelloWorldCSharp, and is based on the Visual C # Console Application template.
I note that you need Visual Studio 11 Ultimate to create a console application, because in Visual Studio 11 Express, you can only create Metro applications.
You may need to clarify two parameters:
- Knowing that the C ++ AMP code will be 32-bit, the target platform of the project should be set to X86, but not to AnyCPU.
- The managed project should allow unsafe code (right click on the HelloWorldCSharp project in the solution browser, click on the Build tab, select “Allow unsafe code”).
Step 2: Add a C ++ project to the solution
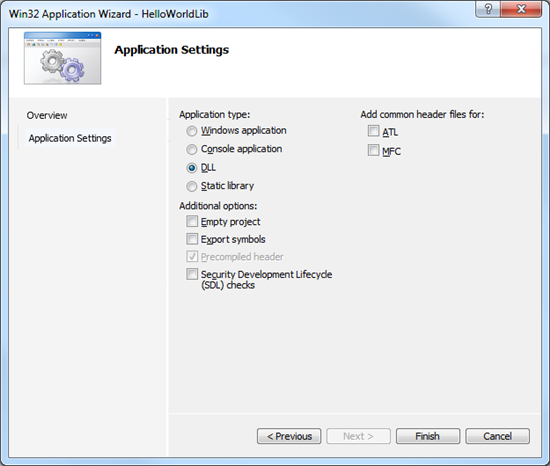
We also need a Win32 DLL containing C ++ AMP code. In this example, we will create a “Win32 Console Application” and call it “HelloWorldLib”:

After clicking Next, select the application type as “DLL”:
Step 3: Add the project build step to copy the Win32 DLL to the binaries of the managed project
When building a solution, I would like both projects to be built, right? However, HelloWorldLib.dll will not be copied to the HelloWorldCSharp binary folder. We need to do this in such a way that HelloWorldCSharp.exe could be found at runtime.
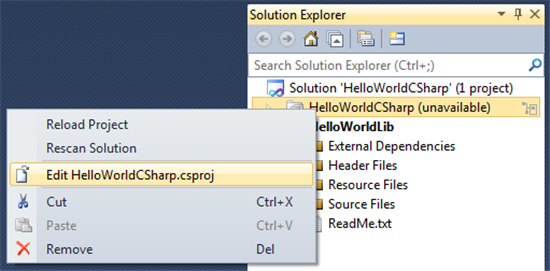
To force HelloWorldLib.dll to be correctly copied each time it is assembled, you must add an assembly step to the HelloWorldCSharp project. First, upload HelloWorldCSharp in Solution Explorer:

Next, you need to edit HelloWorldCSharp.csproj in Visual Studio (right click on the project, click “Edit HelloWorldSharp.csproj”):
Paste the following XML right before the “Microsoft.CSharp.targets” section:
<ItemGroup> <Content Include="..\$(Configuration)\HelloWorldLib.dll"> <Link>HelloWorldLib.dll</Link> </Content> </ItemGroup> After reloading HelloWorldLib, HelloWorldLib.dll should appear in Solution Explorer.
In the properties window, make sure that the value “Copy to Output Directory” is selected as “Copy if newer”, and also “Build Action” is set as “Content”:

Step 4: Add dependencies between projects
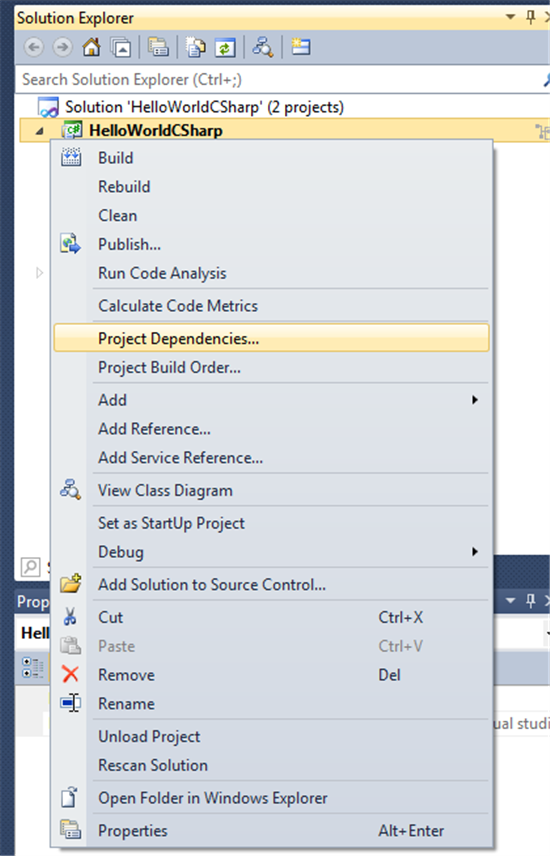
For more convenience, let's set the HelloWorldLib project as a dependency for the HelloWorldCSharp project. Then, when building HelloWorldCSharp, the assembly and HelloWorldLib will occur.
Right click on HelloWorldCSharp and select Project Dependencies:
And then add a dependency on HelloWorldLib:
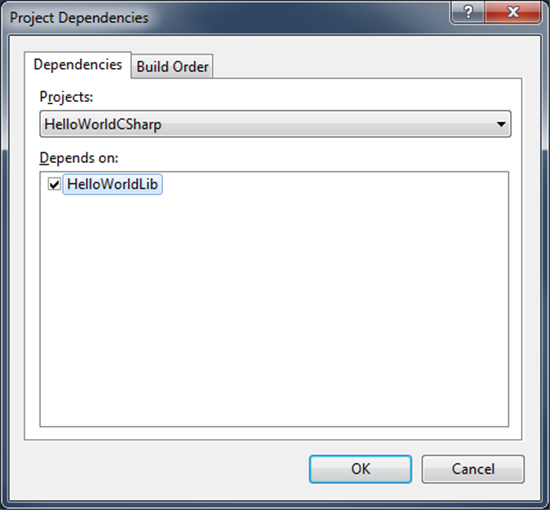
To make sure that the solution build is correct, rebuild the project, then the HelloWorldCSharp binaries folder (i.e. HelloWorldCSharp \ HelloWorldCSharp \ bin \ Debug) must contain both HelloWorldCSharp.exe and HelloWorldLib.dll.
Step 5: Writing C ++ AMP and C # Code
Now we are ready to call C ++ AMP code from C #. Change the HelloWorldLib.cpp as below:
#include "stdafx.h" #include "amp.h" using namespace concurrency; extern "C" __declspec ( dllexport ) void _stdcall square_array(float* arr, int n) { // Create a view over the data on the CPU array_view<float,1> dataView(n, &arr[0]); // Run code on the GPU parallel_for_each(dataView.grid, [=] (index<1> idx) mutable restrict(direct3d) { dataView[idx] = dataView[idx] * dataView[idx]; }); // Copy data from GPU to CPU dataView.synchronize(); } We simply added the square_array function, which squares the array elements using C ++ AMP. Also, we decorate a function to export it from a DLL.
Now, edit the HelloWorldCSharp application to call the C ++ AMP code. Change Program.cs in the HelloWorldCSharp project as shown below:
using System; using System.Runtime.InteropServices; class Program { /// <summary> /// Function defined in HelloWorldLib.dll to square an array using C++ AMP /// </summary> [DllImport("HelloWorldLib", CallingConvention = CallingConvention.StdCall)] extern unsafe static void square_array(float* array, int length); static unsafe void Main() { // Allocate an array float[] arr = new[] { 1.0f, 2.0f, 3.0f, 4.0f }; // Square the array elements using C++ AMP fixed (float* arrPt = &arr[0]) { square_array(arrPt, arr.Length); } // Enumerate the results foreach (var x in arr) { Console.WriteLine(x); } } } … that's all! Now you can run the HelloWorldCSharp project and see the working C ++ AMP code through C #.
I note that this is a very simple example that demonstrates the ability to call a C ++ AMP function from C #. The example is too “naive” to demonstrate the speed of execution - it produces too little action on data elements using the capabilities of GPU acceleration. Post C ++ AMP code for Matrix Multiplication is an example that demonstrates acceleration during matrix multiplication.
From translator
In addition to C ++ AMP, there is another project from Microsoft (its Research division) - Accelerator , which provides parallel computing capabilities on both multi-core CPUs and GPUs that support DirectX 9 and higher.
Accelerator v2 is a native C ++ library with a managed wrapper.
Source: https://habr.com/ru/post/131372/
All Articles