Preparing your Linux based on Gentoo
Many people love Gentoo for its versatility. Using portezhi, you can make a tool for any task. And let you not be confused by the fact that the secretary will never compile Firefox - God forbid her to give the opportunity to put the software! What can be better than a distribution kit, having established that you will not need to do anything with it! Imagine - 5-10 minutes of time and you get a system with the necessary set of software, assembled, configured and optimized according to your preferences.
In this article I will describe the process of creating my own version of the distribution based on Gentoo using Calculate 2.2 utilities. At the output, you will receive a hybrid ISO disk for recording on CD / DVD or USB-Flash, fully compatible with Gentoo, supporting installation on USB-HDD, USB-Flash, HDD with support for LVM and Raid, ext4, ext3, ext2, reiserfs file system , btrfs, xfs, jfs, nilfs2 or fat32.
')
The article is primarily addressed to all fans of Gentoo, system administrators, teachers of computer classes in schools and universities, as well as all fans of Linux. All operations are performed with root user privileges from the console.
1. What we need
Of course, you should already have Gentoo installed, or any Gentoo-based distribution kit and Internet access configured. All the operations I performed from Calculate Linux Desktop 11.9 KDE 64 bits.
First, install the packages calculate-assemble and calculate-builder. In Gentoo, for this you need to connect a Calculate overlay:
emerge layman
layman -a calculate
emerge calculate-assemble calculate-builder
Now decide what system you want to build. Here is a selection of basic images:
- Gentoo Stage3 - a living wage to start building the system;
- Calculate Scratch Server (CSS) is essentially the same Gentoo Stage3 with the kernel, drivers, bootloader, portage and Calculate utilities.
- Calculate Linux Scratch (CLS) - CSS + Xorg + wireless.
- Calculate Linux Desktop with a KDE, Gnome or XFCE desktop (CLD, CLDG, CLDX) or Calculate Directory Server (CDS).
Depending on the task, download the latest Gentoo Stage archive or Calculate Stage image and place in the / var / calculate / remote / stages and / var / calculate / linux directories respectively:
cd /var/calculate/remote/stages
wget mirror.yandex.ru/gentoo-distfiles/releases/x86/current-stage3/stage3-i686-20111018.tar.bz2
or
cd /var/calculate/linux
wget mirror.cnet.kz/calculate/CLDX/stages/i686/cldx-20111024-i686.iso
Stage Calculate Linux image includes Portage tree. In fact, this is one of the main differences between the Calculate image and the Gentoo Stage4. When building a system from Gentoo Stage, you will also need to download portage to the / var / calculate / remote / snapshots directory:
cd /var/calculate/remote/snapshots
wget mirror.yandex.ru/gentoo-distfiles/snapshots/portage-20111024.tar.bz2
Please note that file versions are constantly updated.
In this article, I will choose CLDX 32 bits for the following reasons:
- The distribution already contains most of the necessary programs;
- No binding to Gnome / KDE;
- XFCE includes several small packages and, if desired, is quickly removed.
2. Prepare the system for assembly
The cl-assemble utility is used to prepare the system for assembly. You can use any of the available profiles. In the Calculate Linux profiles, the flags are selected based on the desktop used. CLD is optimized using Qt / KDE, CLDG - Gtk / Gnome, XFCE - Gtk. The CLDX profile is perfect if you don’t want to use either KDE or Gnome.
If you specify “CLDX” as a profile, the program will ask you to enter its name more precisely:

You will also need to specify a section for installation. This can be either a hard disk partition (10-15 GB) or a directory. In the case of using the directory, additional time will be spent on deleting old files. By default, the utility uses the Gentoo Stage3 image and fresh Portage:

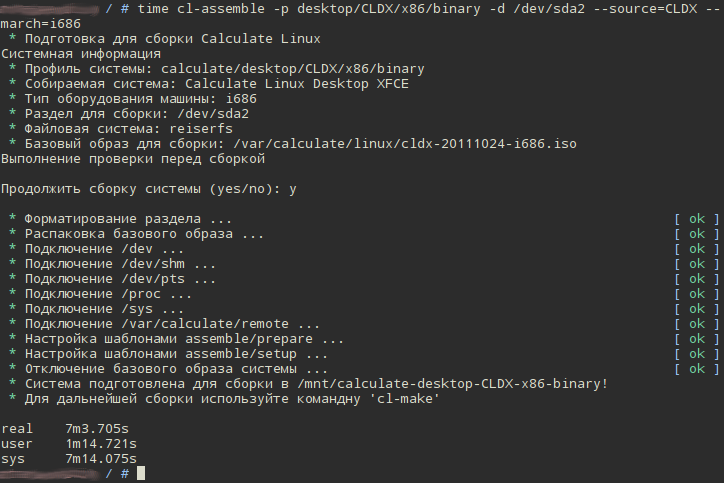
We point out that we want to take a 32-bit CLDX image, the latest version of which can be downloaded from here mirror.cnet.kz/calculate/CLDX/stages/i686 . To do this, you will need to specify the profile correctly and, if we are working in a 64-bit system, indicate that we want to use the i686 architecture:
cl-assemble -p desktop/CLDX/x86/binary -d /dev/sda2 --source=CLDX --march=i686On my car, all the preparation took less than 10 minutes:
3. Update the system
To build the system, use the cl-make utility. Pay attention to several parameters. If you want to build a system from Stage3 - use the build option "-m" (or "--make"), if from the Calculate image you can use the system update option "-u", (or "--update"). Note the "-V" (or "--withvideo") option for copying proprietary video drivers. Copying without installation prevents the violation of the GPL license, while you still have the choice of a proprietary video driver that will be installed into the system during the download process.
cl-make -u -VPerform the update:

In the example above, I did not specify the profile to be collected. It should be entered in case you put several systems on the assembly at the same time. For example, 32 and 64 bit versions. In this case, the profile can be entered as "-p amd64" and "-p x86". By comparing the collected versions, the program will try to determine the desired profile.
In my case, it took about 40 packages to be updated.
Calculate utilities write their actions to the /etc/calculate/assemble.env file:

Some values, such as the rsync portage server, available partitions can be entered into utility variables. Example from a real build server:

After specifying the available sections, it is no longer necessary to pass the parameter of the assembly section.
I managed to write this text while the system is being updated. I came under the update immediately gtk with python, I wish I took today's image. Despite the fact that I chose a binary profile, the compilation comes from source. I'll go pour some coffee :)
4. Make changes
Finally got to the most interesting. What we can change:
- package composition;
- build flags;
- program settings;
- user desktop settings;
- themes, etc.
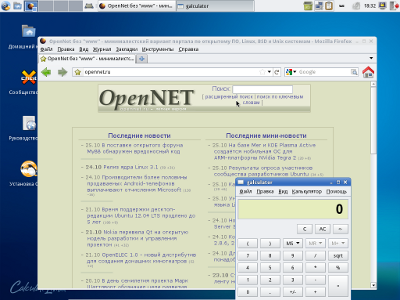
As you can see, the image is deployed to the / mnt / calculate-desktop-CLDX-x86-binary / directory. Use this path to make changes. In the screenshots you can see that with the deployed system, some adjustment is made. Actually all the configuration templates can be viewed in the / usr / share / calculate / templates / assemble / directory. It is important to make changes so as not to cause a configuration conflict. Somewhere you can create your own change patterns, somewhere use alternative files. We now consider in more detail.
4.1. Build flags
Managing package building parameters is done via USE flags. By trimming dependencies, you can achieve several advantages:
- speed up program execution;
- increase the security of the system;
- get rid of extra dependencies;
- reduce disk space requirements.
Let's look at the contents of the USE variable. To do this, you need to run the following command in the assembled system:
linux32 chroot /mnt/calculate-desktop-CLDX-x86-binary /bin/bash -c "emerge --info"Please note that I used the chroot call through the linux32 utility, since I am assembling a 32-bit system from under a 64-bit one. Otherwise, the linux32 utility is not necessary.
Flags will be a great many. You can learn more about them by reading the following descriptions: general - /usr/portage/profiles/use.desc and individual - /usr/portage/profiles/use.local.desc.
For making changes to the flags for all packages, the make.conf file is immediately used. During the build process, the contents of the /etc/make.conf file will be overwritten, so for changes, we recommend using an alternative path, /etc/portage/make.conf.
As an example, let's exclude the support of ipv6 addressing in all packages. To do this, add the following line to the /mnt/calculate-desktop-CLDX-x86-binary/etc/portage/make.conf file:
USE="-ipv6"Let's see what happens. This time, run the update with the "-U" flag, instead of "-u". This will save time on portage synchronization. Run 'cl-make -U -V':

Note. Since the Xorg server was rebuilt when updating packages, at the end the program will rebuild its modules. If you run several builds in a row, analyzing the emerge.log file, the program will rebuild the Xorg-server drivers each time. To prevent this from happening, you can delete the var / log / emerge.log file in the directory of the system you are building. While packing the system into an image, this file will be deleted anyway.
4.2. Flags and packet masks
To change flags and masks, use the following paths: etc / portage / package.use, etc / portage / package.keywords, etc / portage / package.mask, etc / portage / package.unmask. The emerge 2.2 package manager can unmask dependencies.
Consider the unmasking of packages by the example of the Firefox browser. To begin, change the root directory:
linux32 chroot /mnt/calculate-desktop-CLDX-x86-binary
env-update && source /etc/profile
Determine the correct name of the firefox package and find out the list of available versions:
eix firefox
* www-client/firefox
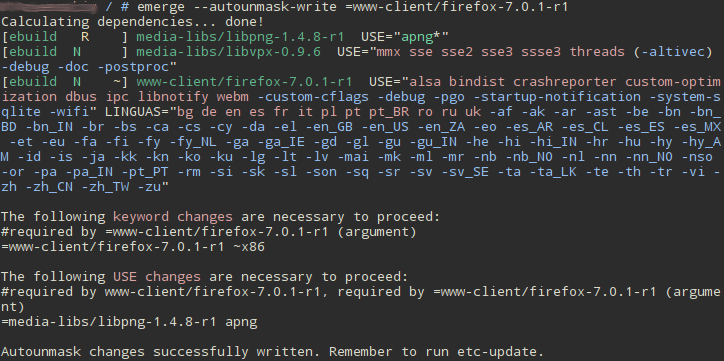
Available versions: *3.6.12 3.6.20 ~3.6.21 ~3.6.22 ~7.0.1-r1Stable version of the package 3.6.20. Let's unmask version 7.0.1-r1:
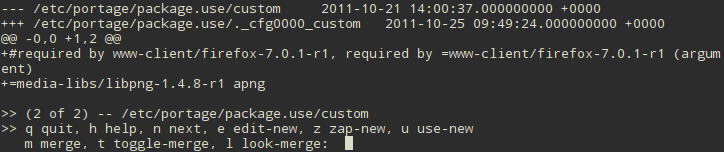
To update the settings, we use the dispatch-conf utility instead of etc-update:
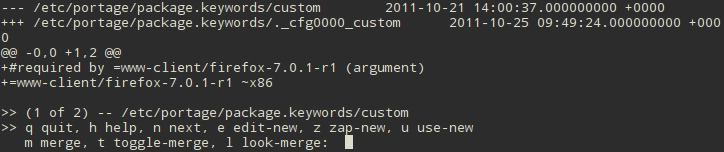
The utility will update the masks and USE-flags. In both cases, press “u” to accept the changes.
Here you can check and write out the names of other packages required for assembly. At the end, to check all dependencies, run:
emerge -p 1 2 ..4.3. Adding Packages
All installed packages, with the exception of dependencies, are written in the 'world' file. If you install a package, it is installed into the system along with the dependent libraries. If any libraries are no longer needed by the package, the 'emerge --depclean' command will remove them. Therefore, it is important that all packages (without dependencies) that you have additionally installed are registered in the 'world' file. You can remove them again with the 'emerge --unmerge' command with the indication of the package (s) or manually, by editing the file and executing the 'emerge --depclean'.
To build a dependency tree, Calculate utilizes meta-packages based on app-misc / calculate-meta. Using the USE flags, the entire dependency tree is built. Since during the build process you could install software for testing, the var / lib / portage / world file will contain only this meta package before packing.
In order to add your packages to the distribution, portage has a great tool - sets. With the help of sets you can prepare your thematic collections of programs. The sets support attachments, which is also very convenient. You can edit your list of packages, use the custom set, located in the / etc / portage / sets / custom @ file, by typing in it the line:
www-client/firefoxOr create a new set with a different name, for example, 'web', by writing a package into it, and in the 'custom' file specify a link to it:
@webThus, a set can contain both nested sets and packages.
During the system update, the programs from the set will be installed, since The set is registered in its world file located in / var / lib / portage / world_sets.
4.4. Removing packages
If you clear the world file and execute 'emerge --depclean', we get a Stage3 image. Those. the cost of living is still there and it is called 'system'. You can update it with the 'emerge system' command, or using the 'emerge system ' set. Meta-package calculate-meta builds dependencies based on the selected profile. Using the USE flags calculate_nowireless, calculate_nonetwork, calculate_noxfce, etc., you can eliminate some of the dependencies. A complete list of flags can be found in the /var/lib/layman/calculate/profiles/desc/calculate.desc file. For example, let's turn off support for wireless devices. To do this, edit the file /etc/portage/make.conf, writing in it:
CALCULATE="nowireless"5. Save changes
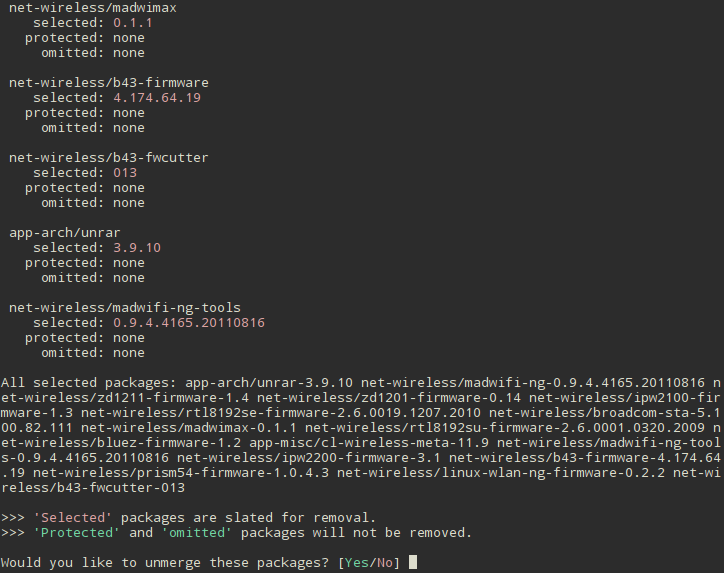
We added the firefox browser, removed the support for wireless devices, let's update the image now:
cl-make -U -VThe firefox package will be installed, and the extra dependencies removed:
5. Create a new image.
To create an image, use the cl-image utility:
cl-image --live iso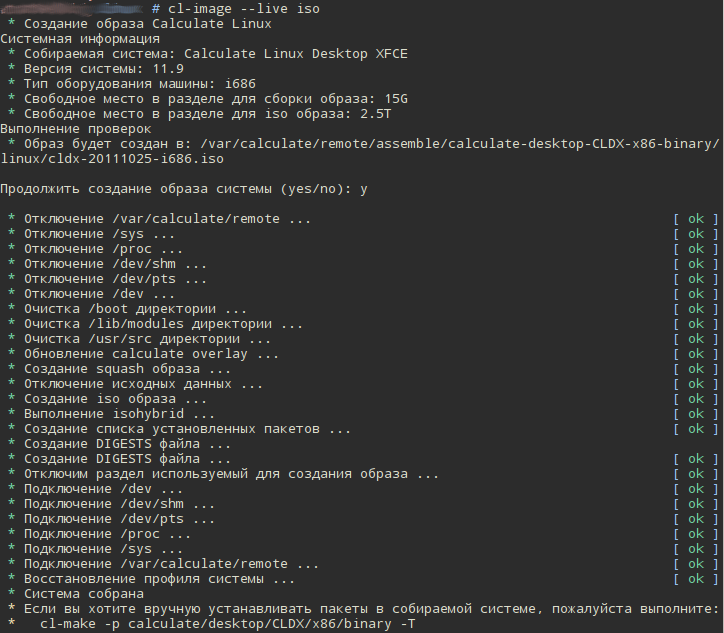
The "--live" option will allow you to win a few seconds when booting from a LiveCD or USB-Flash. Use this option if you are using the fresh Calcuge Linux Stage image.
6. Completion of assembly
If necessary, or upon completion of the installation, you can interrupt the assembly by running:
cl-make --break
7. Summary
For the experiment, I chose the Calculate Linux Desktop XFCE distribution and used the CLDX binary profile. I will execute all further system updates taking into account my USE flags, with the command 'emerge -uDNa world'. If the flags match exactly, the package will be installed from the binary repository, if there are differences, the package will be assembled on my machine.
I received an image with the necessary set of software. Not all of the features I described involved. For example, in the distribution kit, you can prepare templates for customizing the user's desktop (see habrahabr.ru/blogs/linux/129658 ).
In the next article, if there is enough interest, I will describe how to get the same result more clearly and without using a hard disk ;-)
Source: https://habr.com/ru/post/131234/
All Articles