Repair "flooded" laptop keyboard
With a diagnosis of spilled soup, they brought us a laptop that did not have a few keys working. Having carefully studied the depths of the Internet, I came across several articles on repairing keyboards and, having armed with a tool, began to restore it.
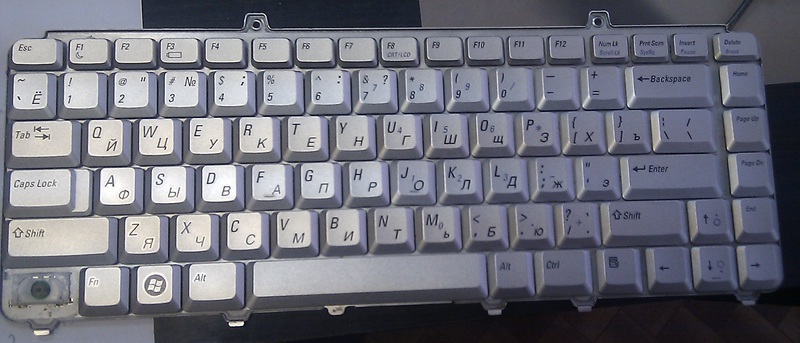
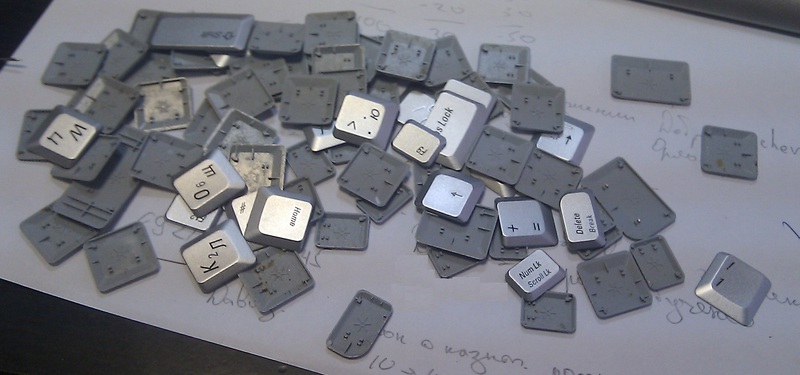
First you need to remove the keyboard from the laptop, and then remove from it all the keys and rocker.
')
I will not describe the process of removal and installation for the millionth time since it is described in more detail here .
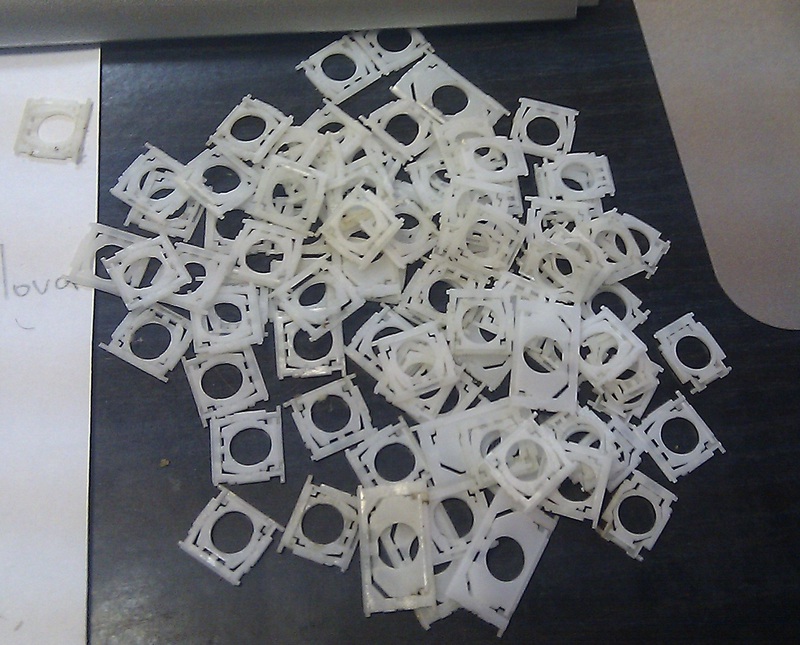
After all the excess is removed, the board itself will appear before us. It is glued to the metal case of the keyboard. When it is separated from the metal, be careful not to tear it, as there is a chance to catch hold of it for fixing the rocker.
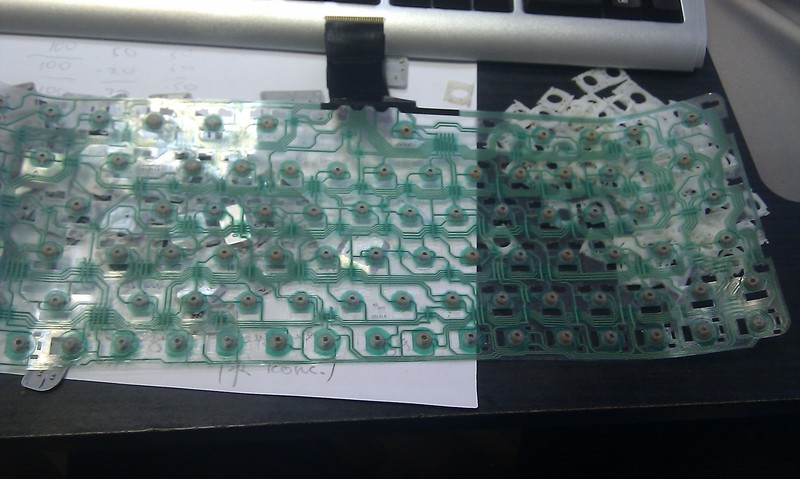
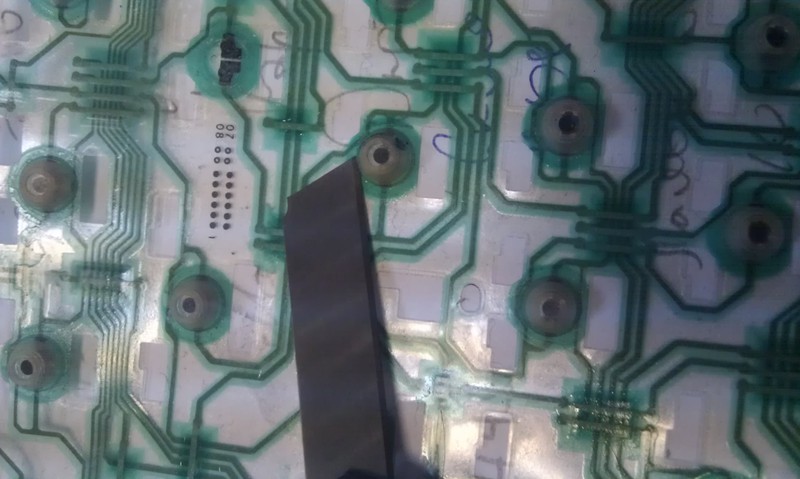
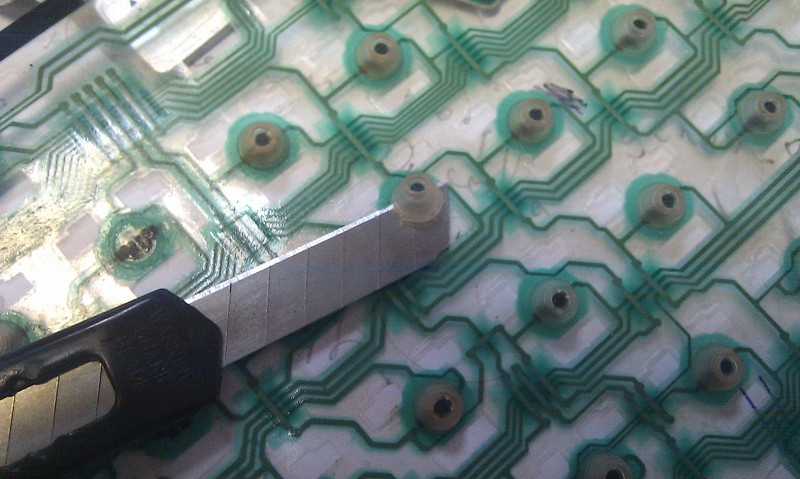
After I removed the fee and the problems started. After rereading all the articles on this topic, I found that the board cannot be analyzed in any way further. After turning it in my hands for a while, I found a way out, no matter how strangely no one covered it on the Internet. Namely: cut off the rubber caps on broken keys. For these purposes, a stationery knife is great.
Attention! When cutting the caps do not apply a lot of effort, try to unstick them from the plastic board. In the future, we need them for reverse installation.
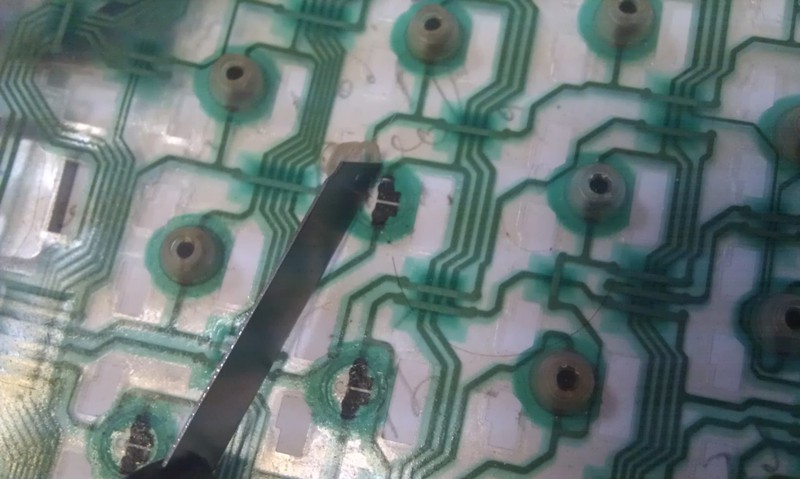
After the necessary caps have been cut off, unprotected contacts will be visible, and that is what we were looking for. Gently wipe them and rubber caps (from the inside) with an alcohol-containing liquid. And proceed to the process of collecting.
The collection process is completely identical to the process of analysis, here it is only necessary to highlight the moment of returning to the place of rubber caps.
They need to be carefully glued, I did this:
1) Squeezed a small puddle of "Super Moment - gel" on a sheet of paper
2) Carefully trying not to cover up anything extra smeared with glue on the edge of the rubber cap that he attached to the board before
3) Effortlessly applied it to the board
After everything is in place, we completely assemble the keyboard in the reverse order. If this method does not suit you, try this one . And if you have damaged tracks on the board, then this one .
I hope that it will be useful to someone. Thanks for attention!
First you need to remove the keyboard from the laptop, and then remove from it all the keys and rocker.
')
I will not describe the process of removal and installation for the millionth time since it is described in more detail here .
After all the excess is removed, the board itself will appear before us. It is glued to the metal case of the keyboard. When it is separated from the metal, be careful not to tear it, as there is a chance to catch hold of it for fixing the rocker.
After I removed the fee and the problems started. After rereading all the articles on this topic, I found that the board cannot be analyzed in any way further. After turning it in my hands for a while, I found a way out, no matter how strangely no one covered it on the Internet. Namely: cut off the rubber caps on broken keys. For these purposes, a stationery knife is great.
Attention! When cutting the caps do not apply a lot of effort, try to unstick them from the plastic board. In the future, we need them for reverse installation.
After the necessary caps have been cut off, unprotected contacts will be visible, and that is what we were looking for. Gently wipe them and rubber caps (from the inside) with an alcohol-containing liquid. And proceed to the process of collecting.
The collection process is completely identical to the process of analysis, here it is only necessary to highlight the moment of returning to the place of rubber caps.
They need to be carefully glued, I did this:
1) Squeezed a small puddle of "Super Moment - gel" on a sheet of paper
2) Carefully trying not to cover up anything extra smeared with glue on the edge of the rubber cap that he attached to the board before
3) Effortlessly applied it to the board
After everything is in place, we completely assemble the keyboard in the reverse order. If this method does not suit you, try this one . And if you have damaged tracks on the board, then this one .
I hope that it will be useful to someone. Thanks for attention!
Source: https://habr.com/ru/post/131118/
All Articles