ABBYY FlexiLayout Studio: we train flexibility
 We continue to talk about ABBYY FlexiLayout Studio - a program for creating flexible descriptions in the ABBYY FlexiCapure data entry system. Last time I told you how to manually make flexible descriptions, and today we will talk about how you can create them automatically - this is a new feature that appeared in the latest, tenth version of ABBYY FlexiLayout Studio.
We will not be cunning, earlier creating descriptions for poorly structured documents was not so simple: even for simple payments or invoices, it was very difficult to create a flexible description without prior training. It was necessary to manually determine the relative position of the fields, the relations between them and similar parameters, and then indicate them, and not clearly, directly on the image, but in the form of numbers. Now you can load several images, “show” the program, where there are static elements and data fields on them - and it will automatically create a description.
For ABBYY FlexiCapture users, this means that simple projects (where the relative position of static elements and data fields in different documents is not very different) can now be handled by an untrained person — for example, accountant Lena. Agree, it is convenient.
')
And now let's see how it works.
We will look at the same example of checks of ATMs of two banks, as in the previous article . Then we had one sample of each check (although, of course, the more, the better). Now we will take three samples of the check of each bank for training the program and one for the subsequent check.
The learning process is as follows: we indicate to the program where the static elements (headers) and data fields are located using the example of a single image. Next, we check how correctly the program “understood” us, trying to find the necessary fields in the second, third, and so on images. If errors occur on some image, we correct them and try the following. After the end of the training we automatically generate a flexible description and check it on two control checks.
So, we launch the application, we create the project, we load images of six selected checks (for control not the clearest are left, but also not the most jammed). Automatically correct the orientation of images and perform predistribution. In the figure - the result. Automatically found words are highlighted:

Add images to the training set and go to training mode. Next, with the help of a magic wand - tool
 - specify the fields and static elements (by double clicking on the found word or by circling a few words with the mouse while holding the left key):
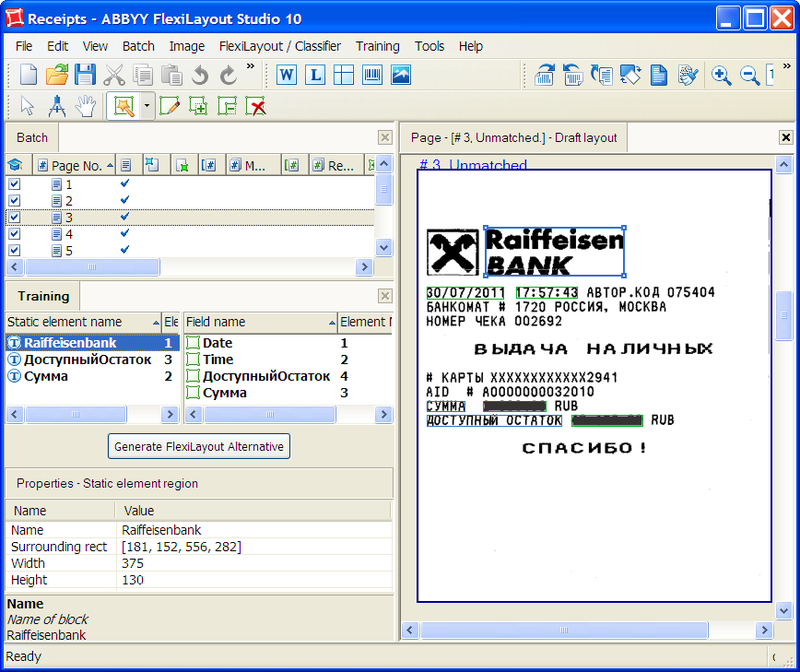
You can see that the interface is slightly different from the manual creation of markup described earlier : instead of the panel with the FlexiLayout structure, the Training panel is displayed. It contains a list of supporting elements (left) and data fields. On the right, as before, the image. Blue boxes highlight static text, green boxes - fields from which information should be extracted.
Static elements are displayed on the Training panel in the left column, fields - in the right. For static elements, the program determines the text to be searched for, as well as some other parameters, for example, whether the text can be multi-line. The recognized text is used as the element name (for example, Available Remaining ). For data fields, the program tries to find a header (static element) and names the field according to it. For the Date and Time fields, the program found the header incorrectly (since it does not exist), they had to be called manually.
So far, everything looks almost the same as it was before. But if you now create markup and look at the properties of elements, then they will, unlike the ninth version, indicate the location of the element relative to others. That is, everything that previously had to be long and dreary to calculate and manually indicate for each static element or data field — its location in the document, its position relative to other objects, possibly the distance from them — is now calculated and filled automatically. Even in the simple case, which we considered in the past example, it took not so little time. And in real life, when the number of elements and fields is in the tens, if not hundreds, the development of the description may take not only days, but weeks. But the documents, in general, can be very similar and have a simple structure, that is, most of the time it took just a selection of the necessary values for the indents and their setting.
And then the most interesting begins: take the check of another bank and try to apply the created markup on it:
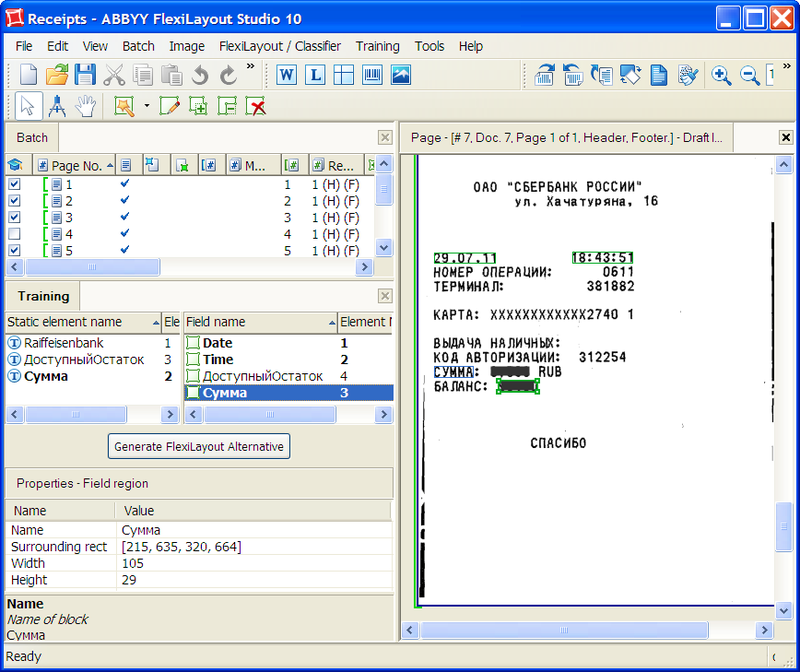
On the Training panel, the objects found are highlighted in bold, in the picture - as before, with blue and green frames.
Oops ... The result is, at first glance, discouraging. Two static elements (the name of the bank and the field header with the account balance) were not found, three of the four fields were recognized, and besides, one was wrong: the balance was chosen instead of the amount. On the other hand, nothing surprising: the check of another bank, static elements are called differently, and the search for fields is conducted relative to them. We specify manually the location of the desired elements by moving and resizing the frames with the mouse, and for the missing elements by dragging the desired group of words with the cursor while holding the left mouse button pressed. At the same time, the program will not only correct the possible location of objects relative to each other, but will also “understand” that the static elements of Raiffeisenbank and Available Balance may contain another text: SBERBANK RUSSIA OJSC and BALANCE, respectively.

Then everything is simple: we repeat the operation for the remaining four checks: we test the markup and, if necessary, make adjustments. After the markup has been tested on all test images (it’s better, of course, that there are more of them and they are more diverse), we create a flexible description and try to process the remaining two checks with it. The result in the figure:

As you can see, it turned out quite good. All elements were found correctly, despite the not very high quality of the Sberbank check. If necessary, the created markup can be further edited by correcting or adding properties or objects. But in general, the program coped with its work: checks are recognized correctly.
Of course, for complex multi-page projects, the fields on which are arranged in various ways, it is not possible to create descriptions in this way yet. On the other hand, for complex projects, you can find time and energy to develop descriptions (or contact us at Professional Services). But for a large number of people who need to create relatively simple flexible descriptions, for example, accounts, payments, invoices, the new opportunity will be very useful: it was necessary to study for a long time, and then set up the description, and now it’s enough to train the program with a few ) examples - that's all.
Pavel Sokolov
Department of Data Entry Products
Source: https://habr.com/ru/post/130459/
All Articles