The Foundry Nuke. Introduction

high resolution on click
Hello again, Habr!
')
In this post I would like to talk about a great program called Nuke from The Foundry , which has already been touched on in this post , but caused a lot of questions from readers, far from 3D graphics in general, and from 3D compositing in particular.
Described in two sentences, then Nyuk is a world standard in compositing and post-processing, and was one of the key tools in the vast majority of Hollywood films with a budget other than handicraft.
What to say in general - Avatar, Tron: Legacy, Transformers, Watchmen, Lords of the Rings, and most of the rest of Hollywood blockbusters were made exactly in Nuka.
I got acquainted with him about three years ago, and immediately fell in love with him: this is one of the most ingenious programs that I have ever seen - both in terms of the approaches used and in terms of usability.
In this post, not a lesson, but an explanation on the fingers of the concepts and principles on which it is built - what kind of animal it is, what it is for, what it is eaten with, and how tasty it is.
In the process of writing a post, I realized that everything that I would like to describe would simply not fit in one post or in a series of articles. Although the post turned out to be long, but this is the tip of the iceberg - it describes a little less than 0.01% of everything you want to share.
Interesting?
Welcome under the cut! Caution! Lots of traffic, Jobs, teapots, and bitten UFOs.
As an introduction, here are some videos that most clearly represent this program.
A small remark : I will describe some things in comparison with Photoshop, since it is familiar to all readers, and doesn’t make sense to compare with compositing software: few readers are familiar with it, and those that are familiar know everything without me.
A small remark number two : I got karma (thanks!) And moved it to the most appropriate blog. In this case, this is “Image Processing”, and not “3D graphics”, since the material of this particular post is more suitable for it: Nyuk is mostly sharpened for video processing and has a huge arsenal of tools, but nothing prevents to use it for processing individual images - just like a single frame. Although it has a huge significance in 3D graphics and it would be different without it.
What it is?
Let's start from afar.
Long ago, during the first seven maxes, the domination of the scanline render, and my childhood, at the exit from the 3D package (say, 3ds max), we received the final picture / series of pictures that looked cool for those times, but now nothing except for a smile do not cause.
The big studios (ILM, Weta, Pixar, DreamWorks, Digital Domain, Blur, and so on) have used the “division of labor”, called pipeline, from even more ancient times: some people make models and geometry, others paint textures, still others animate, fourth render, fifth do compositing, post-effects, and post-processing, sixth sell, and seventh get box office cash from cinemas.
We are interested in precisely part of the pipeline from rendering to post-processing, namely compositing, post-effects, and post-processing, collectively called VFX.
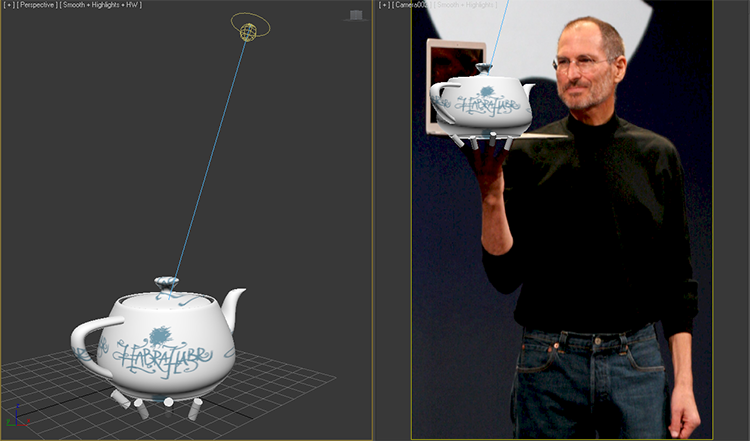
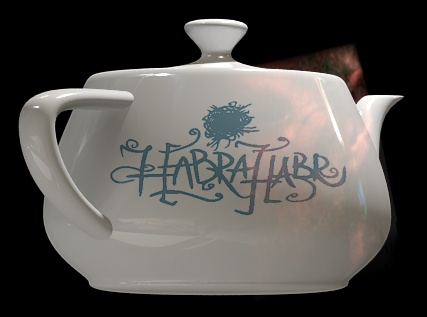
The purpose of this whole action is to integrate three-dimensional objects as best as possible into two-dimensional images obtained from the camera (look at Jobs with a teapot), creating the illusion that this object was there, or to collect several different three-dimensional scenes (or even one ), finally, to give everything a finished look — one that the viewer sees (for example, in a movie theater).
The basis of the technical component of this approach is the following principle:
After calculating the scene, the 3D package does not produce the final image, but the “soup set” of “semi-finished products” called passages — a number of image components in the form of individual images: color of objects, glare, reflections / refractions, lighting, shadows, ambient occlusion , depth, all sorts of masks, and even data passes (about which a little later), where the color of the pixel encodes some value (for example, the position of this pixel in world coordinates, or the direction and speed of movement).
What for?
So why, you ask, do you need to make a garden with passes, if you can immediately get the finished image in jpeg format?
And then, that the flexibility of this approach and its capabilities are amazing: you don’t need to recalculate the scene from scratch, taking hours, or even days, if you want to fix something - this can be done in real-time by simply correcting the necessary pass - like in Photoshop , with the only difference that Photoshop 99% of the capabilities and powers of Nuka never dreamed of, which I will demonstrate with Jobs.
Fundamentals at the heart of Nuka
1. HDR and 32 bit color
Unlike Photoshop, where 32 bits are kept crooked and cannot be used normally, Nyk is a completely 32-bit linear space.
This means that instead of the traditional integer 8 bits per channel (True Color - 24 bits in the sum of three channels), nukes use 32 bits in floating point format (a regular float) for each channel, which allows the pixels to accept any values included in the range supported by the float data type - including negative ones.
Look - all the colors that you see on the monitor screen, in the float view, are in the range from 0 to 1, but the color of the pixel does not interfere with having exorbitant values, for example:
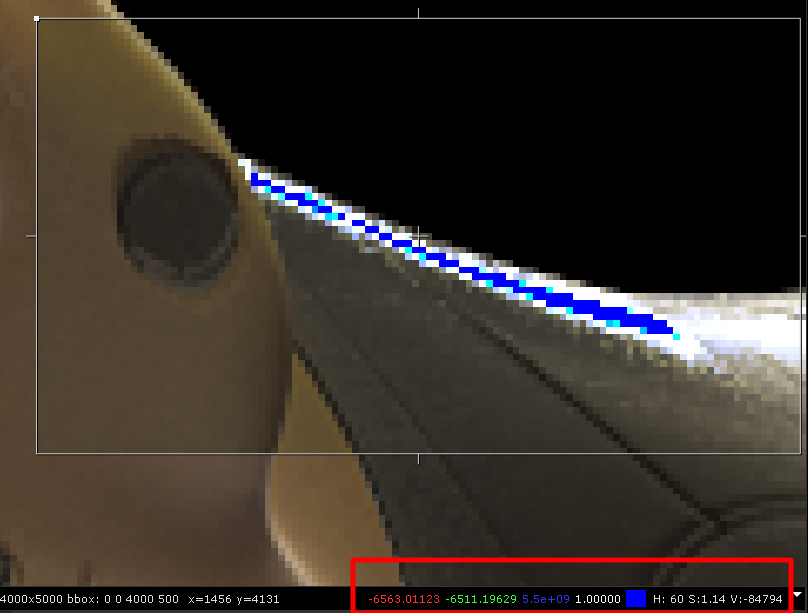
In this screenshot, the color of the blue bar in the center of the red and green components have values of about minus six thousand, and blue - generally about five billion.
Why do we need such large ranges of colors? Good question - I will answer.
They are needed in order to be able to have both ultra-deep shadows “blacker than black” and ultra-bright lights “whiter than white” in the same color space and freely operate with them without loss and rounding errors (this is important): change the exposure, shift, gamma, perform various mathematical operations with them, and so on.
Moreover, it makes it possible to receive data passes from a 3D packet, which would in principle be impossible using the usual integer 8 bits per channel.
There are many file formats for storing images with a large dynamic range, but most often used is exr, which has become the de facto industry standard for its flexibility: you can store an unlimited number of passes in any color format inside a single file (though it can reach very impressive sizes - on average, I get from a gigabyte per 4000x5000 image).
Summarizing, we can say that in terms of color, the pipeline looks like this:
1) Get all passes from 3d package in exr format and 32bit floats per channel, weighing several (tens, hundreds) gigabytes.
2) Upload them to Nyuk, spend all the color corrections there, add all effects, etc., and get the final jpg (avi for video) to output 8 bits per channel and weighing several megabytes.
Also, it is worth noting that 8-bit images (sRGB) loaded into the nuke undergo reverse gamma correction so that their color space becomes linear, and in the viewing window and output, direct gamma correction, although the user may not guess.
But 32-bit images are linear in themselves - they are not modified.
What is linearity for? In order for mathematical operations (even the banal superposition of two images based on certain formulas ) to have a predictable, uniform nature.
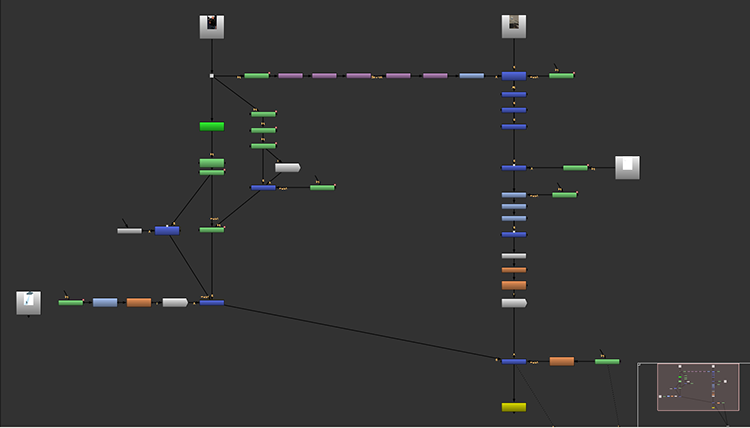
2. Procedural non-destructive approach in the form of a tree
The basis of the nuke is the node graph tree, which allows you to flexibly edit anything and in any way, without losing a bit, since each node represents a kind of action. It is the action: upload an image, apply several images, blur, mix with another, and so on: everything your heart desires - the choice is huge. Each node has a large number of settings, and among themselves they are connected by edges of a directed graph, called pipe.
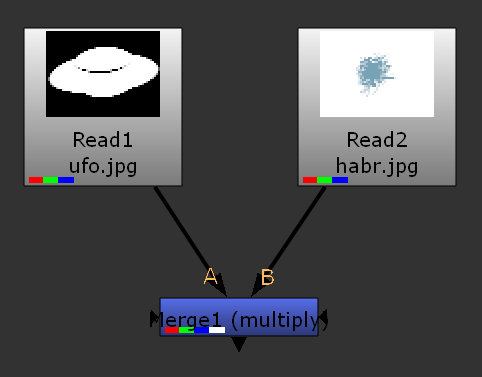
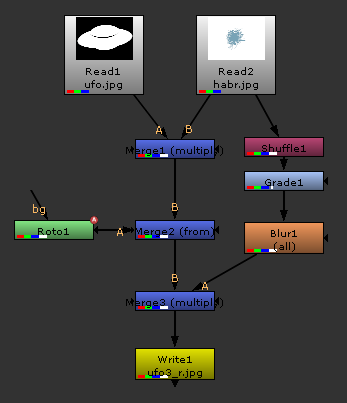
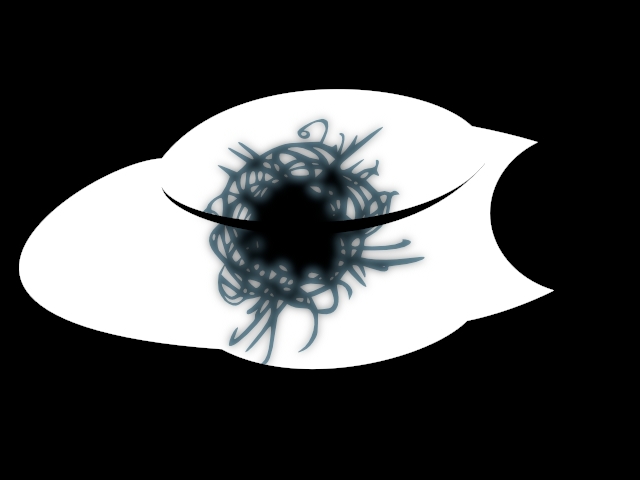
I will demonstrate all this in a simple, but completely dragged-down example (I sketched a vector image of a UFO from here when I did Jobs, and then saved it as a jpeg to simplify this example):
1) Overlaying two images in the multiply mode (many blending modes are exactly the same as in Photoshop):

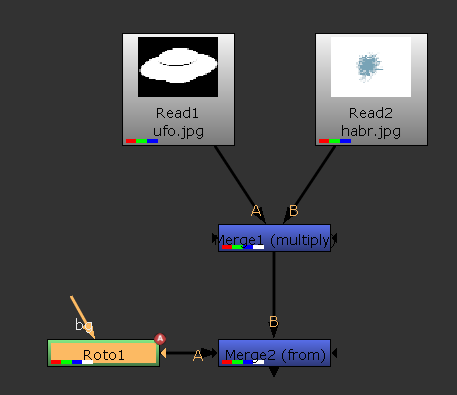
2) Let's bite the UFO in the manner of Apple - let's make a circle in the vector and subtract from our habraNLO.


3) In a separate branch of the tree, we will copy the blue channel from all over to the others, receiving a monochrome image - the intensity of the blue channel was about 0.4, so the logo turned gray, lower the gray to black to get the black logo, and blur it (blur).
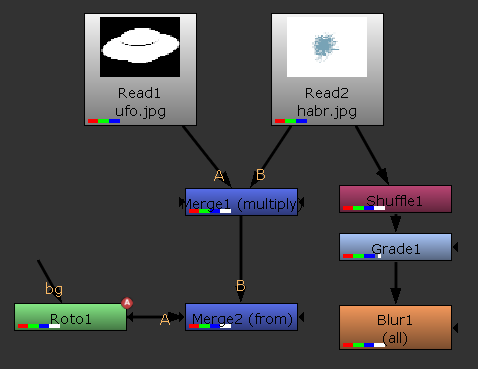

4) We apply a blurred black logo on our UFO in multiplication mode, combining both branches of the tree, and output the result to a file.
Why did I show all this? And in order to demonstrate the power of the tree.
Simplifying very much: Suppose you need to impose two layers, and then blur them.
To implement this in Photoshop, we have two options:
1) We will merge / collapse them, thereby irreversibly losing both, and then we will blur through the filters. And if then something does not like and need to change? Start from the beginning.
2) We duplicate them and make them invisible, and then we repeat paragraph 1.
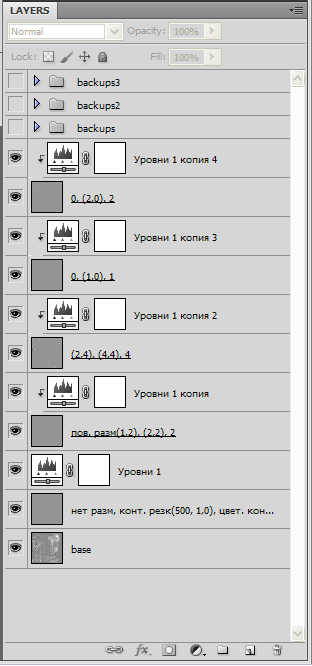
Well, we now have backups of the original layers and can change them if necessary. But then the problem becomes more serious - you need to remember by heart what kind of manipulations were carried out with them in order to repeat them . And if we forgot? Do it again!
The only way out is either to make a separate action for each of his actions (perversion), or to call each layer so that it reflects its history.
Even in images with a small number of layers, this leads to fierce, brainwashing names, but I don’t speak about images with a large number of layers. I have several psd three years ago with several thousand active layers, and I don’t want to open them - not to mention editing.
Since nuke operates with actions (procedural approach), such problems as described above for photoshop are simply not in principle, by design : you can submit other source images to tree inputs and get what you need.
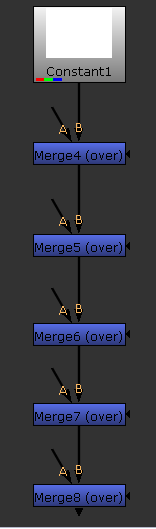
By the way, if you make a chain of Merge in nuke, then this will be the absolute equivalent of layers .
By the way, the nuke scripts weigh quite a bit - the biggest script that I did, weighed about 500k, and at the same time it was huge.
As another example, let's look at the photojob with Jobs.
It took me about three hours, but a screenshot of the tree:
First, I chose this photo from the issue of Google (most of the click):
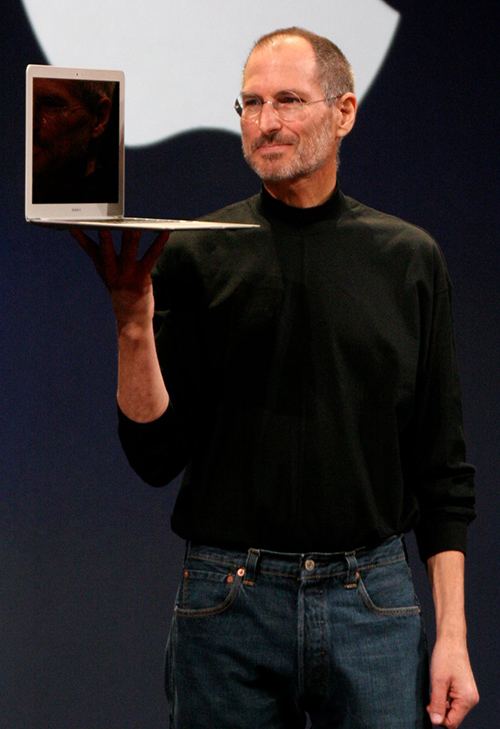
Why did I choose this particular image? Because it is ideal for demonstrating many things that have no analogues in Photoshop, plus on the MacBook screen there is a reflection of the face - it will be useful to us in the future.
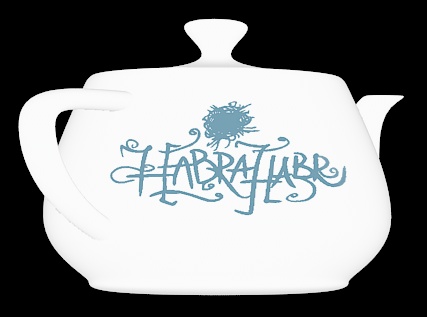
Then I made a simple scene in 3ds max, where I put the Habr logo from the site header on the teapot primitive, cheaply highlighted one source, and threw the HDRI map onto the environment so that there were all sorts of different reflections on the teapot.
Also, I made a few cylinders on the eye, which are not visible to the camera, but shade the kettle in the pass with ambient occlusion to simulate contact shadows from the fingers.
After the calculation, I received a 32-bit exr with all the passes, plus a separate exr with ambient occlusion, since I considered it separately.
Here they are:
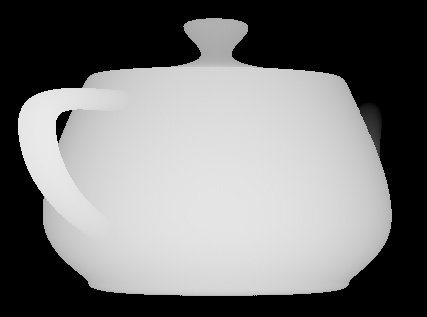
1) A reduced image that shows in the render window and which many use as the final one if they do not use compositing (see the very beginning of the post). Also called Beauty pass.
But this is not for us - this is not enough for us, so we go further.
2) The passes that make up the picture above:
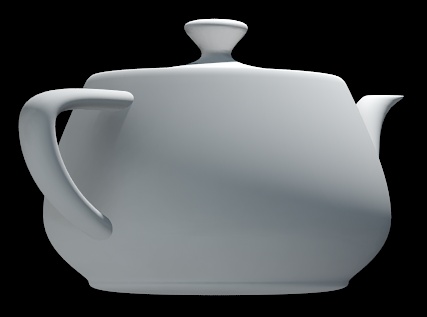
Diffuse pass - flat textures of objects and their color
Lighting pass - shadows and lighting. In general, all these things are done in separate passes, but in this case I brought them in one - for simplification.
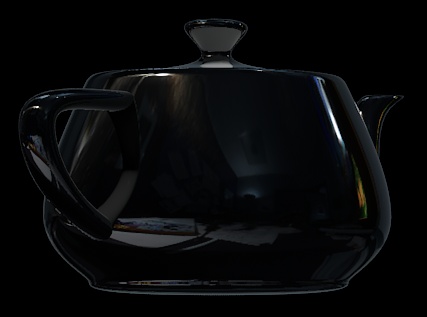
Reflection pass - all the reflections that are in the scene
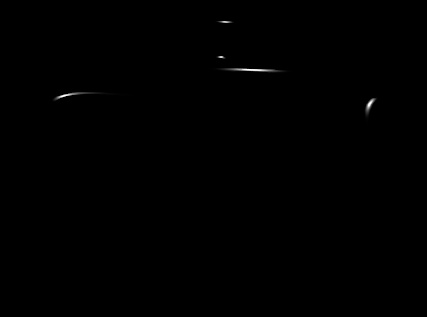
Specular pass - glare from light sources
Ambient occlusion pass

Since it later turned out that the shading from the cylinders does not correspond to the location of the fingers, I redrawn this shading manually in nuke:

We will receive the Beauty pass from these components by the following formula:
Beauty = Diffuse * Lighting + Specular + Reflection
Diffuse * Lighting:

Diffuse * Lighting + Specular:

Diffuse * Lighting + Specular + Reflection (reflection from the MacBook monitor is added to the reflection pass - I'll tell you about it below):
Now we need to add contact shadows from AO - we multiply the resulting Beauty by Ambient Occlusion:

Note: added shadows near the pen, adding realism.
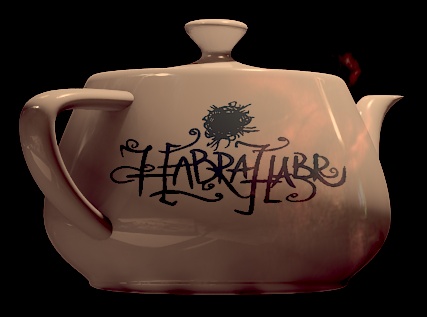
We make color correction so that the colors of the teapot are as close as possible to the colors of the original photo (and this is almost impossible without 32-bit color - there will be too many losses and roundings):
3) Z-Depth pass - image depth. One of the data passes is the pixel color encodes the distance from it to the camera. The brighter the pixel, the closer it is to the viewer.
Used for effects like Depth of Field, Defocus, Bokeh / Convolve, and so on. Also, it is convenient for superimposing two images with regard to depth, if both of them have a pass with depth in the same space.
Now you need to make a blur in depth so that it matches the original photo (look at the MacBook - it is far from clear).
Calibration output from the Depth of Field effect:
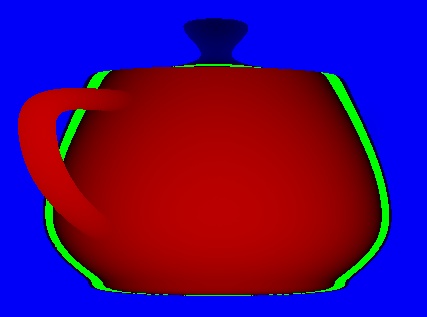
Green is in focus, red is closer to the camera and blurry, blue is farther from the camera and blurry.
The result of the depth of field:

Add grain to the eye - to match the grain in the photo as best as possible. Nyuk has the means to combine the grain (the grain is analyzed from the original and the same is generated), but I did not use them for the sake of simplicity.

4) In a separate branch of the tree, we take the Jobs reflection from the MacBook:

Next, we transform it, make color correction, and impose on the Reflection pass:

The result you have already seen above. Since this happens in the form of a tree, you have to break the story like this - what to do.
5) With one more branch of the tree, we retouch the MacBook and the background (similar to the work of the clone stamp in Photoshop):

Then we make a mask for applying UFOs to the background using the keying methods (yes, the green backgrounds in Avatar were replaced by Pandora with the help of Nuka):

6) Blur the bitten UFO, put grain on it, and add it to the background.

7) In the vector we will draw a mask for the fingers that will go out in front of the kettle:

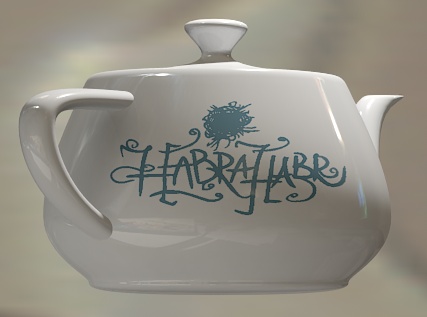
Well, and, finally, we will impose a teapot using a mask.
Voila! (Clickable)
Afterword
Thank you Kuzubov , for giving me the topic of a post about a nuke who wanted to write himself.
Source: https://habr.com/ru/post/129437/
All Articles