Installing Windows 8 Developer Preview for Lazy
 Task: to put Windows 8 Developer Preview to play.
Conditions: the old Windows should survive, there is no DVD drive, there is a big ten gig flash drive too.
Classic solutions:
')
- Put in virtualku. This is slow, you need additional software and without hardware virtualization nothing will work.
- Put on another hard drive. Alas, you can’t insert the second screw into the laptop, and I don’t have it.
- Select a separate section on the screw. And this is putting extra software, dancing with tambourines around sections ... It's lazy!
In addition, the last two options usually require a physical DVD, which is not. Output? VHD!
In addition to the ISO image of Windows 8, we also need to install Windows 7 - earlier versions do not know how to work with VHD. And from under Linux we will not be able to run the installer so easily.
With the release of the seven, Windows finally learned to boot from images. Namely, with VHD images that are used in VirtualPC. In addition, you can create such an image directly in Windows with built-in tools and mount them for use. We will take advantage of this!
So, create a VHD. We stamp in Computer Management -> Storage -> Disk management , now open the Action menu -> Create VHD . The size must be at least 40 gigabytes (according to the Internet), the type is dynamic, otherwise you can grow old until it is created. On a laptop with a 5400RPM screw. Dynamic disk created in a second. I named him c: \ vhd \ w8.vhd and I’ll use it later. Now it needs to be mounted - Action -> Attach VHD .
Now you can copy the ISO content to our VHD, which is available as a regular disk. ISO can be mounted using Daemon Tools, for example. You can copy files with any file manager: Far, Explorer - no difference.
After copying, restart the computer, click F8 and enter the Recovery Console. Here you have to log in to the existing Windows and a window will appear with a choice of recovery tools. We are interested in the most powerful and versatile tool - Command Prompt, that is, the console is normal (: In recovery mode, sometimes the letters for the disks change, the easiest way to check them is to run the laptop, we write in the console
notepadand hit enter. The file open dialog will tell you everything. For example, my drive C became drive D, so my path C : \ vhd \ w8.vhd turned into D : \ vhd \ w8.vhd .
When the letters are sorted out, it's time to mount the VHD. To do this, run DISKPART:
diskpartAnd we say to him:
select vdisk file="c:\vhd\w8.vhd"
attach vdisk
Open Notepad again and look at the letter of our VHD, in my case it is the letter F. Now you can safely run the Windows 8 installer:
f:\setupIt is necessary to choose the type of Custom installation, otherwise you will lose the old Windows and it will be installed. When choosing Custom, you will be asked for which partition to install. Choose VHD. Then the installer will tell you that he does not know how. Do not believe him! Just poke OOK and Next - everything will work.
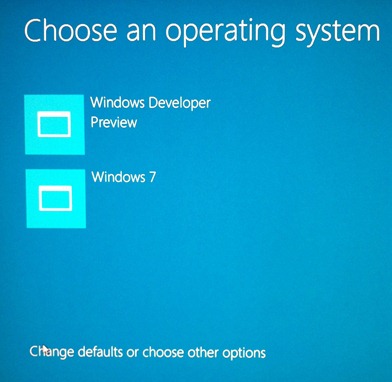
Well, that's all, the installation goes on in the usual way, and after it finishes you will be greeted by a graphic boot manager and will ask which Windows to boot into.
PS This method of installation was produced after reading a couple of tutorials:
- Windows 8 Developer Preview off a VHD Guide to Installing and Booting
- Less Virtual, More Machine - Windows 7 and the Magic of Boot to VHD
In these tutorials you will find a bunch of screenshots of the topic, as well as descriptions of the commands used.
PBS Hfrap user Hf35 noticed that if the VHD and the bootloader are located on different physical disks, then problems may arise. I have only one disk in my laptop, so I cannot comment on this point myself.
Source: https://habr.com/ru/post/128501/
All Articles