XNA Draw or write a particle system. Part II: Shaders
Hello to all game developers and just people who are interested in game development.
 It's time to tell you about pixel shaders and how to do post-proccesing. This is the second part of an article about graphical methods in XNA, in the last article - we looked at the Draw and Begin methods of spriteBatch. For example: let's improve our particle system by adding a pixel shader that will distort space.
')
In this part:
Let's talk a little about shadar. There are two types of shaders (in Shader Model 2.0, we use it): vertex and pixel.
The vertex shader operates with data associated with the vertices of the polyhedra. Such data, in particular, include vertex coordinates in space, texture coordinates, tangent vector, binormal vector, and normal vector. The vertex shader can be used for specific and perspective transformation of vertices, generation of texture coordinates, calculation of lighting, etc.
Pixel shaders are executed for each fragment in the rasterization phase of triangles. A fragment (or pixel) is a point, with window coordinates, obtained by a rasterizer after performing a series of operations on it. Simply put, the resulting point is a frame buffer, a set of these points then forms an image. Pixel shaders operate on the fragments until the final stages, i.e. before tests for depth, alpha and stencil. The pixel shader obtains interpolated data (color, texture coordinates) from the vertex shader.

If we say very briefly about the pixel shader, then this is the handler of the finished image.
In the case of a Displacement-shader - vertex shaders are not needed, consider pixel shaders.
If you are alazy concise person, then Post-processing shaders are executed when the entire game picture has already been drawn: the shader is superimposed on the entire picture, not on individual sprites.
-See spriteBatch.Begin has a parameter, effect, is not it easier to use a shader right away, how do we draw it?
The answer is: that's it that such a shader is applied to individual sprites, as a result, the Displacement-shader will function crookedly .
To create Post-process processing, you first need to draw what should be drawn on the screen - on a separate texture, and then draw this very texture using the Post-process shader. Thus, the shader acts not on individual sprites, but on the picture as a whole.
-Stop, and how to draw on a separate texture?
I answer: meet - RenderTarget2D
And again, hello my friend - conciseness. RenderTarget2D - is essentially a texture on which to draw.
We go to where we usually draw the scene, before we paste it in:
Now everything will be drawn not on the screen, but on RenderTarget2D.
To switch back to the screen, use the following construction:
Remember to clear the RenderTarget before drawing.
The idea of such a pixel shader is very simple: the texture comes in at the entrance, which needs to be “bent”, at the second entrance - a map, on how to bend.
We will generate the map, about how - in practice.
By the way, about the map. The map is the same size as the scene texture, except, perhaps, that we will not see the drawn image.
More about the map and how the shader operates:
In the process of image processing - we get the current pixel position, we get the color. Do the same for the card. Those. in the end, we will have available for modification: the color of the pixel, the position of the pixel, the color of the pixel on the map of the corresponding position of the pixel in the image.
We will use the colors of the map to convey information to the shader, how to bend a pixel.
For example, the R-channel (red) gets values from 0f to 1f. If we see the distortion R = 0.5f on the map, then simply shift the pixel position of the image by 10f * 0.5f pixels. 10f is the force with which we shift.
Accordingly, the R-channel will correspond to the X coordinate, and the G-channel - Y.
If you need pictures, get them:
Original picture:

Map:

The final picture:

So, with the theory sort of sorted out, now let's try to implement it all with code.
Action plan:
We are finalizing the source code from the previous article .
Immediately add some image so that the distortion is noticeable, for example this one:

Copy the ParticleController and call it ShaderController , in it we need to change only the process of creating a particle, and specifically:
We implement post-processing , create new variables:
We initialize them:
Go to the Draw method of the main class and write:
Post-processing is ready, now create a shader .
Create a new Effect (fx) file ( this is a shader file written in HLSL ), enter something like this:
The shader is created, you can load it in the same way as a regular texture, except that the type is not Texture2D , but Effect .
Now update our Draw :
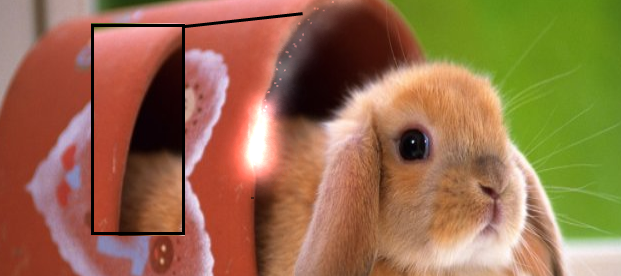
We start, we admire beautiful, realisticanimal distortions (it is better to watch the demo ) :
In fact, this implementation of a particle system (not shaders, but what was in the first lesson) as a whole is not quite good for performance. There are other methods that are more complex in understanding, I will tell you about them later.
I attach source code and demo (this time, it will run on any computer with XNA 4.0 and hardware support DirectX9, inc sh 2.0)
Maybe this week, it may not be known when - I will talk about the Update method and how to implement physics using Box2D .
Good luck and once again with theholiday programmer 0xFF + 1 in the afternoon! ;)
It's time to tell you about pixel shaders and how to do post-proccesing. This is the second part of an article about graphical methods in XNA, in the last article - we looked at the Draw and Begin methods of spriteBatch. For example: let's improve our particle system by adding a pixel shader that will distort space. ')
In this part:
- What is a pixel shader
- What is post-processing
- Briefly: What is RenderTarget2D and what does it
eat? - Displacemenet-map distorting shader
- Practice: refine the particle system
Shader
Let's talk a little about shadar. There are two types of shaders (in Shader Model 2.0, we use it): vertex and pixel.
The vertex shader operates with data associated with the vertices of the polyhedra. Such data, in particular, include vertex coordinates in space, texture coordinates, tangent vector, binormal vector, and normal vector. The vertex shader can be used for specific and perspective transformation of vertices, generation of texture coordinates, calculation of lighting, etc.
Pixel shaders are executed for each fragment in the rasterization phase of triangles. A fragment (or pixel) is a point, with window coordinates, obtained by a rasterizer after performing a series of operations on it. Simply put, the resulting point is a frame buffer, a set of these points then forms an image. Pixel shaders operate on the fragments until the final stages, i.e. before tests for depth, alpha and stencil. The pixel shader obtains interpolated data (color, texture coordinates) from the vertex shader.
If we say very briefly about the pixel shader, then this is the handler of the finished image.
In the case of a Displacement-shader - vertex shaders are not needed, consider pixel shaders.
Post processing
If you are a
-See spriteBatch.Begin has a parameter, effect, is not it easier to use a shader right away, how do we draw it?
The answer is: that's it that such a shader is applied to individual sprites, as a result, the Displacement-shader will function crookedly .
To create Post-process processing, you first need to draw what should be drawn on the screen - on a separate texture, and then draw this very texture using the Post-process shader. Thus, the shader acts not on individual sprites, but on the picture as a whole.
-Stop, and how to draw on a separate texture?
I answer: meet - RenderTarget2D
RenderTarget2D
And again, hello my friend - conciseness. RenderTarget2D - is essentially a texture on which to draw.
We go to where we usually draw the scene, before we paste it in:
GraphicsDevice.SetRenderTarget(renderTarget); Now everything will be drawn not on the screen, but on RenderTarget2D.
To switch back to the screen, use the following construction:
GraphicsDevice.SetRenderTarget(null); Remember to clear the RenderTarget before drawing.
Displacemenet-map distorting shader
The idea of such a pixel shader is very simple: the texture comes in at the entrance, which needs to be “bent”, at the second entrance - a map, on how to bend.
We will generate the map, about how - in practice.
By the way, about the map. The map is the same size as the scene texture, except, perhaps, that we will not see the drawn image.
More about the map and how the shader operates:
In the process of image processing - we get the current pixel position, we get the color. Do the same for the card. Those. in the end, we will have available for modification: the color of the pixel, the position of the pixel, the color of the pixel on the map of the corresponding position of the pixel in the image.
We will use the colors of the map to convey information to the shader, how to bend a pixel.
For example, the R-channel (red) gets values from 0f to 1f. If we see the distortion R = 0.5f on the map, then simply shift the pixel position of the image by 10f * 0.5f pixels. 10f is the force with which we shift.
Accordingly, the R-channel will correspond to the X coordinate, and the G-channel - Y.
If you need pictures, get them:
Original picture:
Map:
The final picture:
So, with the theory sort of sorted out, now let's try to implement it all with code.
Action plan:
- We program a shader.
- We implement post-processing
- Creates another particle system, but this time unusual, these particles will be drawn into the map for the shader.
- We transfer the map to the shader and use it with the Post-process drawing.
- ???
- PROFIT!
Practice: refine the particle system
We are finalizing the source code from the previous article .
Immediately add some image so that the distortion is noticeable, for example this one:
Copy the ParticleController and call it ShaderController , in it we need to change only the process of creating a particle, and specifically:
public void EngineRocketShader(Vector2 position) // , { for (int a = 0; a < 2; a++) // 2 { Vector2 velocity = AngleToV2((float)(Math.PI * 2d * random.NextDouble()), 1.6f); float angle = (float)(Math.PI * 2d * random.NextDouble()); float angleVel = 0; Vector4 color = new Vector4((float)random.NextDouble(), (float)random.NextDouble(), 1f, (float)random.NextDouble()); // R G A . float size = 1f; int ttl = 80; float sizeVel = 0; float alphaVel = 0.01f; GenerateNewParticle(smoke, position, velocity, angle, angleVel, color, size, ttl, sizeVel, alphaVel); } } We implement post-processing , create new variables:
RenderTarget2D shader_map; // RenderTarget2D renderTarget; // We initialize them:
shader_map = new RenderTarget2D(GraphicsDevice, 800, 600); renderTarget = new RenderTarget2D(GraphicsDevice, 800, 600); Go to the Draw method of the main class and write:
protected override void Draw(GameTime gameTime) { GraphicsDevice.SetRenderTarget(renderTarget); // renderTarget GraphicsDevice.Clear(Color.Black); spriteBatch.Begin(); spriteBatch.Draw(background, new Rectangle(0, 0, 800, 600), Color.White); spriteBatch.End(); part.Draw(spriteBatch); GraphicsDevice.SetRenderTarget(shader_map); // GraphicsDevice.Clear(Color.Black); shad.Draw(spriteBatch); GraphicsDevice.SetRenderTarget(null); // GraphicsDevice.Clear(Color.Black); spriteBatch.Begin(); spriteBatch.Draw(renderTarget, new Rectangle(0, 0, 800, 600), Color.White); spriteBatch.End(); base.Draw(gameTime); } Post-processing is ready, now create a shader .
Create a new Effect (fx) file ( this is a shader file written in HLSL ), enter something like this:
texture displacementMap; // sampler TextureSampler : register(s0); // , sampler DisplacementSampler : samplerState{ // TextureAddress Texture = displacementMap; MinFilter = Linear; MagFilter = Linear; AddressU = Clamp; AddressV = Clamp; }; float4 main(float4 color : COLOR0, float2 texCoord : TEXCOORD0) : COLOR0 { /* PIXEL DISTORTION BY DISPLACEMENT MAP */ float3 displacement = tex2D(DisplacementSampler, texCoord); // R,G,B // Offset the main texture coordinates. texCoord.x += displacement.r * 0.1; // texCoord.y += displacement.g * 0.1; // float4 output = tex2D(TextureSampler, texCoord); // return color * output; } technique DistortionPosteffect { pass Pass1 { PixelShader = compile ps_2_0 main(); // } } The shader is created, you can load it in the same way as a regular texture, except that the type is not Texture2D , but Effect .
Now update our Draw :
effect1.Parameters["displacementMap"].SetValue(shader_map); // spriteBatch.Begin(SpriteSortMode.Immediate, BlendState.Opaque, SamplerState.LinearClamp, DepthStencilState.None, RasterizerState.CullCounterClockwise, effect1); // spriteBatch.Draw(renderTarget, new Rectangle(0, 0, 800, 600), Color.White); spriteBatch.End(); We start, we admire beautiful, realistic
In fact, this implementation of a particle system (not shaders, but what was in the first lesson) as a whole is not quite good for performance. There are other methods that are more complex in understanding, I will tell you about them later.
I attach source code and demo (this time, it will run on any computer with XNA 4.0 and hardware support DirectX9, inc sh 2.0)
Maybe this week, it may not be known when - I will talk about the Update method and how to implement physics using Box2D .
Good luck and once again with the
Source: https://habr.com/ru/post/128349/
All Articles