We filter people or how to block one person on video
Good day. I want to offer you a short article about my work with kinekt.
Now I am doing a small part of the advertising project, which uses kinekt. One of the tasks is to “filter” on one person in a crowd. About this and talk.
I use OpenNI, OpenCV and Visual Studio 2010 in my work.
Previously, I never worked closely with images, so I did not know which side to take on. After a brief reflection, the following scheme emerged:
1 - I get a picture from a regular camera;
2 - I get userPixels (pixels that belong to the user);
3 - I make a copy of the picture and apply the filter;
4 - those pixels that are marked as “custom” are being redrawn from the image with the filter into the original image.
')
The approximate plan is clear, let's go!
We declare the necessary variables.
Actually now everything is ready to start. Create generators:
Next you need to do an important thing. The cameras are located next to each other, but not in one place, which means the picture will be different. For coercion to one type there is a special SetViewPoint method. You can use it after you give the command StartGeneratingAll (). And it is important that the OutputMode for both cameras be the same, otherwise there will be an error.
Before we start writing showVideo () with the main loop, we need to convert the image from the camera. To do this, we write a function that draws IplImage from XnRGB24Pixel and in it we will determine which pixels belong to the user.
It remains to write the callbacks and the showVideo method:
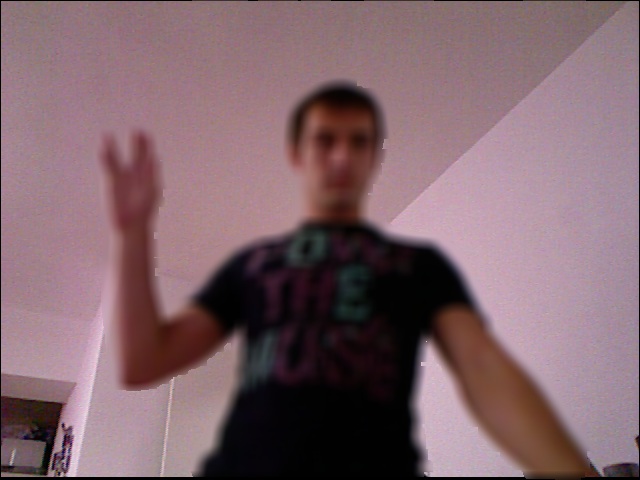
As a result, you should have something like this:

The screenshot below shows the result of a little fit to my goals, with increased boundaries:
Thank you for your attention, success!
Now I am doing a small part of the advertising project, which uses kinekt. One of the tasks is to “filter” on one person in a crowd. About this and talk.
I use OpenNI, OpenCV and Visual Studio 2010 in my work.
Start
Previously, I never worked closely with images, so I did not know which side to take on. After a brief reflection, the following scheme emerged:
1 - I get a picture from a regular camera;
2 - I get userPixels (pixels that belong to the user);
3 - I make a copy of the picture and apply the filter;
4 - those pixels that are marked as “custom” are being redrawn from the image with the filter into the original image.
')
The approximate plan is clear, let's go!
We declare the necessary variables.
xn::Context context; xn::ImageGenerator imageGenerator; // xn::ImageMetaData imageMD; xn::DepthGenerator depthGenerator; // xn::DepthMetaData depthMD; xn::UserGenerator userGenerator; // , xn::SceneMetaData userPixels; XnUserID users[15]; XnUInt16 nUsers = 15; const XnLabel *pLabels; // , !=0 const XnRGB24Pixel *pImageRow; // XnStatus rc; unsigned int pTexMapX;// = 0; unsigned int pTexMapY;// = 0; XnMapOutputMode outputMode; // XnPixelFormat pixelFormat; bool mirrored; // , bool blurOn; int currentUserId; struct MyPixel { int posX; int posY; unsigned char *vBlue; unsigned char *vGreen; unsigned char *vRed; int uLabel; bool border; }; MyPixel pixels[640][480]; // , IplImages IplImage *frame; IplImage *frameBlured; Actually now everything is ready to start. Create generators:
int main(){ outputMode.nFPS = 10; outputMode.nXRes = 640; outputMode.nYRes = 480; XnStatus rc; pTexMap = NULL; pTexMapX = 0; pTexMapY = 0; rc = context.Init(); checkStatus(rc, " create context"); // rc == XN_STATUS_OK , rc = depthGenerator.Create(context); checkStatus(rc, " depth create"); rc = imageGenerator.Create(context); checkStatus(rc, " image create"); rc = userGenerator.Create(context); checkStatus(rc," user create"); return 0; } Next you need to do an important thing. The cameras are located next to each other, but not in one place, which means the picture will be different. For coercion to one type there is a special SetViewPoint method. You can use it after you give the command StartGeneratingAll (). And it is important that the OutputMode for both cameras be the same, otherwise there will be an error.
int main (){ ..... imageGenerator.SetMapOutputMode(outputMode); depthGenerator.SetMapOutputMode(outputMode); imageGenerator.SetPixelFormat(XN_PIXEL_FORMAT_RGB24); // RGB context.StartGeneratingAll(); rc = depthGenerator.GetAlternativeViewPointCap().SetViewPoint(imageGenerator); checkStatus(rc, " user and image view"); // XnCallbackHandle h1; userGenerator.RegisterUserCallbacks(gotUser,lostUser,NULL, h1); // . currentUserId = -1; // id mirrored = false; blurOn = false; frame = cvCreateImage(cvSize(640,480),8,3); frameBlured = cvCreateImage(cvSize(640,480),8,3); // cvNamedWindow ("Filter demo", CV_WINDOW_AUTOSIZE); // . showVideo(); return 0; } Frame processing
Before we start writing showVideo () with the main loop, we need to convert the image from the camera. To do this, we write a function that draws IplImage from XnRGB24Pixel and in it we will determine which pixels belong to the user.
void fromXnRGBToIplImage(const XnRGB24Pixel* pImageMap, IplImage** iplRGBImage) { userGenerator.GetUsers(aUsers,nUsers); userGenerator.GetUserPixels(aUsers[0],userPixels); pLabels = userPixels.Data(); for(int l_y=0;l_y<XN_VGA_Y_RES;++l_y) //XN_VGA_Y_RES = 480 { for(int l_x=0;l_x<XN_VGA_X_RES;++l_x, ++pLabels) //XN_VGA_X_RES= 640 { pixels[l_x][l_y].uLabel = 0; if(pixels[l_x][l_y].border != true) pixels[l_x][l_y].border = false; if(*pLabels !=0) // { currentUserId = (currentUserId == -1)?(*pLabels):currentUserId; // , pixels[l_x][l_y].uLabel = *pLabels; // ( ) if((l_x >0) && pixels[l_x-1][l_y].uLabel == 0 || (l_x < XN_VGA_X_RES-1) && pixels[l_x+1][l_y].uLabel == 0 || (l_y >0 ) && pixels[l_x][l_y-1].uLabel == 0 || (l_y < XN_VGA_Y_RES-1) && pixels[l_x][l_y+1].uLabel == 0 ) { pixels[l_x][l_y].border = true; } } // IplImage - OpenNI Group ((unsigned char*)(*iplRGBImage)->imageData)[(l_y*XN_VGA_X_RES +l_x)*3+0] = pImageMap[l_y*XN_VGA_X_RES+l_x].nBlue; ((unsigned char*)(*iplRGBImage)->imageData)[(l_y*XN_VGA_X_RES +l_x)*3+1] = pImageMap[l_y*XN_VGA_X_RES+l_x].nGreen; ((unsigned char*)(*iplRGBImage)->imageData)[(l_y*XN_VGA_X_RES +l_x)*3+2] = pImageMap[l_y*XN_VGA_X_RES+l_x].nRed; } } // , if(blurOn){ cvSmooth(*iplRGBImage,frameBlured,CV_BLUR,14,14,0,0); for(int j = 0 ; j < 480; ++j) { for(int i = 0 ; i < 640; ++i) { if( pixels[i][j].border == true && pixels[i][j].uLabel == currentUserId || pixels[i][j].uLabel == currentUserId ){ ((unsigned char*)(*iplRGBImage)->imageData)[(j*XN_VGA_X_RES +i)*3+0] = frameBlured->imageData[(j*XN_VGA_X_RES +i)*3+0]; ((unsigned char*)(*iplRGBImage)->imageData)[(j*XN_VGA_X_RES +i)*3+1] = frameBlured->imageData[(j*XN_VGA_X_RES +i)*3+1]; ((unsigned char*)(*iplRGBImage)->imageData)[(j*XN_VGA_X_RES +i)*3+2] = frameBlured->imageData[(j*XN_VGA_X_RES +i)*3+2]; } pixels[i][j].border = false; pixels[i][j].uLabel = 0; } } } } It remains to write the callbacks and the showVideo method:
void XN_CALLBACK_TYPE gotUser(xn::UserGenerator& generator, XnUserID nId, void* pCookie) { // - } void XN_CALLBACK_TYPE lostUser(xn::UserGenerator& generator, XnUserID nId, void* pCookie) { if((int)nId == currentUserId) { currentUserId = -1; // } } void showVideo() { while(1) { rc = context.WaitOneUpdateAll(imageGenerator); imageGenerator.GetMetaData(imageMD); pImageRow = imageGenerator.GetRGB24ImageMap(); char c = cvWaitKey(33); if(c == 27) // esc break; if(c == 109) { mirrored = (mirrored == true)?false:true; } if(c == 98) // b { blurOn = (blurOn == true)?false:true; } fromXnRGBToIplImage(pImageRow,&frame); // , Context SetGlobalMirror(bool), cvFlip if(mirrored) cvFlip(frame, NULL, 1); cvShowImage("Filter demo", frame); } cvReleaseImage( &frame ); cvDestroyWindow("Filter demo" ); } Total
As a result, you should have something like this:
The screenshot below shows the result of a little fit to my goals, with increased boundaries:
Thank you for your attention, success!
Source: https://habr.com/ru/post/127802/
All Articles