You are not authorized by keys yet? Then we go to you
With this note, I want to show that using keys for authorization is easy.
To begin with, we will need PuTTY.
Go to http://www.chiark.greenend.org.uk/~sgtatham/putty/download.html and download the following:
PuTTY - ssh client
Pageant - agent for storing keys (why I will explain later)
PuTTYgen - key generator
First, we will generate the keys, then we will configure PuTTY, and in the end I will show you how to use it all.
Create a daddy for PuTTY and throw it all there.

')
Launch PuTTYgen and select “ Type of key to generate ” SSH-2 RSA and 2048- bit key.

Click Generate . Following the instructions, we randomly move the mouse.
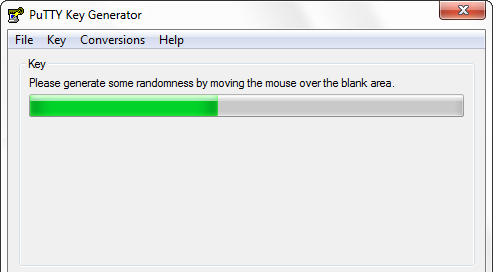
After generation, we will see the following.
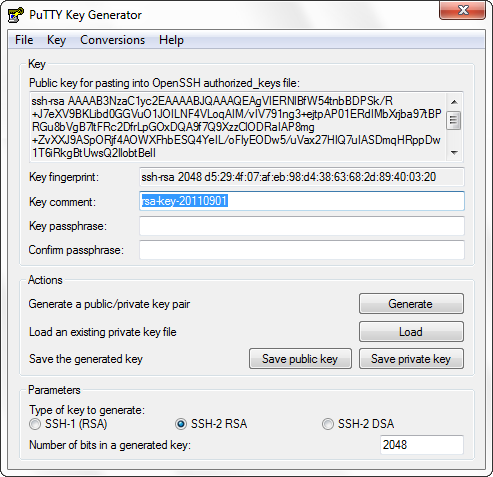
In the upper field is the public key that will be stored by the receiving party.
Oh yeah, I forgot to tell you how direct authorization takes place using keys.
For clarity, take the server and client.
The client informs the server of its public key in any way possible. Worry that someone finds out this key is not worth it.
Authorization is as follows:
further follows the explanation of a person who has not read the relevant literature, therefore describes how he imagines it
The client accesses the server and they exchange public keys.
based on this, the server authorizes the client and grants the corresponding rights.
It was a small digression, back to PuTTYgen.
In the upper field is the public key that will be stored by the receiving party.
Key fingerprint - key fingerprint.
Key comment - the key comment, I usually specify the machine on which this key is used.
Key passphrase is a passphrase for a private key. It should be made difficult. Of course, you can leave it empty, and then the authorization will not require a password, but then I will show that even with a complex password to the key, you can authenticate without re-entering the password, as if there is no password.
Confirm passphrase - confirmation of the password phrase.
Next you need to save the generated keys. I will dwell only on a private key. When saving ( Save private key ), you are prompted to save the key with the extension .ppk . It will be used by Pageant in the future.
Before we proceed to the PuTTY configuration, I’ll tell you about the possibility of recovering a public key from a private one using PuTTYgen.
To do this, click the Load button. Specify private key. Enter the passphrase (if any) and the exact same window will appear as in the previous screenshot.
Now we will start PuTTY and we will make preliminary settings.
Select Default Settings and click Load .
Let's turn to Session-> Logging on the left, tick off Printable output . In the Log file name field, enter logs \ & H_ & Y- & M- & D- & T.log , uncheck Flush log file frequentl y.
Thus, we have indicated that we will store logs in the daddy logs, next to PuTTY.exe with names like 192.168.1.6_2011-08-29-101304.log
Go to the tab Window-> Translation . And select the UTF-8 Remote character set in the list so that there are no problems with the encoding.
In Connection-> SSH-> Auth , we check that there is a tick in front of Attempt authentication using Pageant and specify the path to the private key in the Private key file for authentication column.
After that, go back to the Session tab and click save, so that the specified settings are by default.
It's time to show the work of authorization, using the keys, in practice.
We use the agent to store the keys Pageant.
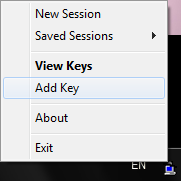
After launch, an icon will appear in the notification area. Click the right button Add key .
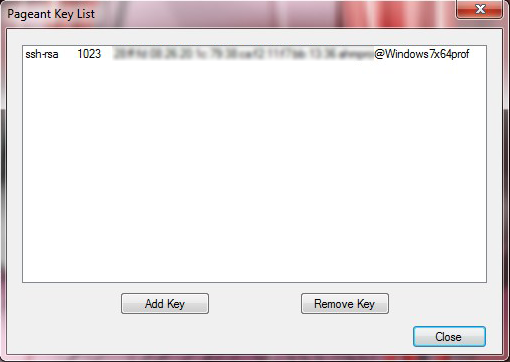
Select the key, specify the passphrase. Now the key is stored in memory.
To view the keys, you can select View keys .
Let's try to log in.
Open PuTTY. Specify IP. Click Open .
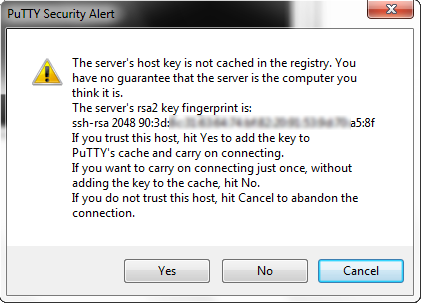
The first time, a warning pops up that earlier we did not use the key for authorization on this server. When this occurs for the first time, it is normal, but if this happens on the server on which we have already logged in, then either the server has changed its keys, or it is a fake server.
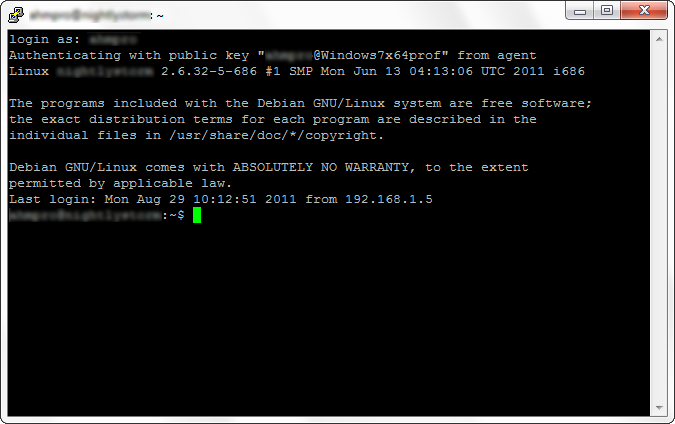
Enter your login. Click Enter. And we are automatically logged in.
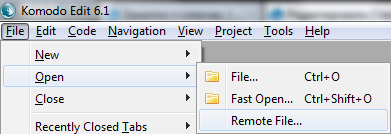
I will show more by the example of Komodo Edit.
Choose File-> Open-> Remote open
Choose Accounts . Then New Server .
In the Server Type we specify SCP . In Name, an arbitrary name for the server. In Hostname ip server (or domain name). In the User Name user login.
Click Add , then OK .
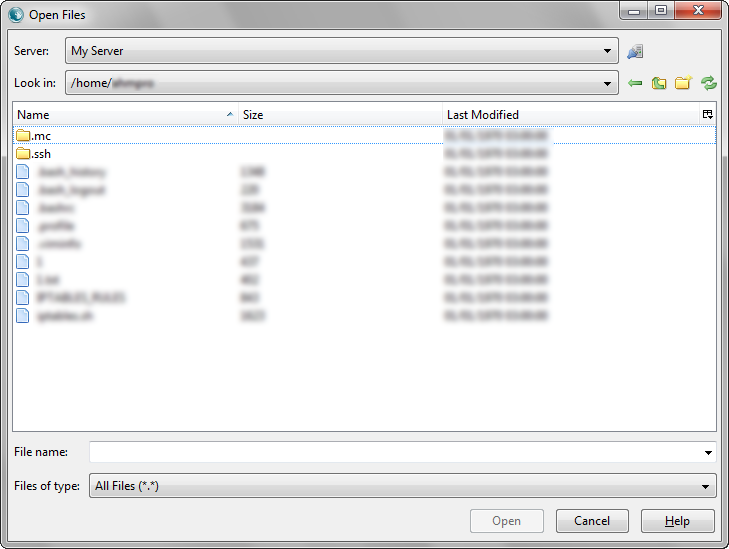
In the top drop-down menu, select our server. If the server allows authorization by keys, then we will see a list of directories on the server, select the desired file and edit it (if you have write access to the user).
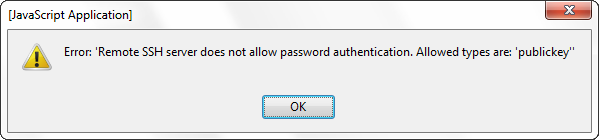
PS: The following error occurs if the server only supports key authorization and you do not have Pageant enabled.
PS2:
Do not miss the useful article Memo to ssh users
To begin with, we will need PuTTY.
Go to http://www.chiark.greenend.org.uk/~sgtatham/putty/download.html and download the following:
PuTTY - ssh client
Pageant - agent for storing keys (why I will explain later)
PuTTYgen - key generator
First, we will generate the keys, then we will configure PuTTY, and in the end I will show you how to use it all.
Create a daddy for PuTTY and throw it all there.
')
Launch PuTTYgen and select “ Type of key to generate ” SSH-2 RSA and 2048- bit key.
Click Generate . Following the instructions, we randomly move the mouse.
After generation, we will see the following.
In the upper field is the public key that will be stored by the receiving party.
Oh yeah, I forgot to tell you how direct authorization takes place using keys.
For clarity, take the server and client.
The client informs the server of its public key in any way possible. Worry that someone finds out this key is not worth it.
Authorization is as follows:
further follows the explanation of a person who has not read the relevant literature, therefore describes how he imagines it
The client accesses the server and they exchange public keys.
based on this, the server authorizes the client and grants the corresponding rights.
It was a small digression, back to PuTTYgen.
In the upper field is the public key that will be stored by the receiving party.
Key fingerprint - key fingerprint.
Key comment - the key comment, I usually specify the machine on which this key is used.
Key passphrase is a passphrase for a private key. It should be made difficult. Of course, you can leave it empty, and then the authorization will not require a password, but then I will show that even with a complex password to the key, you can authenticate without re-entering the password, as if there is no password.
Confirm passphrase - confirmation of the password phrase.
Next you need to save the generated keys. I will dwell only on a private key. When saving ( Save private key ), you are prompted to save the key with the extension .ppk . It will be used by Pageant in the future.
Before we proceed to the PuTTY configuration, I’ll tell you about the possibility of recovering a public key from a private one using PuTTYgen.
To do this, click the Load button. Specify private key. Enter the passphrase (if any) and the exact same window will appear as in the previous screenshot.
Now we will start PuTTY and we will make preliminary settings.
Select Default Settings and click Load .
Let's turn to Session-> Logging on the left, tick off Printable output . In the Log file name field, enter logs \ & H_ & Y- & M- & D- & T.log , uncheck Flush log file frequentl y.
Thus, we have indicated that we will store logs in the daddy logs, next to PuTTY.exe with names like 192.168.1.6_2011-08-29-101304.log
Go to the tab Window-> Translation . And select the UTF-8 Remote character set in the list so that there are no problems with the encoding.
In Connection-> SSH-> Auth , we check that there is a tick in front of Attempt authentication using Pageant and specify the path to the private key in the Private key file for authentication column.
After that, go back to the Session tab and click save, so that the specified settings are by default.
It's time to show the work of authorization, using the keys, in practice.
We use the agent to store the keys Pageant.
After launch, an icon will appear in the notification area. Click the right button Add key .
Select the key, specify the passphrase. Now the key is stored in memory.
To view the keys, you can select View keys .
Let's try to log in.
Open PuTTY. Specify IP. Click Open .
The first time, a warning pops up that earlier we did not use the key for authorization on this server. When this occurs for the first time, it is normal, but if this happens on the server on which we have already logged in, then either the server has changed its keys, or it is a fake server.
Enter your login. Click Enter. And we are automatically logged in.
I will show more by the example of Komodo Edit.
Choose File-> Open-> Remote open
Choose Accounts . Then New Server .
In the Server Type we specify SCP . In Name, an arbitrary name for the server. In Hostname ip server (or domain name). In the User Name user login.
Click Add , then OK .
In the top drop-down menu, select our server. If the server allows authorization by keys, then we will see a list of directories on the server, select the desired file and edit it (if you have write access to the user).
PS: The following error occurs if the server only supports key authorization and you do not have Pageant enabled.
PS2:
Do not miss the useful article Memo to ssh users
Source: https://habr.com/ru/post/127521/
All Articles