Delving deep into Graphics2D
Good afternoon, Habrazhiteli!
 Today, I will again try to draw your attention to some aspects and subtleties of working with graphics in Java. I have already briefly described in the previous article some of the available tools and methods for creating components and UI, but this is only the tip of the iceberg. That is why I want to pay special attention (and the article) to working with graphics. Naturally referring to Graphics2D - Java 3D is a large separate topic (maybe it will be discussed further in the future, but not today).
So, from the previous article you should already know some basics of building components - we will try to expand this knowledge.
')
To begin with, if you consider any component from the MVC point of view, it consists of 3 parts:
Model - a model that stores data on the state of a component and on the basis of which the appearance is built
View - directly visual display of the component
Controller - responsible for controlling the component (events from the keyboard, mouse, and other input devices)
In fact, all standard Swing components are built on the MVC pattern. For example, in JButton, ButtonModel is responsible for the behavior and state of the button (Controller and Model), and ButtonUI, in turn, for its external representation (View). As a result, the share of the JButton class itself is practically nothing left. It will be mostly about the implementation of the external representation of the components (View), and if you specify - about Graphics2D, on the basis of which, in fact, the entire interface is drawn.
I will not argue that there is a lot of different material on this topic, but it is so fragmented and scattered across the expanses of the network that it seems to me that it is not superfluous to collect everything in one place and consistently state.
So, today we will analyze the standard tools provided by Graphics2D, as well as some techniques and tricks for rendering components of any complexity.
It is clear that without sensible ideas, no means will help to do anything, but here I, alas, is powerless. Probably the designer / UX-specialist will be able to help you with this if everything is really bad with fantasy. Honestly, it is rather difficult to “squeeze out” what a new component will look like. It happens that it is even more complicated and takes more time than directly writing working code and debugging it.
In any case, let's get down to business ...
In addition to standard shapes, there are also specific ones (such as the GeneralPath) that allow you to quickly create your own shapes.
There are also some individual projects that have various specific forms:
http://java-sl.com/shapes.html
http://geosoft.no/graphics/
http://designervista.com/shapes/index.php
http://www.jfree.org/jcommon/
There is no point in describing each individual figure — you can read about it in detail here or here (there are also examples of use in both descriptions).
I would just like to clarify here a little bit about how the figure is drawn and what influences the final result. Suppose you have a certain shape (shape shape):
g2d.setRenderingHint (RenderingHints.KEY_ANTIALIASING, RenderingHints.VALUE_ANTIALIAS_ON);
This is enough to enable smoothing of all the figures drawn in the future.
The main thing to remember is to turn off anti-aliasing after your operations, if you don’t want everything that is rendered after, to also use anti-aliasing - for example, if you implement your button background drawing and don’t want to cause anti-aliasing of the default text.
The value of this parameter (RenderingHints.KEY_ANTIALIASING) also affects the smoothing of the text, if it has the default selection.
It is possible to separately enable / disable the need for text smoothing:
g2d.setRenderingHint (RenderingHints.KEY_TEXT_ANTIALIASING, RenderingHints.VALUE_TEXT_ANTIALIAS_ON);
When setting this parameter to any other than VALUE_TEXT_ANTIALIAS_DEFAULT, it will ignore the RenderingHints.KEY_ANTIALIASING value.
Here is a small and simple example showing the differences between drawing with and without anti-aliasing:
(Example and source code can be downloaded here )
If you look closely - you can also notice many other available settings in RenderingHints:
KEY_ANTIALIASING - setting smoothing shapes (and text)
KEY_RENDERING - setting quality / speed of rendering
KEY_DITHERING - mixing colors with limited palette
KEY_TEXT_ANTIALIASING - text smoothing setting
KEY_TEXT_LCD_CONTRAST - text contrast (from 100 to 250) when drawing using special text smoothing
KEY_FRACTIONALMETRICS - setting the "accuracy" of drawing text characters
KEY_INTERPOLATION - setting that is responsible for modifying the pixels of the images when drawing (for example, when you rotate the image)
KEY_ALPHA_INTERPOLATION - setting the quality / speed of processing alpha values
KEY_COLOR_RENDERING - set the quality / speed of color processing
KEY_STROKE_CONTROL - setting the ability to modify the geometry of the figures to improve the final view
Most of these settings usually remain in the “default” state. However, they can be very useful in some specific cases.
For example, if you set KEY_INTERPOLATION to VALUE_INTERPOLATION_BILINEAR, you can avoid loss of image quality when modifying it (rotating / compressing / shifting, etc.) or improving the contrast of text on your background by changing KEY_TEXT_LCD_CONTRAST without affecting the text rendering code.
In any case, you should carefully use these settings and avoid their “going beyond” your drawing method, because, for example, the same antialiasing included in the JTextField will smooth the text and modify it (and probably shift).
For clarity, a small example using 3 different gradients to fill three equal parts on a component:

(Example and source code can be downloaded here )
By the way, probably not everyone knows that in any fillings / drawings, when specifying a color, you can also indicate its transparency (alpha).
For example, new Color (255, 255, 255, 128) is a white color that is transparent to 50%. Alpha in this case is 128. It can vary from 0 to 255. 0 is a completely transparent color, 255 is completely opaque (used by default).
Combining (in other words, Composite) allows you to specify various “modes” of combining new drawing shapes / images with pixels already present on the canvas.
I was able to find the most successful illustrations for different “modes” of combining, as well as an example of their real influence on the figures drawn here . There is also a detailed description of each of the "modes".
In practice, personally, I most often use the AlphaComposite.SRC_OVER variant and the transparency indication to draw further elements in a certain transparency over the things already drawn. There are also quite interesting examples of the use of certain modes when working with images, but more on that later.
In addition to Composite, it is also possible to create your own forms using standard and combining them with various geometric operations. A small example on this topic:
(Example and source code can be downloaded here )
To create this shape, it took only 2 lines:
What is most interesting is that the border of the new figure does not include the internal parts of the borders of the ellipses (those that fall inside the opposite of the ellipse).
In general, the Area can be used for many different things: it can not only add new shapes to existing shapes, but also create an intersection area or exclude certain shapes from others, it is possible to learn from it the common boundaries of the shape (bounds). Also with its help, you can quickly and easily create complex shapes from any other simple shapes available.
If you need a specific shape that you use often enough, it is probably best to create a heir to the Shape class and implement the necessary shape in it. In the future, this will reduce both time costs and the size of the code itself.
In fact, Stroke provides the ability to set the border style drawn by any call to the draw method of the graphic.
In the standard JDK, there is only 1 implementation of the Stroke interface - BasicStroke. It allows you to set the width of the line, how the lines at the corners are combined and how they look on the kots, and also to create dashed lines.
To set Stroke in code, do the following:
By the way, do not worry that the width and some other parameters can be set to float (although the pixels should be integers) - non-integer numbers will only create “smeared” lines / outlines when drawing, which in some cases may even be useful.
More information about the features of BasicStroke can be found, for example, here .
Although the JDK includes only one implementation of Stroke, there are other projects and examples describing the real possibilities of this tool, but more on that later.
Perhaps we start with the most simple options ...
The shadow obtained by a slight shift / modification of the original figure

In the second image - a narrower and tidy version of this type of shadow.
(Example and source code can be downloaded here )
The shadow obtained in this way is applicable only if it extends no more than 1-3 pixels beyond the edge of the original figure, otherwise it starts to seem unnatural. Also, this method requires a rather cumbersome code - for any individual shape you will have to repeatedly check and pick up a shadow.
Iterative shadow
The shadow obtained by repeatedly drawing a modified shape. At the same time, in each subsequent iteration, the size of the figure increases (as one of the options) and the transparency decreases (or the color changes).
(Example and source code can be downloaded here )
This option is good because it does not limit you in the size of the shadow, but at the same time it is even more cumbersome and even more difficult to modify. Also, it is the most sub-optimal of all options in terms of drawing speed.
Gradient shadow
This option is based on the use of gradient fills around the edges of the figure.
In fact, we have 8 parts at the edges in the case of a rectangle in which a fill is required:

In 4 cases - LinearGradientPaint, in other 4 cases - RadialGradientPaint. The result is such a neat shadow:

(Example and source code can be downloaded here )
You can also vary the location of the gradient and get other interesting options, such as this:
(Example and source code can be downloaded here )
The advantage of this option is the speed and quality of rendering the shadow. However, the size of the code again suffers, as can be seen from the example.
Shadow obtained by modifying Stroke when drawing
To be more precise - the shape is drawn several times in a loop with variable color / transparency and Stroke, which allows you to create a semblance of a shadow:

(Example and source code can be downloaded here )
Since the shape of the shape does not affect the rendering of the shadow at all, this technique can be used for any, even the most cunning shapes:
(Example and source code can be downloaded here )
You can also easily render the shadow rendering itself into a separate independent method:
Shadow image
For images, we will not be able to get a shape for drawing a shadow in any previous ways, if it is not just rectangular, but for example round or completely amorphous. To create a shadow in this case, we will approach it a bit from the other side - with the help of AlphaComposite we will create a monochrome copy of the original image and use it as a shadow:
(Example and source code can be downloaded here )
Of course, in some cases, such a shadow would be suitable, but still, I would like to get more smoothed / gradient edges near the shadow itself. Filtering will help us with this problem. To be more precise, we use a special filter on the resulting “shadow” of the image for its more realistic look:
(Example and source code can be downloaded here )
Frankly, for this example, I took the finished version of the filter given here . But even without additional funds, you can “block” the shadow obtained in the first example rather quickly and easily and place it under the image.
By the way, this shadow can also be used for shapes, if you first apply them to a separate image, on the basis of which the filter will work. This can be quite applicable, for example, if the figure (s) do not change dynamically when the application is executed - it is enough to “shoot” it once and use the resulting image when drawing. But personally, I don’t really like this option due to its resource cost, so I excluded it from the list.
To use this tool, it is enough to set the form according to which “clipping” will occur:
There are many cases where this tool can be useful.
First of all, when drawing any component, a certain cut-off form is always pre-installed (usually it is a rectangle (bounds) of the component) - it does not allow the component to “crawl out” beyond its borders. It must be taken into account when setting its specific clipping region. Simply enough, you can do it like this:
If you go back to the chapter on creating shadows, and to be more precise to point 4, you can improve it by cutting off a part of the shadow:
Thus, it becomes possible to additionally transfer the desired clipping region to this method — the method itself will do the rest.
As some of the tests performed show, cropping non-rendered parts (for example, what goes beyond the screen) does not give any significant increase in the speed of work. However, this is understandable, because all calculations of the “what, where and how to draw” type and the drawing itself still work, even if the clip is set to 1 “available” pixel. So "manual" optimization will be much more useful in this case.
Clip is mostly created for the convenience of drawing complex parts and correctly limiting borders, so that neighboring components do not overlap each other.
By itself, the animation is fairly simple to understand and represents only the change in the drawn objects over time. But in practice there are much more questions and problems.
Depending on the type of animation, you may need a lot of additional code that is responsible for the “development of events” and reflects the changes. It is also important not to forget about optimization when redrawing - that is, it is desirable to redraw only those areas of the animated component in which changes have occurred. To do this, simply call the method repaint (new Rectangle (x, y, width, height)).
Consider a small example of the implementation of animation - we will create an effect of the flare running through the text of JLabel. To do this, we first need to decide how it will look to clearly represent what we need to implement.
Let's take as a basis for the “flare” a gradient-filled circle (from light gray in the center to the font color (black) on the edge). We also need a separate timer that is responsible for moving this circle from the beginning to the end of the component.
So, something like this will look like component rendering:
The image is necessary so that only those pixels on which text is present are occupied on it, otherwise with standard rendering, the entire filled rectangle with the specified gradient will fill the incoming Graphics AlphaComposite.SRC_IN method, since in addition to the text on the graph, the bottom panel will already be present (panels) background.
So, now it remains for us to implement the timer, which is triggered, for example, when the cursor enters the JLabel area:
As a result, we get here such a funny effect.
Of course, this example is only the tip of the iceberg. With good imagination, you can create a lot of interesting static or animated things.
Image edge smoothing
Suppose we need to crop the image in a certain form, but standard tools like clip'a when drawing will lead to a disastrous result. In this case, you should use AlphaComposite:
Using Custom Stroke
For a long time, I found a very interesting article on writing my own Stroke class.
In some cases, such a Stroke can greatly facilitate rendering.
Using blur / shadow filters
On the same resource, you can also find a very interesting article on blur.
It may be useful to those engaged in working with images.
Using GlyphVector
One of the "stressful" moments when working with graphics is text rendering, especially if this text is subject to change. For the correct positioning of the text will have to calculate its size and draw based on them.
For such calculations there are two means:
1. FontMetrics
It can be obtained directly from the Graphics2D instance (g2d.getFontMetrics ()).
It allows you to determine the different sizes of indents and heights of the set font.
2. GlyphVector
This option will be more useful in cases when it is necessary to center the text on the Y-coordinate, since it allows you to know exactly the dimensions of a certain text:
Creating your own tooltip manager
Swing has a lot of unsightly things that, however, can be easily smoothed out by changing the UI of the components or working with their layout. In some cases, things are not so simple.
The system of tooltips, implemented for all J-components, applies to such cases. Since all shown tooltips are displayed on a separate strictly rectangular popup (lightweight or heavyweight, depending on whether the tooltip falls within the window borders), we are limited to this area and form, which is very sad. And this is in the era of neat web interfaces and “rounded” shapes!
Of course, you can break the standard TooltipManager, find places for creating windows, set the desired shape for them through new features, but this is firstly - it still does not work on all operating systems, secondly, this is not a very good and optimal option.
Therefore, I had the idea of using GlassPane, which is present in all standard windows, as a display area for tooltips (and later on all kinds of internal windows).
The idea itself consists of several parts:
1. A separate manager ( TooltipManager.java ), who would, if necessary, create a GlassPane for a specific window, on which the tooltip opens and remembers it. Further creation of the tooltip would occur directly in the GlassPane.
2. GlassPane ( TooltipGlassPane.java ) is a transparent panel that skips any events and displays tooltips at the right moment.
3. The tooltip itself ( CustomTooltip.java ) is a standard J-component that displays any content in a nice design depending on its location on the GlassPane.
As a result, the displayed tooltips will look something like this:

You can look at the full implementation of this idea in the library described below. I did not give it in connection with a very large amount of code. The names of the classes that implement the idea have been noted above and correspond to the names of the classes in the project.
Editable list
In addition to adding their “bikes”, in some cases it is quite easy and elegant to use standard means to complement the functionality of existing components.
I think everyone knows the Jlist component, in which, however, there was initially no provision for editing. So now I will show you how to fix this flaw.
First, you need to create an interface that the editor will implement:
There remains the last point - the method of installing the editor in the list. We will carry it into a separate class and make it static for convenience:
That's it, now we can install the editor on any available list with a single line of code:

The main thing to remember is to change the methods of setting / getting the value to / from the editor, if you use non-String'ami in the model. To do this, just override the two methods (of course, depending on the complexity of the required editor) in WebStringListEditor.java - createEditor and getEditorValue.
 Since I devote a lot of time to working with Swing and graphics (especially recently), I had the idea of creating a separate library of UI, advanced components and utilities, which are often so necessary in various places in the code. And little by little this idea began to be realized as a separate library - WebLookAndFeel .
I took as a basis various techniques and developments, which I already wrote in this article, as well as some others, which I will describe later in detail.
By the way, considering that I have on my nose the development of the second version of our commercial product , this idea was once again spurred on by the need for similar functionality and capabilities.
Actually, the library includes most of the techniques described in this article, and many other interesting and useful things for working with graphics:
Also here are some technical "advantages" and features:
More information about it can be read on a separate site .
This library may seem like a kind of “bicycle” to many, and it may be possible for someone to assert that similar functionality is already present in other well-known libraries ...
To this I can say two things:
First , other libraries provide their components at best, with the possibility of styling for a particular UI (and often with crutches). The same library contains a set of additional components already stylized as a general view of WebLaF, which will expand over time.
Secondly, there are no different things that I added and are just going to add to the library anywhere. I have not found a single sensible implementation of ColorChooser in the open spaces of the network, which could be replaced by the terrible JColorChooser. There are no other implementations of JFileChooser. Of course, there is SWT, but to be honest with it there are other problems, difficulties and limitations, which I propose not to go deep yet and discard this option - all this is about Swing.
So, in order to “feel” the interface and components, I added a class to the library with a small demonstration of completed components:
(An example and source code can be downloaded here ) The
full source code and the distribution kit of the library are available on the website:
http://weblookandfeel.com/download/
At the moment, the library is not yet complete, and there are some minor flaws in LookAndFeel, “unsmoothed” places in the code, as well as some functionality and appearance remains very “controversial” and will be changed to the best side.
In connection with all the above, I will be glad to hear any comments, suggestions and constructive criticism on the topic :)
I hope that the source codes of WebLookAndFeel libraries presented above will be able to assist you in mastering the work with graphics. There are many more different interesting things (for example, implementations of UI classes for each of the standard Swing components, LookAndFeel organization, global managers, etc.) than I covered with this article, so I strongly advise you to study them (if you have time and desire , of course).
Also, I apologize for a fairly large break in the publication of articles - the collection of materials, alas, took much longer than I expected, not to mention bringing the WebLaF library to a more or less usable form.
The next article will most likely be devoted to writing your own LookAndFeel (with examples and in pictures, of course), as well as some features of the UI of individual J-components.
(including those given in the article)
MVC
http://lib.juga.ru/article/articleview/163/1/68/
Shapes
http://java.sun.com/developer/technicalArticles/GUI/java2d/java2dpart1.html
http: //www.datadisk. co.uk/html_docs/java/graphics_java2d.htm
Extended Shapes
http://java-sl.com/shapes.html
http://geosoft.no/graphics/
http://designervista.com/shapes/index.php
http : //www.jfree.org/jcommon/
Composite
http://download.oracle.com/javase/tutorial/2d/advanced/compositing.html
BasicStroke
http://www.projava.net/Glava9/Index13.htm
Extended Strokes
http://www.jhlabs.com/java/java2d/strokes/
Blurring
http://www.jhlabs.com/ip/blurring.html
Libraries used in WebLookAndFeel:
java-image-scaling
http://code.google.com/p/java-image-scaling/
TableLayout
http://java.net/projects/tablelayout
Data Tips
Unfortunately at this time there are no resources available for this library
Jericho HTML Parser
http://jericho.htmlparser.net/docs/index.html
and icon sets:
Fugue icons
http://code.google.com/p/fugue-icons-src/
Fatcow icons
http: //www.fatcow. com / free-icons
Project Source Code Highlighter for readable code highlighting:
http://virtser.net/blog/post/source-code-highlighter.aspx
and hosting images for image storage:
http://hostingkartinok.com/
Upd1: a little tweak and links Illustrations
Upd2: Updated library distributions with fixes for various inaccuracies and problems.
Upd3: Fixed inaccuracies and image curves in the article.
Today, I will again try to draw your attention to some aspects and subtleties of working with graphics in Java. I have already briefly described in the previous article some of the available tools and methods for creating components and UI, but this is only the tip of the iceberg. That is why I want to pay special attention (and the article) to working with graphics. Naturally referring to Graphics2D - Java 3D is a large separate topic (maybe it will be discussed further in the future, but not today).So, from the previous article you should already know some basics of building components - we will try to expand this knowledge.
')
To begin with, if you consider any component from the MVC point of view, it consists of 3 parts:
Model - a model that stores data on the state of a component and on the basis of which the appearance is built
View - directly visual display of the component
Controller - responsible for controlling the component (events from the keyboard, mouse, and other input devices)
In fact, all standard Swing components are built on the MVC pattern. For example, in JButton, ButtonModel is responsible for the behavior and state of the button (Controller and Model), and ButtonUI, in turn, for its external representation (View). As a result, the share of the JButton class itself is practically nothing left. It will be mostly about the implementation of the external representation of the components (View), and if you specify - about Graphics2D, on the basis of which, in fact, the entire interface is drawn.
I will not argue that there is a lot of different material on this topic, but it is so fragmented and scattered across the expanses of the network that it seems to me that it is not superfluous to collect everything in one place and consistently state.
Meet on clothes
No matter what anyone says, the interface has always played, plays and will play an important role in the success of any application. Depending on the audience of the application, the role of the interface may be secondary or, on the contrary, paramount and most important. For example, in the case of games or various editors, the interface and usability decide everything (in part because these are applications that you use often enough or for a long time).So, today we will analyze the standard tools provided by Graphics2D, as well as some techniques and tricks for rendering components of any complexity.
It is clear that without sensible ideas, no means will help to do anything, but here I, alas, is powerless. Probably the designer / UX-specialist will be able to help you with this if everything is really bad with fantasy. Honestly, it is rather difficult to “squeeze out” what a new component will look like. It happens that it is even more complicated and takes more time than directly writing working code and debugging it.
In any case, let's get down to business ...
Small table of contents
- Figures
- Rendering hints
- Fill
- Combination when drawing
- Stroke
- Shadows
- Correct clipping
- Animation
- Few tricks
- WebLookAndFeel
- Finally...
- Resources
Figures
Without figures - nowhere. For any component, any simplest thing, you need to draw the outlines of the parts. Doing it manually pixel by pixel is not a pleasant task. Especially if you need to add anti-aliasing to drawing or any other effects. Thank God you don’t need to do it manually - all the standard shapes (Line2D, Rectangle2D, RoundRectangle2D, Ellipse2D, Arc2D, etc.) that you may need to draw are already implemented - all that remains is to specify their coordinates and sizes for drawing in a certain place.In addition to standard shapes, there are also specific ones (such as the GeneralPath) that allow you to quickly create your own shapes.
There are also some individual projects that have various specific forms:
http://java-sl.com/shapes.html
http://geosoft.no/graphics/
http://designervista.com/shapes/index.php
http://www.jfree.org/jcommon/
There is no point in describing each individual figure — you can read about it in detail here or here (there are also examples of use in both descriptions).
I would just like to clarify here a little bit about how the figure is drawn and what influences the final result. Suppose you have a certain shape (shape shape):
- You can use 2 different methods - g2d.fill (shape) and g2d.draw (shape). Fill - Fills all pixels inside the shape, draw - draws the outline of the shape.
- The installed inheritor of the Paint class (g2d.setPaint (Paint)) is responsible for the color or colors in which the drawing takes place - it provides the paint color for every single pixel of the area. The simplest version of this mode is any color (Color) - it simply returns the same color for each pixel. More complex examples are, for example, gradient and texture fills (GradientPaint, TexturePaint, etc.).
- The thickness, frequency (or dash) and the type of merge at the corners and edges of the border of the drawn outline of the shape are affected by the set Stroke (g2d.setStroke (Stroke)).
- The smoothing, rendering quality of shapes and text, as well as other aspects are affected by various parameters given in the chapter below.
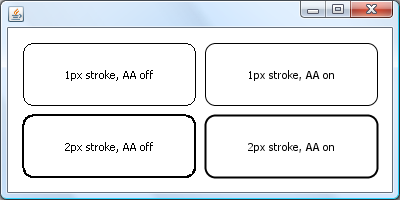
Rendering hints
Anti-aliasing is included in the set of standard tools that come bundled with Graphics2D:g2d.setRenderingHint (RenderingHints.KEY_ANTIALIASING, RenderingHints.VALUE_ANTIALIAS_ON);
This is enough to enable smoothing of all the figures drawn in the future.
The main thing to remember is to turn off anti-aliasing after your operations, if you don’t want everything that is rendered after, to also use anti-aliasing - for example, if you implement your button background drawing and don’t want to cause anti-aliasing of the default text.
The value of this parameter (RenderingHints.KEY_ANTIALIASING) also affects the smoothing of the text, if it has the default selection.
It is possible to separately enable / disable the need for text smoothing:
g2d.setRenderingHint (RenderingHints.KEY_TEXT_ANTIALIASING, RenderingHints.VALUE_TEXT_ANTIALIAS_ON);
When setting this parameter to any other than VALUE_TEXT_ANTIALIAS_DEFAULT, it will ignore the RenderingHints.KEY_ANTIALIASING value.
Here is a small and simple example showing the differences between drawing with and without anti-aliasing:
(Example and source code can be downloaded here )
If you look closely - you can also notice many other available settings in RenderingHints:
KEY_ANTIALIASING - setting smoothing shapes (and text)
KEY_RENDERING - setting quality / speed of rendering
KEY_DITHERING - mixing colors with limited palette
KEY_TEXT_ANTIALIASING - text smoothing setting
KEY_TEXT_LCD_CONTRAST - text contrast (from 100 to 250) when drawing using special text smoothing
KEY_FRACTIONALMETRICS - setting the "accuracy" of drawing text characters
KEY_INTERPOLATION - setting that is responsible for modifying the pixels of the images when drawing (for example, when you rotate the image)
KEY_ALPHA_INTERPOLATION - setting the quality / speed of processing alpha values
KEY_COLOR_RENDERING - set the quality / speed of color processing
KEY_STROKE_CONTROL - setting the ability to modify the geometry of the figures to improve the final view
Most of these settings usually remain in the “default” state. However, they can be very useful in some specific cases.
For example, if you set KEY_INTERPOLATION to VALUE_INTERPOLATION_BILINEAR, you can avoid loss of image quality when modifying it (rotating / compressing / shifting, etc.) or improving the contrast of text on your background by changing KEY_TEXT_LCD_CONTRAST without affecting the text rendering code.
In any case, you should carefully use these settings and avoid their “going beyond” your drawing method, because, for example, the same antialiasing included in the JTextField will smooth the text and modify it (and probably shift).
Fill
There are several available heirs to the Paint class that allow you to paint / fill the shapes in different ways:- Color - the easiest, allows you to draw or fill a shape with one color.
- TexturePaint - allows you to use the existing BufferedImage for filling / drawing as a background image.
- GradientPaint is a simple linear gradient from one point to another with starting and ending colors.
- LinearGradientPaint - a more complex linear gradient from one point to another with any number of intermediate colors with redefinable distances between them.
- RadialGradientPaint - circular gradient with indication of the center of the circle and radius, as well as colors and distances between them, similarly to LinearGradientPaint.
For clarity, a small example using 3 different gradients to fill three equal parts on a component:
(Example and source code can be downloaded here )
By the way, probably not everyone knows that in any fillings / drawings, when specifying a color, you can also indicate its transparency (alpha).
For example, new Color (255, 255, 255, 128) is a white color that is transparent to 50%. Alpha in this case is 128. It can vary from 0 to 255. 0 is a completely transparent color, 255 is completely opaque (used by default).
Combination when drawing
So, we are systematically moving on to more complicated things ...Combining (in other words, Composite) allows you to specify various “modes” of combining new drawing shapes / images with pixels already present on the canvas.
I was able to find the most successful illustrations for different “modes” of combining, as well as an example of their real influence on the figures drawn here . There is also a detailed description of each of the "modes".
In practice, personally, I most often use the AlphaComposite.SRC_OVER variant and the transparency indication to draw further elements in a certain transparency over the things already drawn. There are also quite interesting examples of the use of certain modes when working with images, but more on that later.
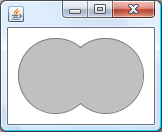
In addition to Composite, it is also possible to create your own forms using standard and combining them with various geometric operations. A small example on this topic:
(Example and source code can be downloaded here )
To create this shape, it took only 2 lines:
Area area = new Area ( new Ellipse2D.Double ( 0, 0, 75, 75 ) );
area.add ( new Area ( new Ellipse2D.Double ( 0, 50, 75, 75 ) ) );
What is most interesting is that the border of the new figure does not include the internal parts of the borders of the ellipses (those that fall inside the opposite of the ellipse).
In general, the Area can be used for many different things: it can not only add new shapes to existing shapes, but also create an intersection area or exclude certain shapes from others, it is possible to learn from it the common boundaries of the shape (bounds). Also with its help, you can quickly and easily create complex shapes from any other simple shapes available.
If you need a specific shape that you use often enough, it is probably best to create a heir to the Shape class and implement the necessary shape in it. In the future, this will reduce both time costs and the size of the code itself.
Stroke
... or as suggested by TheShock " Stroke ."In fact, Stroke provides the ability to set the border style drawn by any call to the draw method of the graphic.
In the standard JDK, there is only 1 implementation of the Stroke interface - BasicStroke. It allows you to set the width of the line, how the lines at the corners are combined and how they look on the kots, and also to create dashed lines.
To set Stroke in code, do the following:
g2d.setStroke ( new BasicStroke ( 2f ) );By the way, do not worry that the width and some other parameters can be set to float (although the pixels should be integers) - non-integer numbers will only create “smeared” lines / outlines when drawing, which in some cases may even be useful.
More information about the features of BasicStroke can be found, for example, here .
Although the JDK includes only one implementation of Stroke, there are other projects and examples describing the real possibilities of this tool, but more on that later.
Shadows
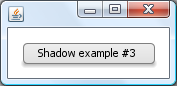
There is no standard implementation of shadows in Java2D, but there are many ways to achieve the “effect” of the shadow — I will tell you about them in this chapter.Perhaps we start with the most simple options ...
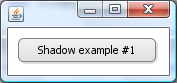
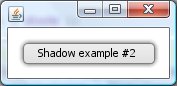
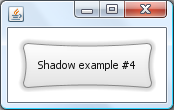
The shadow obtained by a slight shift / modification of the original figure
In the second image - a narrower and tidy version of this type of shadow.
(Example and source code can be downloaded here )
The shadow obtained in this way is applicable only if it extends no more than 1-3 pixels beyond the edge of the original figure, otherwise it starts to seem unnatural. Also, this method requires a rather cumbersome code - for any individual shape you will have to repeatedly check and pick up a shadow.
Iterative shadow
The shadow obtained by repeatedly drawing a modified shape. At the same time, in each subsequent iteration, the size of the figure increases (as one of the options) and the transparency decreases (or the color changes).
(Example and source code can be downloaded here )
This option is good because it does not limit you in the size of the shadow, but at the same time it is even more cumbersome and even more difficult to modify. Also, it is the most sub-optimal of all options in terms of drawing speed.
Gradient shadow
This option is based on the use of gradient fills around the edges of the figure.
In fact, we have 8 parts at the edges in the case of a rectangle in which a fill is required:
In 4 cases - LinearGradientPaint, in other 4 cases - RadialGradientPaint. The result is such a neat shadow:
(Example and source code can be downloaded here )
You can also vary the location of the gradient and get other interesting options, such as this:
(Example and source code can be downloaded here )
The advantage of this option is the speed and quality of rendering the shadow. However, the size of the code again suffers, as can be seen from the example.
Shadow obtained by modifying Stroke when drawing
To be more precise - the shape is drawn several times in a loop with variable color / transparency and Stroke, which allows you to create a semblance of a shadow:
(Example and source code can be downloaded here )
Since the shape of the shape does not affect the rendering of the shadow at all, this technique can be used for any, even the most cunning shapes:
(Example and source code can be downloaded here )
You can also easily render the shadow rendering itself into a separate independent method:
private void drawShade ( Graphics2D g2d, RoundRectangle2D rr, Color shadeColor, int width )
{
Composite comp = g2d.getComposite ();
Stroke old = g2d.getStroke ();
width = width * 2;
for ( int i = width; i >= 2; i -= 2 )
{
float opacity = ( float ) ( width - i ) / ( width - 1 );
g2d.setColor ( shadeColor );
g2d.setComposite ( AlphaComposite.getInstance ( AlphaComposite.SRC_OVER, opacity ) );
g2d.setStroke ( new BasicStroke ( i ) );
g2d.draw ( rr );
}
g2d.setStroke ( old );
g2d.setComposite ( comp );
}
Shadow image
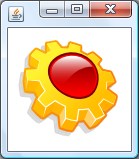
For images, we will not be able to get a shape for drawing a shadow in any previous ways, if it is not just rectangular, but for example round or completely amorphous. To create a shadow in this case, we will approach it a bit from the other side - with the help of AlphaComposite we will create a monochrome copy of the original image and use it as a shadow:
(Example and source code can be downloaded here )
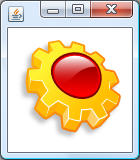
Of course, in some cases, such a shadow would be suitable, but still, I would like to get more smoothed / gradient edges near the shadow itself. Filtering will help us with this problem. To be more precise, we use a special filter on the resulting “shadow” of the image for its more realistic look:
(Example and source code can be downloaded here )
Frankly, for this example, I took the finished version of the filter given here . But even without additional funds, you can “block” the shadow obtained in the first example rather quickly and easily and place it under the image.
By the way, this shadow can also be used for shapes, if you first apply them to a separate image, on the basis of which the filter will work. This can be quite applicable, for example, if the figure (s) do not change dynamically when the application is executed - it is enough to “shoot” it once and use the resulting image when drawing. But personally, I don’t really like this option due to its resource cost, so I excluded it from the list.
Correct clipping
I would like to tell you about one more important aspect that is necessary when working with graphics and creating “correct” components - working with a clip, or cutting off unwanted parts when drawing.To use this tool, it is enough to set the form according to which “clipping” will occur:
g.setClip ( x, y, width, height );
g.setClip ( new Rectangle ( x, y, width, height ) );
g.setClip ( new Rectangle2D.Double ( x, y, width, height ) );There are many cases where this tool can be useful.
First of all, when drawing any component, a certain cut-off form is always pre-installed (usually it is a rectangle (bounds) of the component) - it does not allow the component to “crawl out” beyond its borders. It must be taken into account when setting its specific clipping region. Simply enough, you can do it like this:
Shape oldClip = g.getClip ();
Shape newClip = new Rectangle ( x, y, width, height );
Area clip = new Area ( oldClip );
clip.intersect ( new Area ( newClip ) );
g.setClip ( clip );If you go back to the chapter on creating shadows, and to be more precise to point 4, you can improve it by cutting off a part of the shadow:
public static void drawShade ( Graphics2D g2d, Shape shape, Color shadeColor, int width,
Shape clip, boolean round )
{
Shape oldClip = g2d.getClip ();
if ( clip != null )
{
Area finalClip = new Area ( clip );
finalClip.intersect ( new Area ( oldClip ) );
g2d.setClip ( finalClip );
}

Composite comp = g2d.getComposite ();
float currentComposite = 1f;
if ( comp instanceof AlphaComposite )
{
currentComposite = ( ( AlphaComposite ) comp ).getAlpha ();
}

Stroke old = g2d.getStroke ();
width = width * 2;
for ( int i = width; i >= 2; i -= 2 )
{
float opacity = ( float ) ( width - i ) / ( width - 1 );
g2d.setColor ( shadeColor );
g2d.setComposite ( AlphaComposite
.getInstance ( AlphaComposite.SRC_OVER, opacity * currentComposite ) );
g2d.setStroke (
new BasicStroke ( i, round ? BasicStroke.CAP_ROUND : BasicStroke.CAP_BUTT,
BasicStroke.JOIN_ROUND ) );
g2d.draw ( shape );
}
g2d.setStroke ( old );
g2d.setComposite ( comp );

if ( clip != null )
{
g2d.setClip ( oldClip );
}
}
Thus, it becomes possible to additionally transfer the desired clipping region to this method — the method itself will do the rest.
As some of the tests performed show, cropping non-rendered parts (for example, what goes beyond the screen) does not give any significant increase in the speed of work. However, this is understandable, because all calculations of the “what, where and how to draw” type and the drawing itself still work, even if the clip is set to 1 “available” pixel. So "manual" optimization will be much more useful in this case.
Clip is mostly created for the convenience of drawing complex parts and correctly limiting borders, so that neighboring components do not overlap each other.
Animation
So, it's time to combine some of the knowledge gained and do something more interesting.By itself, the animation is fairly simple to understand and represents only the change in the drawn objects over time. But in practice there are much more questions and problems.
Depending on the type of animation, you may need a lot of additional code that is responsible for the “development of events” and reflects the changes. It is also important not to forget about optimization when redrawing - that is, it is desirable to redraw only those areas of the animated component in which changes have occurred. To do this, simply call the method repaint (new Rectangle (x, y, width, height)).
Consider a small example of the implementation of animation - we will create an effect of the flare running through the text of JLabel. To do this, we first need to decide how it will look to clearly represent what we need to implement.
Let's take as a basis for the “flare” a gradient-filled circle (from light gray in the center to the font color (black) on the edge). We also need a separate timer that is responsible for moving this circle from the beginning to the end of the component.
So, something like this will look like component rendering:
private boolean animating = false ;
private int animationX = 0;
private int animationLength = 140;

private float [] fractions = { 0f, 1f };
private Color[] colors = new Color[]{ new Color ( 200, 200, 200 ), new Color ( 0, 0, 0 ) };

protected void paintComponent ( Graphics g )
{
// ,
BufferedImage bi =
new BufferedImage ( getWidth (), getHeight (), BufferedImage.TYPE_INT_ARGB );
Graphics2D g2d = bi.createGraphics ();
g2d.setFont ( g.getFont () );

//
super.paintComponent ( g2d );

//
if ( animating )
{
g2d.setRenderingHint ( RenderingHints.KEY_ANTIALIASING,
RenderingHints.VALUE_ANTIALIAS_ON );

g2d.setComposite ( AlphaComposite.getInstance ( AlphaComposite.SRC_IN ) );
g2d.setPaint ( new RadialGradientPaint ( animationX - animationLength / 2,
getHeight () / 2, animationLength / 2, fractions, colors ) );
g2d.fillRect ( animationX - animationLength, 0, animationLength, getHeight () );
}

//
g2d.dispose ();
g.drawImage ( bi, 0, 0, null );
}
The image is necessary so that only those pixels on which text is present are occupied on it, otherwise with standard rendering, the entire filled rectangle with the specified gradient will fill the incoming Graphics AlphaComposite.SRC_IN method, since in addition to the text on the graph, the bottom panel will already be present (panels) background.
So, now it remains for us to implement the timer, which is triggered, for example, when the cursor enters the JLabel area:
private static class AnimatedLabel extends JLabel
{
public AnimatedLabel ( String text )
{
super ( text );
setupSettings ();
}

private void setupSettings ()
{
//
setOpaque ( false );
//
setFont ( getFont ().deriveFont ( Font .BOLD ).deriveFont ( 30f ) );

// ,
addMouseListener ( new MouseAdapter()
{
public void mouseEntered ( MouseEvent e )
{
startAnimation ();
}
} );
}

private Timer animator = null ;
private boolean animating = false ;
private int animationX = 0;
private int animationLength = 140;

private float [] fractions = { 0f, 1f };
private Color[] colors = new Color[]{ new Color ( 200, 200, 200 ), new Color ( 0, 0, 0 ) };

private void startAnimation ()
{
// ,
if ( animator != null && animator.isRunning () )
{
return ;
}

//
animating = true ;
animationX = 0;
animator = new Timer ( 1000 / 48, new ActionListener()
{
public void actionPerformed ( ActionEvent e )
{
//
if ( animationX < getWidth () + animationLength )
{
animationX += 10;
AnimatedButton. this .repaint ();
}
else
{
animator.stop ();
}
}
} );
animator.start ();
}

protected void paintComponent ( Graphics g )
{
//
}
}As a result, we get here such a funny effect.
Of course, this example is only the tip of the iceberg. With good imagination, you can create a lot of interesting static or animated things.
Few tricks
Sometimes it's not enough just to know the standard tools to do everything you need. It is necessary to invent various "cunning" things. I would like to share with you what I could find on the net and the “invented bikes” with you in several separate examples. So let's get down to business ...Image edge smoothing
Suppose we need to crop the image in a certain form, but standard tools like clip'a when drawing will lead to a disastrous result. In this case, you should use AlphaComposite:
ImageIcon icon = new ImageIcon ( iconPath );

BufferedImage roundedImage = new BufferedImage ( icon.getIconWidth (), icon.getIconHeight (),
BufferedImage.TYPE_INT_ARGB );
Graphics2D g2d = roundedImage.createGraphics ();
g2d.setRenderingHint ( RenderingHints.KEY_ANTIALIASING, RenderingHints.VALUE_ANTIALIAS_ON );
g2d.setPaint ( Color.WHITE );
g2d.fillRoundRect ( 0, 0, icon.getIconWidth (), icon.getIconHeight (), 10, 10 );
g2d.setComposite ( AlphaComposite.getInstance ( AlphaComposite.SRC_IN ) );
g2d.drawImage ( icon.getImage (), 0, 0, null );
g2d.dispose ();

ImageIcon roundedIcon = new ImageIcon ( roundedImage );Using Custom Stroke
For a long time, I found a very interesting article on writing my own Stroke class.
In some cases, such a Stroke can greatly facilitate rendering.
Using blur / shadow filters
On the same resource, you can also find a very interesting article on blur.
It may be useful to those engaged in working with images.
Using GlyphVector
One of the "stressful" moments when working with graphics is text rendering, especially if this text is subject to change. For the correct positioning of the text will have to calculate its size and draw based on them.
For such calculations there are two means:
1. FontMetrics
It can be obtained directly from the Graphics2D instance (g2d.getFontMetrics ()).
It allows you to determine the different sizes of indents and heights of the set font.
2. GlyphVector
This option will be more useful in cases when it is necessary to center the text on the Y-coordinate, since it allows you to know exactly the dimensions of a certain text:
FontMetrics fm = g2d.getFontMetrics ();
GlyphVector gv = g2d.getFont ().createGlyphVector ( fm.getFontRenderContext (), "Text" );
Rectangle visualBounds = gv.getVisualBounds ().getBounds ();Shape textOutline = gv.getOutline ();Creating your own tooltip manager
Swing has a lot of unsightly things that, however, can be easily smoothed out by changing the UI of the components or working with their layout. In some cases, things are not so simple.
The system of tooltips, implemented for all J-components, applies to such cases. Since all shown tooltips are displayed on a separate strictly rectangular popup (lightweight or heavyweight, depending on whether the tooltip falls within the window borders), we are limited to this area and form, which is very sad. And this is in the era of neat web interfaces and “rounded” shapes!
Of course, you can break the standard TooltipManager, find places for creating windows, set the desired shape for them through new features, but this is firstly - it still does not work on all operating systems, secondly, this is not a very good and optimal option.
Therefore, I had the idea of using GlassPane, which is present in all standard windows, as a display area for tooltips (and later on all kinds of internal windows).
The idea itself consists of several parts:
1. A separate manager ( TooltipManager.java ), who would, if necessary, create a GlassPane for a specific window, on which the tooltip opens and remembers it. Further creation of the tooltip would occur directly in the GlassPane.
2. GlassPane ( TooltipGlassPane.java ) is a transparent panel that skips any events and displays tooltips at the right moment.
3. The tooltip itself ( CustomTooltip.java ) is a standard J-component that displays any content in a nice design depending on its location on the GlassPane.
As a result, the displayed tooltips will look something like this:
You can look at the full implementation of this idea in the library described below. I did not give it in connection with a very large amount of code. The names of the classes that implement the idea have been noted above and correspond to the names of the classes in the project.
Editable list
In addition to adding their “bikes”, in some cases it is quite easy and elegant to use standard means to complement the functionality of existing components.
I think everyone knows the Jlist component, in which, however, there was initially no provision for editing. So now I will show you how to fix this flaw.
First, you need to create an interface that the editor will implement:
public interface ListEditor
{
public void installEditor ( JList list, Runnable startEdit );

public boolean isCellEditable ( JList list, int index, Object value );

public JComponent createEditor ( JList list, int index, Object value );

public Rectangle getEditorBounds ( JList list, int index, Object value , Rectangle cellBounds );

public void setupEditorActions ( JList list, Object value , Runnable cancelEdit,
Runnable finishEdit );

public Object getEditorValue ( JList list, int index, Object oldValue );

public boolean updateModelValue ( JList list, int index, Object value , boolean updateSelection );

public void editStarted ( JList list, int index );

public void editFinished ( JList list, int index, Object oldValue, Object newValue );

public void editCancelled ( JList list, int index );
}public abstract class AbstractListEditor implements ListEditor
{
protected int editedCell = -1;
public void installEditor ( final JList list, final Runnable startEdit )
{
// ,
list.addMouseListener ( new MouseAdapter()
{
public void mouseClicked ( MouseEvent e )
{
if ( e.getClickCount () == 2 && SwingUtilities.isLeftMouseButton ( e ) )
{
startEdit.run ();
}
}
} );
list.addKeyListener ( new KeyAdapter()
{
public void keyReleased ( KeyEvent e )
{
if ( e.getKeyCode () == KeyEvent.VK_F2 )
{
startEdit.run ();
}
}
} );
}
public boolean isCellEditable ( JList list, int index, Object value )
{
return true ;
}
public Rectangle getEditorBounds ( JList list, int index, Object value , Rectangle cellBounds )
{
//
return new Rectangle ( 0, 0, cellBounds.width, cellBounds.height + 1 );
}
public boolean updateModelValue ( JList list, int index, Object value , boolean updateSelection )
{
//
ListModel model = list.getModel ();
if ( model instanceof DefaultListModel )
{
( ( DefaultListModel ) model ).setElementAt ( value , index );
list.repaint ();
return true ;
}
else if ( model instanceof AbstractListModel )
{
final Object[] values = new Object[ model.getSize () ];
for ( int i = 0; i < model.getSize (); i++ )
{
if ( editedCell != i )
{
values[ i ] = model.getElementAt ( i );
}
else
{
values[ i ] = value ;
}
}
list.setModel ( new AbstractListModel()
{
public int getSize ()
{
return values.length;
}
public Object getElementAt ( int index )
{
return values[ index ];
}
} );
return true ;
}
else
{
return false ;
}
}
public void editStarted ( JList list, int index )
{
//
editedCell = index;
}
public void editFinished ( JList list, int index, Object oldValue, Object newValue )
{
//
editedCell = -1;
}
public void editCancelled ( JList list, int index )
{
//
editedCell = -1;
}
public boolean isEditing ()
{
//
return editedCell != -1;
}
}There remains the last point - the method of installing the editor in the list. We will carry it into a separate class and make it static for convenience:
public class ListUtils
{
public static void installEditor ( final JList list, final ListEditor listEditor )
{
// ,
final Runnable startEdit = new Runnable()
{
public void run ()
{
//
final int index = list.getSelectedIndex ();
if ( list.getSelectedIndices ().length != 1 || index == -1 )
{
return ;
}

//
final Object value = list.getModel ().getElementAt ( index );
if ( !listEditor.isCellEditable ( list, index, value ) )
{
return ;
}

//
final JComponent editor = listEditor.createEditor ( list, index, value );

//
editor.setBounds ( computeCellEditorBounds ( index, value , list, listEditor ) );
list.addComponentListener ( new ComponentAdapter()
{
public void componentResized ( ComponentEvent e )
{
checkEditorBounds ();
}

private void checkEditorBounds ()
{
Rectangle newBounds =
computeCellEditorBounds ( index, value , list, listEditor );
if ( newBounds != null && !newBounds.equals ( editor.getBounds () ) )
{
editor.setBounds ( newBounds );
list.revalidate ();
list.repaint ();
}
}
} );

//
list.add ( editor );
list.revalidate ();
list.repaint ();

//
if ( editor.isFocusable () )
{
editor.requestFocus ();
editor.requestFocusInWindow ();
}

//
final Runnable cancelEdit = new Runnable()
{
public void run ()
{
list.remove ( editor );
list.revalidate ();
list.repaint ();

listEditor.editCancelled ( list, index );
}
};
final Runnable finishEdit = new Runnable()
{
public void run ()
{
Object newValue = listEditor.getEditorValue ( list, index, value );
boolean changed =
listEditor.updateModelValue ( list, index, newValue, true );

list.remove ( editor );
list.revalidate ();
list.repaint ();

if ( changed )
{
listEditor.editFinished ( list, index, value , newValue );
}
else
{
listEditor.editCancelled ( list, index );
}
}
};
listEditor.setupEditorActions ( list, value , cancelEdit, finishEdit );

//
listEditor.editStarted ( list, index );
}
};
listEditor.installEditor ( list, startEdit );
}

private static Rectangle computeCellEditorBounds ( int index, Object value , JList list,
ListEditor listEditor )
{
//
Rectangle cellBounds = list.getCellBounds ( index, index );
if ( cellBounds != null )
{
Rectangle editorBounds = listEditor.getEditorBounds ( list, index, value , cellBounds );
return new Rectangle ( cellBounds.x + editorBounds.x, cellBounds.y + editorBounds.y,
editorBounds.width, editorBounds.height );
}
else
{
return null ;
}
}
}
That's it, now we can install the editor on any available list with a single line of code:
The main thing to remember is to change the methods of setting / getting the value to / from the editor, if you use non-String'ami in the model. To do this, just override the two methods (of course, depending on the complexity of the required editor) in WebStringListEditor.java - createEditor and getEditorValue.
Web Look And Feel
Since I devote a lot of time to working with Swing and graphics (especially recently), I had the idea of creating a separate library of UI, advanced components and utilities, which are often so necessary in various places in the code. And little by little this idea began to be realized as a separate library - WebLookAndFeel .I took as a basis various techniques and developments, which I already wrote in this article, as well as some others, which I will describe later in detail.
By the way, considering that I have on my nose the development of the second version of our commercial product , this idea was once again spurred on by the need for similar functionality and capabilities.
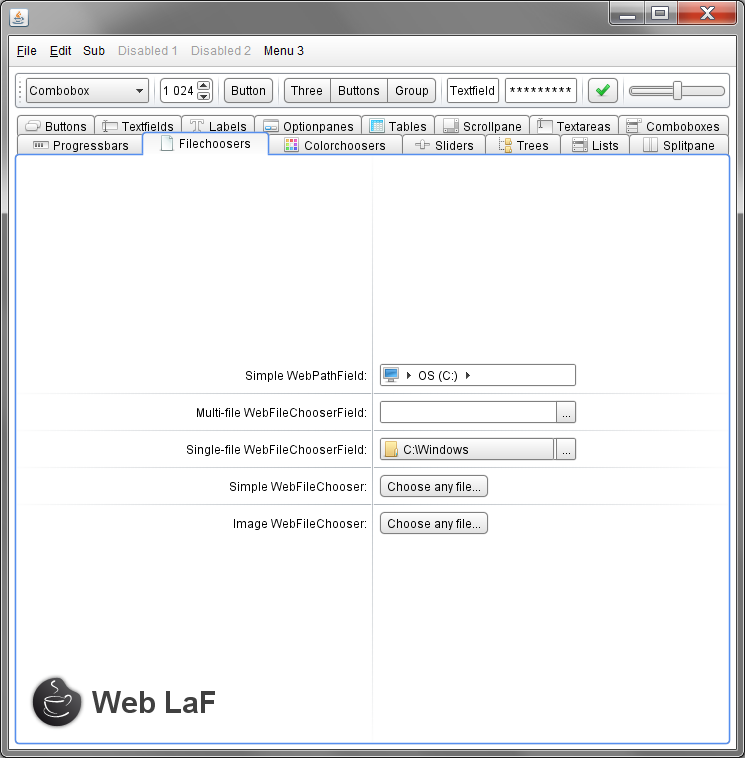
Actually, the library includes most of the techniques described in this article, and many other interesting and useful things for working with graphics:
- Web LaF itself is a separate full-fledged cross-platform pure-java LaF
- A set of additional components (also styled as Web LaF) - FileChooser / ColorChooser / Gallery / Calendar and many others (lots of them!)
- A set of utility classes for: working with graphics, files, text, images, and many other aspects (for example, to simplify downloading files from a URL, reading images, various operations with them, etc.)
Also here are some technical "advantages" and features:
- Fully cross-platform and easily customizable LookAndFeel (directly tested on Windows XP / Vista / 7, Mac OS X 10.6.7, Ubuntu 9/11)
- Minimum memory requirements (it will be easy to run on -Xms16m -Xmx16m and will perform even heavy operations with images, not to mention the work of LaF and various utilities)
- Single-jar bundle - that is, everything you need is included in a single jar library that works for all operating systems
- JDK 1.6 update 20 and newer is required (I can’t say anything about JDK 7 yet - I have not tried it, but in theory no deprecated things and test features are used in the code)
More information about it can be read on a separate site .
This library may seem like a kind of “bicycle” to many, and it may be possible for someone to assert that similar functionality is already present in other well-known libraries ...
To this I can say two things:
First , other libraries provide their components at best, with the possibility of styling for a particular UI (and often with crutches). The same library contains a set of additional components already stylized as a general view of WebLaF, which will expand over time.
Secondly, there are no different things that I added and are just going to add to the library anywhere. I have not found a single sensible implementation of ColorChooser in the open spaces of the network, which could be replaced by the terrible JColorChooser. There are no other implementations of JFileChooser. Of course, there is SWT, but to be honest with it there are other problems, difficulties and limitations, which I propose not to go deep yet and discard this option - all this is about Swing.
So, in order to “feel” the interface and components, I added a class to the library with a small demonstration of completed components:
(An example and source code can be downloaded here ) The
full source code and the distribution kit of the library are available on the website:
http://weblookandfeel.com/download/
At the moment, the library is not yet complete, and there are some minor flaws in LookAndFeel, “unsmoothed” places in the code, as well as some functionality and appearance remains very “controversial” and will be changed to the best side.
In connection with all the above, I will be glad to hear any comments, suggestions and constructive criticism on the topic :)
Finally...
I hope now your knowledge in terms of graphics in Java a little structured and become more tangible and applicable in practice.I hope that the source codes of WebLookAndFeel libraries presented above will be able to assist you in mastering the work with graphics. There are many more different interesting things (for example, implementations of UI classes for each of the standard Swing components, LookAndFeel organization, global managers, etc.) than I covered with this article, so I strongly advise you to study them (if you have time and desire , of course).
Also, I apologize for a fairly large break in the publication of articles - the collection of materials, alas, took much longer than I expected, not to mention bringing the WebLaF library to a more or less usable form.
The next article will most likely be devoted to writing your own LookAndFeel (with examples and in pictures, of course), as well as some features of the UI of individual J-components.
Resources
Various third-party resources on the topic:(including those given in the article)
MVC
http://lib.juga.ru/article/articleview/163/1/68/
Shapes
http://java.sun.com/developer/technicalArticles/GUI/java2d/java2dpart1.html
http: //www.datadisk. co.uk/html_docs/java/graphics_java2d.htm
Extended Shapes
http://java-sl.com/shapes.html
http://geosoft.no/graphics/
http://designervista.com/shapes/index.php
http : //www.jfree.org/jcommon/
Composite
http://download.oracle.com/javase/tutorial/2d/advanced/compositing.html
BasicStroke
http://www.projava.net/Glava9/Index13.htm
Extended Strokes
http://www.jhlabs.com/java/java2d/strokes/
Blurring
http://www.jhlabs.com/ip/blurring.html
Libraries used in WebLookAndFeel:
java-image-scaling
http://code.google.com/p/java-image-scaling/
TableLayout
http://java.net/projects/tablelayout
Data Tips
Unfortunately at this time there are no resources available for this library
Jericho HTML Parser
http://jericho.htmlparser.net/docs/index.html
and icon sets:
Fugue icons
http://code.google.com/p/fugue-icons-src/
Fatcow icons
http: //www.fatcow. com / free-icons
Special thanks to...
Project Source Code Highlighter for readable code highlighting:
http://virtser.net/blog/post/source-code-highlighter.aspx
and hosting images for image storage:
http://hostingkartinok.com/
Upd1: a little tweak and links Illustrations
Upd2: Updated library distributions with fixes for various inaccuracies and problems.
Upd3: Fixed inaccuracies and image curves in the article.
Source: https://habr.com/ru/post/127518/
All Articles