Importing models from Source 2009 into Photoshop Extended
 On the Source engine, which has been updated countless times in its history, Valve has developed many of the most wonderful games, including Team Fortress 2, Left 4 Dead and Portal. Not the first year using the versions of Photoshop CS4-CS5 Extended, the possibility of working with 3D objects in these versions, I learned only recently. Of course, my hands were itching and I wanted to urgently try out this outlandish technology, but I really didn’t want to make aluminum cans and abstractions using basic primitives. I wanted to be able to create fan art using models from games directly. I will tell about this wonderful hemorrhoidal quest under the cut.
 Foreword
As a goal, I asked myself to import some models from Team Fortress 2 into Photoshop, and if to be a little more specific, my goal was to get full-fledged textured 3D layers of accessories from a demoopane , which you can observe at the very beginning of the topic, so that stick them on the official image from VALVe, where all the classes in the game are depicted. For fun.
Just a little preface
The method I developed is a direct analogy to the removal of the glands through the anus, since the process uses many different utilities, some of which work only through the ass. But, unfortunately, I did not find simple ways.
')
Training
The procedure will require the following software:
Adobe Photoshop CS4 (and later) Extended
VTF Plug-In for Photoshop
Autodesk 3ds Max 9 (and higher)
3ds Max SMD Importer
Notepad ++
GCFScape
Source SDK + Source SDK Base 2007 (Downloading from Steam)
MDL Decompiler
Team fortress 2
Step 1: Get the model files from the game
Since all the Team Fortress 2 files are packed into GCF containers, we will need to unpack them with a very handy utility GCFScape. After spending about fifteen minutes looking for a model folder that used to be in team fortress 2 content.gcf , I thought of looking into team fortress 2 materials.gcf , which previously contained only textures.
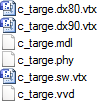 Navigating a GCF file with GCFScape is a pleasure. Weapon models should be sought in tf \ models \ weapons \ c_models , cap models in tf \ models \ player \ items . Models in Source usually consist of six files (sample on the left), we all need them. Looking ahead, so as not to confuse the reader: of course, we need and textures. We are looking for the necessary texture files (* .vmt + * .vtf) in \ tf \ materials \ models , the name is usually identical to the model name.
So, I hope the reader understood which files to unpack from GCF, despite the confusion of the above explanation, and sorted out convenient daddies. Moving on.
Step 2: Decompiling the models from the game
The models in the game are presented as .mdl files and five related files, the purpose of which I do not know and do not want to know. It is impossible to work with this format, therefore it is necessary to decompile it into the SMD (Source Model) format. With this, the incredibly curve utility MDL Decompiler, the latest version of which dates back to 2005, will help us.
Let's start with its installation. According to the author, the executable file must be placed in the bin folder in the Source SDK folder ( steam \ steamapps \% account name% \ sourcesdk ), but if you follow this instruction, the utility crashes when you start. By typing, it was found that it runs perfectly from the bin \ ep1 \ bin folder .
The interface is simple and will understand it each, first set the path to the .mdl file, and then indicate where we want to see the decompiled model. It would be nice if everything was so simple.
First, you need to conjure a little over the .mdl files. Open the file in Notepad ++, replace the fifth character with a comma and save. Why and why this is necessary, we can only guess.

Now you can certainly decompile. Before decompiling it is necessary to remove the checkbox from “Use Steam file access”, otherwise a crash will await us. After specifying all the necessary data, click Extract - voila, the SMD file appeared in the specified folder.
Step 3: Convert Decompiled Models
Most 3D editors can work with SMD files after installing a small plugin, but for Photoshop with this problem, I did not find any information about SMD plugins for PS in Google. Having scratched my turnips, I came to the conclusion that I would have to resort to a rather idiotic method - importing the SMD file into 3ds Max with the plugin installed and then exporting it to the 3DS format.
Actually, there is nothing to explain. Open 3ds Max (I chose version 9, since I don’t need it at all, and I chose the lightest version of the supported ones), click File -> Import, select our SMD file, leave all settings in default to default windows, do not touch anything, click File -> Export, select the 3DS format, save and ... everything! The model is finally converted to a sane format.
Step 4: Import the model into Photoshop
At this step, I don’t want to get hung up at all, since working with 3D files in Photoshop is a completely different story and I’ll just say how to put our model on the canvas.
Create a new document with convenient dimensions and background, click 3D -> New layer from 3D file, select our model in 3DS format and everything is ready.
Step 5: Overlay Default Texture
All textures in Source have VTF format and to work with it you need a plug-in for Photoshop, indicated at the beginning of the topic. Actually, the imposition of a VTF texture on a model is no different from the imposition of any other texture on any other model.

In the file selection window that appears, select the type of the VTF file and select the texture that was in advance (indicated in step 1).
Finally, we got a model in the form in which it can be found in the game!

Conclusion
Since after writing this topic, I suddenly became all lazy, the stated goal was achieved absolutely carelessly, so the models in the image are very crooked.

That's it. Now, if an idea comes to mind using models from the game, I will not resort to Garry's Mod and Greenscreen, everything is much simpler. I hope the information in the topic will benefit someone.
And may the reader forgive me for the fact that I did not dwell on the necessary software - there is a list, there are links, there are installation instructions on the links.
Thanks for attention :)
 When distributing the material, reference to the author (Ponkin Dmitry) and the preservation of the original license CC-BY-SA 3.0 are required
Source: https://habr.com/ru/post/127032/
All Articles