How to make trash benefit?
What am I talking about?
Tasks are different ... There are simple, there are complex, and there are such, the solution of which can take more than one week and a sufficient number of nerve cells. One of these tasks is how to consider unfolding something serious on a large amount of weak iron. Namely…
(Hereinafter we will talk about a little specific and optimized configuration of LTSP and raising a server cluster based on it).
Some organization decided to deploy a terminal server and a bunch of terminal clients. Without any preliminary calculations, without tests and apparently without brains, HP-shnye terminals of several types were purchased by someone. They differed primarily in the amount of RAM and the size of the built-in flash drive. The RAM size ranged from 128 to 512 MB, the drive size ranged from 64 to 256. Well, for completeness, we should mention the Via / AMD ~ 800 MHz x86 processors used, and the video from the same Via or SiS. The zoo is shorter.
Well bought and bought something already here. They deployed the server, began to connect clients ... And approximately after connecting the 70th, a fairly powerful server just began to sink. And along with the server, the clients also began to slow down, but how else? There was not enough network resources or resources of the server itself. What to do? After all, about 150 non-connected terminals are still lying around! Ay-yay-yay said at the same time users, admins and others. Poludohalis half a year and scored. By the way, yes, the terminals were originally under Windows CE and, accordingly, interacted with the terminal server via RDP.
')
And six months later they suddenly remembered ... And they gave it to an outsourcing. With the farewell "But if you solve the problem of performance, all will be well!". Actually what was required now from the terminals. It was necessary that when the terminal was launched, a hand-written software was launched that allows the user to log in to the “whatever-that-is” server and, if the authorization was successful, launch the browser. Business? Yeah ... And all this should work even on the most dead terminals. That is, the bar - 128MB of RAM, 64MB on the drive. You can not worry about the processor, it will cope somehow ...
Attempt number one, or Embedded Linux will help us!
Naturally, taking into account the number of clients, it was decided not to use terminal solutions and to make each client self-sufficient. For this was originally shut up Buildroot. A small distribution was assembled, including the kernel, the minimum set of system and network utilities, Qt Embedded, a bit of its own software and ... yes, in fact, everything. The size of the tse was about 40 mb, that is, it was completely placed on the weakest piece of iron. The truth is not earned for all terminals. If on Via the assembled complex earned from a half-kick, then it refused to start at the terminal with AMD. It was necessary to collect Debian there separately, the benefit that places in that type of pieces of iron were dofig.
The project was successfully completed and even handed over to the customer. Everything worked of course is not perfect, there were gaps, it was necessary to limit the number of tabs in the browser 5th, so that it does not lean on the resources of the terminals. It is possible to say that you can put it on the nose! Everyone was happy, that's just ...
But what about a fun farm?
Yes, yes ... The omnipresent and so necessary Flash. Well, to the heap - Java-plugin for the browser. The problems are the same - there is not enough space in the firmware, and all the RAM has already been eaten by WebKit. In addition, even if we had enough space, Qt Embedded does not support browser plugins, since on Linux it needs X.Org to work with these plugins. Well, yes, that same XEmbedWindow, or whatever it is ... In short, the garbage, which allows you to embed external windows into your applications. And as I said, even if we had enough space, the dead terminal with its 128 MB would never pull X's + Qt + running webcam browser + Flash. It's sad. Scale turnip ... Scale long ... Finally, we try something else. We take as an option such a scheme: the OS starts from the terminal, but when logged in, the session is still started from the terminal server via the NX client. In theory, this should at least a little to unload the server. Horseradish bald ...
Build a new Buildroot, this time throwing out Qt and stuffing X.Org and NX client. For the sake of the test, we put the official NoMachine NX Server on the server. This is here if someone does not know. We are loading, we see the mega login dialog in English, we understand, we are connected to the custom session ... Voila, we launched the browser from the server. We ship in 5 tabs YouTube, let the video. works. We are looking at the load on the test server ... The word “Lust!” And I want to leave the mouth: ~ 100-120 mb of RAM, taken away by a single client browser, doesn’t bring us closer to our optimization goal ... Add to that the load on the network, it’s not fun…
If we had at least 15-30 clients, it would still be possible ... But not over 300. Although again ... No settings for autologin were found for the NX-client, as no necessary parameters were found that can be passed to it at launch - type start up with this config, show me such a software on a server, while you don’t callus your Basurman face and shut up!
Ha ha! And you did not work out?
What are you ... Then there would not be all this text =) In general, looking more towards a couple of options (like starting everything in the same build, something like ssh -X), I came to the conclusion that all this is not right otherwise.
At this point in my search, I came across an LTSP - Linux termianl Server Project. In principle, I read about it at the very beginning, but I considered that “all the same there is a terminal server, let’s go back to the same thing where we started” and skeptically closed the Wikipedia page. However, partly due to the lack of other options, and partly due to the fact that in the Ubuntu Help section, the LTSP dedicated feature described the ability to launch local applications on the terminal itself, I decided to try ...
Dust Jo It!
So. As initial conditions, let's say, we have an i386 computer or a virtual machine (with two network cards on board) and a Ubuntu Server 11.04 distribution. Plus a couple of terminals that can boot over the network. To test ...
First of all, of course, we install on our Ubuntu server. Immediately after that, we throw out extra repositories and reinstall the necessary software.
echo "deb http://ftp.ubuntu.com/ubuntu/ natty main restricted universe multiverse" > /etc/apt/sources.list apt-get update apt-get install bash-completion openbox xserver-xorg xorg xbase-clients xterm ltsp-server-standalone arora gettext -y Next, we need to configure both network interfaces. So. so that one looks into the general network, and the second one looks at its own subnet. Rule file / etc / network / interfaces:
auto lo iface lo inet loopback auto eth0 iface eth0 inet static address 192.168.1.170 netmask 255.255.255.0 gateway 192.168.1.1 auto eth1 iface eth1 inet static address 192.168.22.1 netmask 255.255.255.0 Then we collect the client:
ltsp-build-client The last but one we are setting up a DHCP server, the /etc/ltsp/dhcpd.conf file:
#authoritative; class "ltsp-clients" { match if substring (hardware,1,8) = "00:14:85"; } subnet 192.168.22.0 netmask 255.255.255.0 { #range 192.168.22.20 192.168.22.250; option domain-name "example.com"; option domain-name-servers 192.168.22.1; option broadcast-address 192.168.22.255; option routers 192.168.22.1; option root-path "192.168.22.1:/opt/ltsp/i386"; next-server 192.168.22.1; option subnet-mask 255.255.255.0; option root-path "/opt/ltsp/i386"; if substring( option vendor-class-identifier, 0, 9 ) = "PXEClient" { filename "/ltsp/i386/pxelinux.0"; } else { filename "/ltsp/i386/nbi.img"; } pool { allow members of "ltsp-clients"; range 192.168.22.20 192.168.22.250; } group { next-server 192.168.22.1; host test { deny-unknown-clients; hardware ethernet 00:14:85:47:AA:73; fixed-address 192.168.22.53; } } } Here we indicate what and how to load, and in which subnet to distribute IP-addresses to our customers. In addition, we only test our solution, and therefore do not want our DHCP server in any way to conflict with the main DHCP located in the organization’s network. For this, we first call it not authoritative (when the machine asks for a certain IP from it, which it raves about at night, our server will simply kick it off) and then allocate a pool of MAC addresses that our server can assign IP to.
Almost everything is ready for the first boot, but the IP of our server is far from 192.168.1.1, and therefore when booting the system on the client will not be in the course where to look for the NBD server. Therefore, we need to fix the file /var/lib/tftpboot/ltsp/i386/pxelinux.cfg/default, replacing the nbdport parameter with nbdroot. This file is downloaded by the client when PXE is loaded as the base config:
default ltsp label ltsp kernel vmlinuz append ro initrd=initrd.img quiet splash nbdroot=192.168.1.170:2000 Reboot the server, start the network boot on the client and ... see the login screen:

Well, something like that. If you think about it, now you can boot from clients, log in and work in the system. The truth on the server at the moment is what xterm and openbox are. In addition, this is not entirely consistent with our task.
Suppose that for our needs there is no need to differentiate users at the OS level and all of them can simultaneously log into the system under one user. After that, the software is launched for authorization, and if the authorization is successful, the main application, that is, the browser, is launched. Let's try to get rid of the authorization screen first and automatically log in under a certain user. First, create it:
useradd ltspclient -p $(perl -e'print crypt("1234", "aa")') -m echo "ltspclient ALL = NOPASSWD: ALL" >> /etc/sudoers echo "ltspclient ALL = NOPASSWD: ALL" >> /opt/ltsp/i386/etc/sudoers There is another configuration file in LTSP, which can contain important and various settings, this is the file /var/lib/tftpboot/ltsp/i386/lts.conf. The parameters specified in it are already used during the boot of the main operating system, whose image via NFS is mounted immediately after the PXE boot. Fill it around like this:
[Default] LDM_AUTOLOGIN=true LDM_USERNAME=ltspclient LDM_PASSWORD=1234 LOCAL_APPS=True XkbModel = pc104 XkbLayout = us,ru XkbOptions = "grp:alt_shift_toggle,grp_led:scroll" As it is easy to guess, this will allow our user to automatically log in. Cool, yeah. Just what should he do in an empty X.Org? We need to run our own software after logging in. There is always a wonderful /home/ltspclient/.xinitrc for this. Create it and write:
#!/usr/bin/env bash export LANG="en_US.UTF-8" export LC_ALL="en_US.UTF-8" export LANGUAGE="en_US.UTF-8" export LC_CTYPE="en_US.UTF-8" openbox & authorize -style cleanlooks #xterm And of course we create a symlink on it:
ln -s /home/ltspclient/.xinitrc /home/ltspclient/.xsession Restart the client. Voila, after the download, our own application started up (let's say we have already deployed it on the server). It was launched from the server, but it is quite small, it takes 2 MB of memory and you can not worry too much about it. Another thing is the browser. after the launch of which the server sags so badly ... again twenty-five have come to the fact that resources are gnawing on the server = (. Firstly, the network is constantly for all clients to draw a full browser (remember that Qt draws into X's just pictures?). Secondly, it’s 100 mb of RAM. On a server with 8 GB of RAM, you can deploy a maximum of 80 clients and then, provided that they do not constantly eat the processor and the network.
Okay ... Bullshit war, the main maneuvers! What was there about local applications? As it turned out, local applications are real applications that are not located on the server, but are installed directly into the mounted image of the system. And through some wrapper from the current server session, you can still run them. In this case, the entire load falls on the terminal. To implement such an idea, we need to deliver the necessary libraries and our browser to the image. In short, it looks like this:
cd /opt/ltsp/i386/ mount -o bind /proc ./proc chroot ./ apt-get update apt-get install arora sudo flashplugin-nonfree sun-java6-plugin ssh gettext -y exit umount /opt/ltsp/i386/proc ltsp-update-sshkeys ltsp-update-image --arch i386 Everything is simple - we make crhrot in the / opt / ltsp / i386 / directory in which the guts of the image lie, we deliver the right software right there (suppose for the sake of example that our browser is arora), and then just update the system image. That's it, now we have an application that we can run locally!
Before that, as I said, it was empirically found out that a browser with open 5 tabs with YouTube in each takes up a maximum of 120 MB in memory. This means that terminals with 128 MB RAM can not be able to run it. Let's try to cheat. We will make it so that after launching the first application, it would look at the parameters of the system and, depending on them, decide whether to launch a local or remote browser. Let's add the following to the code of the first application:
Widget.h file:
... class Widget : public QWidget { Q_OBJECT public: explicit Widget(QWidget *parent = 0); ~Widget(); void readDeviceInfo(); ... protected: QString deviceUuidInfoFileName; ... }; ... Widget.cpp file:
... Widget::Widget(QWidget *parent) : QWidget(parent) { ... //test for memory QString uuid = QUuid::createUuid ().toString().remove("{").remove("}"); deviceUuidInfoFileName = QDesktopServices::storageLocation(QDesktopServices::HomeLocation) + "/.info_" + uuid + "_mem.txt"; QString runFileName = QDesktopServices::storageLocation(QDesktopServices::HomeLocation) + "/deviceInfo_" + uuid +".sh"; QString program = "/usr/bin/ltsp-localapps \"free -m | grep \"Mem:\" > " + deviceUuidInfoFileName + "\""; QFile runFile(runFileName); if (runFile.open(QIODevice::WriteOnly | QIODevice::Text)){ QTextStream out(&runFile); out << program << "\n"; QFile::Permissions Permissions = runFile.permissions(); // Permissions == 0x6600; Permissions |= QFile::ExeOther|QFile::ExeUser|QFile::ExeOwner|QFile::ExeGroup; // Permissions == 0x7711; if(!runFile.setPermissions(Permissions)) { qDebug() << "Cannot set file Permitions"; return; } Permissions = runFile.permissions(); // Permissions == 0x6600; if(Permissions & (QFile::ExeOther|QFile::ExeUser|QFile::ExeOwner|QFile::ExeGroup)) { qDebug() << "Info", "Executable file"; } runFile.close(); } QProcess *ltspla = new QProcess(this); ltspla->start(runFileName); ltspla->waitForFinished(); runFile.remove(runFile.fileName()); QTimer::singleShot ( 500, this, SLOT(readDeviceInfo())); } void Widget::readDeviceInfo() { QFile file(deviceUuidInfoFileName); if (!file.open(QIODevice::ReadOnly | QIODevice::Text)){ qDebug() << "Error reading memory info!"; QTimer::singleShot ( 500, this, SLOT(readDeviceInfo())); return; } QTextStream in(&file); QString memory = in.readAll().split(" ",QString::SkipEmptyParts).at(1).trimmed(); qDebug() << "Memory:" << memory; file.close(); file.remove(file.fileName()); if (memory.toInt()<220){ ui->rbRunBrowserRemote->setChecked(true); } } ... Kostyuvo, but ... In fact, we run the command here / usr / bin / ltsp-localapps “free -m | grep "Mem:“> filename.txt "and then simply read the data from the file filename.txt and decide which version of the browser to run. If the RAM is less than a certain level, then let the server version, if more - local.
What does this give? And quite tangible results ... After the launch of a local browser that unfolds in full screen, the client essentially forgets about the server. For both X and the application are simultaneously locally started — nothing is drawn on the server, and therefore no data is being transmitted over the network. In addition, the calculations all occur just as locally and the server is completely unnecessary. Cool? Aha This will allow to separate all more or less normal clients from their rather weak counterparts. The first will provide themselves with resources, while the latter will still parasitize on the server.
If we accept that we have approximately equal and equal clients, then we have achieved a part of the task - we were able to optimize the process so as to half load the server. After all, normal clients will need it only during the download and briefly during authorization. Although the bottleneck of course remains - this is the morning when a lot of people come and press the power button on their clients. There is nothing you can do about it, the traffic load will be noticeable. But this is also relatively relative. And here's why: the boot process can be divided into two stages:
1) PXE boot - approximately 8 MB of traffic from the eth1 interface is spent on it. Then there is a small pause, initialization and the image of the main OS is requested for mounting
2) Booting the main OS - this is loading the kernel, libraries, starting daemons and other stuff. This stage requires about another 16 MB of data transmitted over the network via the eth0 interface. This also includes autologin and the launch of the first application.
This is what happens? If the speed of our network cards is 100 Mbit / s, then it is 12.5 MB / s. Round up to 10 to throw out various flaws related to collisions, etc. Further. For example, we have three types of terminals - if all of them are turned on at the same time at 9 am, then they will start loading a little bit at different speeds. I think the analysis between different types will be 1-3 seconds. For each client, we need to transfer ~ 26 MB of data, that is, in general ~ 3 seconds per client (not immediately of course), multiply 3 * 300 (at the same time or with a period of a minute or two clients included). 900 seconds or 900/60 = 15 minutes, or 900 * 26 = 23,400 megabytes of data. Lousy looks, is not it? In general, of course, but not to say that much. After all, we have two interfaces, and each of them will pump its own data volume - 900 * 16 = 14,400 mb through eth0 and 900 * 8 = 7,200 mb through eth1. network load will remain high, but the load on each of the interfaces will be significantly reduced. Unfortunately, no matter how cool it is, but a very narrow place remains and it would seem that one cannot get away from it. It remains either to install gigabit interfaces, or to rely on the load time of a single terminal. which is ~ 45 seconds, in which the whole process of downloading data from the server is spread.
And yes, I am not sure about the correctness of my calculations in the previous paragraph, if I blunted somewhere, please correct.
Intermediate conclusions ...
Compared with the previous versions and compared with what was originally used on these pieces of iron. under ideal conditions, we were able to unload our server in half, shifting some of the work to that of our trash, which is not quite trash ... And moreover, we were able to cram a full-fledged WebKit browser with plug-ins into it, and therefore users could unceasingly cut into Flash / html5-toys and watch porn right in the workplace (although the customer says that the plug-ins were needed for bank clients, but we all know =)).
So this is koenchno, all is well ... Half the work is done. But after all, we still have about 150 dead clients, with the above that we already understood that the server will be able to serve a maximum of 80, and given that the server needs not only to be served on the verge of possibilities, but also to work, but also to keep the connection with 150 more or less normal clients, it turns out that they can comfortably sit on a ~ 40-50 server of simultaneously connected dead terminal clients + 150 normal ones. Not thick, though not empty ... What to do next? And then we will come to the rescue ...
Paste! Cluster!
Yes, yes, it is a cluster! The fact. that during its development, LTSP has grown to the point that it has the opportunity to create a cluster of servers, with a load balancer, and even a web interface. “Uuuuuu ....” said the harsh Siberian lumberjacks. Well, I went to read the datasheet and the manual for deploying an LTSP cluster.
First, let's look at what components ltsp-cluster consists of. First of all, LTSP-Cluster itself is a set of plug-ins to an ltsp server included in the default distribution of the LTSP distribution. In addition, to build a client that supports clustering, you do not need to install anything extra; you just need to run the client build with the --ltsp-cluster option
The project includes the following components:
- Load Balancer Server is the main load control server that monitors all connected application servers.
- Control Center (Web Interface) - a web interface that allows you to get information about connected clients and server load. and also make some adjustments.
- Load Balancer Agent for GNU / Linux / Windows - placed on each application server, sends information about server load to Load Balancer Server
- Accounts Manager is a daemon installed on the same machine as the Load Balancer Agent. Can dynamically create and delete users if necessary. Well, that is, we started on the main server of the user ltspclient, but on the app-servers, it is not like it ... And we have autologin ... This is supposedly the Accounts Manager and monitors the automatic creation of this user when accessing one of the servers.
- PXE Configuration Editor — Receives parameters from the Control Center and generates a PXE configuration file from them.
- NX Loadbalancer - starts the SSH server and monitors the connection of the user nx, if necessary, transfers it to one or another server.
Let's try, what ...
First we need to rebuild our client with the cluster support options on our server:
ltsp-build-client --arch i386 --ltsp-cluster --prompt-rootpass --accept-unsigned-packages During the build we will be asked a few questions that need to be answered:
Configuration of LTSP-Cluster NOTE: booleans must be answered as uppercase Y or N Server name: 192.168.1.170 Port (default: 80): Use SSL [y/N]: N Enable hardware inventory [Y/n]: Y Request timeout (default: 2): 0 In the future, these parameters can be corrected in the /opt/ltsp/i386/etc/ltsp/getltscfg-cluster.conf file. After another there will be an invitation to enter the root password.
When this is done, you need to decide how to deploy the Control Center and the Load Balancer Server - on the same physical server, on different or just on different virtual machines. Well, for simplicity, we deploy them in the same place as the main server.
The first thing of course we put the Control Center:
apt-get install ltsp-cluster-control postgresql --no-install-recommends Tweak the /etc/ltsp/ltsp-cluster-control.config.php config
... $CONFIG['loadbalancer'] = "192.168.1.170"; #Hostname of the loadbalancer ... Create a new user and a new database for PostgreSql (the password as in /etc/ltsp/ltsp-cluster-control.config.php is ltspcluster):
sudo -u postgres createuser -SDRlP ltsp sudo -u postgres createdb ltsp -O ltsp Next, you need to expand the scheme itself into the created database, the witch is shorter:
cd /usr/share/ltsp-cluster-control/DB/ cat schema.sql functions.sql | psql -h localhost ltsp ltsp wget http://bazaar.launchpad.net/%7Eltsp-cluster-team/ltsp-cluster/ltsp-cluster-control/download/head%3A/controlcenter.py-20090118065910-j5inpmeqapsuuepd-3/control-center.py wget http://bazaar.launchpad.net/%7Eltsp-cluster-team/ltsp-cluster/ltsp-cluster-control/download/head%3A/rdpldm.config-20090430131602-g0xccqrcx91oxsl0-1/rdp%2Bldm.config apt-get install python-pygresql /etc/init.d/apache2 stop python control-center.py rdp+ldm.config /etc/init.d/apache2 start After all this, click on the link 192.168.1.170/ltsp-cluster-control/Admin where you can already poke around the interface ... Immediately on the first page you should indicate some important parameters:
LANG = en_US.UTF-8 LDM_DIRECTX = True LDM_SERVER = %LOADBALANCER% LOCAL_APPS_MENU = True SCREEN_07 = ldm TIMESERVER = ntp.ubuntu.com XKBLAYOUT = us,ru Finished the first ... Next ... Load balancer ... also deployed on the same machine:
apt-get install ltsp-cluster-lbserver --no-install-recommends Its config is /etc/ltsp/lbsconfig.xml:
<?xml version="1.0"?> <lbsconfig> <lbservice listen="*:8008" max-threads="2" refresh-delay="60" returns="$IP"/> <lbslave is-slave="false"/> <mgmtservice enabled="true" listen="*:8001"/> <nodes> <group default="true" name="default"> <node address="http://192.168.1.171:8000" name="ltsp-appserv01"/> </group> </nodes> <rules> <variable name="LOADAVG" weight="50"> <rule capacity=".7"/> </variable> <variable name="NBX11SESS" weight="25"> <rule capacity="$CPUFREQ*$CPUCOUNT*$CPUCOUNT/120" critical="$CPUFREQ*$CPUCOUNT*$CPUCOUNT/100"/> </variable> <variable name="MEMUSED" weight="25"> <rule capacity="$MEMTOTAL-100000"/> </variable> </rules> </lbsconfig> I can only say that for our purposes in the future we only need to change the parameters inside.
<nodes> <group default="true" name="default"> <node address="http://192.168.1.171:8000" name="ltsp-appserv01"/> </group> </nodes> In addition, you can change the number of threads. By default, it is recommended (why) to set 1:
<lbservice listen="*:8008" max-threads="1" refresh-delay="60" returns="$IP"/> Here it is easy to guess you can add / delete application servers. Finally, restart Load balancer:
/etc/init.d/ltsp-cluster-lbserver restart Oh, and I'm tired of writing ... Well, okay. at the moment we have a fully one fully configured main server with a web snout and load balancer. In theory, then we only need to deploy new and new application servers and, as they are deployed, edit the balancer configuration a little.
Oh yes, it is also necessary that the balancer be able to recognize the domain name ltsp-appserv01, for this in / etc / hosts on our lbserver, you need to add a line like:
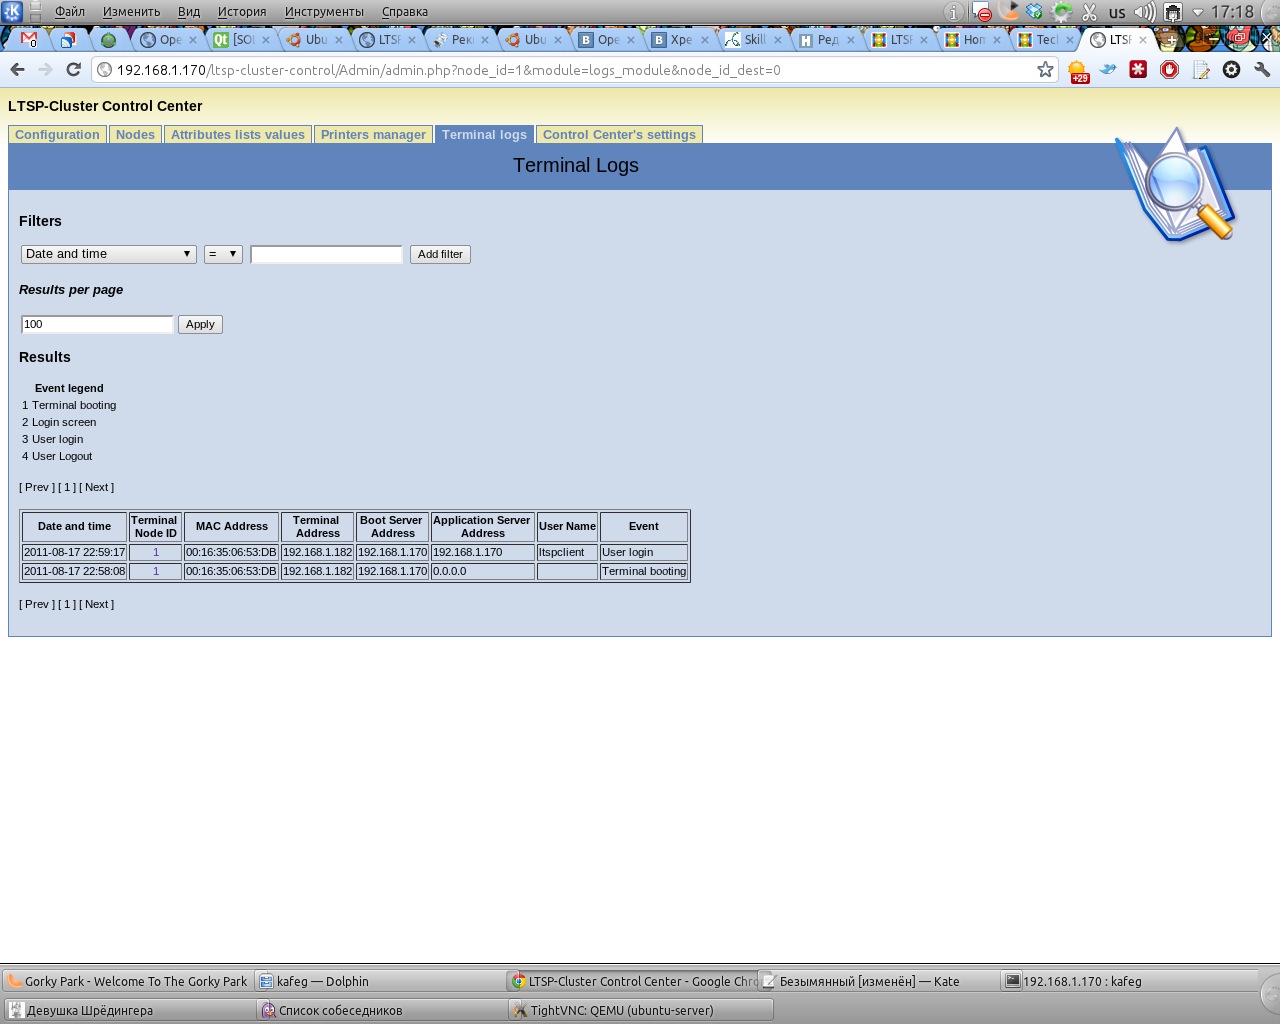
192.168.1.171 ltsp-appserv01 By the way, having already downloaded from any client, it will be possible to see the information that this client is connected to the application server 192.168.1.170 - that is, to our main server. In this regard, the Control Center already logs with might and main and the MAC address of our client is recorded in the database. Something tells me that we need to put Account Manager on the root server, but we don’t want to do this yet, we’ll better move on to setting up the first of our application servers. Well, a screenshot of the web interface. so as to diversify this text:
So, on a virtual machine or on another computer we set Ubuntu Server 11.04 32bit. During the installation process, specify the hostname as ltsp-appserv01 and mark it to install the Open SSH Server. For convenience ... After a successful installation, we boot and first of all we edit the file / etc / network / interfaces. I have some strange feeling of deja vu, and you?
auto lo iface lo inet loopback auto eth0 iface eth0 inet static address 192.168.1.171 netmask 255.255.255.0 gateway 192.168.1.1 They indicated that this is a computer with the address 171 - it is this IP that is registered for it in the lbserver config. Restart interface:
$ sudo ifdown eth0 && sudo ifup eth0 Address successfully changed. Go ahead. And then we have a choice of two options for the development of events, depending on the task at hand:
1) We just install ubuntu-desktop and when the user login a standard ubunt shell is launched
2) We can run exactly what we need. Along this path and let's go ...
Again we stamp on the beaten track:
echo "deb http://ftp.ubuntu.com/ubuntu/ natty main restricted universe multiverse" > /etc/apt/sources.list apt-get update apt-get install bash-completion openbox xserver-xorg xorg xbase-clients xterm ltsp-server ltsp-server ltsp-cluster-lbagent ltsp-cluster-accountmanager arora -y update-rc.d -f nbd-server remove We are waiting for the whole matter to be delivered ... In fact, there is nothing more to do here, we first reboot the server with the agent, and then the main one. We try to re-boot from the client. And so it turns out that our good old 192.168.1.170, that is, the main server, is used as the Application server. This is not surprising, because its load is very low and Load Balancer simply does not transfer the load to other servers.Over time, this will of course change and other servers will be forced to take on part of the load.
Yeah, schaz! In order for the balancing to work, you will have to invent your algorithm yourself , add the entire list of servers to the pool and finally add all the servers in the ssh_known_hosts file in the image. Tyts!
1) Address Pool. To do this, we add the line to the end of the /var/lib/tftpboot/ltsp/i386/lts.conf file:
MY_SERVER_LIST = "192.168.1.170 192.168.1.171" 2) We invent an algorithm (I just sneaked a step ) and write it to a file:
#!/bin/sh max_rank=-1 max_server='' for server in $MY_SERVER_LIST; do rank=$(nc $server 9571 | sed -n 's/rating://p') if [ "$rank" -gt "$max_rank" ]; then max_rank="$rank" max_server="$server" fi done echo "$max_server" We carry out:
chmod a+x /opt/ltsp/i386/usr/share/ltsp/get_hosts Nothing complicated, just go through all the NetCat servers and choose the least loaded one. This script can be changed so that it uses the balancing server, but I don’t want to do this, because using such a simple script, in principle, you can get rid of lbagent and lbserver.
3) During the setup and raising of all additional servers, we have already generated DSA and RSA key pairs. In order for clients to connect to additional servers, you must copy the generated public keys from the additional servers first to the main server and then to the image. To do this, first on each additional server do the following:
ltsp-update-sshkeys --export ssh_known_hosts.192.168.1.171 scp ssh_known_hosts.192.168.1.171 root@192.168.1.170:/etc/ltsp/ And on the main server:
ltsp-update-sshkeys && ltsp-update-image --arch i386 && echo -e 'default ltsp\nlabel ltsp\nkernel vmlinuz\nappend ro initrd=initrd.img quiet splash nbdroot=192.168.1.170:2000\n' > /var/lib/tftpboot/ltsp/i386/pxelinux.cfg/default Checking:
cat /opt/ltsp/i386/etc/ssh/ssh_known_hosts The only thing I don’t understand is what for then a balancing server is needed ... Probably in future releases the file / opt / ltsp / i386 / usr / share / ltsp / get_hosts, but this is not the case now. But anyway, now balancing works exactly.
By the way, you can check how one or another application server is loaded using the /usr/share/pyshared/lbserver/test_comm.py script. First, we indicate in it the address of the required server:
rpcserver = xmlrpclib.ServerProxy("http://192.168.1.171:8000") And then we execute it and look at the result:
$ python /usr/share/pyshared/lbserver/test_comm.py [{'name': 'MEMTOTAL', 'value': 507788}, {'name': 'CPUFREQ', 'value': 3502.64}, {'name': 'CPUCOUNT', 'value': 1}, {'name': 'DISTRO', 'value': 'Ubuntu 11.04'}, {'name': 'IP', 'value': '192.168.1.171'}, {'name': 'HOSTNAME', 'value': 'ltsp-appserv01'}, {'name': 'ADDRESSES', 'value': '192.168.1.171'}, {'name': 'MEMFREE', 'value': 476144}, {'name': 'MEMUSED', 'value': 31676}, {'name': 'LOADAVG', 'value': 0.0}, {'name': 'USERS', 'value': 'kafeg'}, {'name': 'NBUSERS', 'value': 1}, {'name': 'NBX11SESS', 'value': 1}] The script /usr/share/pyshared/lbserver/test_mgmt.py, which can access the main server and return some information, can also be useful.
rpcserver = xmlrpclib.ServerProxy("http://192.168.1.170:8001") $ python /usr/share/pyshared/lbserver/test_mgmt.py [{'default': True, 'nodes': [{'active': True, 'lastWeight': 100, 'values': [{'critic': False, 'name': 'MEMTOTAL', 'value': 507788}, {'name': 'LOADAVG'}, {'critic': False, 'name': 'ADDRESSES', 'value': '192.168.1.171'}, {'critic': False, 'name': 'IP', 'value': '192.168.1.171'}, {'critic': False, 'name': 'HOSTNAME', 'value': 'ltsp-appserv01'}, {'critic': False, 'name': 'NBUSERS', 'value': 1}, {'critic': False, 'name': 'NBX11SESS', 'value': 1}, {'critic': False, 'name': 'MEMFREE', 'value': 476052}, {'critic': False, 'name': 'CPUCOUNT', 'value': 1}, {'critic': False, 'name': 'CPUFREQ', 'value': 3502.64}, {'critic': False, 'name': 'USERS', 'value': 'kafeg'}, {'critic': False, 'name': 'MEMUSED', 'value': 31768}, {'critic': False, 'name': 'DISTRO', 'value': 'Ubuntu 11.04'}], 'name': 'ltsp-appserv01', 'address': 'http://192.168.1.171:8000'}], 'name': 'default'}] Everything
That's probably all I could dig about LTSP. Finally, I would like to say that with such detail I tried to paint everything here only because there is practically no information on technology in Russian, although it looks quite attractive. What stands out is my surprise, when after the first boot I heard from the terminal a KDE input sound and earned without any interrogation ...
Perhaps, period.
Source: https://habr.com/ru/post/126476/
All Articles