Creating an application on the Cocos2d framework for iOS
Hello!
My first game was written by an iPhone SDK about a peeing boy, it was very slow on 3G and 3GS. I did the second one with less CPU load, and I already heard about cocos2d, after reading the documentation about it, I decided not to return to the SDK, and started programming for this platform. In this article I will not describe how to install cocos2d, it is described here , I will try not to repeat with this post. I can only add there is a stable 1.0.1 version . In this article I will explain how to create a menu, animation, and transition between layers.
So, to the point.
')
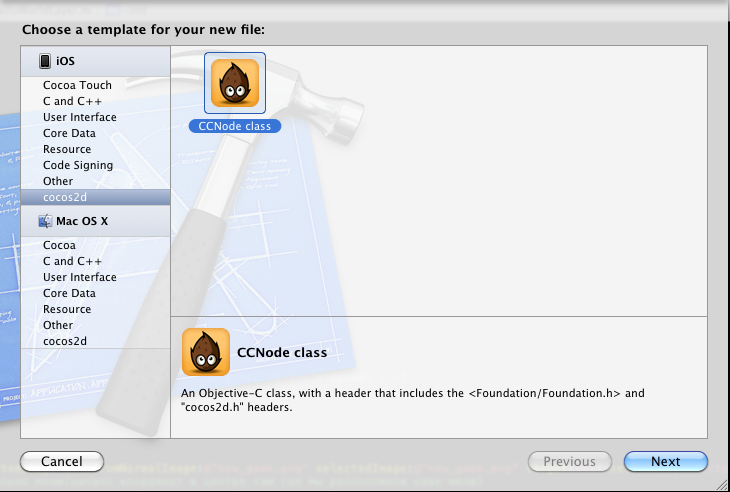
Create a project on cocos2d, orient it to an iPad, go to the HelloWorldLayer.m file and in the (id) init method create a sprite for the background:
I can add that when we add our sprite to the layer, you can add a tag:
Further, here we create a menu:
The cocos2d menu is an alternative to the iPhone SDK buttons, here we looked at 2 types of cells (a picture and an inscription), as you see, they refer to certain methods, in our case these are transitions to other layers:
In this case,
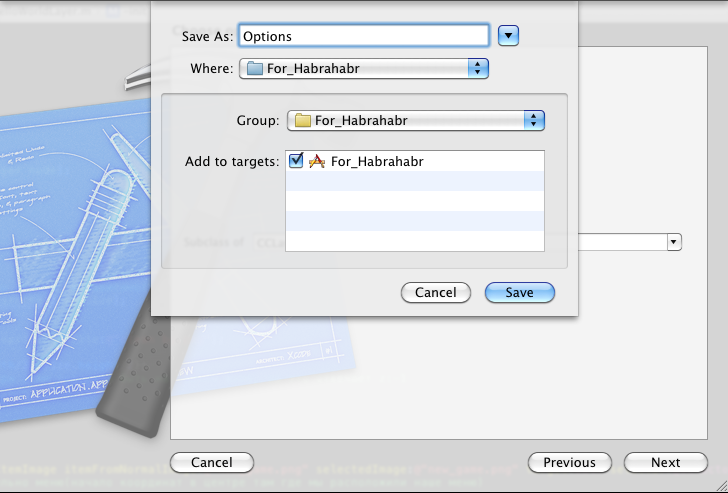
Create Options files, press the + N commands:
as seen on the last screenshot, we create a custom layer, by default it is black, but after playing in RGB you can set any color.
Next, create a CCMenu and a method that returns a return to the main menu:
popScene removes the current layer. Be careful under this layer should be any other, as stated above, we just impose a layer, otherwise it will generate an error.
Next, create a Game layer:
Create a background and set a delay before creating another sprite in the Game.m file:
here I applied anchorPoint, then we will see its real use:
here we apply different actions on the cockroach. When we compile and see that the cockroach moves with acceleration, and then rotates, while the point of rotation is the lower left corner, this is the anchorPoint to which we specified (0, 0). We specified the movement of the cockroach, CCMoveBy is responsible for the movement, CCEaseInOut is responsible for the smoothness of acceleration and deceleration during the movement, CCRotateBy is responsible for the rotation. Also here we see the use of CCSequence, this command is used to ensure that the actions on the sprite go in turn.
And finally, create the animation after the delay:
I commented most of it, add the texture I created with zwoptexapp.com , it's free, I got the plist and png files, dragged them into the project. This is the
and so
You can also see that when applying an action instead of CCSequence, CCSpawn was applied, this command is used to ensure that actions on the sprite go at the same time.
Often I see problems on the forums with the creation of animation on cocos2d, so I included it in this article. I hope this article will be useful to someone.
The project can be downloaded here .
My first game was written by an iPhone SDK about a peeing boy, it was very slow on 3G and 3GS. I did the second one with less CPU load, and I already heard about cocos2d, after reading the documentation about it, I decided not to return to the SDK, and started programming for this platform. In this article I will not describe how to install cocos2d, it is described here , I will try not to repeat with this post. I can only add there is a stable 1.0.1 version . In this article I will explain how to create a menu, animation, and transition between layers.
So, to the point.
')
Create a project on cocos2d, orient it to an iPad, go to the HelloWorldLayer.m file and in the (id) init method create a sprite for the background:
-(id) init { if( (self=[super init])) { // , CGSize size = [[CCDirector sharedDirector] winSize]; // backgroung CCSprite * background = [CCSprite spriteWithFile:@"clean bg.png"]; // background.position = ccp(size.width/2, size.height/2); // CCLayer , // z:-1 [self addChild:background z:-1]; } return self; }I can add that when we add our sprite to the layer, you can add a tag:
[self addChild:background z:-1 tag:100]; this is done so that you can find a sprite on a tag in another method or class, this is done like this: CCSprite *spr = (CCSprite *)[self getChildByTag:100]; then do what you want with this sprite.Further, here we create a menu:
// // CCMenuItemImage * image = [CCMenuItemImage itemFromNormalImage:@"new_game.png" selectedImage:@"new_game.png" target:self selector:@selector(perehod_v_igru)]; // ( , // ) image.position = ccp(0, 50); // font CCMenuItemFont * font = [CCMenuItemFont itemFromString:@"" target:self selector:@selector(options)]; font.position = ccp(0, -50); // // CCMenu * menu = [CCMenu menuWithItems:image, font, nil]; // menu.position = ccp(size.width /2 , size.height/2); // [self addChild:menu];The cocos2d menu is an alternative to the iPhone SDK buttons, here we looked at 2 types of cells (a picture and an inscription), as you see, they refer to certain methods, in our case these are transitions to other layers:
-(void)perehod_v_igru { // [[CCDirector sharedDirector] replaceScene:[CCTransitionPageTurn transitionWithDuration:1 scene:[Game node]]]; }CCTransition is responsible for the transition effect from one layer to another for a certain time. -(void)options { // [[CCDirector sharedDirector] pushScene:[Options node]]; }In this case,
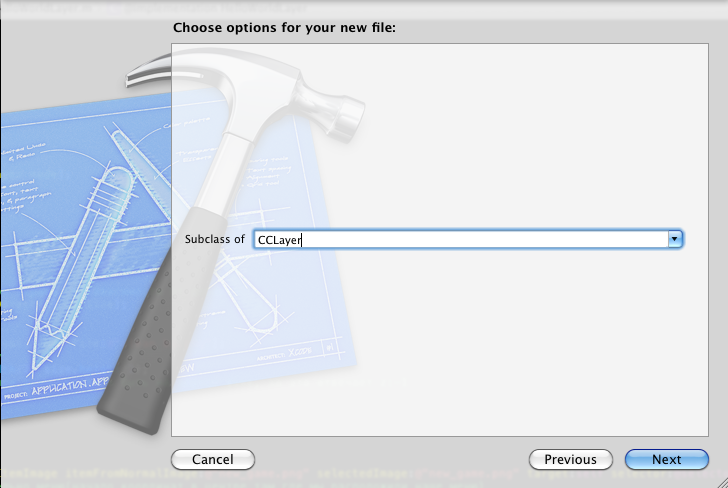
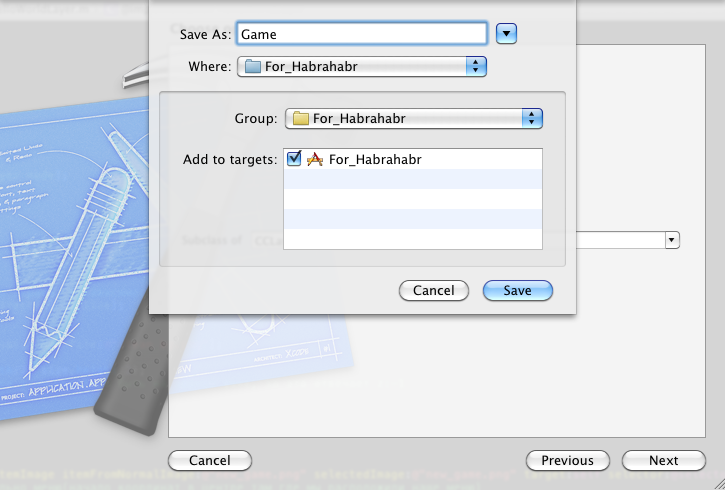
pushScene is used to temporarily overlay a layer.Create Options files, press the + N commands:
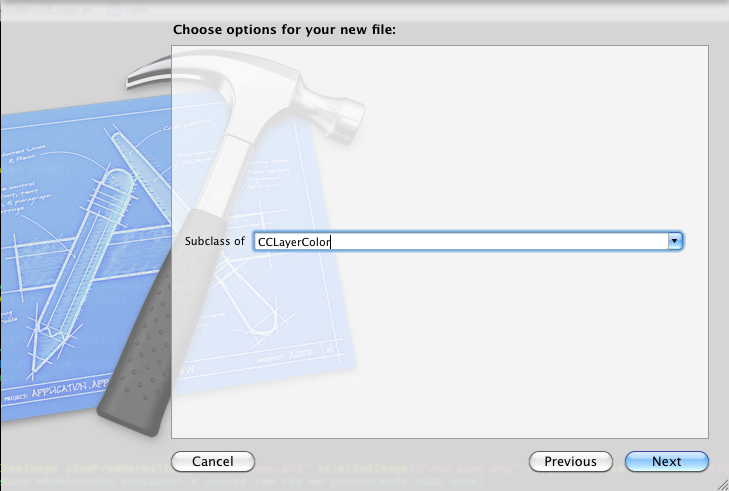
as seen on the last screenshot, we create a custom layer, by default it is black, but after playing in RGB you can set any color.
Next, create a CCMenu and a method that returns a return to the main menu:
-(id) init { // RGB if ((self = [super initWithColor:ccc4(255, 0, 0, 155)])) { CGSize size = [[CCDirector sharedDirector] winSize]; CCMenuItemFont * font = [CCMenuItemFont itemFromString:@" " target:self selector:@selector(backItem)]; font.position = ccp(0, 0); CCMenu * menu = [CCMenu menuWithItems: font, nil]; menu.position = ccp(size.width /2 , size.height/2); [self addChild:menu]; } return self; } -(void)backItem{ // [[CCDirector sharedDirector] popScene]; }popScene removes the current layer. Be careful under this layer should be any other, as stated above, we just impose a layer, otherwise it will generate an error.
Next, create a Game layer:
Create a background and set a delay before creating another sprite in the Game.m file:
-(id) init { if( (self=[super init])) { CGSize size = [[CCDirector sharedDirector] winSize]; // background CCSprite * background = [CCSprite spriteWithFile:@"clean bg.png"]; //anchorPoint , //background.anchorPoint = ccp(0.5f,0.5f); // anchorPoint = ccp(1, 1); // , (0, 0) background.anchorPoint = ccp(1, 1); background.position = ccp(size.width, size.height); [self addChild:background z:-1]; // 0,5 [self performSelector:@selector(sozdanie_CCSprite) withObject:self afterDelay:0.5]; } return self; }here I applied anchorPoint, then we will see its real use:
-(void)sozdanie_CCSprite { // background CCSprite * tarakan = [CCSprite spriteWithFile:@"tarakan0.png"]; tarakan.position = ccp(512, 100); tarakan.anchorPoint = ccp(0,0); [self addChild:tarakan]; //Actions // id move = [CCMoveBy actionWithDuration:2 position:ccp(0, 500)]; // id accel = [CCEaseInOut actionWithAction:move rate:5]; // id rotate = [CCRotateBy actionWithDuration:2.0f angle:360]; // [tarakan runAction:[CCSequence actions:accel, rotate, nil]]; // [self performSelector:@selector(animation) withObject:self afterDelay:3.5]; }here we apply different actions on the cockroach. When we compile and see that the cockroach moves with acceleration, and then rotates, while the point of rotation is the lower left corner, this is the anchorPoint to which we specified (0, 0). We specified the movement of the cockroach, CCMoveBy is responsible for the movement, CCEaseInOut is responsible for the smoothness of acceleration and deceleration during the movement, CCRotateBy is responsible for the rotation. Also here we see the use of CCSequence, this command is used to ensure that the actions on the sprite go in turn.
And finally, create the animation after the delay:
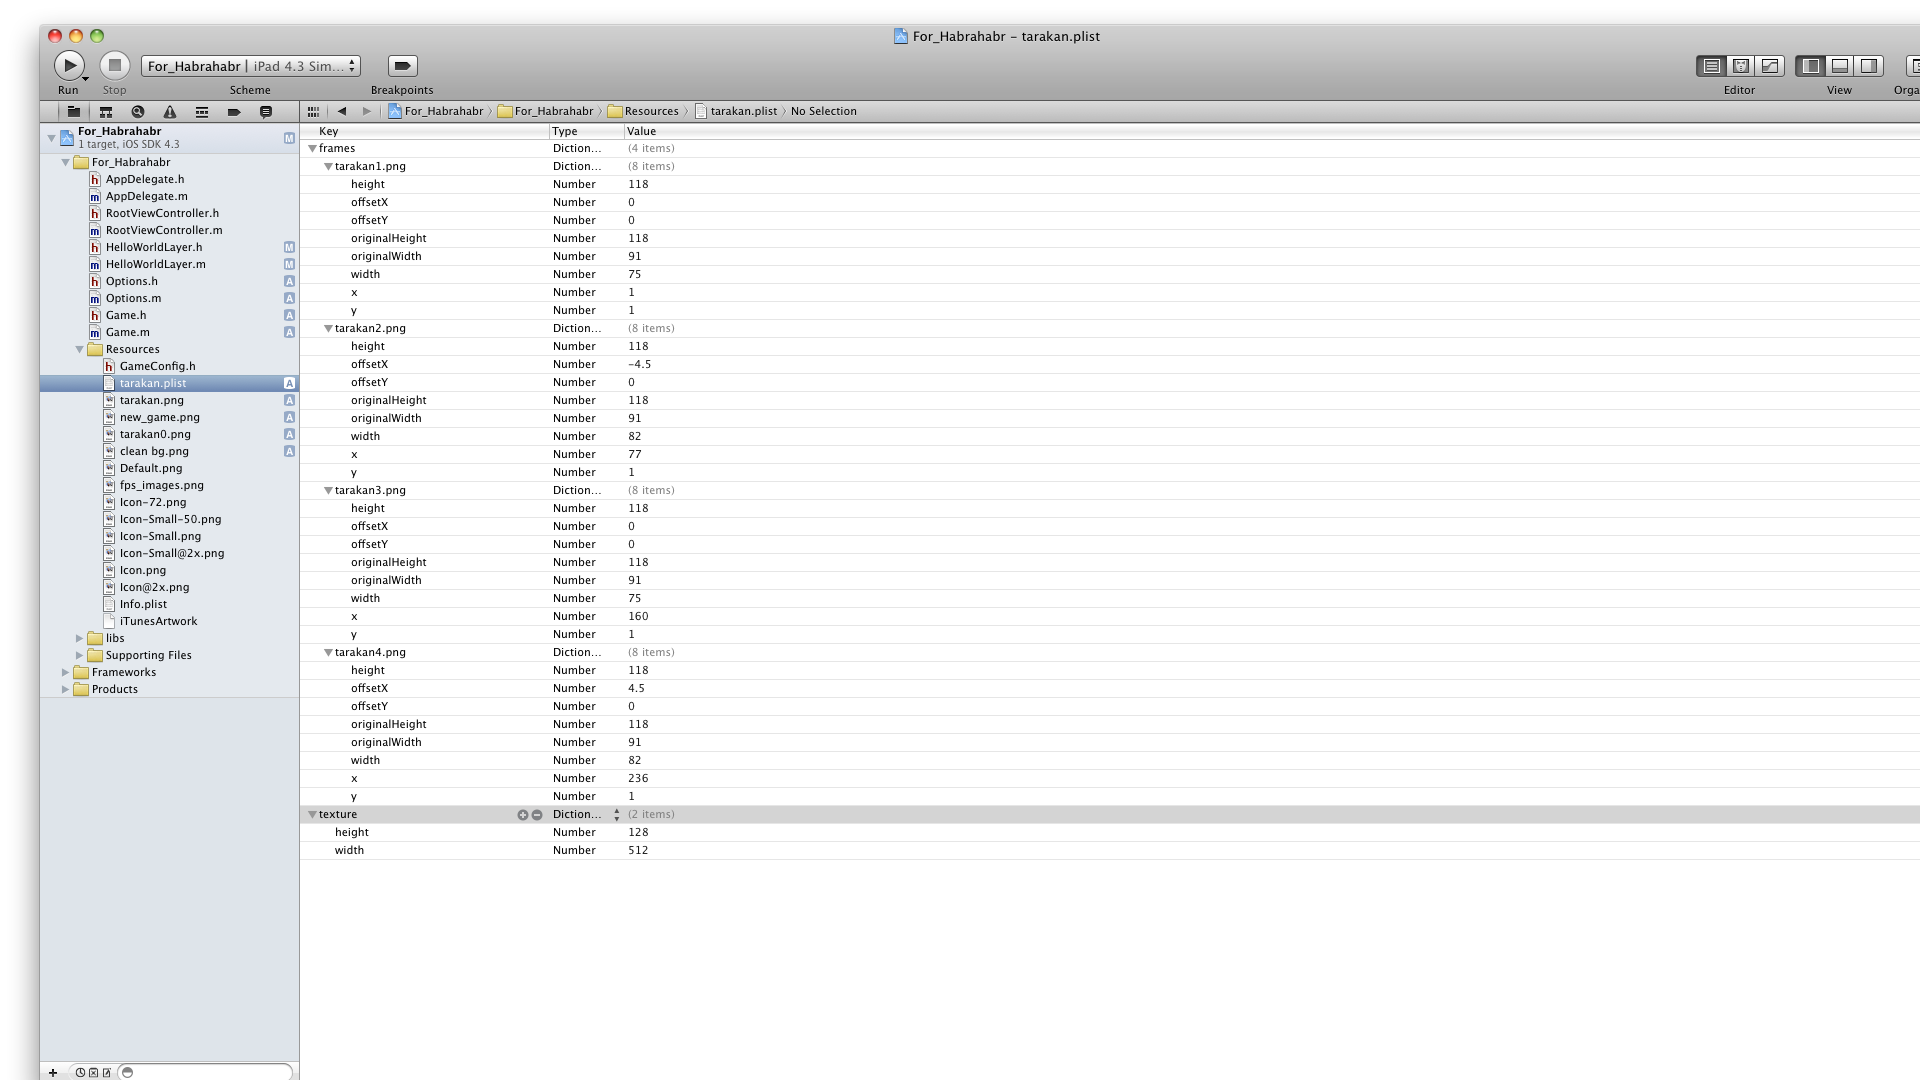
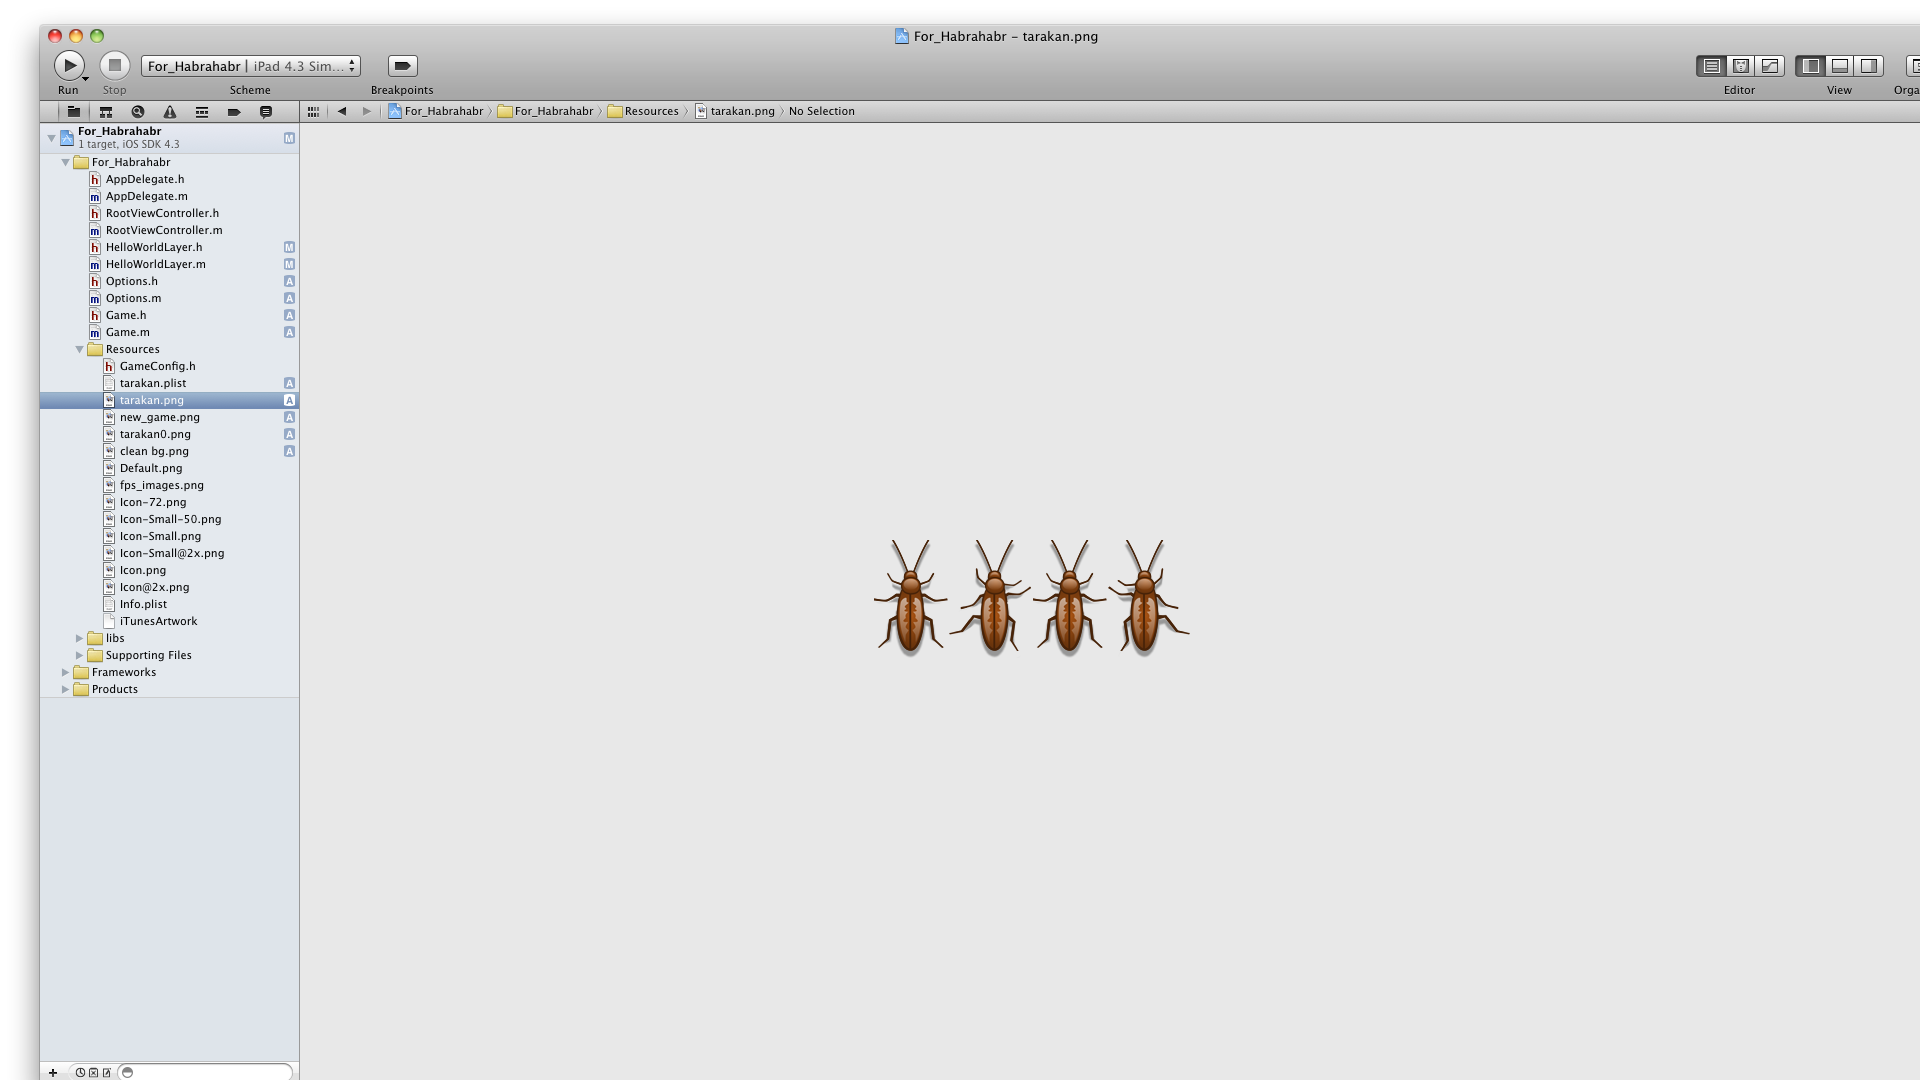
-(void)animation { CGSize size = [[CCDirector sharedDirector] winSize]; // plist [[CCSpriteFrameCache sharedSpriteFrameCache] addSpriteFramesWithFile:@"tarakan.plist" textureFile:@"tarakan.png"]; //CCSpriteBatchNode cocos2d, // // CCSpriteBatchNode * bowSheet = [CCSpriteBatchNode batchNodeWithFile:@"tarakan.png"]; NSString *topbird = @"tarakan"; NSMutableArray *walkAnimFrames = [NSMutableArray array]; // for(int i = 1; i <= 4; ++i) { CCSpriteFrame *frame = [[CCSpriteFrameCache sharedSpriteFrameCache] spriteFrameByName: topbird stringByAppendingString:[ NSString stringWithFormat:@"%d.png", i]]]; [walkAnimFrames addObject:frame]; } // CCAnimation *walkAnim = [CCAnimation animationWithFrames:walkAnimFrames delay:0.1f]; NSString *bowFrame = [topbird stringByAppendingString:@"1.png"]; // CCSprite * bow = [CCSprite spriteWithSpriteFrameName:bowFrame]; bow.position = ccp(size.width/2 , -100); [bowSheet addChild:bow]; //CCAnimate CCAnimation // CCAnimate CCAnimate * bowAnim = [[CCAnimate actionWithAnimation:walkAnim restoreOriginalFrame:YES] retain]; [self addChild:bowSheet]; // id walkAction = [CCRepeat actionWithAction:bowAnim times:5]; // id da = [CCMoveBy actionWithDuration:2 position:ccp(0, 600)]; // [bow runAction:[CCSpawn actions:da, walkAction, nil]]; }I commented most of it, add the texture I created with zwoptexapp.com , it's free, I got the plist and png files, dragged them into the project. This is the
tarakan.plist file:and so
tarakan.png file:You can also see that when applying an action instead of CCSequence, CCSpawn was applied, this command is used to ensure that actions on the sprite go at the same time.
Often I see problems on the forums with the creation of animation on cocos2d, so I included it in this article. I hope this article will be useful to someone.
The project can be downloaded here .
Source: https://habr.com/ru/post/126422/
All Articles