Using iDRAC6 kvm virtual media to install the OS
We use hardware from Dell every day.
Over the past past year, we have seen the excellent work of equipment from Dell and now we want to talk about the advantages of servers in more detail.
In this article, I will talk about the convenience of the iDRAC6 and its virtual console.
')
The iDRAC6 is a powerful remote server management tool that allows you to install and reinstall the OS yourself.
There are 2 types of them:
iDRAC 6 Express (standard and installed in the server);
iDRAC 6 Enterprise (optional, its price is in the range of $ 130-170).
When they order a server, they want to install the OS themselves at 10% of the clients who are applying to our server, and this is exactly the situation that Dell allows the client to do.
For the move in iDRAC6 use the standard data, user (user): root and password (password): calvin.
Before entering, you need to configure the iDRAC to the IP address you need, then in the browser enter it for example: 192.168.0.100 and the login window will open.
It looks like this:

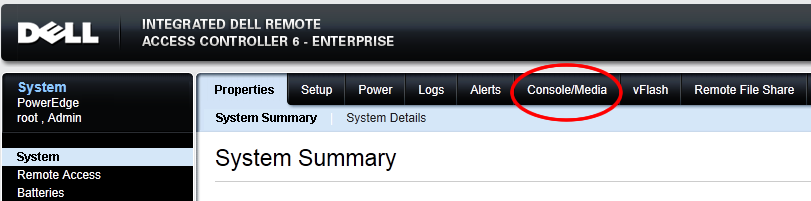
In order to install OS on your server, we need to go to Console / Media, which is located in the top management menu.
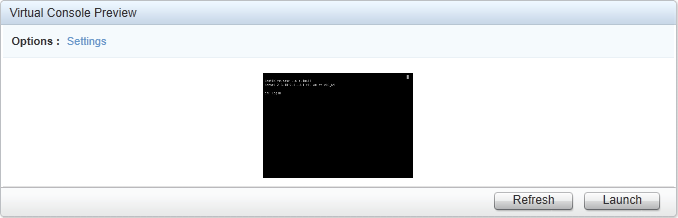
Also on the main page, you can immediately start Virtual Console Preview by clicking on Launch
To run the virtual console, you need the Java Runtime Environment installed on your computer, which can be downloaded from the official site.
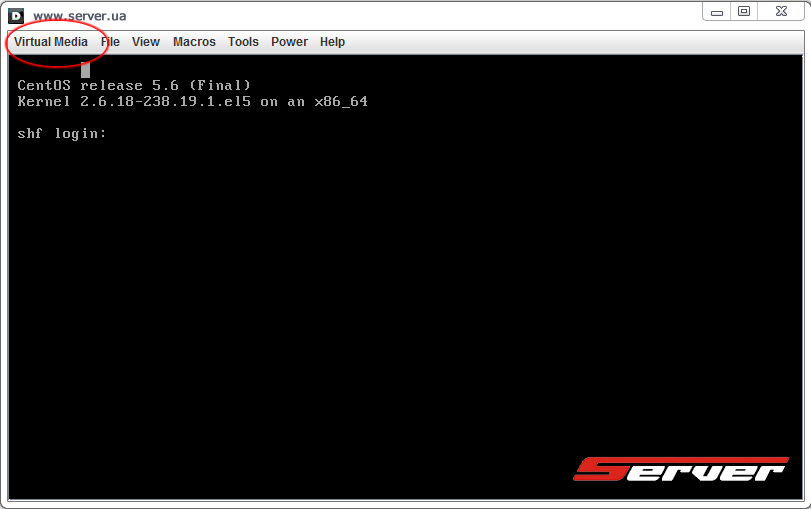
In the KVM window that opens, select Virtual Media and launch it.
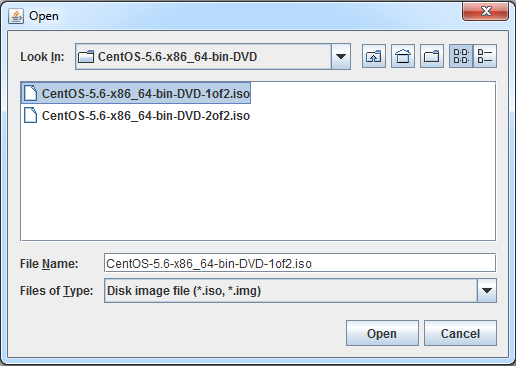
In order to install the OS, download the operating system we need. As an example, I took CentOS 5.6 (64). and saved iso on my computer.
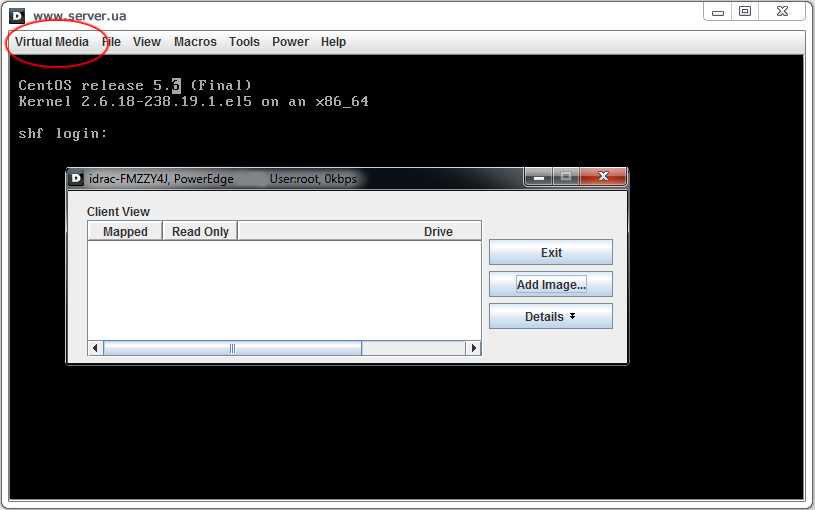
Now you can proceed further. In Virtual Media, click Add Image ... to select the downloaded iso.
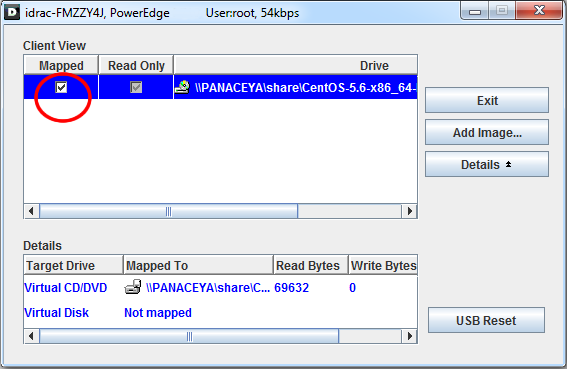
When you check the box for Mapped, you may get an error that Virtual is not attached. This is not terrible and let's connect it. To do this, select the Console / Media menu, then the Configuration. In Status, select Attach, and in Enable Boot Once, tick then save (Apply).

At this stage, we have completed the most important thing, then everything will be very simple. It is necessary to install the boot not from the hard disk, but from the Virtual CD / DVD. This stage can be done in different ways either through iDrac or through the BIOS. If you want to change a parameter in bios, then simply through the Console will execute Ctrl + Alt + Del.

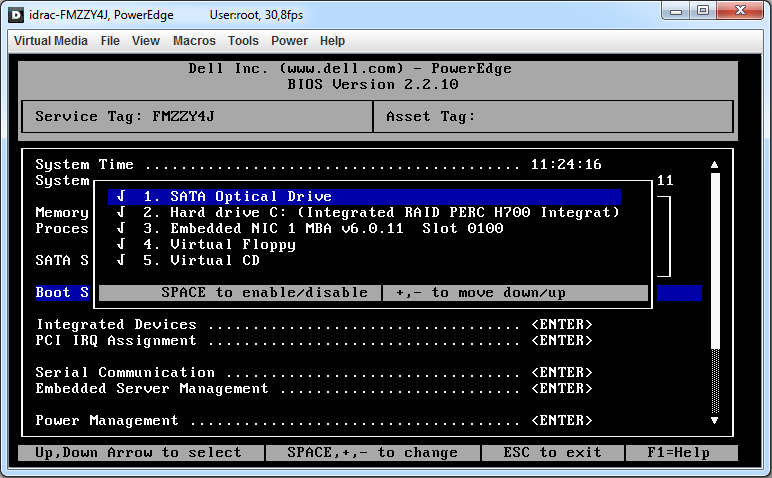
Use + - to move the Virtual CD up.

We save everything and reboot the server again. After that we already boot from our virtual CD / DVD.
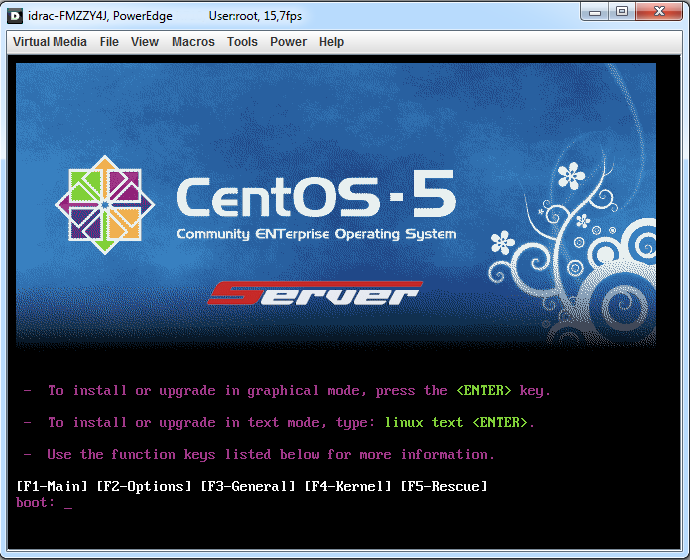
And then the matter is yours ...
Over the past past year, we have seen the excellent work of equipment from Dell and now we want to talk about the advantages of servers in more detail.
In this article, I will talk about the convenience of the iDRAC6 and its virtual console.
')
The iDRAC6 is a powerful remote server management tool that allows you to install and reinstall the OS yourself.
There are 2 types of them:
iDRAC 6 Express (standard and installed in the server);
iDRAC 6 Enterprise (optional, its price is in the range of $ 130-170).
When they order a server, they want to install the OS themselves at 10% of the clients who are applying to our server, and this is exactly the situation that Dell allows the client to do.
For the move in iDRAC6 use the standard data, user (user): root and password (password): calvin.
Before entering, you need to configure the iDRAC to the IP address you need, then in the browser enter it for example: 192.168.0.100 and the login window will open.
It looks like this:
In order to install OS on your server, we need to go to Console / Media, which is located in the top management menu.
Also on the main page, you can immediately start Virtual Console Preview by clicking on Launch
To run the virtual console, you need the Java Runtime Environment installed on your computer, which can be downloaded from the official site.
In the KVM window that opens, select Virtual Media and launch it.
In order to install the OS, download the operating system we need. As an example, I took CentOS 5.6 (64). and saved iso on my computer.
Now you can proceed further. In Virtual Media, click Add Image ... to select the downloaded iso.
When you check the box for Mapped, you may get an error that Virtual is not attached. This is not terrible and let's connect it. To do this, select the Console / Media menu, then the Configuration. In Status, select Attach, and in Enable Boot Once, tick then save (Apply).
At this stage, we have completed the most important thing, then everything will be very simple. It is necessary to install the boot not from the hard disk, but from the Virtual CD / DVD. This stage can be done in different ways either through iDrac or through the BIOS. If you want to change a parameter in bios, then simply through the Console will execute Ctrl + Alt + Del.
Use + - to move the Virtual CD up.
We save everything and reboot the server again. After that we already boot from our virtual CD / DVD.
And then the matter is yours ...
Source: https://habr.com/ru/post/126413/
All Articles