Making a map editor for your platform
Many, I think, created, or at least tried to create some kind of toy. And very often, indie developers choose the genre of arcade, scrolling shooter, platformer or something like that. Here I want to talk about creating a simplest level editor for such an arcade game.
As a platform, I chose C # + XNA 4.0, and WinForms for custom elements in the level editor.
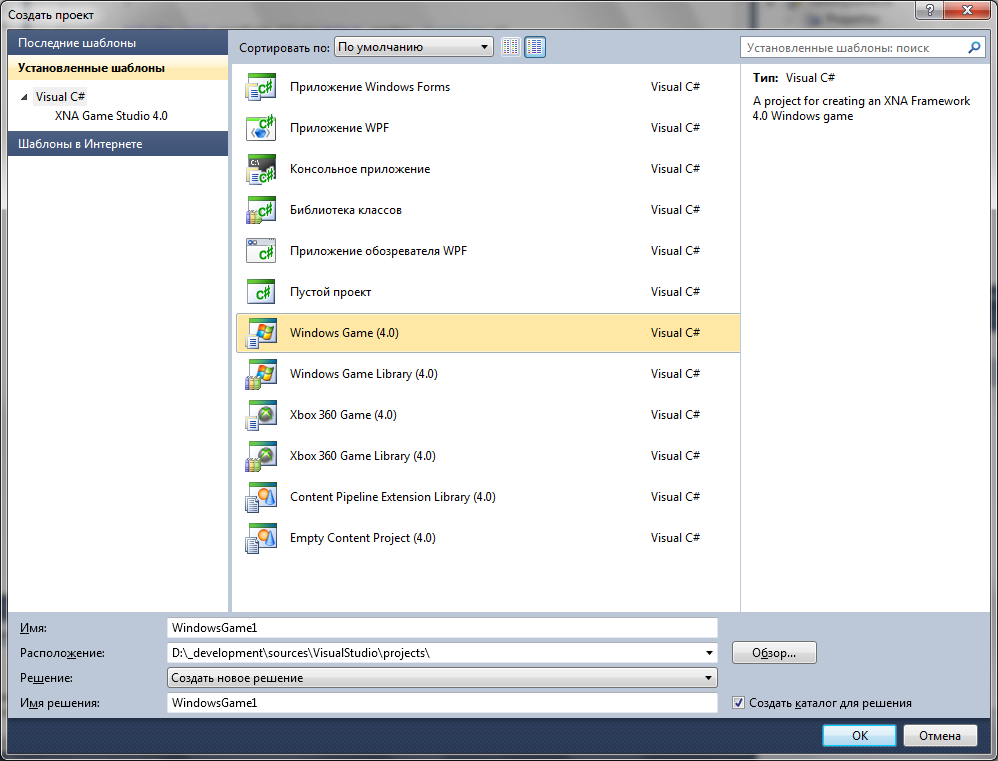
Create a Windows Game project in VisualStudio and go!
For the level, I created a separate class that is used both in the game itself and in the editor. For convenience, I brought it to a separate project and added to both solutions. The level object itself is created in the editor, serialized to a file, and then from that file it is deserialized into the game.
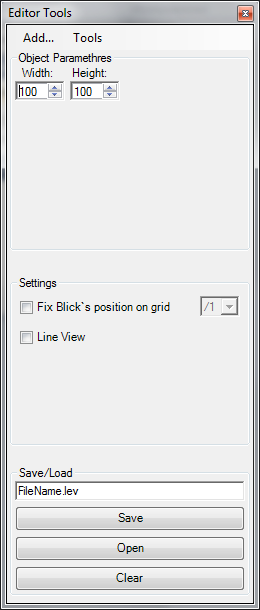
As I said, I did the interface on Windows Forms. We connect System.Windows.Forms to our project. Some Windows Forms class names may conflict with names in Xna, the poet will do so
MSDN has an excellent description of Windows Forms and all of its widgets, so I will not dwell on this. With the interaction of Windows Forms and XNA, I had no problems. Create a procedure in the Game1 class (the standard name of the game class in Xna) that creates a window, widgets and sets them up, and calls it in the Initialize () method. I did something like this:
')
Create a level class and indicate that it is serializable:
This class contains lists of all objects (I made only one type of object, but adding others is no longer difficult)
Block class:
Please note that it should also be serializable, and the texture should not be serialized (otherwise, an error), but we add it directly when loading the level into the game itself (for this you can create an additional String Texturename property, int TextureType or whatever you want).
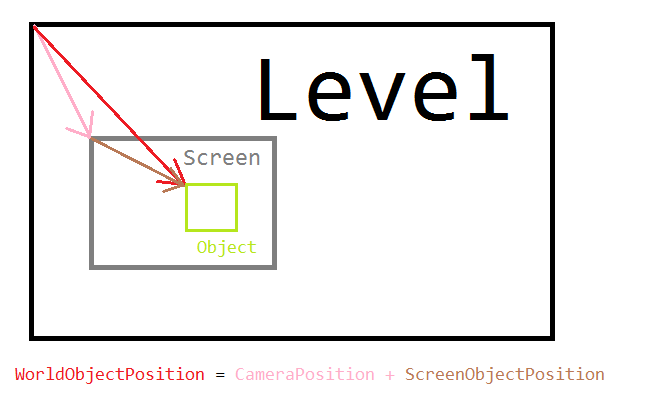
CameraPos is a vector pointing to the camera position needed to make the level scroll.
In the same class methods for translating coordinated from screen to world and vice versa:
In the Game1 class, we create a description of the current tool:
And in the event handler of the tool switch in our auxiliary window, we change the currTool variable to what the user chooses.
If a block is selected, then we create it and drag it around the window, when we click the mouse, we add it to the list of blocks and it is fixed in the level.
The tool for creating a block has two modes of operation: a free location and a location at certain places, at a distance that is a multiple of the block size, so that the level is more correct.
Scroll window:
We do not forget when doing a translation from screen coordinates to world coordinates and vice versa, when it is necessary (when drawing, adding an object, etc.).
In the handler of clicking on the Save / Load buttons, we call class methods for working with load saving.
This class is located in the project for working with a level (in the same place as Level, Block, etc.)
We make this.level = OpenLevel (“foo.lvl”) in the game, but don't forget to add texture to the blocks.
Next, we process the player's interaction with the level (for me, for now this is limited to this:
)
That's how I made the frame for the level editor. Now you can add other objects, expand it.
Please do not swear for sloppy / ugly / crooked code.
I post a screenshot, a project in which you can throw these blocks on the stage and the game itself, in which you can run around the level I can’t lay out, it’s raw now, but if you're interested, then there’s enough to see. By default, an accelerator with the name Test.lev from the folder with the game binarics loads, and the editor saves the file in the folder with the entire file, so the level file will need to be transferred. Otherwise, you need to correct the name of the level in the source code (all sources are attached).
Link to skydrive (7z file)
On narod.ru (file in zip format) - for those who do not have 7zip

UPD: added files to the article.
As a platform, I chose C # + XNA 4.0, and WinForms for custom elements in the level editor.
Create a Windows Game project in VisualStudio and go!
0. Architecture
For the level, I created a separate class that is used both in the game itself and in the editor. For convenience, I brought it to a separate project and added to both solutions. The level object itself is created in the editor, serialized to a file, and then from that file it is deserialized into the game.
1. Interface
As I said, I did the interface on Windows Forms. We connect System.Windows.Forms to our project. Some Windows Forms class names may conflict with names in Xna, the poet will do so
using WinForms = System.Windows.Forms;MSDN has an excellent description of Windows Forms and all of its widgets, so I will not dwell on this. With the interaction of Windows Forms and XNA, I had no problems. Create a procedure in the Game1 class (the standard name of the game class in Xna) that creates a window, widgets and sets them up, and calls it in the Initialize () method. I did something like this:
')
2. Class level
Create a level class and indicate that it is serializable:
[Serializable]
public class Level
{
//...

}
This class contains lists of all objects (I made only one type of object, but adding others is no longer difficult)
public List<Block> Blocks = new List<Block>();
public Vector2 cameraPos;
Block class:
[Serializable]
public class Block
{
[NonSerialized]
public Texture2D tex;

public Rectangle rect;

public Block(Texture2D texture, Rectangle rectangle)
{
this.tex = texture;
this.rect = rectangle;
}

}
Please note that it should also be serializable, and the texture should not be serialized (otherwise, an error), but we add it directly when loading the level into the game itself (for this you can create an additional String Texturename property, int TextureType or whatever you want).
CameraPos is a vector pointing to the camera position needed to make the level scroll.
In the same class methods for translating coordinated from screen to world and vice versa:
public Vector2 ScreenToWorld(Vector2 vector)
{
Vector2 rvect;
rvect = cameraPos + vector;
return rvect;
}

public Vector2 WorldToScreen(Vector2 vector)
{
Vector2 rvect;
rvect = vector - cameraPos;
return rvect;
}
3. The editor himself
In the Game1 class, we create a description of the current tool:
enum CurrentTool
{
None,
Brick,
Delete
}
CurrentTool currTool = CurrentTool.None;
And in the event handler of the tool switch in our auxiliary window, we change the currTool variable to what the user chooses.
If a block is selected, then we create it and drag it around the window, when we click the mouse, we add it to the list of blocks and it is fixed in the level.
The tool for creating a block has two modes of operation: a free location and a location at certain places, at a distance that is a multiple of the block size, so that the level is more correct.
Scroll window:
if (Keyboard.GetState().IsKeyDown(Keys.Left) && lastKeyboardState.IsKeyUp(Keys.Left))
{
level.cameraPos += new Vector2(-10, 0);
}
//
We do not forget when doing a translation from screen coordinates to world coordinates and vice versa, when it is necessary (when drawing, adding an object, etc.).
4. Save / load level.
In the handler of clicking on the Save / Load buttons, we call class methods for working with load saving.
using System.Runtime.Serialization.Formatters.Binary;
using System.IO;

namespace LevelLib
{
public static class SaveOpenLevel
{
public static Level OpenLevel(string filename)
{
Level level;
if (filename == "")
{
return null;
}
if (!File.Exists(filename))
{
return null;
}
BinaryFormatter bf = new BinaryFormatter();
Stream fs = new FileStream(filename, FileMode.Open);
level = (Level)bf.Deserialize(fs);
fs.Close();
return level;
}

public static int SaveLevel(string filename, Level level)
{
if (filename == "")
{
return 1;
}
BinaryFormatter bf = new BinaryFormatter();
Stream fs = new FileStream(filename, FileMode.Create);
bf.Serialize(fs, level);
fs.Close();
return 0;
}
}
}

* This source code was highlighted with Source Code Highlighter.
This class is located in the project for working with a level (in the same place as Level, Block, etc.)
We make this.level = OpenLevel (“foo.lvl”) in the game, but don't forget to add texture to the blocks.
Next, we process the player's interaction with the level (for me, for now this is limited to this:
foreach(Block block in level.blocks)
{
if(block.Intersets(player.Rectangle)
return true;
}
)
5. Afterword
That's how I made the frame for the level editor. Now you can add other objects, expand it.
Please do not swear for sloppy / ugly / crooked code.
I post a screenshot, a project in which you can throw these blocks on the stage and the game itself, in which you can run around the level I can’t lay out, it’s raw now, but if you're interested, then there’s enough to see. By default, an accelerator with the name Test.lev from the folder with the game binarics loads, and the editor saves the file in the folder with the entire file, so the level file will need to be transferred. Otherwise, you need to correct the name of the level in the source code (all sources are attached).
Link to skydrive (7z file)
On narod.ru (file in zip format) - for those who do not have 7zip
UPD: added files to the article.
Source: https://habr.com/ru/post/125225/
All Articles