Adaptation of smartphone applications for the HP TouchPad tablet
HP TouchPad tablet is a very uncommon webOS-device , possessing the property of backward compatibility with almost any application for smartphones on the webOS platform, created using the Mojo SDK development environment (hereinafter Mojo-application). The only serious drawback is that Mojo applications run in the usual 320x480 pixel resolution, completely ignoring the extra screen space of the tablet.
This article will help you quickly adapt the phone application created in the Mojo SDK development environment to the new tablet from HP.
')
If, while creating his application, the developer showed insight and realized the possibility of scalability, instead of tedious porting a Mojo application to the tablet using the development environment
Enyo SDK , you can just take a few minutes to your application to make it full-screen and user-friendly TouchPad.
So let's get started ...
Before you do anything, plan your plan. Go through all the scenes of the application and record those scenes that can be exited only with the help of the “back” gesture in the gestures area of the smartphone. We will need this list later to implement a separate return button, since the TouchPad is devoid of gestures.
The next step is to make changes to the appinfo.json file so that the TouchPad removes the frame around our application and switches to full-screen mode. Add the following line to the appinfo.json file:
uiRevision: 2Now download the application to the emulator or tablet and make sure everything works as expected.
The image has increased, but the buttons have changed in size (to fit the screen width of 1024 pixels instead of 320), which does not look very aesthetic. The same problem can occur with text fields and groups of elements. We will return to correct these shortcomings later.
TouchPad Definition
Now we need to determine whether our application is running on the phone or on the TouchPad. While there is only one tablet on the webOS, you can use a small software trick, which will be discussed further. Although you may have to implement an additional definition of the screen size of the tablet, if the promised 7-inch Opal comes out. But for now this is enough, and then you still have to Enyo-izirovat your application.
Depending on the file structure of your application, you may have created a global JavaScript file containing the basic functions. In that case, we will work with him. Otherwise, if your application is windowless, we will work with AppAssistant.js files, or, if your application is single-stage, work will be done with the StageAssistant.js file. In any case, all further references will be to the file that you consider to be "global."
In your global file, create a new function. It is good practice to have a named object accessible from any part of the application, and if you use the Metrix developer statistics service , you already have such an object. Otherwise, create such an object:
var myApp = {};Make sure that this code is out of any other functions and is placed on a separate line so that access to it is global. Now let's move on to creating our TouchPad tablet detection feature.
myApp.isTouchPad = function(){

};
First of all, we need to insert the code that will make our function work. We will interact with the DeviceInfo object from the Mojo framework. Nothing complicated here, everything is very simple and straightforward. We will go through all the stages and step by step we will consider all the necessary operations.
if(Mojo.Environment.DeviceInfo.modelNameAscii.indexOf("ouch")>-1) {

return true;

}
This block looks at the textual name of the device and looks for the string “ouch” in it. The string “ouch” is chosen so that there is no problem with case-dependence, to exclude the possible influence of spaces, plus the line itself was short. A regular expression would be more suitable, but the author was too lazy to write it.
But what if the program will run on another webOS-device with a high resolution screen or in an emulator? In this case, we add two more checks if the first checks fail. Once again, this may not be the most ideal way, but it works and, in the end, you still plan to redo your Enyo applications, right? :)
if(Mojo.Environment.DeviceInfo.screenWidth==1024){ return true; }

if(Mojo.Environment.DeviceInfo.screenHeight==1024){ return true; }
Here we check the width and height of the device screen, depending on its orientation.
Finally, we set the default return value to false if previous checks have not determined anything appropriate.
return false;Now combine all of the above:
var myApp = {};

myApp.isTouchPad = function(){

if(Mojo.Environment.DeviceInfo.modelNameAscii.indexOf("ouch")>-1) {

return true;

}

if(Mojo.Environment.DeviceInfo.screenWidth==1024){ return true; }

if(Mojo.Environment.DeviceInfo.screenHeight==1024){ return true; }

return false;

};
Once again, perhaps there are better and more effective ways to do this, but this one works fine.
Handling TouchPad specific moments
Finally there is a chance to use our function. In the scenes where you want to display the return button, insert this code snippet:
if(myApp.isTouchPad()){

var menuModel = {

visible: true,
items: [
{ icon: "back", command: "goBack"}
]
};

this.controller.setupWidget(Mojo.Menu.commandMenu,
this.attributes = {
spacerHeight: 0,
menuClass: 'no-fade'
},
menuModel
);

}
Here we use the CommandMenu widget, but we might as well use the ViewMenu widget or the common action button, or any other widget. This snippet simply displays a small round button with a “back” arrow so that users can return to the previous scene.
You may want to insert it into the switch in the handleCommand function for your scene.
case 'goBack':

this.controller.stageController.popScene();

break;
or any other code applicable to your application to return to the previous scene.
Improving the appearance of the application
As mentioned above, your buttons and similar elements rang out wide, which doesn't look very aesthetically pleasing. Here is an easy way to fix this. Inside the scene, where it’s determined that the program is running on a TouchPad, add this small code that adds a special style to the widget.
this.controller.get("search-button").addClassName("touchpad");This code will add the “touchpad” class to the search button widget. Now you can control it through your CSS style sheet. For example:
#search-button.touchpad {

width: 45% !important;

margin: 5px auto !important;

}
This design will reduce the buttons and place them in the center of the screen. But what if in the application you have two related buttons? Then you need to place them next to each other, like this:
this.controller.get("save-button").addClassName("touchpad");

this.controller.get("cancel-button").addClassName("touchpad");
And then in your CSS do this:
#save-button.touchpad {

width: 45% !important;

margin-left: 10px !important;

float: left;

}

#cancel-button.touchpad {

width: 45% !important;

margin-right: 10px !important;

float: right;

}
Now the buttons are located next to each other. You may have to play with the parameters to find the right ones for a particular application (and also to have the clear: both element so that the content matches what was expected).
Other things to worry about
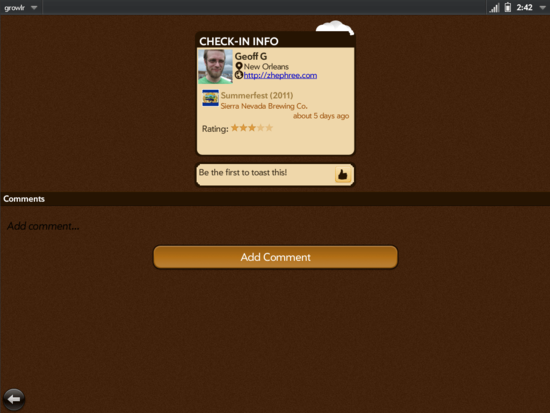
If the scene uses a background image, make sure you repeat it before filling the entire screen. Absolutely everything will look super-wide, so it's best to use separate images for the TouchPad. Adapting my growlr app, the author of the article didn’t do absolutely everything to make it look perfect on the TouchPad. The main task was to quickly get a workable application. You can enhance the appearance for as long as you like, but it is better to spend this time porting the application to Enyo.
And it's all! If you have comments on the article, welcome to comments here or on the website of the author.
Source: https://habr.com/ru/post/124775/
All Articles