Arduino? - Not! IDuino - Yes! (Part 1)
Looking at the prices of ready-made arduins in our country, I became sad.
But then he wondered ... What the hell ?! After all, they use conventional AVR microcontrollers that are available in bulk on the radio market for a normal price.
And why not collect your own and not sit on the ready-made?
For those who are interested in the process of assembling and setting up their simplest Arduino, I ask for cat.
Now on the Internet is full of resources devoted to Arduino. But a bit annoying plane of the material and frequent copy-paste. Basically, most of the articles are only in the first meeting and the flashing of LEDs, there is no detailed description of the scheme, more complex algorithms and other things. Looking at it, I decided to collect my fee and do with it what I want, and do it consciously, and not according to the instructions.
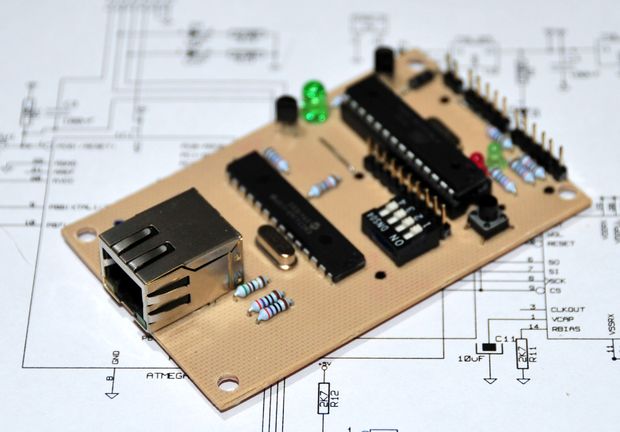
For the start, I decided to choose the most popular Atmega8 controller.
In our radio market, its average cost varies between 12-18 UAH, depending on the place of purchase (shop / stall) and the type of case.
For me at that time there was no problem in terms of programming, there was a programmer and an LPT port on the computer. But I wanted to do it right away so as not to depend on the old iron, so the breadboard, 50 meters of MGTF wires, a small placer and another ATtiny2313 controller were immediately bought.
I will make a reservation, I took controllers for several pieces at once, just in case.
Since in modern PCs and laptops now LPT and COM are not to be found in the afternoon with fire, it was decided to make a board with a USB interface. But I will say straight away that in order to do this, you will still need to find either an adapter with USB-COM, or a computer with an LPT port (USB-LPT will not work!). Therefore, for these purposes, and was taken ATtiny2313.
This microcontroller in our circuit will act as a “buffer” between our main controller (ATMEGA8) and PC.
')
But stop talking and start from theory to practice.
First of all, before all the movements, we need to build a programmer.
I will give two schemes that will help in this or that case.
LPT programmer "5-wire"
The name is absurd, but it is the simplest programmer for our controllers, the essence lies in the simplicity and low reliability. But for our experiences will be enough.
We need:
1.LPT male connector, or rather 25-pin DB-25-male connector
2.4 100 Ohm resistor (can be in the range of 80-250 Ohms)
3.5-core wire with a length of not more than 20 cm and, preferably, with metallized screening.
4. Direct hands.
We solder everything according to such a simple scheme.
The only important note is that you must install resistors, as they protect the port. And if without them, then, simply, shorting the conclusions, kill the port.

On the appointment of conclusions later.
You must have something like that.
If a computer with LPT has not been found, or it has been found, but its port has already been burned, then a second programmer will help you.
COM - ISP (Gromov programmer)
We need:
1. COM Female Connector DB-9-F
2. 3 pulse diode (I took d220)
3. 7 resistors of 1 kΩ
4. 5-core wire up to 1 meter.
5. Straight arms
The scheme is as follows:
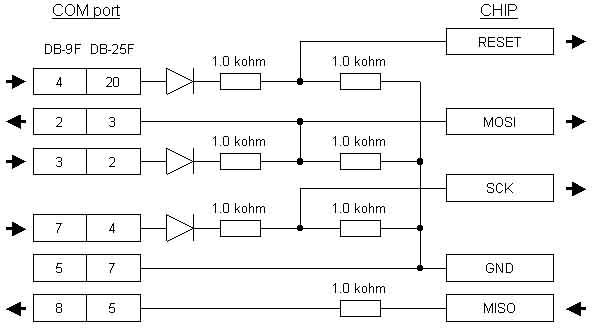
A scattering of resistors and diodes is needed in order to bring the signal levels of the COM port (-12V, + 12V) to the required (0, + 5V).
This programmer circuit is quite common and is known as the Gromov programmer. The name came from the author of the program Algorithm Builder Gennady Gromov, who proposed such a scheme.
To start this is all, in the next part of the article we will proceed to the detailed theory, board assembly, firmware and debugging.
Links
- Gromov website;
- Part of the material from the site .
UPD .: Based on your comments and suggestions, the second part will be based
Source: https://habr.com/ru/post/123466/
All Articles