Video peephole with minimum costs
Good day, habra users.
I used to look into the peephole from childhood before opening the door to someone’s apartment.
But after the move, it turned out that one could not see into the peephole who asks to visit you.
In other words, you need to do something that will allow you to see what is happening near the elevator without leaving your apartment.
Like this:

')
No sooner said than done!
Raw materials
Based on my greed, I didn’t want to spend a lot of money on this business, so for a start I looked at what I had in stock:
- HP computer (it costs me as a file server)
- Old analog camcorder JVC
- TV tuner AverMedia 307
- Meters 5 wires twisted pair (for the video signal is not the best option, but still)
From this list it is quite possible to build a video surveillance of the corridor.
But one thing: an old video camera of impressive size (hanging it in the corridor is not very beautiful). I decided to look for a replacement: I looked at a lot of cameras on the Internet, but most of all I liked the color with the possibility of night shooting , this mini camera costs only $ 12. I decided and ordered a camera in China, brought it, checked it, everything seemed to work.
Let's get together to put it all together.
Camera installation
The camera is sold without anything in the kit. The camera has two “tulip” outputs and one power output (9V) approximately as a connector of an old Nokia. These connectors did not suit me because of their size, we cut
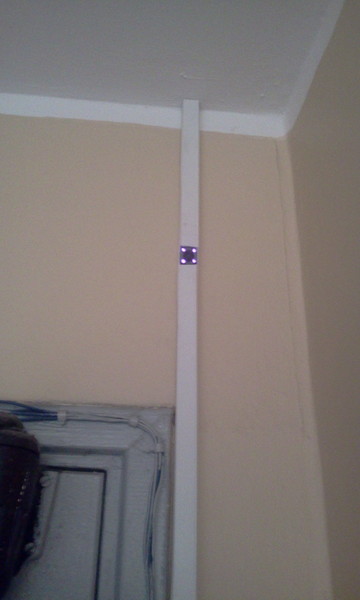
Side view of the camera:

Front camera view:

We turn to the computer part.
Display video from camera
As a server, I chose Ubuntu Server 11.04 when installing it, he asked about the GUI, chose the xfce desktop. After installation, created a separate user with automatic login to the graphics system and configured the power manager for a permanent job. I opened firefox and pressed F11 (fullscreen) and closed it, then added firefox to autorun via session settings. Now when you start the computer, firefox will immediately open in full-screen mode. Now we will start the most difficult - installation of the video recorder.
I do not exactly remember the whole set of required packages, but the main ones are video4linux video4linux2 and the zoneminder video server itself . When installing the zoneminder (sudo apt-get install zoneminder ffmpeg), it automatically installed apache, mysql, php5 and all the necessary dependencies. Now make a link to the apache settings:
sudo ln -s /etc/zm/apache.conf /etc/apache2/conf.d/zoneminder
Then restart apache: sudo service apache2 restart
And voila, open localmin / zm in the browser from the server and see the zoneminder-a configuration panel.
Notice in the center at the top of the inscription running (I immediately started, but there are cases when it does not immediately start, if you click on this inscription, you can start the zoneminder daemon).
Looking ahead, I’ll immediately say that in order to display video in a resolution greater than 320x240, you need to increase the kernel memory by writing the following two lines in /etc/sysctl.conf:
kernel.shmall = 134217728
kernel.shmmax = 134217728
And to work immediately (without rebooting) you need:
echo 134217728> / proc / sys / kernel / shmall
echo 134217728> / proc / sys / kernel / shmmax
For more detailed configuration of the zoneminder, you can find the necessary information on the official site zoneminder.org .
I will write in two words:
Add a new monitor, select
Source Type -> local (local device)
Function -> monitor (simple viewing, if modect is selected, motion recording will be performed)
Source tab:
Device Path / dev / video1 (To find the path you need sudo apt-get install v4l2-utils and after v4l2_ctl --all)
Capture Method -> I chose Video For Linux Version 2
Device Channel 1 (I use the composite input in the TV tuner)
Capture Pallette YUYV
Width and Height according to your desire, but for the selected camera I achieved normal operation at a resolution of 500x340.
Buffers -> Image Buffer Size 200 (frame buffer)
Pre Event Image Count 50 (number of frames before the event to record)
Post Event Image Count 50 (number of frames after the event for recording)
The remaining settings can not be changed, but it is intuitively clear what settings are affected.
Next, the settings of the Zoneminder itself, on the main page on the right above the settings link. I chose STREAM_METHOD mjpeg instead of jpeg in the images tab, as it seemed to me so it works a little faster. The rest of the settings for your taste and color.
Now on the main page there was a recording of a new camera, clicking on its name (Monitor1) will see the video display from the camera:

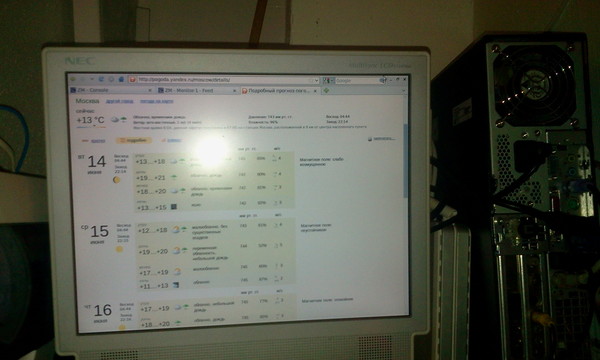
The video is displayed in the browser, the browser itself works in full-screen mode, by pressing Ctrl-Tab you can navigate through the browser tabs, so along with the video I opened a page with the weather forecast (and set the browser to open tabs from the last session) and now, not leaving I only see if there is anyone in the corridor, but also the weather for today, and then it suddenly rains, and as always I will forget the umbrella.
Weather display:

And one more bonus. Taking a device on Android (however, any device with a program that can show streaming IP video) and installing TinyCamMonitor there, setting the following in the host name field like xxxx / cgi-bin / nph-zms? Mode = single & monitor = 1 & scale = 150 & connkey = 722426 & rand = 1308306882
where xxxx is the IP address of the server, and the path itself can be taken by looking at the source code of the page with video display in the browser and finding id = "liveStream" src = "xxxx / cgi-bin / nph-zms? mode = single & monitor = 1 & scale = 150 & connkey = 932856 & rand = 1308899602 "alt =" Monitor-1 "width =" 750 "height =" 510 ". Src is the way to go. Specify the port number (by default 80) and you can see the camera on the screen of your phone or tablet or another device.
Thank you for your attention, I hope you were interested in reading this article.
Source: https://habr.com/ru/post/122548/
All Articles