KVM & OpenVZ virtualization and cloud computing using Proxmox VE
Introduction
Proxmox Virtual Environment (Proxmox VE) is an open source virtualization system based on Debian GNU / Linux. Developed by the Austrian company Proxmox Server Solutions GmbH, sponsored by the Internet Foundation Austria.
It uses KVM and OpenVZ as hypervisors. Accordingly, it is able to perform any supported KVM OS (Linux, * BSD, Windows and others) with minimal loss of performance and lossless Linux.
Virtual machine management and server administration are performed via the web interface or via the standard Linux command line interface.
There are many options available for virtual machines being created: used hypervisor, storage type (image file or LVM), type of emulated disk subsystem (IDE, SCSI or VirtIO), type of network card emulated, number of processors available, and others.
ru.wikipedia.org/wiki/Proxmox_Virtual_Environment
It is important to know that:
- Proxmox VE uses only x86_64 architecture.
- To use KVM, your processor must support hardware virtualization (Intel VT or AMD-V). OpenVZ does not require hardware virtualization.
')
Cluster configuration
In this article we will create a cluster of two machines.
The configuration will be as follows:
Master server1.example.com IP 192.168.0.100
Slave server2.examle.com IP 192.168.0.101
You can download the distribution itself at this address: pve.proxmox.com/wiki/Downloads
Install master and slave servers
Let's start installing the master server (server1.example.com, IP 192.168.0.100)
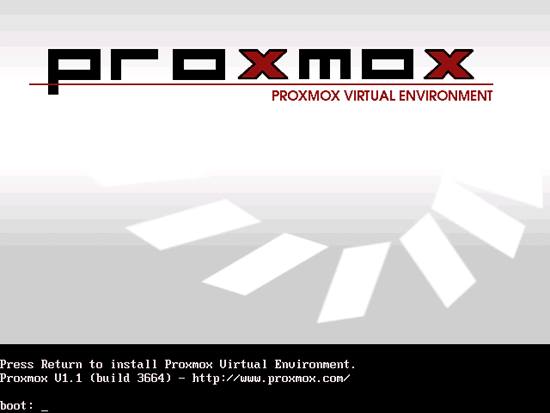
After loading the CD press Enter
Accept the license agreement

Next, click Install

Fill in the fields from the Country, select the Time zone, and the keyboard layout

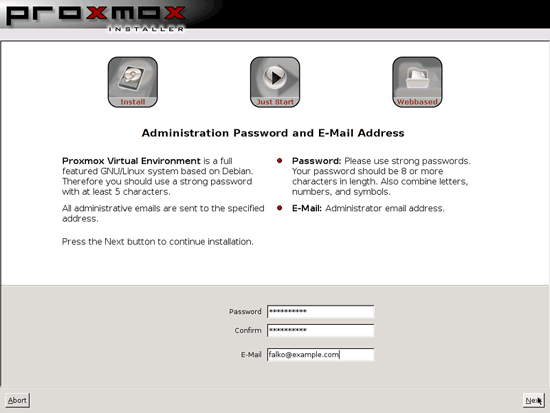
Specify the root password, password confirmation, and postal address
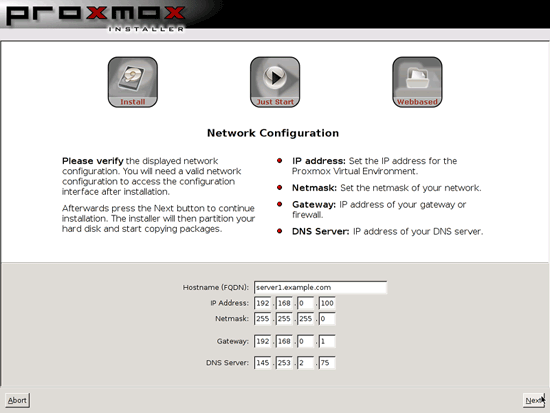
Now we proceed to the network configuration of our cluster, in this case we have the Hostname server1.example.com
IP 192.168.0.100
NETMASK 255.255.255.0
GATEWAY 192.168.0.1
DNS 145.253.2.75
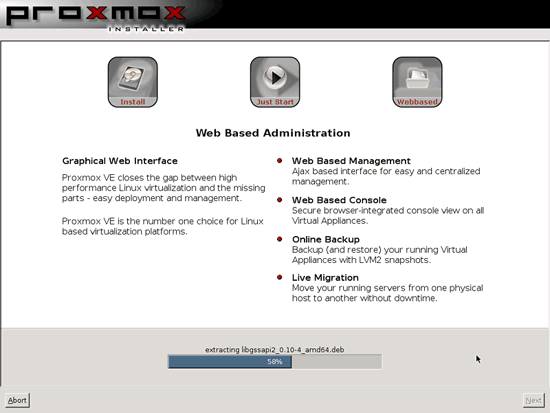
If you have already noticed that when installing the distribution does not require the creation of partitions. He automatically creates partitions using LVM. This is done because Proxmox makes it possible to backups our snapshots of virtual machines.
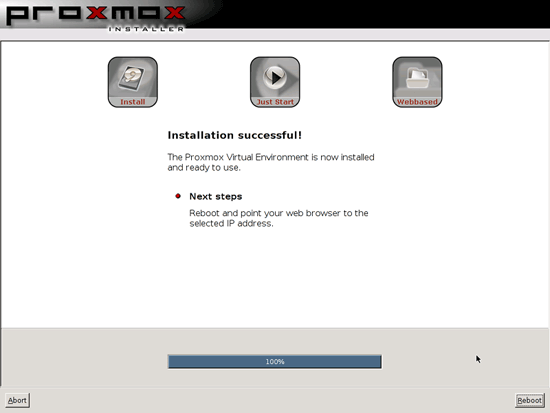
After installation, click Reboot
Control panel
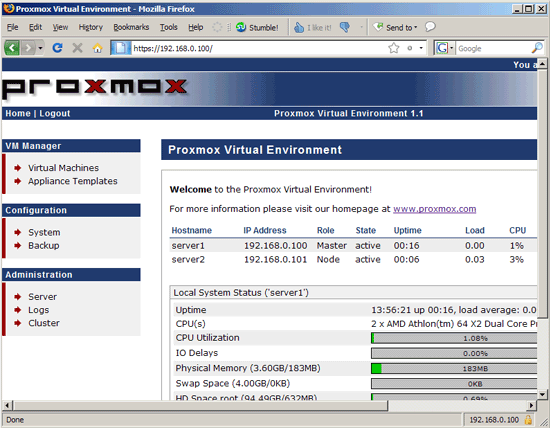
As soon as the system has booted, it can be accessed via http or https (When accessing the http protocol, you will be automatically transferred to https)
In our case, we dial 192.168.0.100 and get into the administration section of our cluster, fill in the Username and Password

Home page of our web muzzle
Having made sure that our server is working, we proceed to the installation of a slave server or node, the installation process is identical to the master installation process, just specify the server name and IP addresses, respectively, as we mentioned above. In our case, the slave server will be named server2.example.com with the IP address 192.168.0.101

After the successful installation process of the slave server, we go over SSH to our servers server1.example.com and server2.example.com and execute several commands:
server1:
Now check the status of our cluster:
server2:
Check the status of our cluster again.
server2:
The output shows us that the server with the IP address is 192.168.0.100, we have Master (M), and the server with the IP 192.168.0.101 is Node (N)
Now, let's go back to the Proxmox CP (Central Panel) and add templates for our future virtual machines. To add a template, go to the Appliance Templates section. The Downloads tab contains a list of templates provided by the Proxmox VE project. The names of distributions, version and type of virtualization are indicated. But at once I want to clarify about one nuance. The links in the list are broken. Therefore, we will first download the template and add it manually.

A download page is available at this download.proxmox.com/appliances address.
Select the template we need, download it to your PC, go to the Local tab and load it. You can also download ISO images for KVM virtualization as well.

Create OpenVZ container
To create a container, go to the section Virtual Machines> Create ...


Type - OpenVZ Container
Template - Template for VM
Hostename - hostname for example vm1.example.com
Memory (MB) - Memory Size
Swap (MB) - Shared Virtual Memory
Password - root password
Confirm Password - password confirmation
VMID identifier
Cluster Node - choose a cluster, in our case it is 1
Start at boot - automatic start of the container
Disk space - the volume of the disk system.
Virtual Network - Choose venet and set the IP address for our VM
DNS domain - domain (example.com)
Primary DNS server
Secondary DNS server
Next, click Create.

In the List tab, the VM we created should be displayed.
When you select a container, you can monitor the VM operation status, container loading status, etc. You can also run VNC control.


Creating virtual machines on remote systems in a cluster
To create a VM on remote systems in a cluster, you need to do the same thing that was described above, but instead of server1 (192.168.0.100) of the Cluster Node item whose selected property was server2 (192.168.0.101).

If you re-enter the List tab, we will already find that a virtual machine has also been created on server2.

Links to projects
Proxmox VE: pve.proxmox.com/wiki/Main_Page
OpenVZ: wiki.openvz.org
KVM: kvm.qumranet.com/kvmwiki
PS
If you find errors or inaccuracy in the translation, please write in the LAN, I will correct it.
Proxmox Virtual Environment (Proxmox VE) is an open source virtualization system based on Debian GNU / Linux. Developed by the Austrian company Proxmox Server Solutions GmbH, sponsored by the Internet Foundation Austria.
It uses KVM and OpenVZ as hypervisors. Accordingly, it is able to perform any supported KVM OS (Linux, * BSD, Windows and others) with minimal loss of performance and lossless Linux.
Virtual machine management and server administration are performed via the web interface or via the standard Linux command line interface.
There are many options available for virtual machines being created: used hypervisor, storage type (image file or LVM), type of emulated disk subsystem (IDE, SCSI or VirtIO), type of network card emulated, number of processors available, and others.
ru.wikipedia.org/wiki/Proxmox_Virtual_Environment
It is important to know that:
- Proxmox VE uses only x86_64 architecture.
- To use KVM, your processor must support hardware virtualization (Intel VT or AMD-V). OpenVZ does not require hardware virtualization.
')
Cluster configuration
In this article we will create a cluster of two machines.
The configuration will be as follows:
Master server1.example.com IP 192.168.0.100
Slave server2.examle.com IP 192.168.0.101
You can download the distribution itself at this address: pve.proxmox.com/wiki/Downloads
PS Distribution is licensed under the GPL
Creation and management of virtual machines will occur on the master server.
Install master and slave servers
Let's start installing the master server (server1.example.com, IP 192.168.0.100)
After loading the CD press Enter
Accept the license agreement
Next, click Install
Fill in the fields from the Country, select the Time zone, and the keyboard layout
Specify the root password, password confirmation, and postal address
Now we proceed to the network configuration of our cluster, in this case we have the Hostname server1.example.com
IP 192.168.0.100
NETMASK 255.255.255.0
GATEWAY 192.168.0.1
DNS 145.253.2.75
If you have already noticed that when installing the distribution does not require the creation of partitions. He automatically creates partitions using LVM. This is done because Proxmox makes it possible to backups our snapshots of virtual machines.
After installation, click Reboot
Control panel
As soon as the system has booted, it can be accessed via http or https (When accessing the http protocol, you will be automatically transferred to https)
In our case, we dial 192.168.0.100 and get into the administration section of our cluster, fill in the Username and Password
Home page of our web muzzle
Having made sure that our server is working, we proceed to the installation of a slave server or node, the installation process is identical to the master installation process, just specify the server name and IP addresses, respectively, as we mentioned above. In our case, the slave server will be named server2.example.com with the IP address 192.168.0.101
After the successful installation process of the slave server, we go over SSH to our servers server1.example.com and server2.example.com and execute several commands:
server1:
pveca -c
server1:~# pveca -c
Generating public/private rsa key pair.
Your identification has been saved in /root/.ssh/id_rsa.
Your public key has been saved in /root/.ssh/id_rsa.pub.
The key fingerprint is:
ce:bf:a2:cd:69:23:e4:78:fc:05:db:fc:55:ef:52:1d root@server1
cluster master successfully created
server1:~#
Now check the status of our cluster:
pveca -l
server1:~# pveca -l
CID----IPADDRESS----ROLE-STATE--------UPTIME---LOAD----MEM---ROOT---DATA
1 : 192.168.0.100 MA 00:14 0.00 5% 1% 0%
server1:~#
server2:
pveca -a -h 192.168.0.100
server2:~# pveca -a -h 192.168.0.100
Generating public/private rsa key pair.
Your identification has been saved in /root/.ssh/id_rsa.
Your public key has been saved in /root/.ssh/id_rsa.pub.
The key fingerprint is:
ea:ad:21:fc:5d:9b:af:ab:fb:0d:72:72:c7:94:23:ca root@server2
The authenticity of host '192.168.0.100 (192.168.0.100)' can't be established.
RSA key fingerprint is 7c:17:8c:35:9c:be:60:6b:56:97:2a:0b:72:60:57:09.
Are you sure you want to continue connecting (yes/no)? <-- yes
Warning: Permanently added '192.168.0.100' (RSA) to the list of known hosts.
root@192.168.0.100's password: <-- root password of server1.example.com
cluster node successfully created
server2:~#
Check the status of our cluster again.
server2:
pveca -l
This should display both servers in the output:
server2:~# pveca -l
CID----IPADDRESS----ROLE-STATE--------UPTIME---LOAD----MEM---ROOT---DATA
1 : 192.168.0.100 MS 00:15 0.00 5% 1% 0%
2 : 192.168.0.101 NS 00:04 0.08 15% 1% 0%
server2:~#
The output shows us that the server with the IP address is 192.168.0.100, we have Master (M), and the server with the IP 192.168.0.101 is Node (N)
Now, let's go back to the Proxmox CP (Central Panel) and add templates for our future virtual machines. To add a template, go to the Appliance Templates section. The Downloads tab contains a list of templates provided by the Proxmox VE project. The names of distributions, version and type of virtualization are indicated. But at once I want to clarify about one nuance. The links in the list are broken. Therefore, we will first download the template and add it manually.
A download page is available at this download.proxmox.com/appliances address.
Select the template we need, download it to your PC, go to the Local tab and load it. You can also download ISO images for KVM virtualization as well.
Create OpenVZ container
To create a container, go to the section Virtual Machines> Create ...
Type - OpenVZ Container
Template - Template for VM
Hostename - hostname for example vm1.example.com
Memory (MB) - Memory Size
Swap (MB) - Shared Virtual Memory
Password - root password
Confirm Password - password confirmation
VMID identifier
Cluster Node - choose a cluster, in our case it is 1
Start at boot - automatic start of the container
Disk space - the volume of the disk system.
Virtual Network - Choose venet and set the IP address for our VM
DNS domain - domain (example.com)
Primary DNS server
Secondary DNS server
Next, click Create.
In the List tab, the VM we created should be displayed.
When you select a container, you can monitor the VM operation status, container loading status, etc. You can also run VNC control.
Creating virtual machines on remote systems in a cluster
To create a VM on remote systems in a cluster, you need to do the same thing that was described above, but instead of server1 (192.168.0.100) of the Cluster Node item whose selected property was server2 (192.168.0.101).
If you re-enter the List tab, we will already find that a virtual machine has also been created on server2.
I didn't write about KVM. The process of creating a container is exactly the same as for OpenVZ.
Links to projects
Proxmox VE: pve.proxmox.com/wiki/Main_Page
OpenVZ: wiki.openvz.org
KVM: kvm.qumranet.com/kvmwiki
PS
If you find errors or inaccuracy in the translation, please write in the LAN, I will correct it.
Source: https://habr.com/ru/post/122338/
All Articles