Tea on the laptop keyboard - it can happen to anyone
If you poured a drink on the keyboard, and it stopped working, and you don’t want to buy a new one or you can’t, do not worry, it’s not so difficult to clean it. You need only patience and about two hours of your time. If your keyboard is dry and began to work by itself - do not worry, you still need to clean it, otherwise the problem will return to you later, but cleaning will not help. Well, if you still have not spilled anything - do not despair, it can happen to anyone! My laptop, for example, was very high and far in relation to the drink. However, you never know in advance what the flight path of the splashed tea will be.
First of all, it should be noted that liquids are a danger to the entire system. Even if everything is working now, then in a few months your laptop can go to a landfill. In the event of an incident, it is desirable to instantly de-energize the laptop by removing the charge and battery (yes, the liquid will not wait for the programs to complete). Then just as quickly flip it down the flooded side and let the liquid drain. After that, fully unleash and assess the damage. Do not connect power if there is a liquid inside or its remnants in the form of a sweet syrup. In the case of pure (distilled?) Water, you need to wait a day for all the liquid to evaporate. In the case of tea / coffee and other drinks, the insides must be cleaned, otherwise the board will be short-circuited, oxidized, and this will easily kill your laptop. In this article I will not describe how to wash the motherboard. We will proceed from the fact that you, like me, have untwisted the laptop and found that you are incredibly lucky, because flooded only the keyboard.
My injured Eee PC 901 serves as an experimental sample. Naturally, you may have some differences, but in general the procedure is identical on most models. Sorry for the quality of the photo, shot with what was at hand. Well, and I hope everyone understands that they follow my advice at your own peril;)
')
Remove the keyboard. In my case, it is fixed with three latches on top, which must be gently pressed alternately, while pulling the keyboard up. As soon as you release the keyboard, do not rush to joyfully pull it out: you need to disconnect the cable. In the photo you can see it on the bottom left.
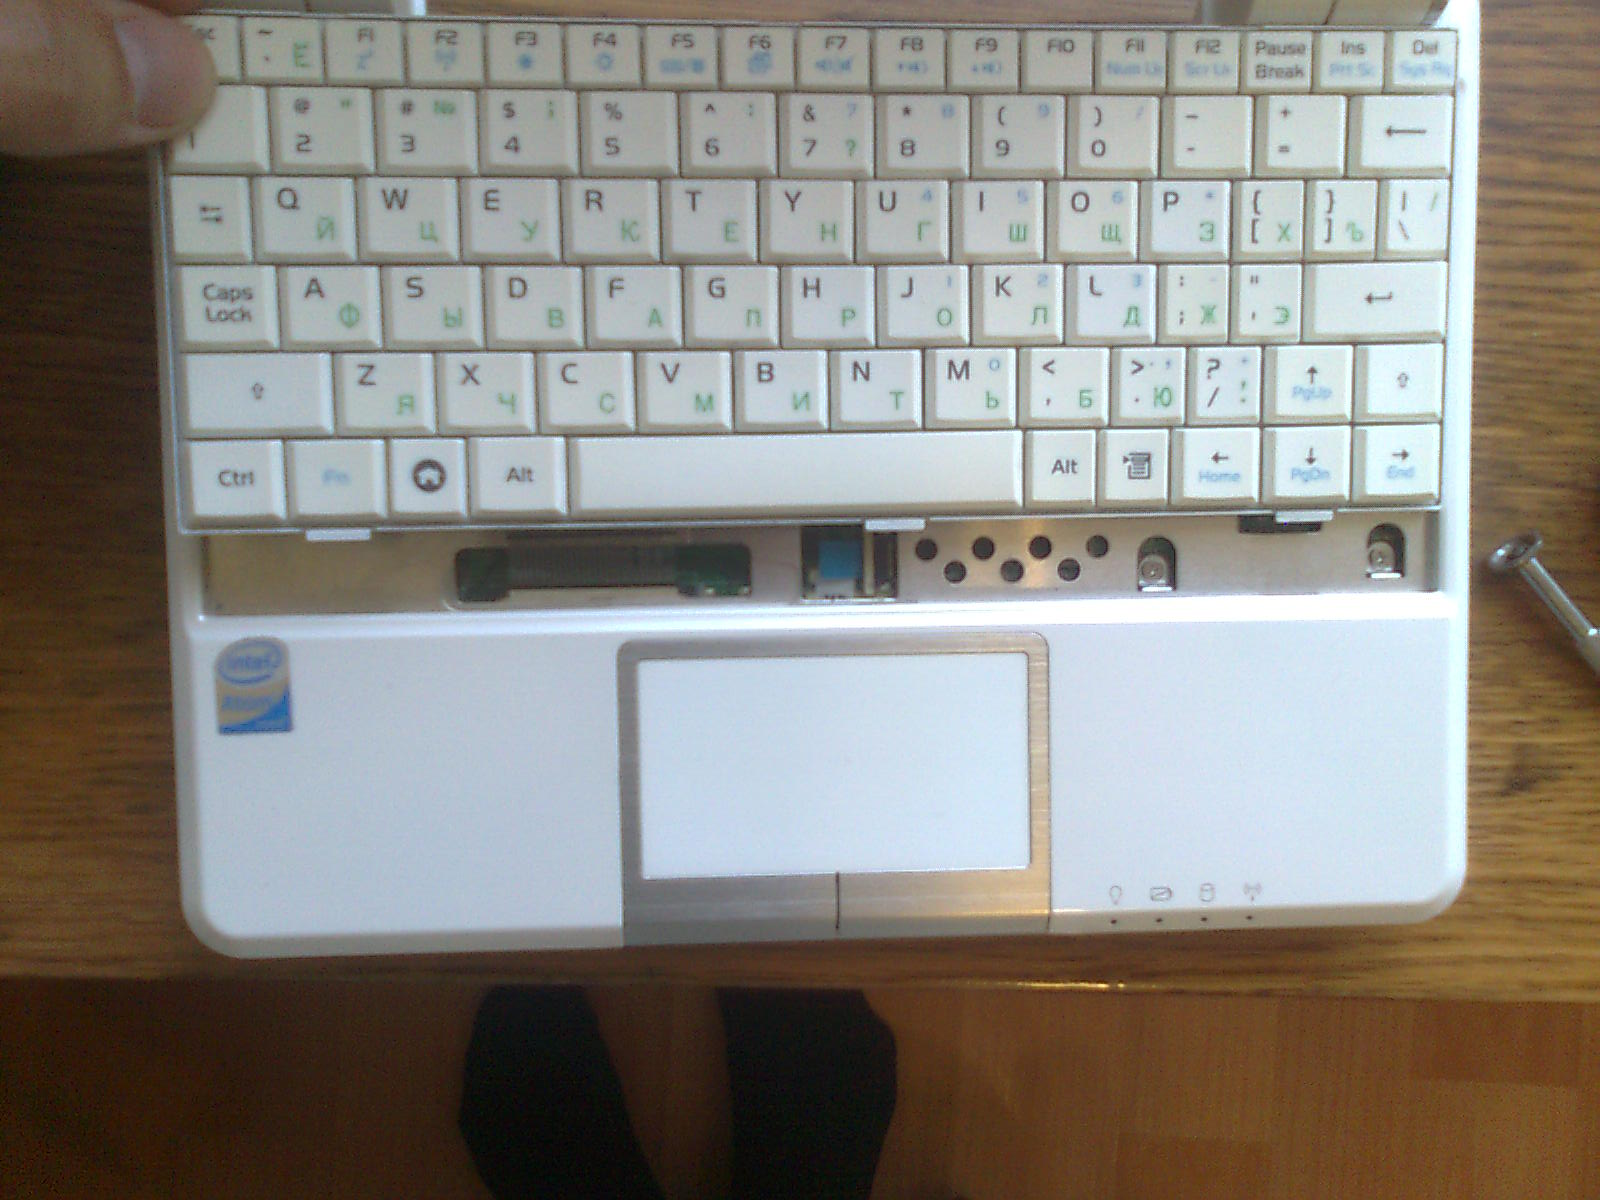
No, at the very bottom - these are my legs accidentally hit the frame, and the loop - right under the keyboard. The train just does not pull out. It is fixed with clips on the sides. First, gently pull them up along the train. For this fit a small screwdriver (later it will also come in handy). Then the train can be easily removed. I repeat: EASY! Caution: do not scratch the track on the motherboard with a screwdriver.
So, we have a disconnected keyboard. We examine the space under it for something tasty. We are especially interested in the liquid or its characteristic traces identified by the color of the original drink.
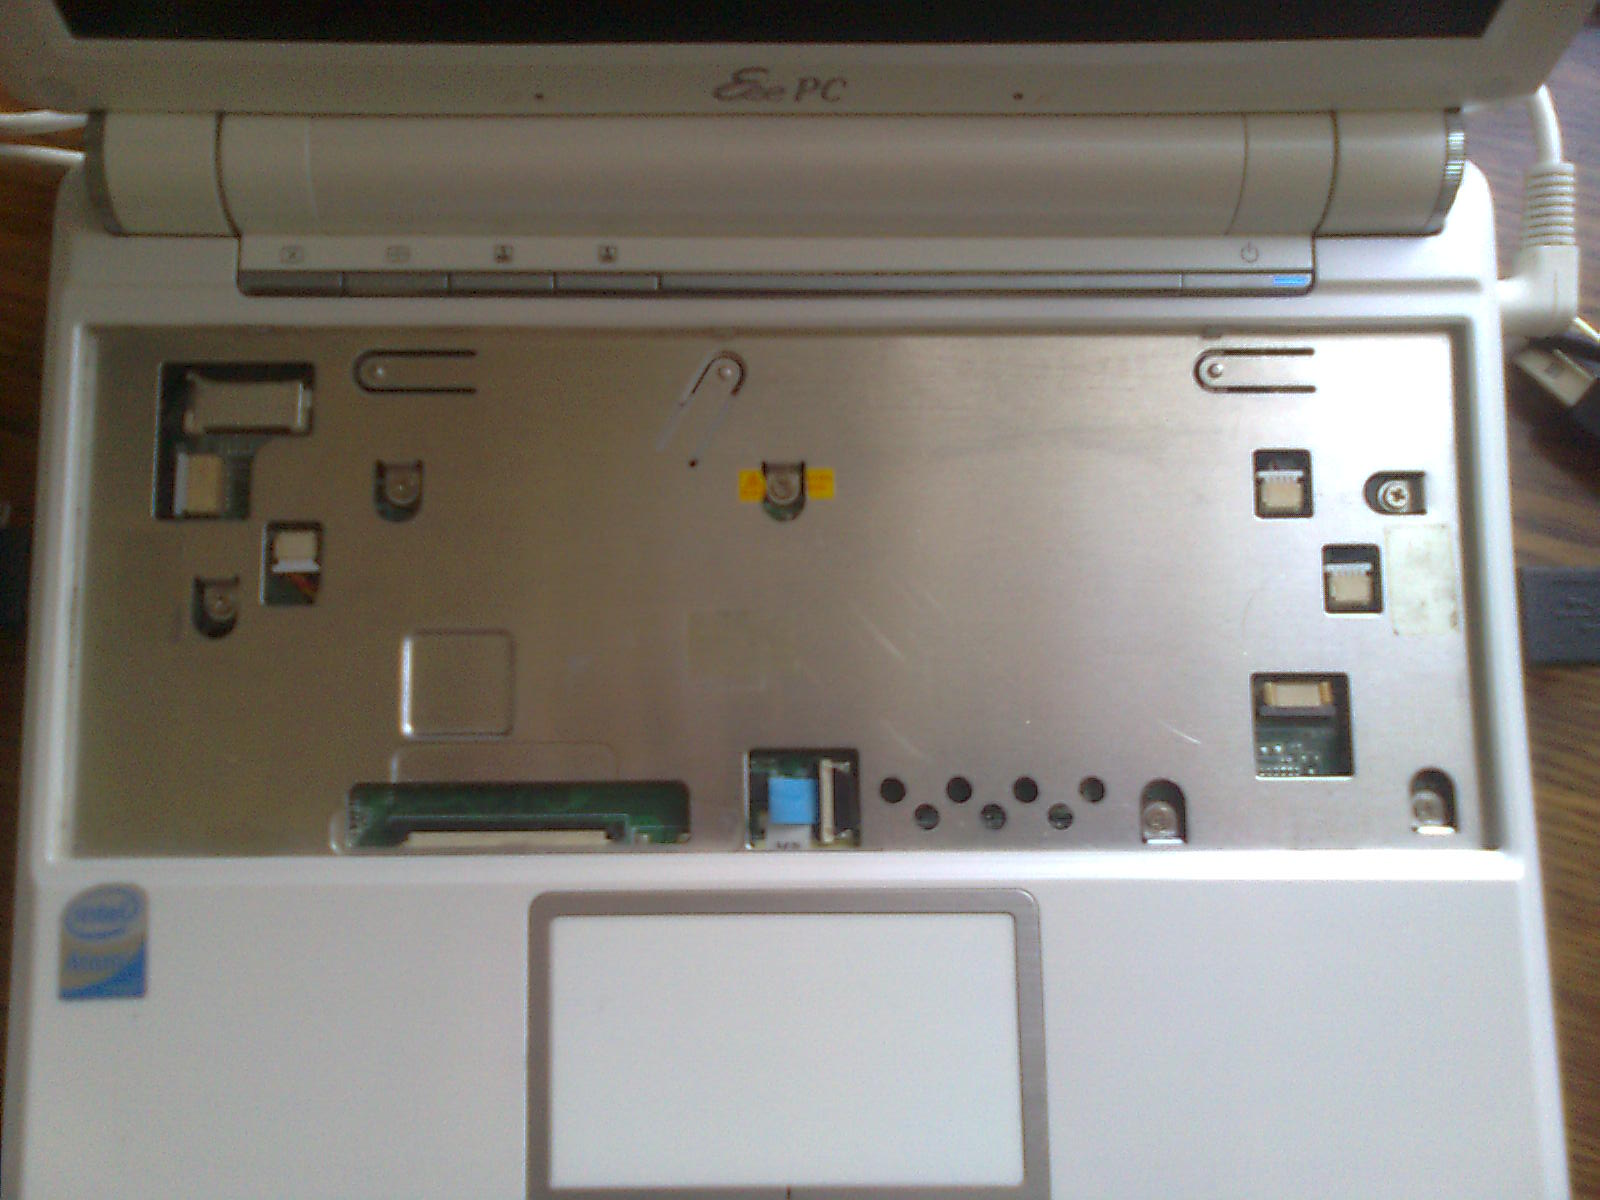
If there is any suspicion that the liquid could penetrate further, then it is better to continue disassembling. Instructions for your laptop model can be found online. If there are no traces of liquid under the keyboard, and you are so lazy to disassemble further that you are absolutely sure that only the keyboard has suffered, then we leave it to your conscience.
On the Internet, you can often find advice to rinse the keyboard in warm water. I would advise to approach this matter more seriously and rinse the entire laptop at once. But ... I will not. Let's still look inside to realize the inefficiency and danger of this method.
First you need to remove all the buttons. Each button consists of an upper platform and an elevator - a miniature construction under the platform that provides the mobility of the button. I found the advice to first remove the platform, hooking them in a strictly defined place, and then remove the elevators. Such a method seemed dumb to me, because I was not sure whether the button would come off before the elevator broke down. In addition, I did not understand where I put the screwdriver in to safely unhook the button. In the end, turning the keyboard over, I realized that at least in my model, you can unhook the buttons immediately with elevators. It all simplifies.
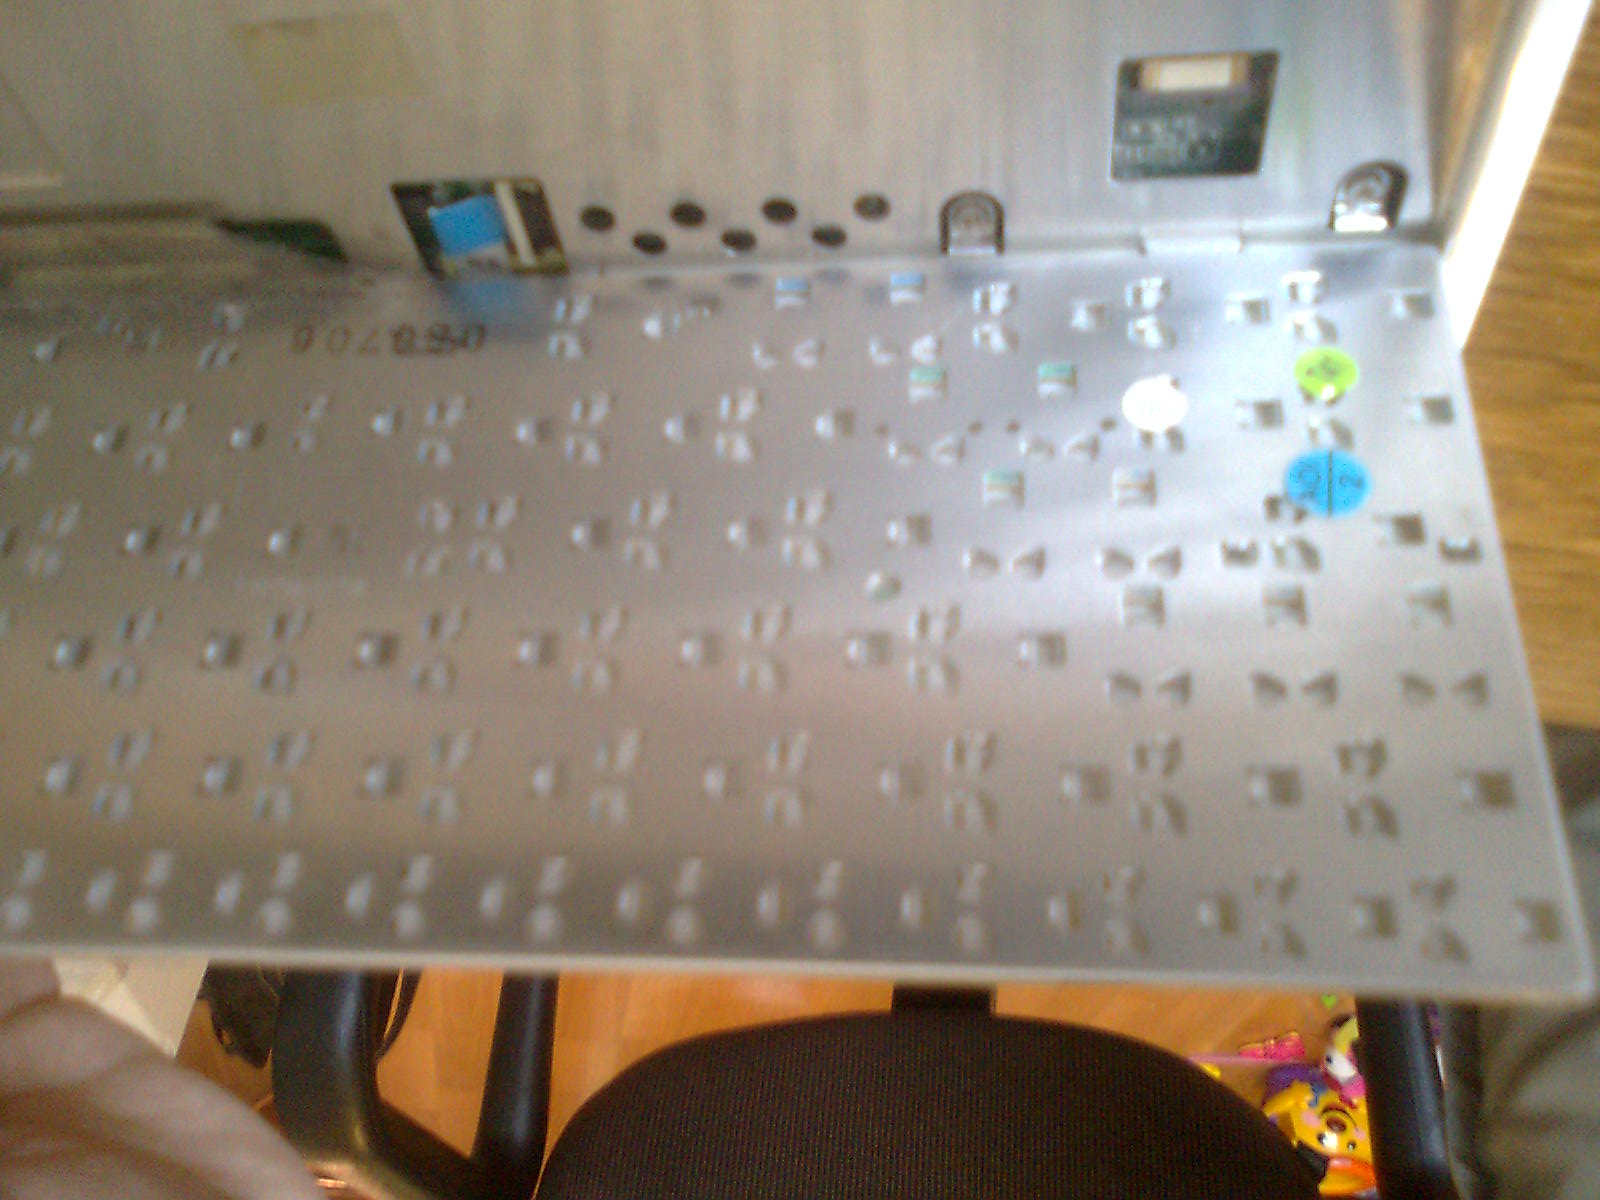
The photo shows (bad, but visible) that each button has three “holes”. In your case there may be four. Well, if not at all, you will first have to separately remove the site. On the one hand, the elevator is fixed by a “hook”, on the other - by two latches. Select the most unnecessary button on the keyboard (e?), And try using a screwdriver to unclip the latches first, pressing down and to the side, then the hook. Broke? Nothing, do not mind, you have them still how much!
Detachable buttons can be neatly folded in the same order, so that later it was easier to assemble. Attention! Young children really like these buttons, take care of them from each other.
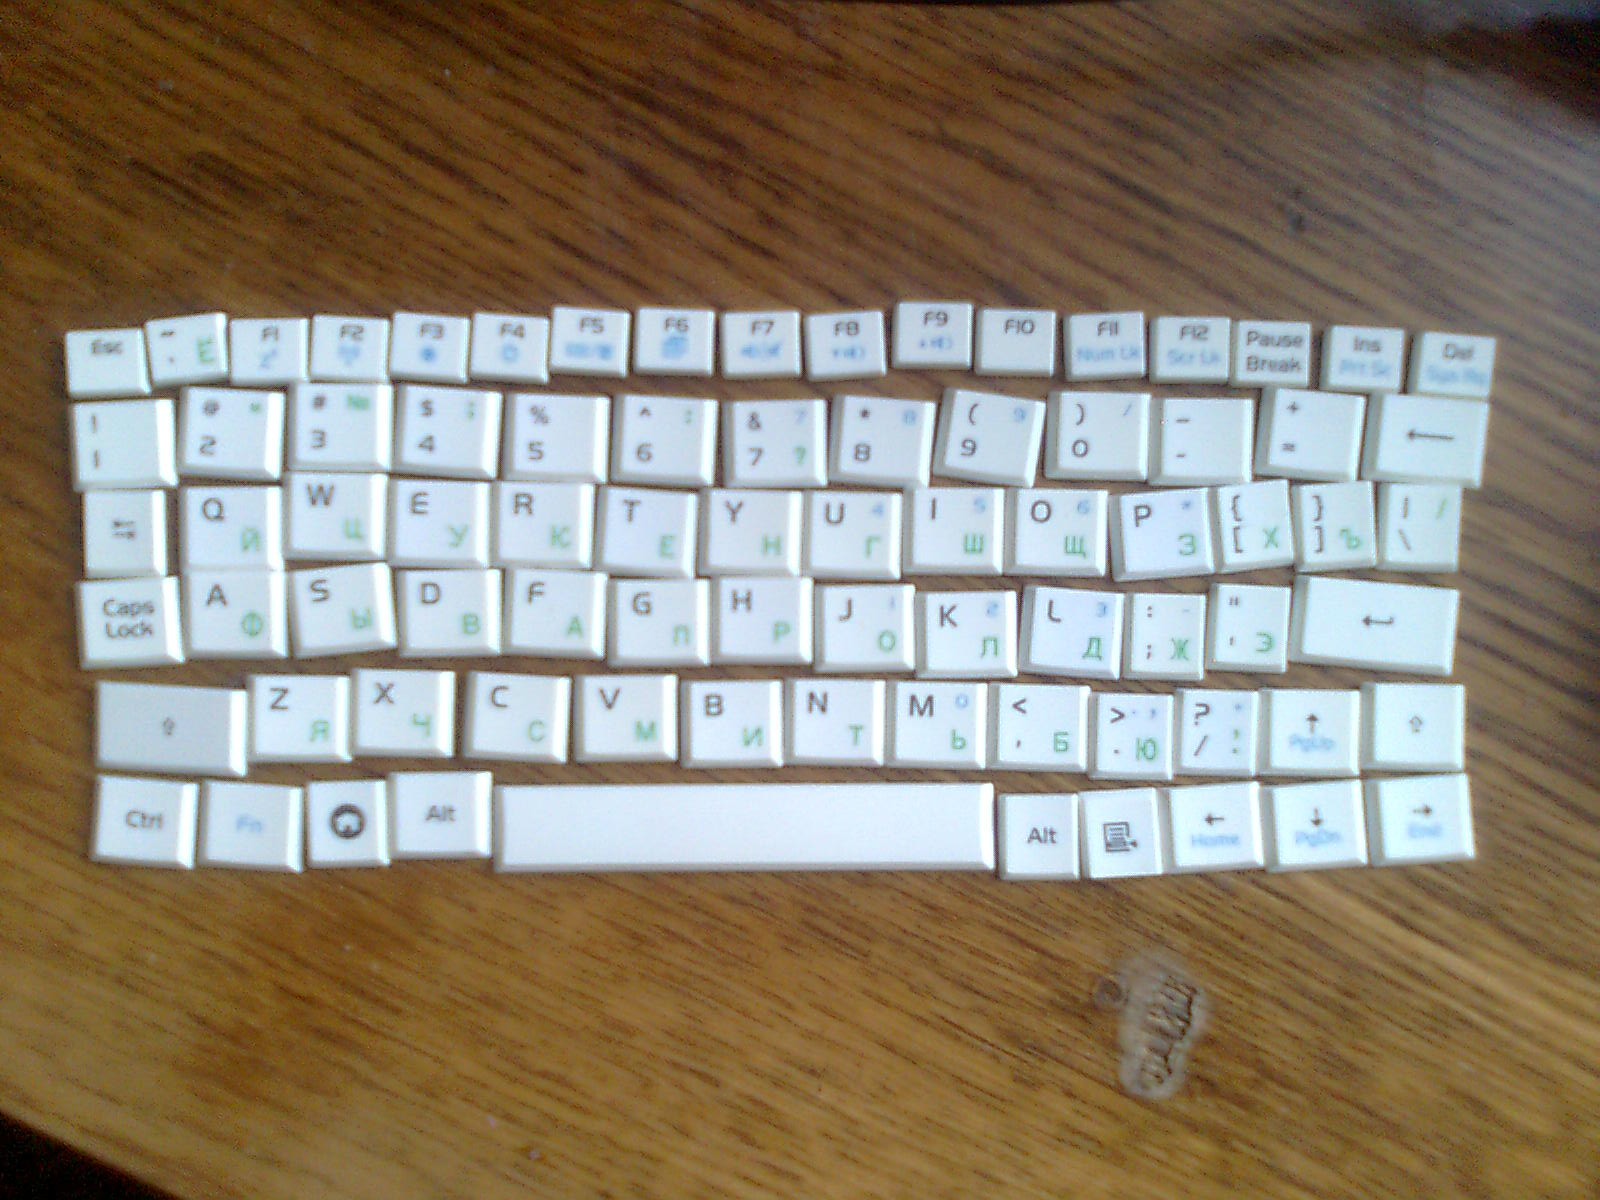
It is also desirable to take a picture in advance or scan / otkserit it.
After all the buttons are removed, remove the upper rubber gasket.
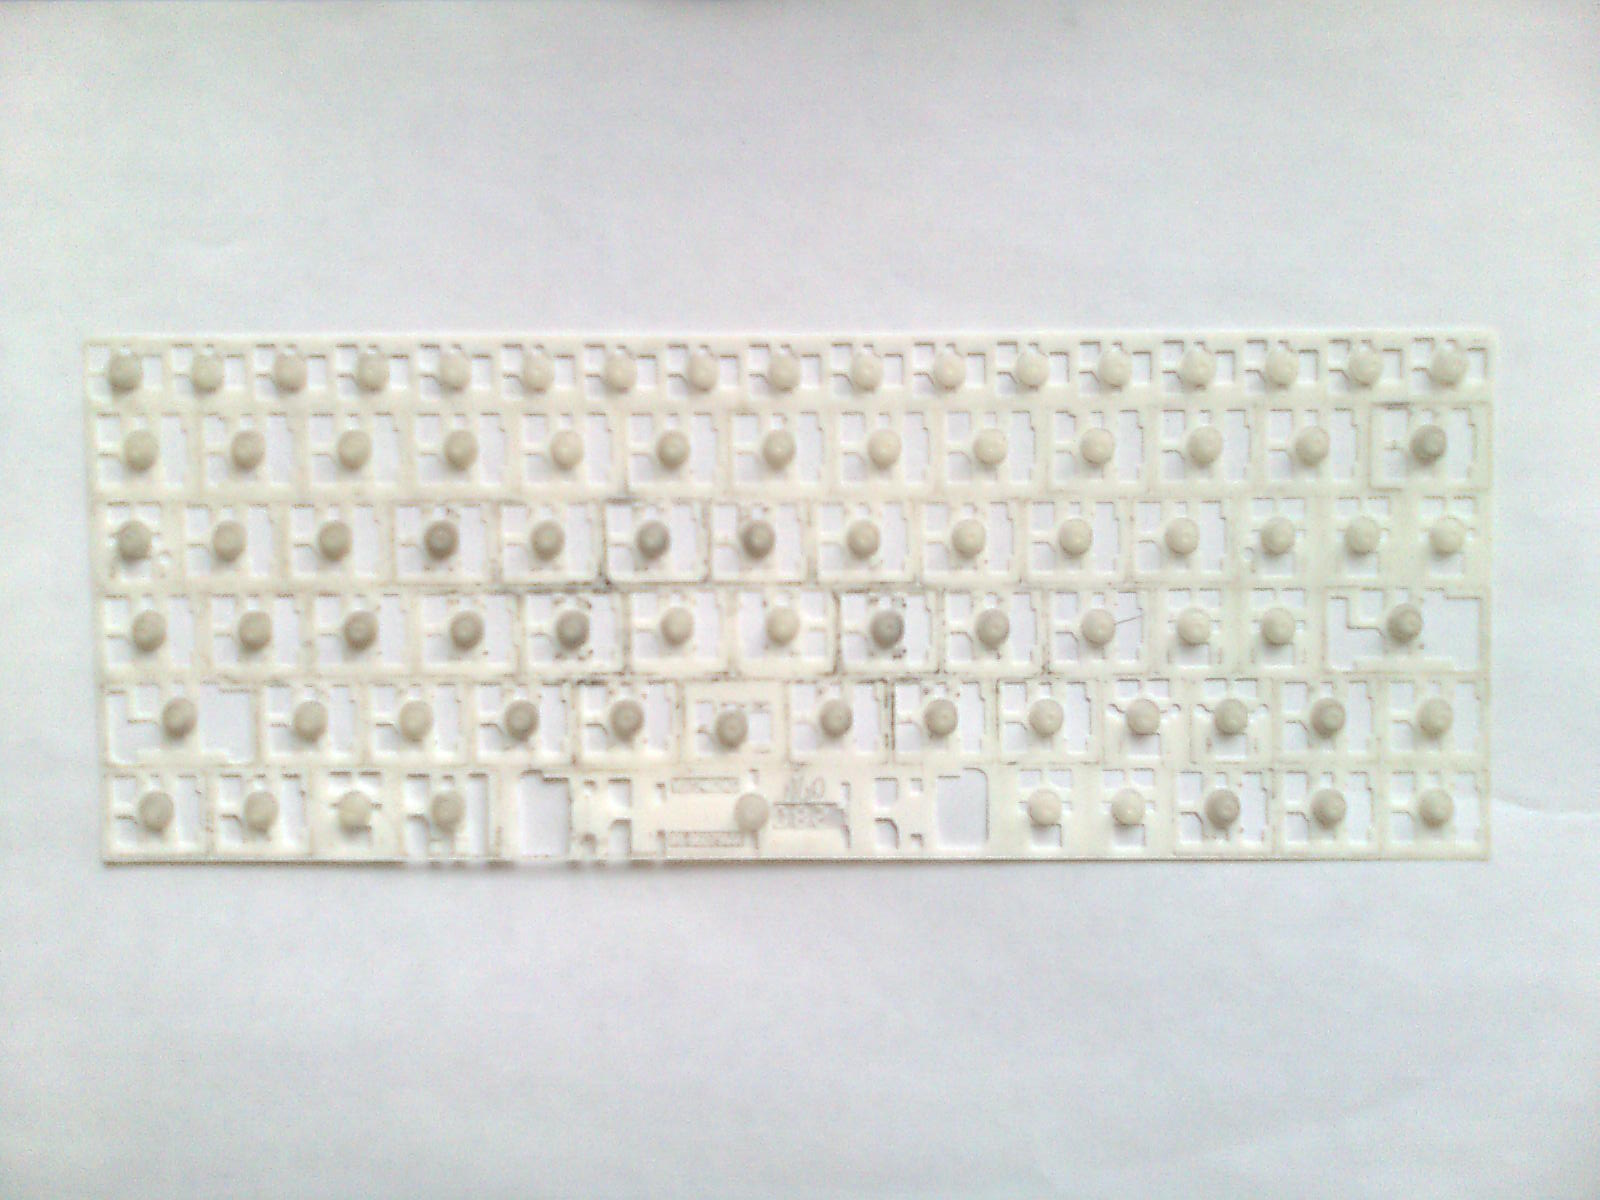
This thing acts as a spring, and the role of contacts (as opposed to remote controls, if someone disassembled) usually does not perform. But for hygienic reasons, it is still worth washing.
Under it we see just such a picture.
At first glance it may seem scary, but when we analyze everything in layers, it will be clearer.
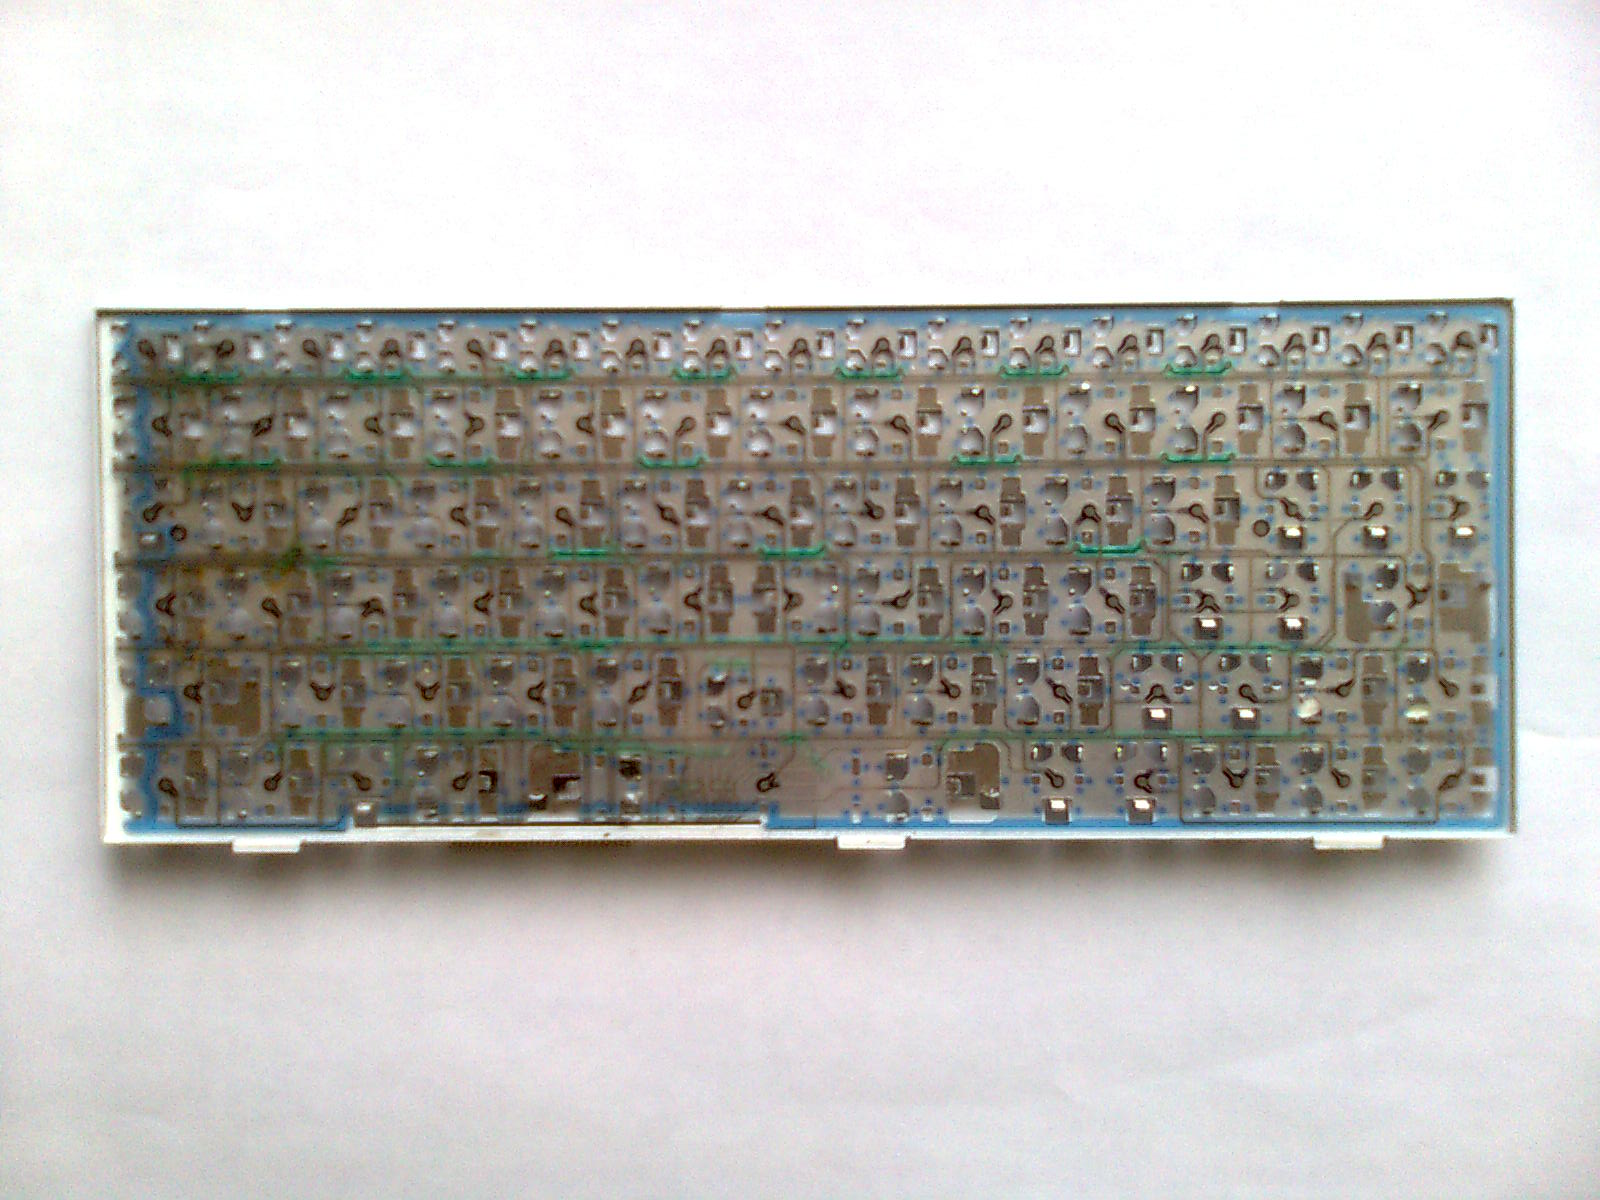
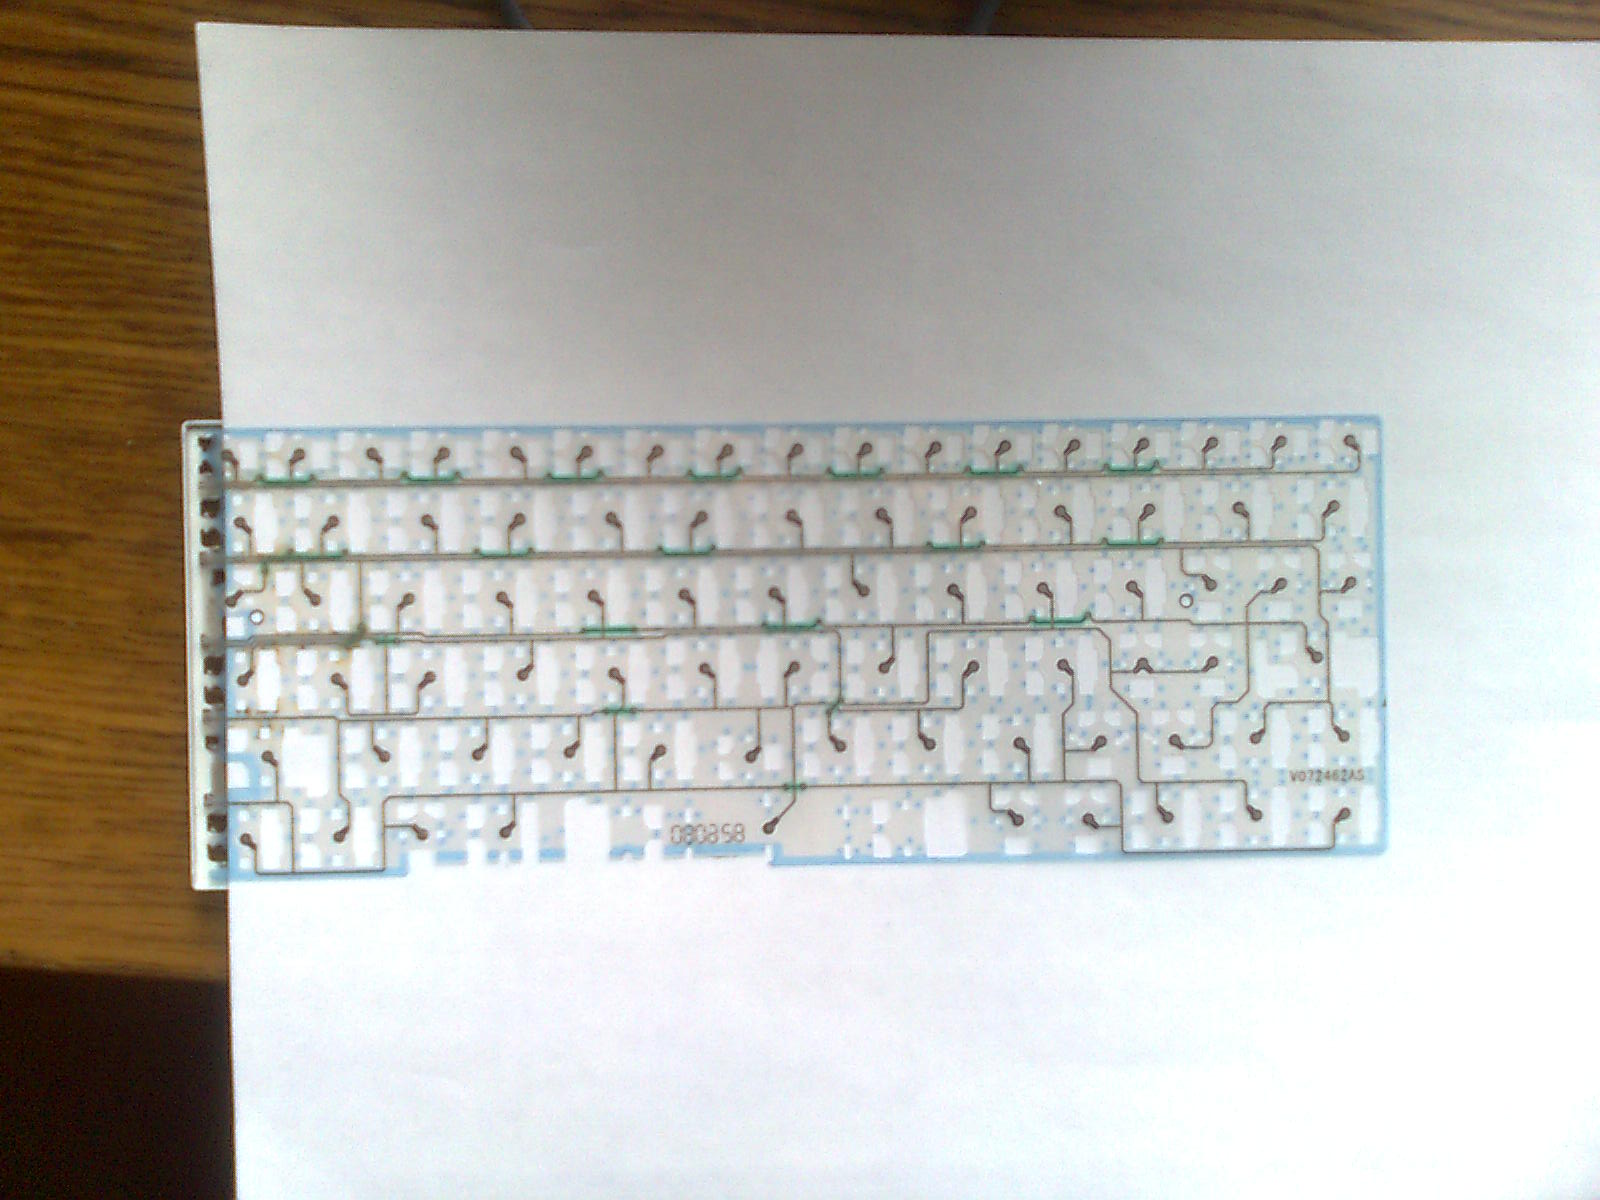
The heart of the keyboard is three layers of films with tracks and contacts. The top and bottom are formed by folding the solid film in half, with the tracks and the contacts inside.
The middle layer is insulating, it does not have tracks, but has holes through which, when the buttons are pressed, the contacts of the upper and lower layers touch.
These three layers constitute a problem, because the liquid readily flows there, carrying sugar and other substances dissolved in it. The water will dry, but pollution will remain. Rinse unparsed keyboard in water will be quite difficult, if possible at all. Therefore, the layers need to be separated. This is the hardest part.
Layers of film glued together. I can see glue of blue color: a continuous strip along the edge, and points on the whole area.
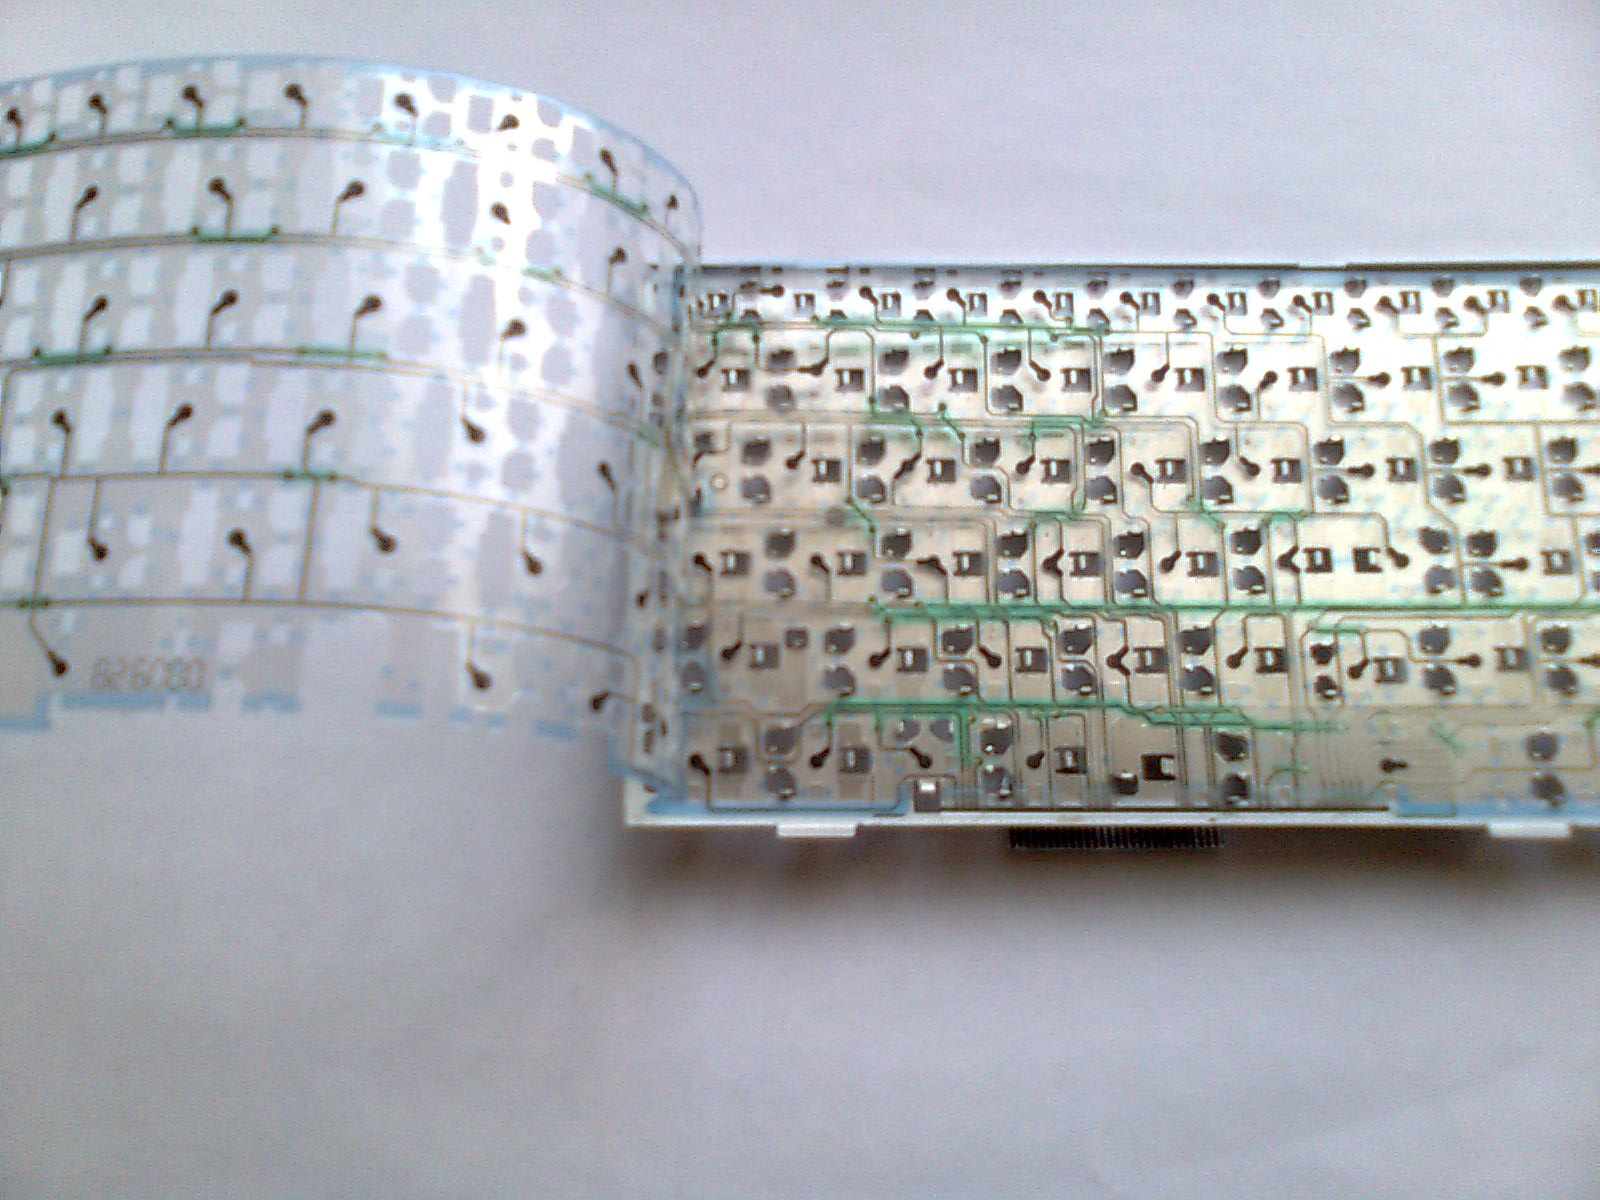
I easily managed to separate one layer, starting from the edge. Then, pulling the top layer up over the edge and holding the bottom one at the base of the keyboard, I separated it completely. The second did not want to give in. It turned out to “tear” the edge with a screwdriver through the hole in the film. Further - as with the first. If the layer comes off badly, or does not come off at all, you can try to heat it with a hairdryer. Caution: do not tear tracks. And with a hairdryer, too, be careful. Keep the hair dryer at a sufficient distance, and if such a function is provided - adjust the temperature so that the air does not burn your hands. Otherwise, you can swim.
My bottom layer is glued to the base of the keyboard along with the cable, so I did not separate it, so as not to damage the connection. But this is generally not necessary.
Now each layer must be carefully cleaned, paying special attention to contacts, paths and spaces between tracks. Then everything is dried. Accelerate the process again helps us hair dryer. Make sure everything is really dry and clean. Disassemble the second time you are unlikely to want.
Added by:
Here I want to quote very useful comments from Hayz about what you need to wash. I washed with water, because at the time I did not find any reasonable explanations. It helped me, but I don’t know for how long.
Regarding alcohol - everything is not entirely unambiguous. Alcohol alcohol - discord, and not everyone can be suitable for these purposes. It is better to use traditional ethyl alcohol (ethanol). Isopropyl alcohol sometimes erased people contacts and letters on the keyboard. And if you rinse with water, then be sure to distilled. From my point of view, this is the safest option. Of course, all this does not apply to rubber pads and other non-conductive elements. They can be washed under the tap. In general, this question is still not clear enough, and it would be nice to hear the opinion of a competent person.
It is also worth inspecting the tracks for damage. It could happen if much time has passed since the moment of flooding, as well as in case of inaccurate separation of layers. According to the testimonies of the victims, the tracks may oxidize and disintegrate, crack or flake. You can restore the tracks using conductive varnish. They say this is sold cheaply in auto shops, designed to restore the rear window heating filaments. They need to carefully trace the damaged parts of the tracks. At the same time make sure that the thin strings of varnish do not form a short circuit between the tracks.
Finished cleaning and repair - we put everything in reverse order. Gently and smoothly connect the layers of the film, put the gum on top, and fix all the corner buttons so that nothing slides.
The button is put like this: we catch the hold, gently press on the platform from the side of the latches, click - and that's it! To make sure that everything is done correctly, we put the keyboard in place, fixing the cable, turn on the laptop and check the operation of the buttons. Everything works, nothing sinks? Again, turn off the power, remove the keyboard and install the rest of the buttons in random order. Only about 80-100 pieces. Not so much as it may seem :) Before you reinstall the keyboard, carefully examine the buttons and make sure that they all stand exactly. I got crooked Enter, and some other buttons are dancing (which, in general, is not critical). But I do not want to turn off the laptop. That's how we live.
First of all, it should be noted that liquids are a danger to the entire system. Even if everything is working now, then in a few months your laptop can go to a landfill. In the event of an incident, it is desirable to instantly de-energize the laptop by removing the charge and battery (yes, the liquid will not wait for the programs to complete). Then just as quickly flip it down the flooded side and let the liquid drain. After that, fully unleash and assess the damage. Do not connect power if there is a liquid inside or its remnants in the form of a sweet syrup. In the case of pure (distilled?) Water, you need to wait a day for all the liquid to evaporate. In the case of tea / coffee and other drinks, the insides must be cleaned, otherwise the board will be short-circuited, oxidized, and this will easily kill your laptop. In this article I will not describe how to wash the motherboard. We will proceed from the fact that you, like me, have untwisted the laptop and found that you are incredibly lucky, because flooded only the keyboard.
My injured Eee PC 901 serves as an experimental sample. Naturally, you may have some differences, but in general the procedure is identical on most models. Sorry for the quality of the photo, shot with what was at hand. Well, and I hope everyone understands that they follow my advice at your own peril;)
')
Remove the keyboard. In my case, it is fixed with three latches on top, which must be gently pressed alternately, while pulling the keyboard up. As soon as you release the keyboard, do not rush to joyfully pull it out: you need to disconnect the cable. In the photo you can see it on the bottom left.
No, at the very bottom - these are my legs accidentally hit the frame, and the loop - right under the keyboard. The train just does not pull out. It is fixed with clips on the sides. First, gently pull them up along the train. For this fit a small screwdriver (later it will also come in handy). Then the train can be easily removed. I repeat: EASY! Caution: do not scratch the track on the motherboard with a screwdriver.
So, we have a disconnected keyboard. We examine the space under it for something tasty. We are especially interested in the liquid or its characteristic traces identified by the color of the original drink.
If there is any suspicion that the liquid could penetrate further, then it is better to continue disassembling. Instructions for your laptop model can be found online. If there are no traces of liquid under the keyboard, and you are so lazy to disassemble further that you are absolutely sure that only the keyboard has suffered, then we leave it to your conscience.
On the Internet, you can often find advice to rinse the keyboard in warm water. I would advise to approach this matter more seriously and rinse the entire laptop at once. But ... I will not. Let's still look inside to realize the inefficiency and danger of this method.
First you need to remove all the buttons. Each button consists of an upper platform and an elevator - a miniature construction under the platform that provides the mobility of the button. I found the advice to first remove the platform, hooking them in a strictly defined place, and then remove the elevators. Such a method seemed dumb to me, because I was not sure whether the button would come off before the elevator broke down. In addition, I did not understand where I put the screwdriver in to safely unhook the button. In the end, turning the keyboard over, I realized that at least in my model, you can unhook the buttons immediately with elevators. It all simplifies.
The photo shows (bad, but visible) that each button has three “holes”. In your case there may be four. Well, if not at all, you will first have to separately remove the site. On the one hand, the elevator is fixed by a “hook”, on the other - by two latches. Select the most unnecessary button on the keyboard (e?), And try using a screwdriver to unclip the latches first, pressing down and to the side, then the hook. Broke? Nothing, do not mind, you have them still how much!
Detachable buttons can be neatly folded in the same order, so that later it was easier to assemble. Attention! Young children really like these buttons, take care of them from each other.
It is also desirable to take a picture in advance or scan / otkserit it.
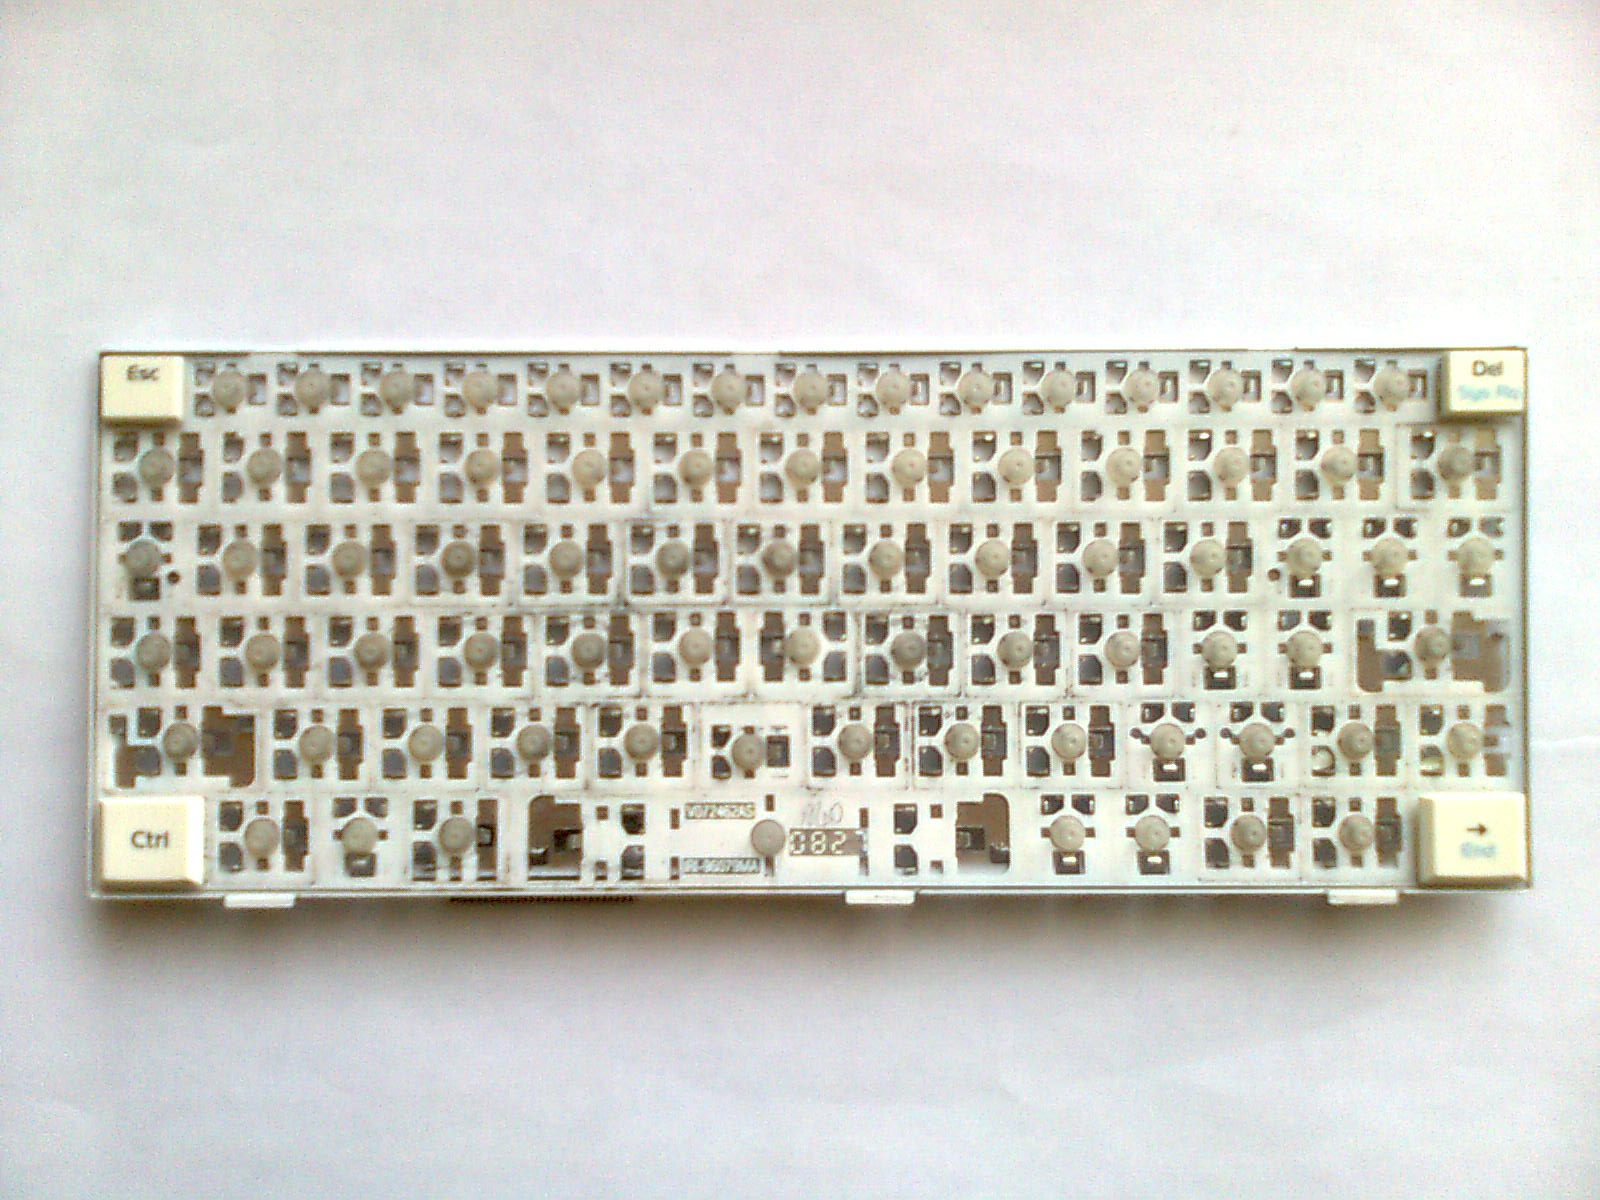
After all the buttons are removed, remove the upper rubber gasket.
This thing acts as a spring, and the role of contacts (as opposed to remote controls, if someone disassembled) usually does not perform. But for hygienic reasons, it is still worth washing.
Under it we see just such a picture.
At first glance it may seem scary, but when we analyze everything in layers, it will be clearer.
The heart of the keyboard is three layers of films with tracks and contacts. The top and bottom are formed by folding the solid film in half, with the tracks and the contacts inside.
The middle layer is insulating, it does not have tracks, but has holes through which, when the buttons are pressed, the contacts of the upper and lower layers touch.
These three layers constitute a problem, because the liquid readily flows there, carrying sugar and other substances dissolved in it. The water will dry, but pollution will remain. Rinse unparsed keyboard in water will be quite difficult, if possible at all. Therefore, the layers need to be separated. This is the hardest part.
Layers of film glued together. I can see glue of blue color: a continuous strip along the edge, and points on the whole area.
I easily managed to separate one layer, starting from the edge. Then, pulling the top layer up over the edge and holding the bottom one at the base of the keyboard, I separated it completely. The second did not want to give in. It turned out to “tear” the edge with a screwdriver through the hole in the film. Further - as with the first. If the layer comes off badly, or does not come off at all, you can try to heat it with a hairdryer. Caution: do not tear tracks. And with a hairdryer, too, be careful. Keep the hair dryer at a sufficient distance, and if such a function is provided - adjust the temperature so that the air does not burn your hands. Otherwise, you can swim.
My bottom layer is glued to the base of the keyboard along with the cable, so I did not separate it, so as not to damage the connection. But this is generally not necessary.
Now each layer must be carefully cleaned, paying special attention to contacts, paths and spaces between tracks. Then everything is dried. Accelerate the process again helps us hair dryer. Make sure everything is really dry and clean. Disassemble the second time you are unlikely to want.
Added by:
Here I want to quote very useful comments from Hayz about what you need to wash. I washed with water, because at the time I did not find any reasonable explanations. It helped me, but I don’t know for how long.
I do not recommend using water to flush keyboard contacts.
Otherwise, subsequent oxidation of these contacts is possible, and, as a result, everything will have to be changed. It is better to do it with alcohol, and at least 96% is very desirable. And the sooner after the "flooding" - the better. The essence of alcohol is that it collects water, which is in the pores and evaporates quickly. It is clear that the amount of alcohol should be much more water in the solution. Otherwise, the effect of collecting moisture will not. Those. 40% vodka will not do. Triple Cologne is 75% better, but not good.
Tap water is not so clean - there are all sorts of impurities and salts, which act as a catalyst for corrosion and begin the destruction of the metal. In the atmospheric air, such salts are much less, so for the occurrence of corrosion it takes much more time.
Regarding alcohol - everything is not entirely unambiguous. Alcohol alcohol - discord, and not everyone can be suitable for these purposes. It is better to use traditional ethyl alcohol (ethanol). Isopropyl alcohol sometimes erased people contacts and letters on the keyboard. And if you rinse with water, then be sure to distilled. From my point of view, this is the safest option. Of course, all this does not apply to rubber pads and other non-conductive elements. They can be washed under the tap. In general, this question is still not clear enough, and it would be nice to hear the opinion of a competent person.
It is also worth inspecting the tracks for damage. It could happen if much time has passed since the moment of flooding, as well as in case of inaccurate separation of layers. According to the testimonies of the victims, the tracks may oxidize and disintegrate, crack or flake. You can restore the tracks using conductive varnish. They say this is sold cheaply in auto shops, designed to restore the rear window heating filaments. They need to carefully trace the damaged parts of the tracks. At the same time make sure that the thin strings of varnish do not form a short circuit between the tracks.
Finished cleaning and repair - we put everything in reverse order. Gently and smoothly connect the layers of the film, put the gum on top, and fix all the corner buttons so that nothing slides.
The button is put like this: we catch the hold, gently press on the platform from the side of the latches, click - and that's it! To make sure that everything is done correctly, we put the keyboard in place, fixing the cable, turn on the laptop and check the operation of the buttons. Everything works, nothing sinks? Again, turn off the power, remove the keyboard and install the rest of the buttons in random order. Only about 80-100 pieces. Not so much as it may seem :) Before you reinstall the keyboard, carefully examine the buttons and make sure that they all stand exactly. I got crooked Enter, and some other buttons are dancing (which, in general, is not critical). But I do not want to turn off the laptop. That's how we live.
Source: https://habr.com/ru/post/122105/
All Articles