We collect the home server in the case of a shoe box
Recently, there was a question about torrent rocking + small file storage for the house. I didn’t want to spend a lot of money on this, so it was decided to use a box of shoes under the body, which no one could find work for. The tools and materials were also used by the most helpful, so that a similar body under the force assemble each. The whole assembly process took me only about 4 hours. The output turned out to be a good body with a well-thought-out ventilation and an almost silent system.
Basic requirements for the future system:
There were no high performance requirements.
The server was going instead of the old system. She was very noisy, warm and unstable. The old system unit was the Intel Celeron 1700 on the old budget motherboard Gigabyte Ga8ST800 and Seagate Barracuda ES ST3750640 for only 750 Gb for the file dump. The overall picture was complemented by the old NONAME package with a 250W PowerMaster power supply. Of all this, I was only satisfied with the hard drive, but even here it was impossible to do without additional costs, because its IDE interface is already outdated and on modern compact motherboards it can only be found on something specific.
Intel® Desktop Board D410PT with Atom D410 onboard was chosen as the basis for the new server. Cooling is completely passive, and energy consumption with a minimum load of only about 19W. In addition, this is one of the most inexpensive solutions with an embedded processor in the Mini-ITX form factor (~ 1700r.). By adding 2 Gb DDR2 400 memory and a power supply, we get a working system. The power supply should be approached with particular responsibility, because it will be the main source of noise. I have long had a spare FSP ATX-350PAF with automatic regulation of speed, which it was decided to use, since it was ideally suited to the requirements. About this power supply I want to note that the fan in it is almost unheard of, which, by the way, says the sticker with the promising inscription W / NOISE KILLER.
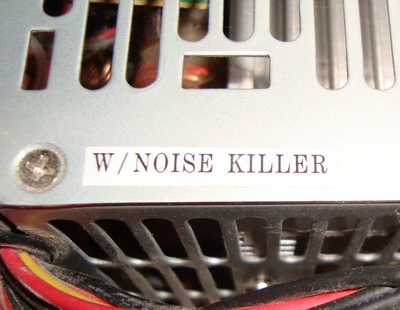
It really can be considered a murderer of noise.
For a case any box of shoes is suitable, the main thing is that the motherboard should fit there. I took the first one that fit perfectly.
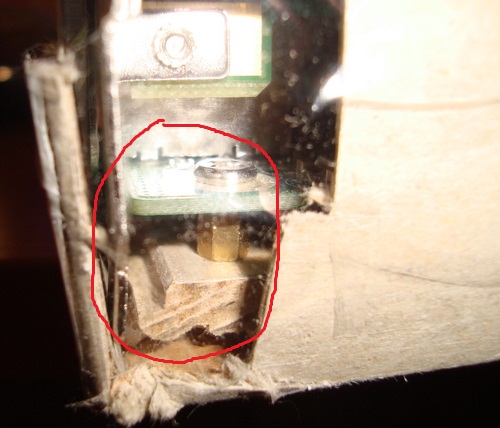
In order to stiffen the body and so that there was something to fix the board to the bottom, I glued a piece of laminate left over from the repair. Laminate had to be cut to the size of the box and connect the 2 boards.

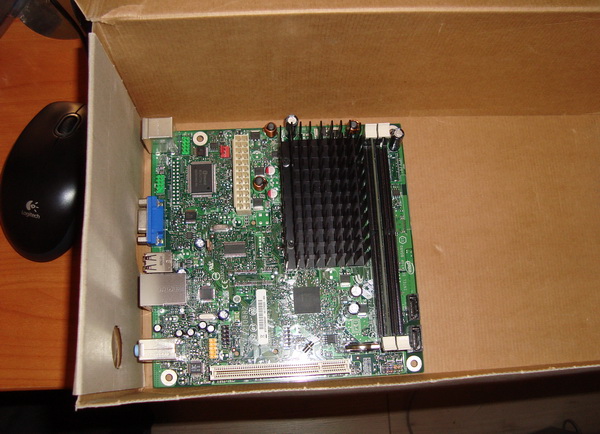
Before gluing, it is also necessary to drill holes for fastening the motherboard to the bottom, into which the standard fastener will be screwed. A 2.5 mm drill bit fits perfectly. After assembly, it looks like this:
')
Only after fixing the fasteners and checking the coincidence of the holes on the matplate and mounting holes, glue the laminate to the bottom of the box.
When marking, it is necessary to take into account the gap from the back wall so that the PCI network card and the back panel of the motherboard can normally stand up.
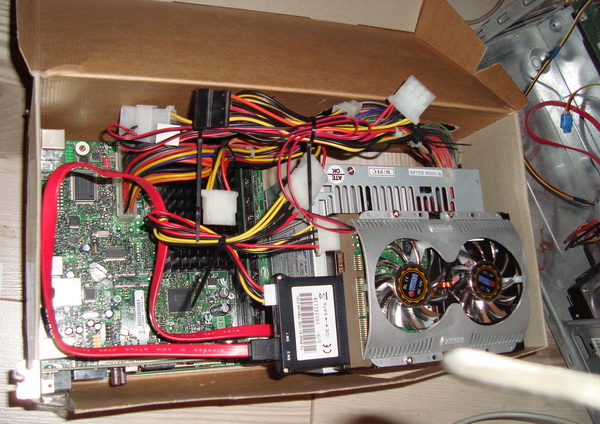
You should have something like this:
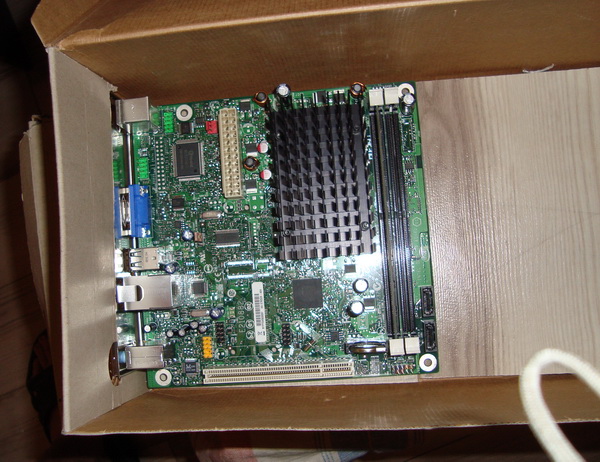
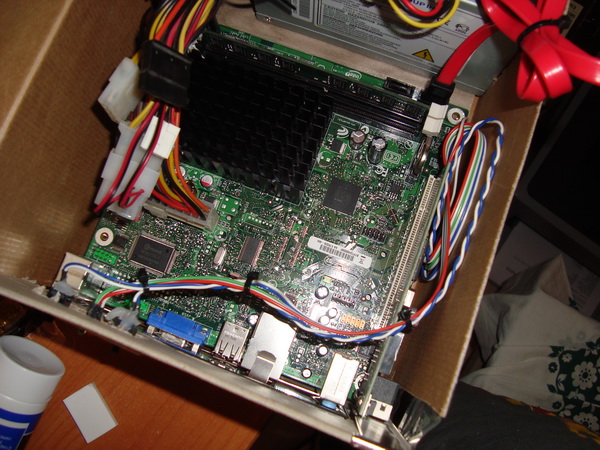
This, in fact, the most crucial part ends. Motherboard should get up after drying glue in its place and you can fasten it with screws.
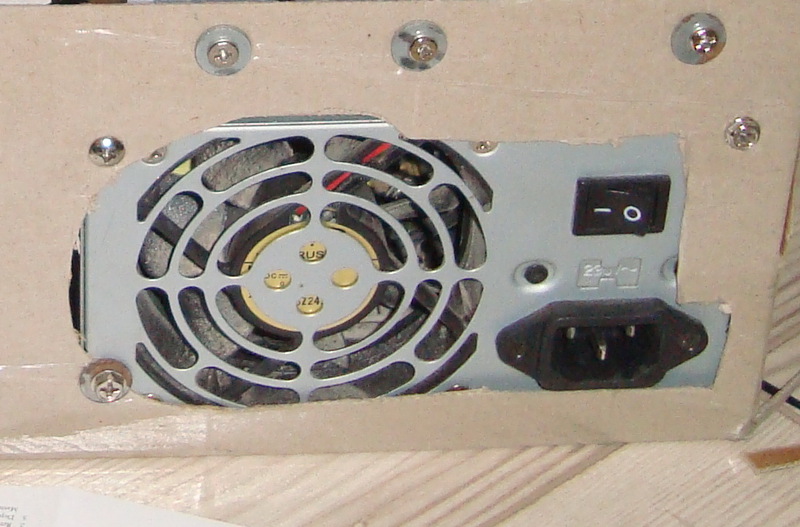
Next we need to choose a place for the power supply. I put it in the remaining place behind the motherboard, and that it does not dangle tightened screws with washers directly to the dense cardboard box. For air circulation and power wires, I cut 2 holes in the sides of the box. You can cut with any stationery knife - it turns out quickly and accurately.
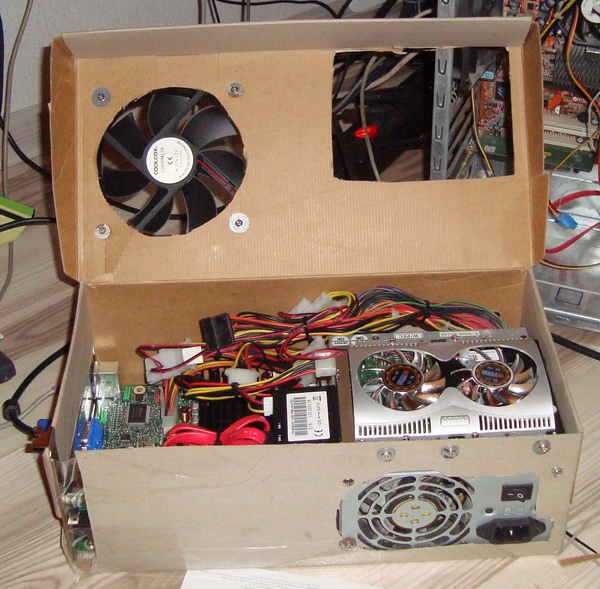
For hard disk space was found only on top of the power supply. I also screwed it on one side to the wall of the box, and for this whole design not to be heated from above, I had to install an HDD cooler. Since I have an IDE hard drive and only SATA interfaces are present on the motherboard, I had to use an SATA <-> IDE adapter from Espada and suffer a little from its connection. It turned out the hard drive must be set in the Master. In case of abnormal heat, I installed a 12 cm fan on the top cover, but as practice has shown, it is not very necessary, passive cooling is quite enough in normal conditions. As a result, my server began to look like this.


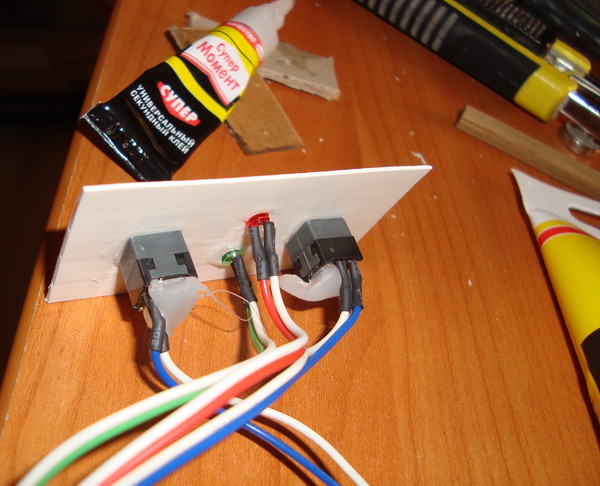
To prevent the fans on the Hdd cooler and the top cover from being heard, I turned them on under 5 volts. For this, we had to slightly modify their connectors:
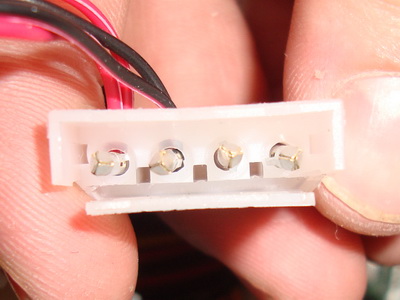

After such a modification, they can be turned on both under 5 and under 12 volts, which is very convenient.
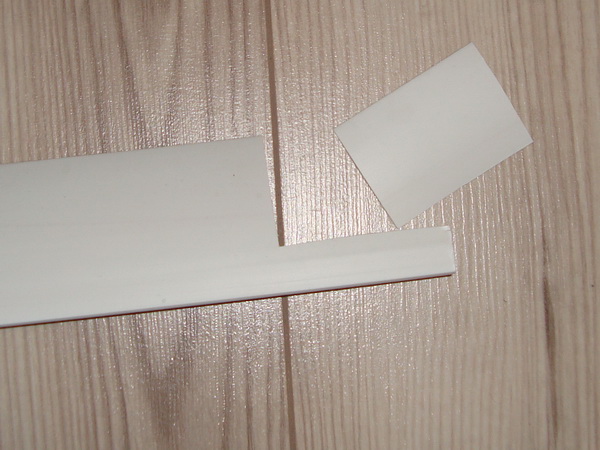
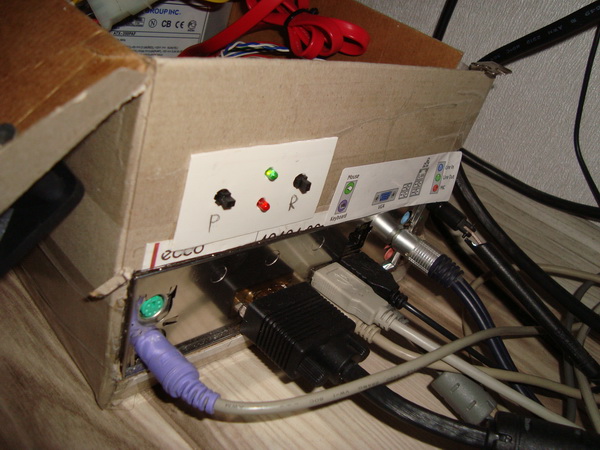
The final touch is doing the socket with the controls. The organs themselves (2 LEDs and 2 buttons) were borrowed from the old building. It’s not very nice to mount into cardboard, so I cut a piece of white plastic from a building corner, which I also left after repair (the market costs 100 rubles for a 3 meter piece)

Actually, what happened:
Cost of components and materials:
total ~ 5200 rubles. I spent about 3000 rubles on everything. Basically it is a motherboard with a processor and memory.
The result is a great server with low power consumption, which is almost inaudible. As for the software part, for now I’ve put Windows 7 there and use it as a home PC. Performance is not enough. For example, a movie in 1080p does not look, 720p with a grief in half (you have to turn off the extra programs and choose a fast player). I also had to disable the antivirus to properly surf the Internet, the processor load is constantly 50-100%. I tried to run quake3 on it - it's not comfortable to play. For home PCs, choose a more powerful processor.
Basic requirements for the future system:
- Low heat generation. The server was supposed to be placed under the ceiling, above the niche for the refrigerator, respectively, there was a complete absence of any ventilation;
- Silence of work. The noise was also critical since there were no obstacles for spreading it around the apartment;
- Minimum energy consumption;
- Minimum material costs;
- The server should occupy as little space as possible;
- The presence of two Ethernet ports for the distribution of the Internet in the apartment;
There were no high performance requirements.
The server was going instead of the old system. She was very noisy, warm and unstable. The old system unit was the Intel Celeron 1700 on the old budget motherboard Gigabyte Ga8ST800 and Seagate Barracuda ES ST3750640 for only 750 Gb for the file dump. The overall picture was complemented by the old NONAME package with a 250W PowerMaster power supply. Of all this, I was only satisfied with the hard drive, but even here it was impossible to do without additional costs, because its IDE interface is already outdated and on modern compact motherboards it can only be found on something specific.
Select components
Intel® Desktop Board D410PT with Atom D410 onboard was chosen as the basis for the new server. Cooling is completely passive, and energy consumption with a minimum load of only about 19W. In addition, this is one of the most inexpensive solutions with an embedded processor in the Mini-ITX form factor (~ 1700r.). By adding 2 Gb DDR2 400 memory and a power supply, we get a working system. The power supply should be approached with particular responsibility, because it will be the main source of noise. I have long had a spare FSP ATX-350PAF with automatic regulation of speed, which it was decided to use, since it was ideally suited to the requirements. About this power supply I want to note that the fan in it is almost unheard of, which, by the way, says the sticker with the promising inscription W / NOISE KILLER.
It really can be considered a murderer of noise.
The body itself
For a case any box of shoes is suitable, the main thing is that the motherboard should fit there. I took the first one that fit perfectly.
In order to stiffen the body and so that there was something to fix the board to the bottom, I glued a piece of laminate left over from the repair. Laminate had to be cut to the size of the box and connect the 2 boards.
Before gluing, it is also necessary to drill holes for fastening the motherboard to the bottom, into which the standard fastener will be screwed. A 2.5 mm drill bit fits perfectly. After assembly, it looks like this:
')
Only after fixing the fasteners and checking the coincidence of the holes on the matplate and mounting holes, glue the laminate to the bottom of the box.
When marking, it is necessary to take into account the gap from the back wall so that the PCI network card and the back panel of the motherboard can normally stand up.
You should have something like this:
This, in fact, the most crucial part ends. Motherboard should get up after drying glue in its place and you can fasten it with screws.
Next we need to choose a place for the power supply. I put it in the remaining place behind the motherboard, and that it does not dangle tightened screws with washers directly to the dense cardboard box. For air circulation and power wires, I cut 2 holes in the sides of the box. You can cut with any stationery knife - it turns out quickly and accurately.
For hard disk space was found only on top of the power supply. I also screwed it on one side to the wall of the box, and for this whole design not to be heated from above, I had to install an HDD cooler. Since I have an IDE hard drive and only SATA interfaces are present on the motherboard, I had to use an SATA <-> IDE adapter from Espada and suffer a little from its connection. It turned out the hard drive must be set in the Master. In case of abnormal heat, I installed a 12 cm fan on the top cover, but as practice has shown, it is not very necessary, passive cooling is quite enough in normal conditions. As a result, my server began to look like this.
To prevent the fans on the Hdd cooler and the top cover from being heard, I turned them on under 5 volts. For this, we had to slightly modify their connectors:
After such a modification, they can be turned on both under 5 and under 12 volts, which is very convenient.
The final touch is doing the socket with the controls. The organs themselves (2 LEDs and 2 buttons) were borrowed from the old building. It’s not very nice to mount into cardboard, so I cut a piece of white plastic from a building corner, which I also left after repair (the market costs 100 rubles for a 3 meter piece)
Actually, what happened:
Expenses
Cost of components and materials:
- Motherboard D410PT - 1750 r .;
- DDR2 2 Gb memory module - 830 p .;
- Power unit FSP ATX-350PAF - 800 p .;
- Hard disk - to taste - about 1500 p .;
- Fan 12cm - 80 p .;
- Cooler for Hdd - 200 p .;
total ~ 5200 rubles. I spent about 3000 rubles on everything. Basically it is a motherboard with a processor and memory.
The result is a great server with low power consumption, which is almost inaudible. As for the software part, for now I’ve put Windows 7 there and use it as a home PC. Performance is not enough. For example, a movie in 1080p does not look, 720p with a grief in half (you have to turn off the extra programs and choose a fast player). I also had to disable the antivirus to properly surf the Internet, the processor load is constantly 50-100%. I tried to run quake3 on it - it's not comfortable to play. For home PCs, choose a more powerful processor.
Source: https://habr.com/ru/post/122010/
All Articles