Radio control via browser
 In the process of creating your own radio station, the flow of ideas reached the conduct of the ethers through the web interface. At first I tried to find ready-made solutions, but I found almost nothing in runet. He began to think about the method of implementation and miraculously came across an article in the English version of Wikipedia about Airtime (before January 18, 2011 - Campcaster) from Sourcefabric.
Airtime features:
- Creation of the air grid and playlists through the web interface;
- Download music through the browser (support drag and drop);
- Registration of hosts who have access to the admin panel and can control the air;
- Creating widgets with the schedule of esters and tracks for third-party sites;
- The ability to record esters for re-broadcast;
- Several options for broadcasting audio stream.
Select server options
First test server:
- OS: Ubuntu-10.10-x86_64;
- CPU: 500Mhz;
- Memory: 256Mb;
- Disk space: 5000Mb.
The load at "idle" without listeners reached 90%. In normal mode, the server could not support a comfortable listening radio. Yes, and all software modules occupy almost 1GB, which is 20% of the total disk space.
Second server:
- OS: Ubuntu-10.10-x86_64;
- CPU: 750Mhz;
- Memory: 512Mb;
- Disk space: 20Gb.
This server performed better. At idle, the processor load is on average 25%; it can be used as a server for a small number of listeners.
')
Server Tuning
Airtime with all the necessary packages can be installed either manually or automatically. In any case, you need to prepare, namely to add Surcefabric to the list of repositories, because they have all the necessary packages.
$ nano /etc/apt/sources.listFor Ubuntu, add the line:
deb apt.sourcefabric.org lucid main
#
deb apt.sourcefabric.org maverick main
For Debian:
deb apt.sourcefabric.org squeeze mainUpdate the list of repositories:
$ apt-get updateInstall the signature key:
$ apt-get install sourcefabric-keyringAirtime uses a PostgreSQL database to store playlists, track and user information. Therefore, we install it:
$ apt-get install postgresqlIn order for users to hear the broadcast, you need to install a streaming server. I use Icecast2 for this purpose, as it is very convenient for configuration and uses few system resources.
$ apt-get install icecast2If you plan to broadcast the audio output of the sound card, then you need to remove the PulseAudio audio server, and instead put the ALSA mixer.
$ apt-get purge pulseaudioFor GUI:
$ apt-get install gnome-alsamixerFor console:
$ apt-get install alsa-utilsManual installation of Airtime
Install all necessary packages:
$ apt-get install apache2 curl daemontools daemontools-run ecasound \
gzip libao-ocaml libapache2-mod-php5 libcamomile-ocaml-dev libesd0 \
libmad-ocaml libmp3lame0 libmp3lame-dev libportaudio2 libsamplerate0 \
libsoundtouch-ocaml libtaglib-ocaml libvorbis-ocaml-dev mpg123 multitail \
odbc-postgresql oggvideotools openssl php-pear php5-curl php5-gd \
php5-pgsql poc-streamer pwgen python python-configobj python-mutagen \
python-pip python-setuptools rabbitmq-server tar unzip
Next, install the necessary modules for Python to work with Airtima:
$ pip install kombu
$ pip install poster
Install phing:
$ mkdir -p /tmp/pear/cache
$ pear channel-discover pear.phing.info
$ pear install phing/phing-2.4.2
Download, unpack and install Airtime:
$ wget downloads.sourceforge.net/project/Airtime/1.8.1/Airtime-1.8.1.tar.gz
$ tar -xvzf Airtime-1.8.1.tar.gz -C /var/lib/
$ chown -R root.root /var/lib/Airtime/
$ cd /var/lib/Airtime/install/
$ php Airtime-install.php
We work with Apache. Configure the necessary modules and create a virtual host configuration:
$ a2enmod php5 rewrite
$ nano /etc/apache2/sites-available/Airtime
In the open file we register:
<VirtualHost *:80> ServerName example.com ServerAdmin admin@example.com DocumentRoot /var/www/Airtime/public SetEnv APPLICATION_ENV "development" <Directory /var/www/Airtime/public> DirectoryIndex index.php AllowOverride all Order allow,deny Allow from all </Directory> </VirtualHost> Save and reload Apache
$ /etc/init.d/apache2 reloadWe configure PHP for Airtime, for this purpose in the /etc/php5/apache2/php.ini file you need to find and change the following parameters:
memory_limit = 256M
magic_quotes_gpc = Off
file_uploads = On
upload_tmp_dir = /tmp
phar.readonly = Off
Next we need to configure Icecast2, for this we go to edit the configuration file /etc/icecast2/icecast.xml . The most important thing is to set the password for broadcasting from third-party applications, it will need to be written in other configuration files. We set passwords between the <source-password>, <relay-password> and <admin-password> tags
<authentication> <source-password>somepassword</source-password> <relay-password>somepassword</relay-password> <!-- icecast2 --> <admin-user>admin</admin-user> <admin-password>adminpassword</admin-password> </authentication> After that we need to allow the launch of icecast2:
$ nano /etc/default/icecast2Replace the line ENABLE = false with ENABLE = true , save and restart IceCast2:
$ service icecast2 startNext, we need to configure liquidsoap, which will direct the stream from Airtime to IceCast2:
$ nano /etc/Airtime/liquidsoap.cfgIn the section «stream settings» we register the access parameters to icecast2.
# , icecast.xml
Icecast_pass = “somepassword”
# , .
# Ogg Vorbis MP3. MP3,
# .
output_sound_device = false
output_icecast_vorbis = false
output_icecast_mp3 = true
Restart the server and can start the broadcast.
Installation in automatic mode
$ mkdir -p /tmp/pear/cache
$ apt-get install Airtime
During the installation, you will be asked questions about the configuration of Apache2 and RabbitMQ.
After installation, you need to configure PHP, IceCast2, Liquidsoap and Airtime. Restart the server and can start the broadcast.
Setting up the broadcast through the web panel
We go to the virtual host, which is registered in / etc / apache2 / sites-available / Airtime (in our case example.com ), we are welcomed by the authorization form. From the very beginning, the login and password is “admin”.

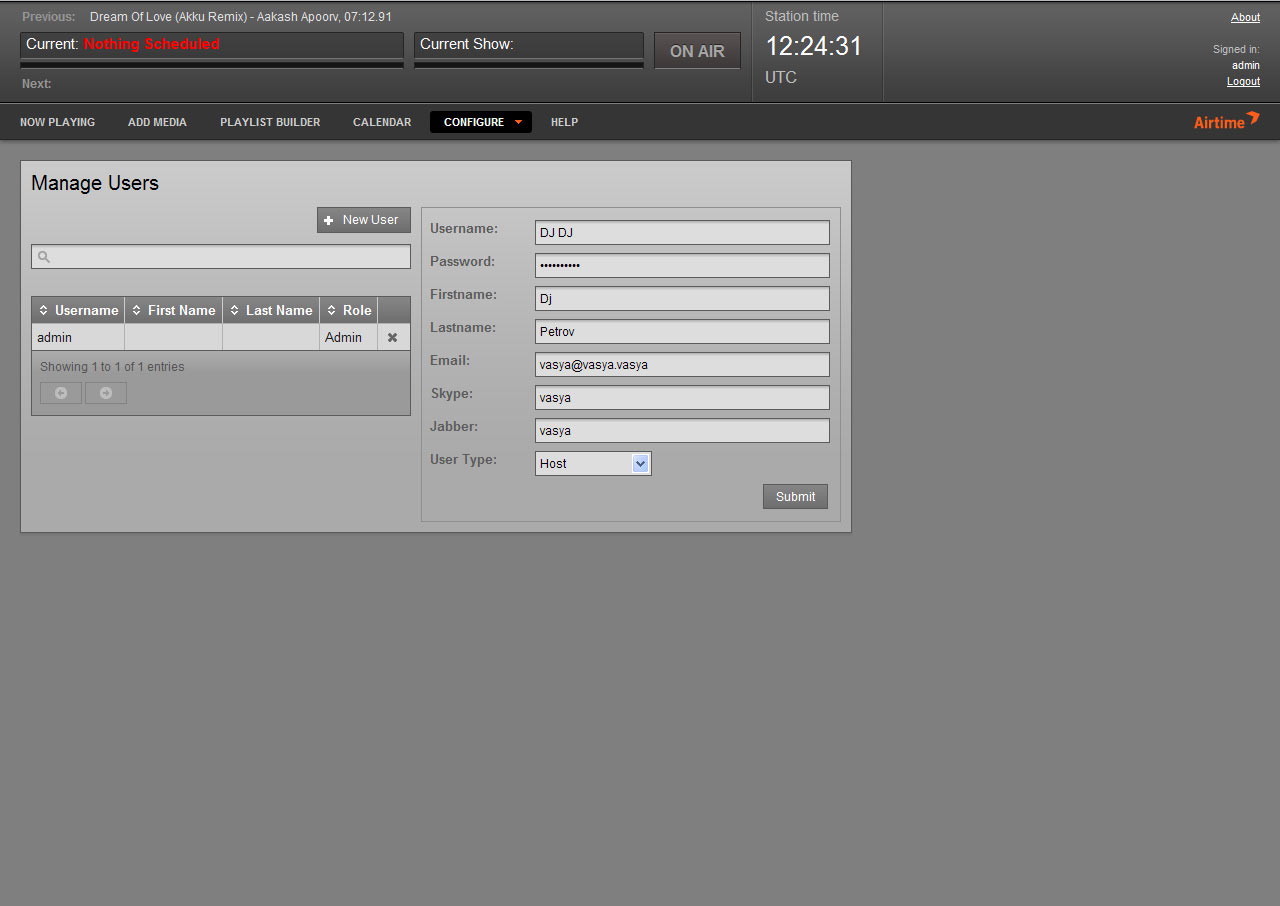
After logging in, select “CONFIGURE -> Manage Users” in the menu and change the administrator's password; here you can create new users with different types of access.
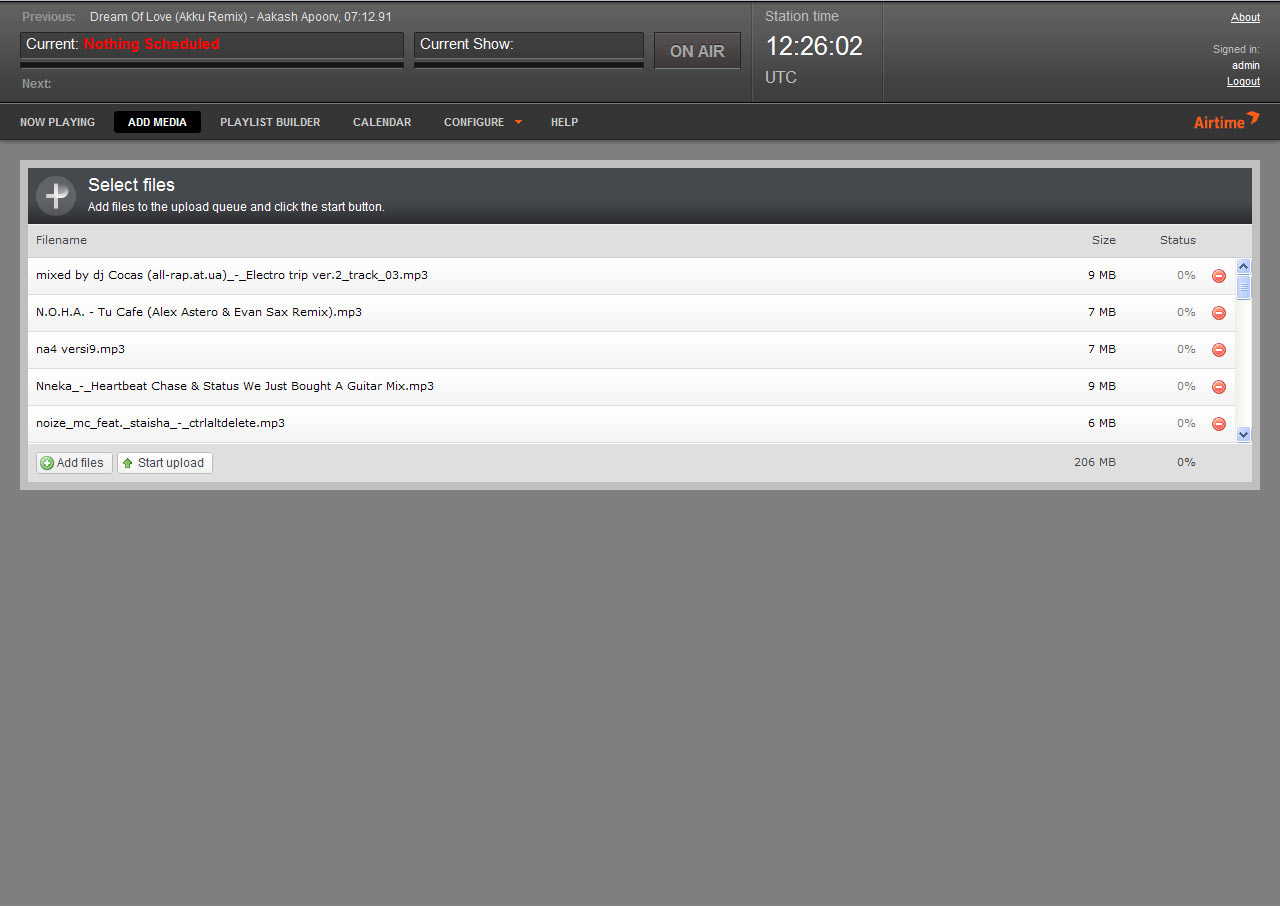
In the ADD MEDIA tab, we have the opportunity to download music that we plan to use on the radio. Supports multiboot and drag and drop.
The “PLAYLIST BUILDER” tab allows you to create new playlists. This is done by dragging and dropping tracks from the list loaded into the playlist.

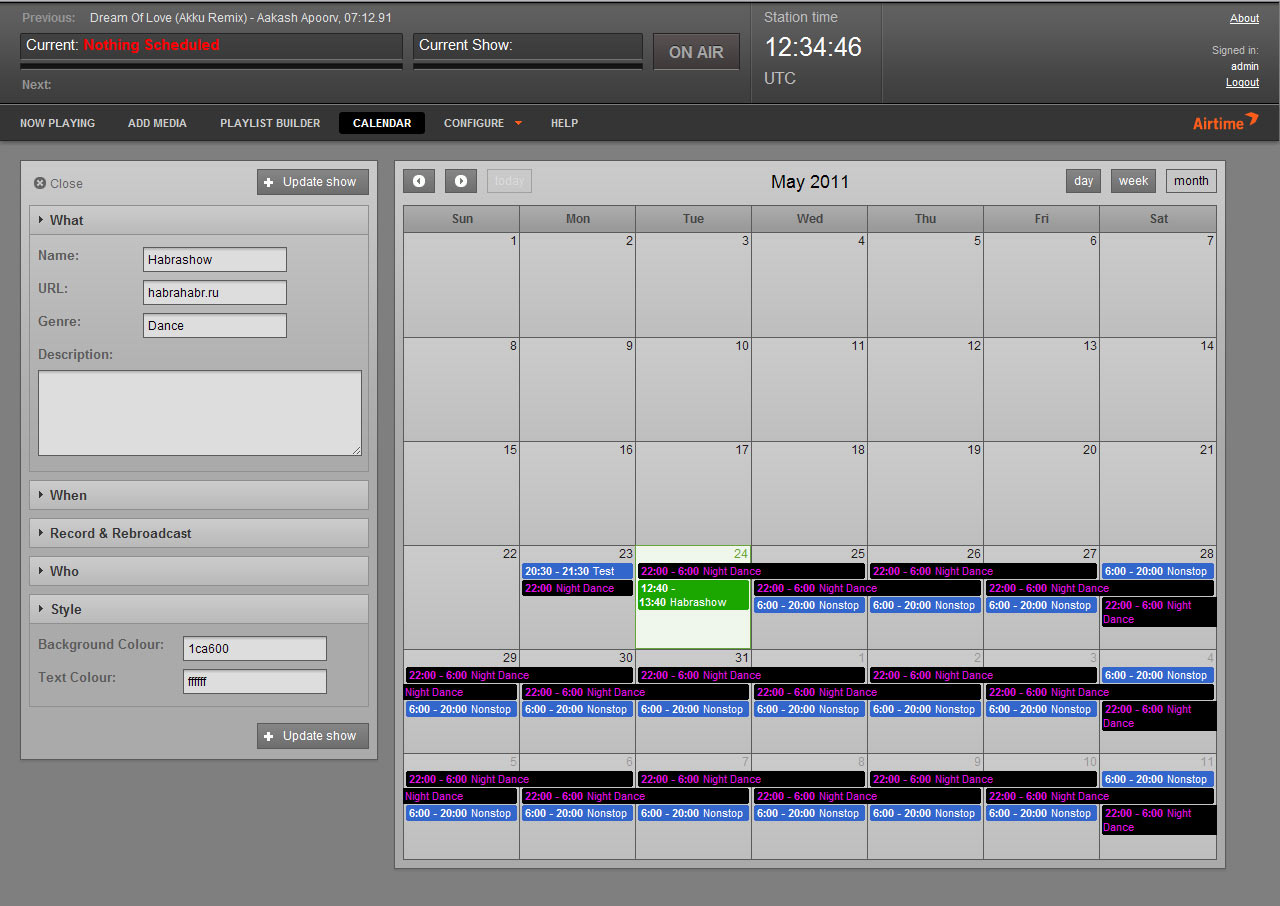
In the tab "CALENDAR" we create and edit the grid of esters.
As soon as we set up the ethers, add music and playlists, the necessary music will play clearly on schedule.
Go to example.com:8000 and can listen to your radio.
Conclusion
Advantages of Airtime:
- Easy installation;
- Clear graphical interface;
- Configuration flexibility;
- The ability to broadcast to the sound card.
Disadvantages:
- Strongly loads the system;
- Bad Cyrillic support.
If you plan to broadcast your radio station to a large number of listeners, it is better to use several servers:
- Medium power server for installing Airtime and all related utilities on it;
- A powerful server for installing Icescast2 on it, which will relay the stream from the first server.
More information about Airtime and its configuration can be found on the developer’s website: www.sourcefabric.org/en/products/Airtime_overview
Source: https://habr.com/ru/post/120640/
All Articles