Creating a simple 3D application with ShiVa3D
 This year on Habré, articles about writing games on Unity3D have become quite popular. But for some reason no one else talked about competitors. Today I will talk about the most important (in my opinion) competitor - ShiVa3D.
Small review
ShiVa3D is a three-dimensional game engine with a graphic editor designed to create applications and games for the web, consoles and mobile devices.
With the help of Shiva, you can make programs and games for Windows, Linux , Mac OS, iOS, Android, Palm OS and Wii. There is also a plugin for viewing 3D right in the browser.
ShiVa3D consists of four parts: Editor, Game Engine, Developer Tool (program for building projects) and Server.
Shiva's game engine is based on Open GL or DirectX graphics and ODE physics. The engine is able to draw the landscape, the ocean and various three-dimensional models using shaders. There are static and dynamic lighting and shadows, dynamic particles, various effects, animations, user interface elements, the ability to create multiplayer games and play sounds. The engine is expanded with plugins, for example, you can replace ODE physics with PhysX.
')
The built-in WYSIYWG editor allows you to create games and applications using all the features of the engine. For programming, Lua is mainly used, but you can
Sample application
Although the editor is a lot of different demos, I still tell you how to make your application. I use the PLE edition, which can be downloaded from the official site .
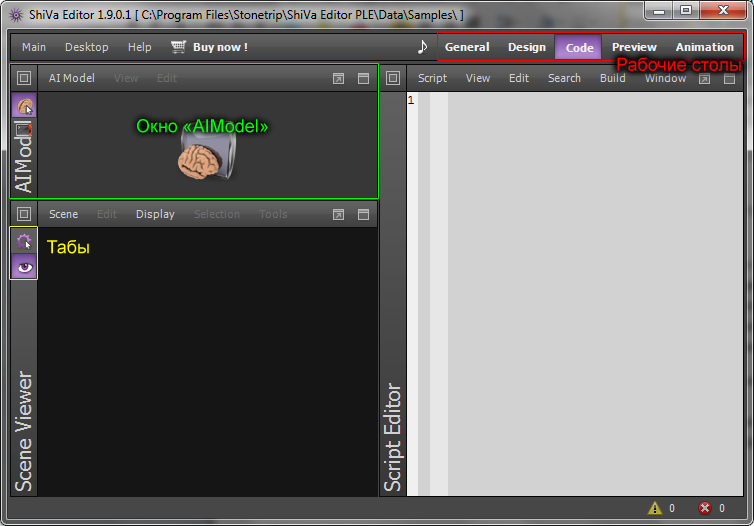
At first glance, Shiva has a not very friendly interface. But it has several advantages:
- Everything is divided into desktops (the default is five, but you can do up to eight)
- Any desktop can be customized (arrange windows one by one of the templates and change the set of tabs)
So let's start creating the first application.
First of all, in the Game Editor window we create a new game (Game → Create). Next you need to create a scene, for this in the same window click Edit → Scene → Create. After creation, the scene is immediately loaded into the Scene Viewer.
Let's start filling the scene. It is customary to do this on the desktop "Design".
First, create a landscape. In the Terrain Editor window, click Terrain → Create and in the form that appears, set the
Chunk Count = "4x4" (enough for a start). After clicking the OK button, we will see a flat plane in the Scene Viewer. To shape, you need to select all the pieces (Chunks) and in the Geometry section add The camera is controlled using three key combinations:
- Alt + left mouse button - camera rotation
- Alt + right mouse button - zoom in / out camera
- Alt + middle mouse button - move the camera around
Next, make the sky. We find the Ambience Editor (another tab in the same window as the Terrain Editor) and in the Sky section put the sky textures in the appropriate fields (for the bottom you can not put). I like skyblue textures.
There is not enough water for a complete set ... The ocean is made in the corresponding section of the Ambience Editor (Ocean section). All you need to do is to mark the very first check box “Enable Ocean” and adjust everything else to your liking.
In principle, everything. That's just the code to run is not enough ...
Go to the “General” desktop and create a new AI Model (Game Editor → Edit → User Main AI → Create).
Next on the desktop "Code" click "Add Handler" and select onInit.
In the body of the function we write
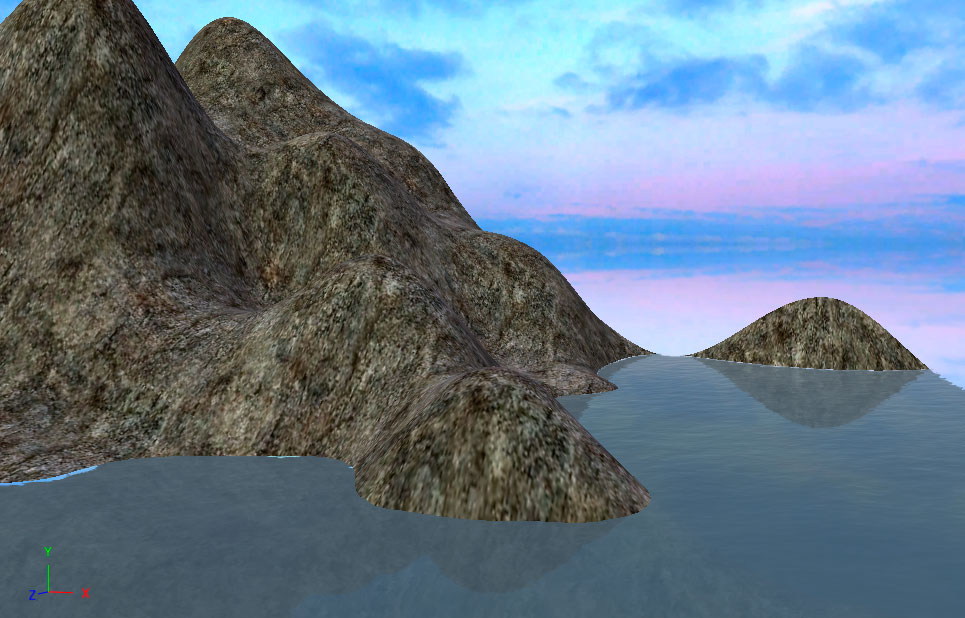
application.setCurrentUserScene("MyScene") -- MyScene Save and compile the code. Then you can go to the desktop "Preview" and see what you got. I got this:
Results
ShiVa is not a complicated engine. It is suitable for game developers with a small budget. Also on the official website there are interior designs made with the help of shiva. If you want to do something more serious on ShiVa, it will be useful to read the tutorials and documentation on the developer page .
Source: https://habr.com/ru/post/119697/
All Articles