Fast labeling of images using external contours
 In the article I will tell you how to quickly list the connected objects on a binary raster. We used this algorithm to recognize images and texts; it differs from similar high processing speed (in pictures up to 3200x2400, with some reservations, it works out in milliseconds) and availability in understanding (if you have some knowledge of C ++). I note that the original image will be interpreted by the algorithm as “read-only” (why spoil something with which other methods can work), and therefore, the algorithm will require a small amount of additional memory. In addition, external contours are a useful object for image analysis and vectorization.
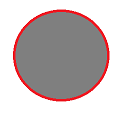
 So, the task: convert the original image (array of points Image) into a list of contours. A contour is simply a set of external points for a connected part of the image. For example, the contour for a filled circle is a circle obtained from all external points.
 Eight-connectedness is used, that is, two points are connected if they are neighbors with respect to the directions up-left-right-down and along the diagonals. Thus, each point can have up to eight neighbors.
')
Little preparation
Let us begin the construction of an algorithm that quite effectively obtains a contour for a given initial external point of an object with the following structure:
class Contour : public Points
{
// references to the constructor params
const Image& SourceImage;
ImageMap& CurrentImageMap;

public :
/* here we assume that image is coherent in any of 8 ways,
* so if the pixel will not have neighbor in any of 4 diagonal and 4 straight directions
* then it will be considered as separate image part */

// extract contour and mark all coherent points on image map
Contour( const Image& img, ImageMap& map, const Point& start);

private :
// private methods for contour pass implementation only
void passDownLeft(Point& p, bool InvertedAxis = false );
Point movePoint( const Point& src, int x, int y, bool InvertedAxis = false );
Point commitPoint( const Point& p);
};
Here are all the necessary objects and methods that we consider. The designer does not cause doubts, SourceImage too.
What is ImageMap? In fact, the contour construction algorithm needs to somehow mark the points in order to prevent their re-visit, so the points considered will be marked with the number of the object to which they belong.
It would seem that this will require memory as much as the original image takes, but we will use a more efficient structure. There is no sense in wasting memory on points that do not belong to the contour or lying inside it, so I want to store only the boundary points with a small overhead and be able to quickly address them.

The structure is based on the index of image blocks of STEP 2 size. The index itself is an array of links to blocks, the size of X / STEP * Y / STEP, where X and Y - the resolution of the original image. When a block is written for writing, it is allocated in memory and the corresponding index element is marked with its pointer. In the worst case, we will get memory usage equal to the size of the picture if each (n * STEP, m * STEP) point is marked, but on average we save 50-90% of the memory. Indexing, as you already guessed, is done simply by dividing the coordinates by STEP, and if STEP is a power of two, then it works remarkably quickly.
By the way, after the execution of the algorithm, ImageMap is the result of the task of enumerating objects in an image.
The commitPoint method is used to add a point to the contour and associate the ImageMap with the current contour:
Point Contour::commitPoint( const Point& p)
{
if (!CurrentImageMap.isAssigned(p) && SourceImage.isFilled(p))
{
CurrentImageMap.assignSegment(p, this );
push_back(p);
}
return p;
}
Of course, these are implementation details, but everything is simple and can be reused. The movePoint function is also quite simple; it simply adds the specified increment to the point:
Point Contour::movePoint( const Point& src, int x, int y, bool InvertedAxis)
{
Point p = src;
if (InvertedAxis)
{
x = -x;
y = -y;
}
pX += x;
pY += y;
return p;
}
The InvertedAxis parameter, as you might guess, simply changes the increment to the opposite (this will come in handy later).
The core of the algorithm
Well, now interesting. Actually, the bypass function itself: passDownLeft. For a given starting point, we want to go around the object, moving down and, if possible, to the left.
While we are within the object (i.e. the color of the current point is not equal to the background color):
- Go down one point relative to the current.
- If the left point, relatively new current is filled - then we are lucky, we move to the left "until it stops." If the point above the leftmost one is filled, then we have found a self-intersection and exit the bypass.
- If not filled, move to the right until we reach the filled point.
It sounds simple enough, but the exact implementation looks a little more complicated:
void Contour::passDownLeft(Point& p, bool InvertedAxis)
{
while (SourceImage.isInside(p))
{
commitPoint(p);

// step one point down
p = movePoint(p, 0,1, InvertedAxis);

// select one of neighbors which is filled, prefer left one...
Point left = movePoint(p, -1,0, InvertedAxis);
if (SourceImage.isFilled(left))
{
p = commitPoint(left);
// ...and shift left as many as possible
while (SourceImage.isInside(p))
{
Point left = movePoint(p, -1,0, InvertedAxis);
if (!SourceImage.isFilled(left))
break ; // no more left neighbors

p = commitPoint(left);

Point up = movePoint(p, 0,-1, InvertedAxis);
if (SourceImage.isFilled(up))
return ; // crossed inside area
}
}
else
{
// selection still unfilled...
while (SourceImage.isInside(p) && !SourceImage.isFilled(p))
{
// ...shift right by connected points and test again
Point right = movePoint(p, 1,0, InvertedAxis);
Point rightUp = movePoint(right, 0,-1, InvertedAxis);
if (!SourceImage.isFilled(rightUp))
return ; // no more bottom right neighbors
commitPoint(rightUp);
p = commitPoint(right);
}
}
}
}
The isInside function checks whether a point lies within the image in order not to go beyond its borders.
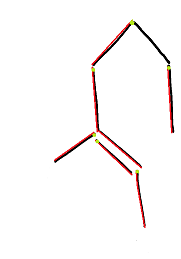
 Having started this detour on the test picture (light green dots - starting points for traversing each object), we, as one would expect, will not get contours, since the construction process will rest on the lowest points of each object. Therefore, one such function is not enough. But, you can add a contour by going up and to the right, which is easily obtained by the InvertedAxis flag provided for this case! Thus, the constructor, which was left at last, will complement the contour construction algorithm:
ontour::Contour( const Image& img, ImageMap& map, const Point& start)
: SourceImage(img), CurrentImageMap(map)
{
bool doneSomething = true ;
Point p = start;
for ( int iter = 0; doneSomething; iter++)
{
size_t count = size();
passDownLeft(p, iter % 2 == 1);
doneSomething = size() > count;
}
}
We will alternate crawls down-left and up-right, as long as it adds new points to the contour.
So, we have obtained a working method for enumerating all points of the outer contour for a given image object, working in linear time, relative to the number of points of this contour.
Enumeration of starting points
The case is left for small - from the source image to find all the starting points for building contours:
void Vectorization::getContours()
{
Point p(0,0); // line-by-line scan to extract contours of objects
for (pY = 0; pY < SourceImage.getHeight(); p.Y++)
{
for (pX = 0; pX < SourceImage.getWidth(); p.X++)
{
if (SourceImage.isFilled(p) && !ImageMap.isAssigned(p))
{
// that pixel is unprocessed yet, so extract the contour starting from it
Contour* c = new Contour(SourceImage, ImageMap, p);
// add new contour
ContoursStorage.push_back( c );
}
}
}
}
Here it is for now is the slowest part of the algorithm: after all, you need to bypass every point of the image.
But its optimization also practically lies on the surface: we will use the same index structure as when storing ImageMap, dividing the image into blocks of size STEP 2 .
void Vectorization::getContoursOptimized()
{
Point pIndex(0,0); // step-by-step scan
for (pIndex.Y = 0; pIndex.Y < SourceImage.getHeight(); pIndex.Y += STEP)
{
for (pIndex.X = 0; pIndex.X < SourceImage.getWidth(); pIndex.X += STEP)
{
if (!SourceImage.isEmptyIndex(pIndex))
{
Point pLocal = pIndex;
for (pLocal.Y = pIndex.Y ; pLocal.Y < STEP; pLocal.Y++)
{
for (pLocal.X = pIndex.X ; pLocal.X < STEP; pLocal.X++)
{
if (SourceImage.isFilled(pLocal))
{
if (Map.isAssigned(pLocal))
{
pLocal.X = dynamic_cast<Contour*>(Map.getSegment(pLocal))->getMaxX(pLocal.Y);
break ; /* skip already processed points by getting the max contour X for the specified Y */
}
// that pixel is unprocessed yet, so extract the contour starting from it
Contour* cntr = new Contour(SourceImage, Map, pLocal);
// add new contour
ContoursStorage.push_back( cntr ) ;
}
}
}
}
}
}
}
The complexity of such an algorithm is proportional to the number of points of external contours for image objects.
Trick
From the last fact, it follows that this method is generally not very good on images where there is practically no group of related points, while filling with points is close to full of possible (25% - every second point in each coordinate is filled, the rest are not).
But from the point of view of image processing, such images are just noise, which are easily cut off by pre-filters. So all is well :)
Source: https://habr.com/ru/post/119461/
All Articles