We write the first application on Mono Android
Hello. In this article I would like to share my experience of creating applications for the Android mobile platform using Mono and make out a simple example.
To get started with Mono Android you need to install:
Also, to create an xml layout (let's call it markup), we need one of the graphical tools. I use DroidDraw , but there are many alternatives on the net. So everyone can pick something for themselves.
After installing all of the above, you need to create and configure one (or several) device emulators with the Android platform. You can also do this when you first start the application. In my example, I am using an emulator with Android 2.1.1 version.
Now you can create our first Mono Android project.
Create a new project

')
And call it MyFirstMonoAndroidApplication.

The new project contains several elements: the Assets and Resources directories and a class called Activity1.
Assets in this example will not be affected. I would like to dwell on the rest of the elements.
With resources, everything is quite simple. The Drawable directory stores images used in the application. Directory Layout contains a set of xml markup. And the Values directory stores various predefined string values that we use in our application.
All resources used in the application should be marked as AndroidResource in the properties.
Let's go to our class Activity1. Apparently, it is inherited from the base class Activity. What is an Activity? An activity is one specific task that a user can perform. Almost all activities interact with the user through a graphical interface (xml markup).
Pay attention to the line SetContentView (Resource.Layout.Main);
This is where the loading and installation of markup for the current Activity takes place.
Let's slightly change the markup and the code of the Activity itself.
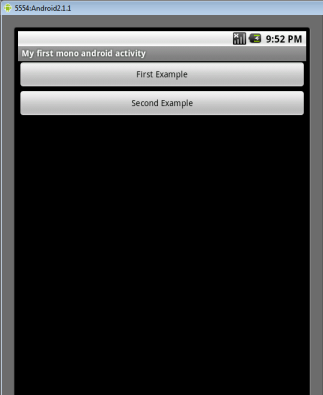
Let it be a simple form with two buttons, each of which handles the execution of another Activity.
Markup:
The main class of the application. That is what we will see when starting.
The code is fairly simple and straightforward, except for using the new Intent class.
What is an Intent? This is an abstract description of the operation being performed. In other words, this is the user's intention to do something definite. In our case, when you click on the button, the user switches to another Activity.
To compile the code you need to add the classes to which we refer. Through the context menu of the project, we add two new Activities with the names TitlesListActivity and MoreFriendlyRssFeedActivity.
I would like to demonstrate some simple examples that can help in learning Mono Android. One of the main things that any programmer faces is the display of a list.
Let it be a list of headlines from the RSS feed. Let's create a simple class for reading RSS.
Now we will display this list in the Activity with the name TitlesListActivity.
For this we will use ListActivity, whose main (and only) purpose is to display the list.
Note that it does not need to set xml markup and call SetContentView.
Of particular interest is the following resource: Android.Resource.Layout.SimpleListItem1. This is one of the predefined resources, a complete list of which (along with the markup) can be found by reference .
Its markup:
It's time to launch our app.
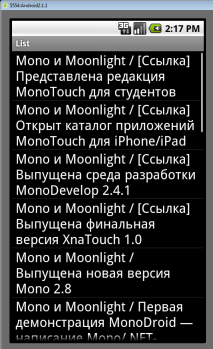
Clicking on the first button opens a new Activity with a list of titles in the RSS feed.
Fine! Everything works, but, of course, I want something more complicated.
Add the ability to select a specific RSS feed from the list and open a post from the feed in the browser.
First of all, let's work on resources a bit: add two images with Mono and .NET logos to the Drawable directory (don't forget to specify the type of resource!). Also in the file Strings.xml (directory Values) add an array of values for the drop-down list:
Now you need to create a new markup MoreFriendlyRssFeed.xml
It's very simple: Spinner to select the tape and ListView to display the list. It is important to understand that about the layout of elements within the ListView (or rather, its adapter), at this stage, does not know anything. Based on this markup, we can say that ListView simply displays a “sort of” list.
You also need to create markup for the list item. Let's call it RssRow.xml. Let each element of the list include a button with an image and text - the title of the article.
It is time to move on to the most important thing: to implement an Activity that will tie all our parts together.
Pay attention to another predefined resource Android.Resource.Layout.SimpleSpinnerItem. For convenience, I also give his markup:
To display the text in the list, use the ArrayAdapter class. If we need to display something more complex, then we are faced with the need to implement our own class, a successor from the ArrayAdapter, which overrides the GetView method. Create an RssListItemAdapter class to bind and display data:
Now it is possible to bind the data to the list and display them in the desired form. Add the ability to bind to the data in the event handler select an item from the list.
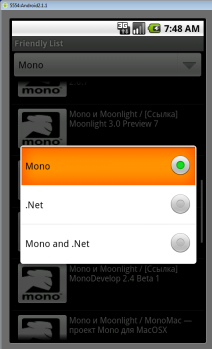
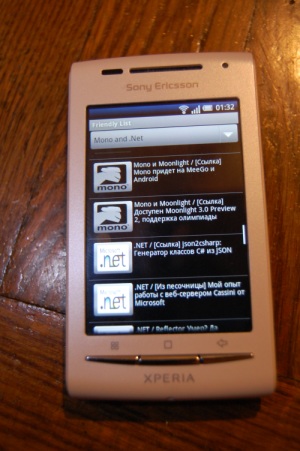
Run the application and open the second example. Now we have the option to select the RSS feed (or set of feeds).
Our list will look like this:

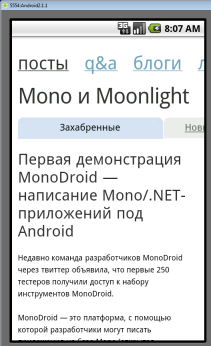
When you click on the button next to the title, the corresponding article opens in the browser.
Things to do: start the application on a specific Android device. If we try to do it right now, we will get an error when trying to build an apk (Android Package) file. I would also like to point out that the trial version of Mono Android allows you to run applications only on an emulator. Fortunately, my version is no longer a trial, so I can bring the example to its logical conclusion.
To build the installation package correctly, you need to create AndroidManifest.xml. This file contains key information about the application, information without which the launch of the application on the device is impossible.
It is possible to create AndroidManifest.xml through project properties:

But it will be much more interesting to write it with your hands:
Now you can build apk file. Build -> Package MyFirstMonoAndroidApplication for Android (.apk)
We copy it to the device with the Android system and run. During the installation, a warning will be displayed:
Allow this application to: Full access to the Internet.
That is, all the necessary requirements from the manifest will be shown to the user prior to installation. Confirm, wait for the end of the installation. AND…
Thanks for attention.
Link to application source code
To get started with Mono Android you need to install:
- Visual Studio Professional and above or MonoDevelop 2.6 beta 1
- Java sdk
- Android SDK
- Mono for Android plugin for Windows or Mac
Also, to create an xml layout (let's call it markup), we need one of the graphical tools. I use DroidDraw , but there are many alternatives on the net. So everyone can pick something for themselves.
After installing all of the above, you need to create and configure one (or several) device emulators with the Android platform. You can also do this when you first start the application. In my example, I am using an emulator with Android 2.1.1 version.
Now you can create our first Mono Android project.
The first project of Mono Android
Create a new project
')
And call it MyFirstMonoAndroidApplication.
The new project contains several elements: the Assets and Resources directories and a class called Activity1.
Assets in this example will not be affected. I would like to dwell on the rest of the elements.
With resources, everything is quite simple. The Drawable directory stores images used in the application. Directory Layout contains a set of xml markup. And the Values directory stores various predefined string values that we use in our application.
All resources used in the application should be marked as AndroidResource in the properties.
Let's go to our class Activity1. Apparently, it is inherited from the base class Activity. What is an Activity? An activity is one specific task that a user can perform. Almost all activities interact with the user through a graphical interface (xml markup).
Pay attention to the line SetContentView (Resource.Layout.Main);
This is where the loading and installation of markup for the current Activity takes place.
Let's slightly change the markup and the code of the Activity itself.
Let it be a simple form with two buttons, each of which handles the execution of another Activity.
Markup:
<? xml version ="1.0" encoding ="utf-8" ? >
< LinearLayout
android:layout_width ="fill_parent"
android:layout_height ="fill_parent"
xmlns:android ="http://schemas.android.com/apk/res/android"
android:orientation ="vertical" >
< Button
android:id ="@+id/FirstExample"
android:layout_width ="fill_parent"
android:layout_height ="wrap_content"
android:text ="First Example" ></ Button >
< Button
android:id ="@+id/SecondExample"
android:layout_width ="fill_parent"
android:layout_height ="wrap_content"
android:text ="Second Example" ></ Button >
</ LinearLayout >

* This source code was highlighted with Source Code Highlighter .
The main class of the application. That is what we will see when starting.
[Activity(Label = "My first mono android activity" , MainLauncher = true , Icon = "@drawable/icon" )]
public class MyMainActivity : Activity
{
protected override void OnCreate(Bundle bundle)
{
base .OnCreate(bundle);
SetContentView(Resource.Layout.Main);
Button firstExample = FindViewById<Button>(Resource.Id.FirstExample);
firstExample.Click += firstExample_Click;
Button secondExample = FindViewById<Button>(Resource.Id.SecondExample);
secondExample.Click += secondExample_Click;
}

void firstExample_Click( object sender, EventArgs e)
{
Intent titlesIntent = new Intent( this , typeof (TitlesListActivity));
StartActivity(titlesIntent);
}

void secondExample_Click( object sender, EventArgs e)
{
Intent friendlyListIntent = new Intent( this , typeof (MoreFriendlyRssFeedActivity));
StartActivity(friendlyListIntent);
}
}

* This source code was highlighted with Source Code Highlighter .
The code is fairly simple and straightforward, except for using the new Intent class.
What is an Intent? This is an abstract description of the operation being performed. In other words, this is the user's intention to do something definite. In our case, when you click on the button, the user switches to another Activity.
To compile the code you need to add the classes to which we refer. Through the context menu of the project, we add two new Activities with the names TitlesListActivity and MoreFriendlyRssFeedActivity.
I would like to demonstrate some simple examples that can help in learning Mono Android. One of the main things that any programmer faces is the display of a list.
Let it be a list of headlines from the RSS feed. Let's create a simple class for reading RSS.
public class RssReader
{
private const string _title = "title" ;
private const string _link = "link" ;
private const string _item = "item" ;
private const string _channel = "channel" ;

private static Func< XElement , RssListItem> GetTitlesAndLinksFunc = (x => new RssListItem { Title = x.Element(_title).Value, Link = x.Element(_link).Value });

public static IList<RssListItem> GetRssListItems( params string [] rssUris)
{
List <RssListItem> fullList = new List <RssListItem>();

IEnumerable < XElement > itemsFromConcreteIteration;
foreach ( string rssUri in rssUris)
{
itemsFromConcreteIteration = GetRssFeedChannel(rssUri).Elements(_item);
fullList.AddRange(itemsFromConcreteIteration.Select(GetTitlesAndLinksFunc));
}

return fullList;
}

public static IEnumerable < string > GetTitles( string rssUri)
{
IEnumerable < XElement > items = GetRssFeedChannel(rssUri).Elements(_item);
return items.Select(x => x.Element(_title).Value);
}

public static XElement GetRssFeedChannel( string rssUri)
{
XElement feed = XElement .Load(rssUri);
return feed.Element(_channel);
}
}

public class RssListItem
{
public string Title { get ; set ; }
public string Link { get ; set ; }
}

* This source code was highlighted with Source Code Highlighter .
Now we will display this list in the Activity with the name TitlesListActivity.
For this we will use ListActivity, whose main (and only) purpose is to display the list.
Note that it does not need to set xml markup and call SetContentView.
[Activity(Label = "List" )]
public class TitlesListActivity : ListActivity
{
protected override void OnCreate(Bundle bundle)
{
base .OnCreate(bundle);

var titles = RssReader.GetTitles( "http://habrahabr.ru/rss/blogs/mono/" );
ListAdapter = new ArrayAdapter< string >( this , Android.Resource.Layout.SimpleListItem1, titles.ToArray());
}
}

* This source code was highlighted with Source Code Highlighter .
Of particular interest is the following resource: Android.Resource.Layout.SimpleListItem1. This is one of the predefined resources, a complete list of which (along with the markup) can be found by reference .
Its markup:
< TextView xmlns:android ="http://schemas.android.com/apk/res/android"
android:id ="@android:id/text1"
android:layout_width ="fill_parent"
android:layout_height ="wrap_content"
android:textAppearance ="?android:attr/textAppearanceLarge"
android:gravity ="center_vertical"
android:paddingLeft ="6dip"
android:minHeight ="?android:attr/listPreferredItemHeight"
/>

* This source code was highlighted with Source Code Highlighter .
It's time to launch our app.
Clicking on the first button opens a new Activity with a list of titles in the RSS feed.
Fine! Everything works, but, of course, I want something more complicated.
Complicate the task
Add the ability to select a specific RSS feed from the list and open a post from the feed in the browser.
First of all, let's work on resources a bit: add two images with Mono and .NET logos to the Drawable directory (don't forget to specify the type of resource!). Also in the file Strings.xml (directory Values) add an array of values for the drop-down list:
<? xml version ="1.0" encoding ="utf-8" ? >
< resources >
< string name ="ApplicationName" > MyFirstMonoAndroidApplication </ string >
< string-array name ="frameworks" >
< item > Mono </ item >
< item > .Net </ item >
< item > Mono and .Net </ item >
</ string-array >
</ resources >

* This source code was highlighted with Source Code Highlighter .
Now you need to create a new markup MoreFriendlyRssFeed.xml
<? xml version ="1.0" encoding ="utf-8" ? >
< LinearLayout
android:layout_width ="fill_parent"
android:layout_height ="fill_parent"
xmlns:android ="http://schemas.android.com/apk/res/android"
android:orientation ="vertical" >
< Spinner
android:id ="@+id/FrameworkSelector"
android:layout_width ="fill_parent"
android:layout_height ="wrap_content" >
</ Spinner >
< ListView
android:id ="@+id/RssEntries"
android:layout_width ="fill_parent"
android:layout_height ="wrap_content" >
</ ListView >
</ LinearLayout >

* This source code was highlighted with Source Code Highlighter .
It's very simple: Spinner to select the tape and ListView to display the list. It is important to understand that about the layout of elements within the ListView (or rather, its adapter), at this stage, does not know anything. Based on this markup, we can say that ListView simply displays a “sort of” list.
You also need to create markup for the list item. Let's call it RssRow.xml. Let each element of the list include a button with an image and text - the title of the article.
<? xml version ="1.0" encoding ="utf-8" ? >
< LinearLayout xmlns:android ="http://schemas.android.com/apk/res/android"
android:layout_width ="fill_parent"
android:layout_height ="wrap_content"
android:padding ="6dip" >
< ImageButton
android:id ="@+id/LogoButton"
android:layout_width ="wrap_content"
android:layout_height ="wrap_content"
android:src ="@drawable/mono" >
</ ImageButton >
< TextView
android:id ="@+id/Title"
android:layout_width ="wrap_content"
android:layout_height ="wrap_content" >
</ TextView >
</ LinearLayout >

* This source code was highlighted with Source Code Highlighter .
It is time to move on to the most important thing: to implement an Activity that will tie all our parts together.
[Activity(Label = "Friendly List" )]
public class MoreFriendlyRssFeedActivity : Activity
{
protected override void OnCreate(Bundle bundle)
{
base .OnCreate(bundle);
SetContentView(Resource.Layout.MoreFriendlyRssFeed);

Spinner spinner = FindViewById<Spinner>(Resource.Id.FrameworkSelector);
spinner.ItemSelected += spinner_ItemSelected;
ArrayAdapter adapter = ArrayAdapter.CreateFromResource( this , Resource.Array.frameworks, Android.Resource.Layout.SimpleSpinnerItem);
adapter.SetDropDownViewResource(
Android.Resource.Layout.SimpleSpinnerDropDownItem);
spinner.Adapter = adapter;
}

void spinner_ItemSelected( object sender, ItemEventArgs e)
{}
}

* This source code was highlighted with Source Code Highlighter .
Pay attention to another predefined resource Android.Resource.Layout.SimpleSpinnerItem. For convenience, I also give his markup:
< TextView xmlns:android ="http://schemas.android.com/apk/res/android"
android:id ="@android:id/text1"
style ="?android:attr/spinnerItemStyle"
android:singleLine ="true"
android:layout_width ="fill_parent"
android:layout_height ="wrap_content" />

* This source code was highlighted with Source Code Highlighter .
To display the text in the list, use the ArrayAdapter class. If we need to display something more complex, then we are faced with the need to implement our own class, a successor from the ArrayAdapter, which overrides the GetView method. Create an RssListItemAdapter class to bind and display data:
public class RssListItemAdapter: ArrayAdapter<RssListItem>
{
private IList <RssListItem> Items;

public RssListItemAdapter(Context context, int textViewResourceId, IList<RssListItem> items)
: base (context, textViewResourceId, items)
{
Items = items;
}

public override View GetView( int position, View convertView, ViewGroup parent)
{
View view = convertView;
if (view == null )
{
LayoutInflater inflater = (LayoutInflater)Context.GetSystemService(Context.LayoutInflaterService);
// , .
view = inflater.Inflate(Resource.Layout.RssRow, null );
}

//
RssListItem item = Items[position];

//
//
ImageButton btnLogo = (ImageButton)view.FindViewById(Resource.Id.LogoButton);
btnLogo.Click += delegate
{
Intent browserIntent = new Intent( "android.intent.action.VIEW" , Android.Net. Uri .Parse(item.Link));
Context.StartActivity(browserIntent);
};

// ( )
btnLogo.SetImageResource(item.Title.StartsWith( "Mono" ) ? Resource.Drawable.mono : Resource.Drawable.net);

//
TextView txtTitle = (TextView)view.FindViewById(Resource.Id.Title);
txtTitle.Text = item.Title;

//
return view;
}
}

* This source code was highlighted with Source Code Highlighter .
Now it is possible to bind the data to the list and display them in the desired form. Add the ability to bind to the data in the event handler select an item from the list.
void spinner_ItemSelected( object sender, ItemEventArgs e)
{
ListView view = FindViewById<ListView>(Resource.Id.RssEntries);

switch (e.Position)
{
case 0:
view.Adapter = new RssListItemAdapter( this , Resource.Layout.RssRow, RssReader.GetRssListItems( "http://habrahabr.ru/rss/blogs/mono/" ));
break ;
case 1:
view.Adapter = new RssListItemAdapter( this , Resource.Layout.RssRow, RssReader.GetRssListItems( "http://habrahabr.ru/rss/blogs/net/" ));
break ;
case 2:
view.Adapter = new RssListItemAdapter( this , Resource.Layout.RssRow, RssReader.GetRssListItems( "http://habrahabr.ru/rss/blogs/mono/" , "http://habrahabr.ru/rss/blogs/net/" ));
break ;
}
}

* This source code was highlighted with Source Code Highlighter .
Run the application and open the second example. Now we have the option to select the RSS feed (or set of feeds).
Our list will look like this:
When you click on the button next to the title, the corresponding article opens in the browser.
Running an application on an Android device
Things to do: start the application on a specific Android device. If we try to do it right now, we will get an error when trying to build an apk (Android Package) file. I would also like to point out that the trial version of Mono Android allows you to run applications only on an emulator. Fortunately, my version is no longer a trial, so I can bring the example to its logical conclusion.
To build the installation package correctly, you need to create AndroidManifest.xml. This file contains key information about the application, information without which the launch of the application on the device is impossible.
It is possible to create AndroidManifest.xml through project properties:
But it will be much more interesting to write it with your hands:
<? xml version ="1.0" encoding ="utf-8" ? >
< manifest xmlns:android ="http://schemas.android.com/apk/res/android" package ="First.MonoApp" android:versionCode ="1" android:versionName ="1.0" >
< application android:label ="MyMonoApp" >
</ application >
< uses-sdk android:minSdkVersion ="4" />
< uses-permission android:name ="android.permission.INTERNET" />
</ manifest >

* This source code was highlighted with Source Code Highlighter .
Now you can build apk file. Build -> Package MyFirstMonoAndroidApplication for Android (.apk)
We copy it to the device with the Android system and run. During the installation, a warning will be displayed:
Allow this application to: Full access to the Internet.
That is, all the necessary requirements from the manifest will be shown to the user prior to installation. Confirm, wait for the end of the installation. AND…
Thanks for attention.
Link to application source code
Source: https://habr.com/ru/post/119001/
All Articles