Getting Started with Windows Azure Toolkit for iOS
I am very pleased to present the already available Windows Azure Toolkit for iOS toolkit!
The first release of Windows Azure Toolkit for iOS allows you to easily and conveniently access Windows Azure storage from iOS applications. As for Windows Azure Toolkit for Windows Phone 7, we will add new features to the toolkit, such as push alerts, Access Control Service, etc.
You can download the toolkit and all source code on github:
You can use the toolkit in two ways. It can be used to directly access Windows Azure storage, or, alternatively, through a proxy service. The proxy service code is the same as that used in Windows Azure Toolkit for Windows Phone 7, it eliminates the need to store Azure Storage accounts locally on the device.
')
This release of Windows Azure Toolkit for iOS is an important milestone, it reinforces my opinion that Windows Azure is a great place to run services for mobile applications.
If you need to quickly raise and run a mobile service on Windows Azure, pay attention to the package Cloud Ready Package for Devices (which can be found in the downloads https://github.com/microsoft-dpe/watoolkitios-lib )
The package Cloud Ready Package for Devices is designed to simplify the construction of mobile applications that use the capabilities of services running in Windows Azure. Instead of having to open Visual Studio and compile the solution with the services you want to use, we provide you with pre-assembled Windows Azure CSPKG and CSCFG files — all you need to do is update the configuration file with your credentials.
In this video, you can see how easy it is to deploy a package in Windows Azure, regardless of your operating system (for example, Windows 7 or OSX) and the target device (for example, Windows Phone 7, iOS or Android). You can read more about Windows Azure Toolkit for Windows Phone 7 and Windows Azure Toolkit for iOS in the author's blog: Wade Wegner .
You can download the compiled library for working with the repository with github (can be found in downloads https://github.com/microsoft-dpe/watoolkitios-lib ). After unzipping, there will be several folders:
If you are not familiar with Xcode, below is a brief tutorial on how to create and run your first project. Launch Xcode and create a new project:
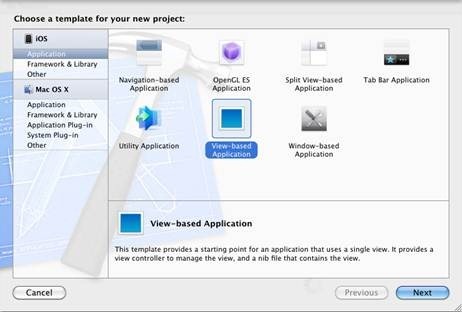
Select View-based application and click Next .
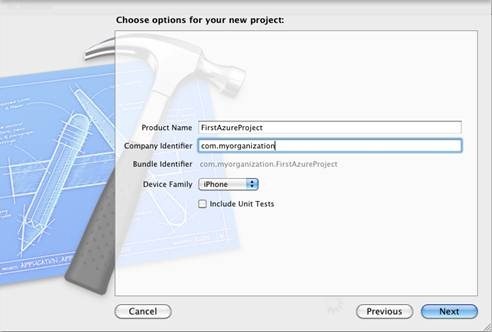
Specify the project name and company. In this step-by-step instruction, we will call it “FirstAzureProject” . Unit Test do not turn on.
Select the folder where to save the project and uncheck the checkbox source code repository .
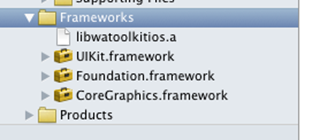
When the project opens, right-click on Frameworks and select Add Files to ...

Find the libwatoolkitios.a library in the folder of the downloaded package (for the emulator or device), and add it to the Frameworks folder.
Now, click on the topmost project (FirstAzureProject) in the left column. Click on targets. Click on the Build Settings heading in the third column. Check that All is selected so that all settings are displayed.
In the search field, enter header search and find the Header Search Paths setting:

Double-click on the line (on the right side) and click on the + button at the bottom left.

Add the path to the folder that contains the header files (one of the folders that is created when unpacking the downloaded archive). For example, "~ / Desktop / v1.0.0 / include" if the archive has been unarchived to the desktop. Don't forget to enclose the path in quotes if it contains spaces.

Now, click on the Build Phases tab and expand the Link Binary with Libraries section:

Click the + button at the bottom left and scroll down the list until you find the libxml2.2.7.3.dylib library. Add this library to the project.
Now that all the necessary references have been added, let's test what library functions can be called. To do this, double-click the [ProjectName] AppDelegate.m file (for example, FirstAzureProjectAppDelegate.m) and import the following header files into the class:
Build If the build is completed successfully, then the library is correctly added to the project. If there is a failure, it is recommended to go back and check the setting for header search files (header search paths).
Assuming that everything is assembled, in the .m file, add the following declarations after the synthesize lines:
Now, add the following code after the [self.window makeKeyAndVisible] line to the didFinishLaunchingWithOptions method:
Check that you have replaced ACCOUNT_NAME and ACCOUNT_KEY with your name and access key to Windows Azure Storage, which can be obtained from your Windows Azure management portal ( http://windows.azure.com ).
Build and run the project. You should see something like the text below in the debug window:
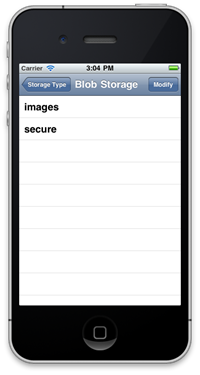
It indicates that the account contains 2 containers. This of course depends on how many BLOB containers you have created in your Windows Axure account.
Check out the class documentation to learn more about the API provided by the toolkit. Below are some additional examples.
In the [ProjectName] AppDelegate.m class, add the following header files:
In the didFinishLaunchingWithOptions method, after the line [self.window makeKeyAndVisible], try several of the following commands. Again, when you run the project, the result is displayed in the debugger window.
Authentication using account name and key:
Authentication using a proxy service from Windows Azure Toolkit for Windows Phone 7:
Replace PROXY_URL , USERNAME and PASSWORD with the data required to access your proxy service.
Creating a new client to access the repository:
Getting a list of BLOB containers (not supported through a proxy server):
Getting all container BLOBs (also not supported through a proxy):
Get all tables from storage (works both through proxy and directly):
Create a table (works both through proxy and directly):
Delete table (works both through proxy and directly):
Get records from the table (works both through proxy and directly):
Get the records from the table using predicates (works both through proxy and directly):
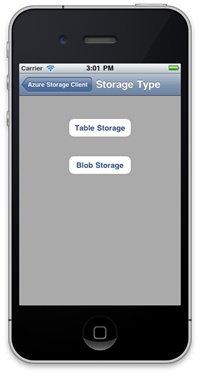
If you are wondering what else can be done using the toolkit, I recommend looking at the sample application - the watoolkitios-samples project. The project demonstrates all the capabilities of the toolkit, including creating, loading and retrieving records from the storage of tables and BLOBs.
The first release of Windows Azure Toolkit for iOS allows you to easily and conveniently access Windows Azure storage from iOS applications. As for Windows Azure Toolkit for Windows Phone 7, we will add new features to the toolkit, such as push alerts, Access Control Service, etc.
 |  |  |
You can download the toolkit and all source code on github:
- Source code: https://github.com/microsoft-dpe/watoolkitios-lib
- Sample application: https://github.com/microsoft-dpe/watoolkitios-samples
- Documentation: https://github.com/microsoft-dpe/watoolkitios-doc
You can use the toolkit in two ways. It can be used to directly access Windows Azure storage, or, alternatively, through a proxy service. The proxy service code is the same as that used in Windows Azure Toolkit for Windows Phone 7, it eliminates the need to store Azure Storage accounts locally on the device.
')
This release of Windows Azure Toolkit for iOS is an important milestone, it reinforces my opinion that Windows Azure is a great place to run services for mobile applications.
Deploying Windows Azure Services
If you need to quickly raise and run a mobile service on Windows Azure, pay attention to the package Cloud Ready Package for Devices (which can be found in the downloads https://github.com/microsoft-dpe/watoolkitios-lib )
The package Cloud Ready Package for Devices is designed to simplify the construction of mobile applications that use the capabilities of services running in Windows Azure. Instead of having to open Visual Studio and compile the solution with the services you want to use, we provide you with pre-assembled Windows Azure CSPKG and CSCFG files — all you need to do is update the configuration file with your credentials.
In this video, you can see how easy it is to deploy a package in Windows Azure, regardless of your operating system (for example, Windows 7 or OSX) and the target device (for example, Windows Phone 7, iOS or Android). You can read more about Windows Azure Toolkit for Windows Phone 7 and Windows Azure Toolkit for iOS in the author's blog: Wade Wegner .
Unpacking v1.0.0 zip library file
You can download the compiled library for working with the repository with github (can be found in downloads https://github.com/microsoft-dpe/watoolkitios-lib ). After unzipping, there will be several folders:
- /4.3-device - binary library for iOS 4.3 (device)
- /4.3-simulator - binary library for iOS 4.3 (emulator)
- / include - header files for the library
Creating your first project using the toolkit
If you are not familiar with Xcode, below is a brief tutorial on how to create and run your first project. Launch Xcode and create a new project:
Select View-based application and click Next .
Specify the project name and company. In this step-by-step instruction, we will call it “FirstAzureProject” . Unit Test do not turn on.
Select the folder where to save the project and uncheck the checkbox source code repository .
When the project opens, right-click on Frameworks and select Add Files to ...
Find the libwatoolkitios.a library in the folder of the downloaded package (for the emulator or device), and add it to the Frameworks folder.
Now, click on the topmost project (FirstAzureProject) in the left column. Click on targets. Click on the Build Settings heading in the third column. Check that All is selected so that all settings are displayed.
In the search field, enter header search and find the Header Search Paths setting:
Double-click on the line (on the right side) and click on the + button at the bottom left.
Add the path to the folder that contains the header files (one of the folders that is created when unpacking the downloaded archive). For example, "~ / Desktop / v1.0.0 / include" if the archive has been unarchived to the desktop. Don't forget to enclose the path in quotes if it contains spaces.
Now, click on the Build Phases tab and expand the Link Binary with Libraries section:
Click the + button at the bottom left and scroll down the list until you find the libxml2.2.7.3.dylib library. Add this library to the project.
Check that everything works
Now that all the necessary references have been added, let's test what library functions can be called. To do this, double-click the [ProjectName] AppDelegate.m file (for example, FirstAzureProjectAppDelegate.m) and import the following header files into the class:
#import "AuthenticationCredential.h" #import "CloudStorageClient.h" Build If the build is completed successfully, then the library is correctly added to the project. If there is a failure, it is recommended to go back and check the setting for header search files (header search paths).
Assuming that everything is assembled, in the .m file, add the following declarations after the synthesize lines:
AuthenticationCredential *credential; CloudStorageClient *client; Now, add the following code after the [self.window makeKeyAndVisible] line to the didFinishLaunchingWithOptions method:
credential = [AuthenticationCredential credentialWithAzureServiceAccount:@"ACCOUNT_NAME" accessKey:@"ACCOUNT_KEY"]; client = [CloudStorageClient storageClientWithCredential:credential]; [client getBlobContainersWithBlock:^(NSArray* containers, NSError* error) { if (error) { NSLog(@"%@",[error localizedDescription]); } else { NSLog(@"%i containers were found…",[containers count]); } }]; Check that you have replaced ACCOUNT_NAME and ACCOUNT_KEY with your name and access key to Windows Azure Storage, which can be obtained from your Windows Azure management portal ( http://windows.azure.com ).
Build and run the project. You should see something like the text below in the debug window:
2011-05-06 18:18:46.001 FirstAzureProject[27456:207] 2 containers were found…
It indicates that the account contains 2 containers. This of course depends on how many BLOB containers you have created in your Windows Axure account.
What else can be done using the toolkit
Check out the class documentation to learn more about the API provided by the toolkit. Below are some additional examples.
In the [ProjectName] AppDelegate.m class, add the following header files:
#import "AuthenticationCredential.h" #import "CloudStorageClient.h" #import "BlobContainer.h" #import "Blob.h" #import "TableEntity.h" #import "TableFetchRequest.h" In the didFinishLaunchingWithOptions method, after the line [self.window makeKeyAndVisible], try several of the following commands. Again, when you run the project, the result is displayed in the debugger window.
Authentication using account name and key:
credential = [AuthenticationCredential credentialWithAzureServiceAccount:@"ACCOUNT_NAME" accessKey:@"ACCOUNT_KEY"]; Authentication using a proxy service from Windows Azure Toolkit for Windows Phone 7:
credential = [AuthenticationCredential authenticateCredentialWithProxyURL:[NSURL URLWithString:@"PROXY_URL"] user:@"USERNAME" password:@"PASSWORD" withBlock:^(NSError *error) { if (error) { NSLog(@"%@",[error localizedDescription]); } else { NSLog(@"Successfully logged in"); } }]; Replace PROXY_URL , USERNAME and PASSWORD with the data required to access your proxy service.
Creating a new client to access the repository:
client = [CloudStorageClient storageClientWithCredential:credential]; Getting a list of BLOB containers (not supported through a proxy server):
// get all blob containers [client getBlobContainersWithBlock:^(NSArray *containers, NSError *error) { if (error) { NSLog(@"%@",[error localizedDescription]); } else { NSLog(@"%i containers were found…",[containers count]); } }]; Getting all container BLOBs (also not supported through a proxy):
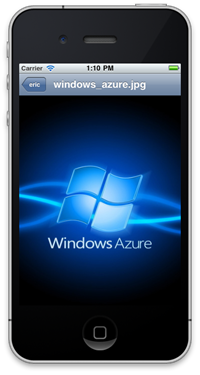
// get all blobs within a container [client getBlobs:@"images" withBlock:^(NSArray *blobs, NSError *error) { if (error) { NSLog(@"%@",[error localizedDescription]); } else { NSLog(@"%i blobs were found in the images container…",[blobs count]); } }]; Get all tables from storage (works both through proxy and directly):
// get all tables [client getTablesWithBlock:^(NSArray* tables, NSError* error) { if (error) { NSLog(@"%@",[error localizedDescription]); } else { NSLog(@"%i tables found",[tables count]); } }]; Create a table (works both through proxy and directly):
// create table [client createTableNamed:@"wadestable" withBlock:^(NSError *error) { if (error) { NSLog(@"%@",[error localizedDescription]); } else { NSLog(@"Table created"); } }]; Delete table (works both through proxy and directly):
//delete a table [client deleteTableNamed:@"wadestable" withBlock:^(NSError *error) { if (error) { NSLog(@"%@",[error localizedDescription]); } else { NSLog(@"Table was deleted"); } }]; Get records from the table (works both through proxy and directly):
// get entities for table developers TableFetchRequest* fetchRequest = [TableFetchRequest fetchRequestForTable:@"Developers"]; [client getEntities:fetchRequest withBlock:^(NSArray *entities, NSError *error) { if (error) { NSLog(@"%@",[error localizedDescription]); } else { NSLog(@"%i entities found in the developer table",[entities count]); } }]; Get the records from the table using predicates (works both through proxy and directly):
// get entities for table developers with predicate request NSError* error = nil; NSPredicate* predicate = [NSPredicate predicateWithFormat:@"Name = 'Wade' || Name = 'Vittorio' || Name = 'Nathan'"]; TableFetchRequest* anotherFetchRequest = [TableFetchRequest fetchRequestForTable:@"Developers" predicate:predicate error:&error]; [client getEntities:anotherFetchRequest withBlock:^(NSArray *entities, NSError *error) { if (error) { NSLog(@"%@",[error localizedDescription]); } else { NSLog(@"%i entities returned by this request",[entities count]); } }]; What else can you do?
If you are wondering what else can be done using the toolkit, I recommend looking at the sample application - the watoolkitios-samples project. The project demonstrates all the capabilities of the toolkit, including creating, loading and retrieving records from the storage of tables and BLOBs.
Source: https://habr.com/ru/post/118969/
All Articles