Orchard CMS for Developer - Part 2

In the continuation of the article on development for open-source CMS Orchard, we consider the output of content to the page, the update of modules and the concept of widgets. And we’ll finish the module that allows you to add to the site on Orchard a list of quick access points for the Internet Explorer 9 docked site.
Start
So, let's continue working on the IE9Pins module for Orchard CMS. Last time we stopped at the fact that we’ve finished with the admin part - we added the ability to create, edit and delete items from the IE9 jump list. In essence, they implemented a CRUD for a content type that includes a single part for storing data of the jump list item.
Jump lists - approaches
Now it's time to add data from the admin part to the site itself, turning it into a functioning list of transitions for IE9. As you, I suspect, have already learned from an article on MSDN or Konstantin Kichinsky’s blog, in order to register a quick transition list (and generally manage the behavior of a pinned site), there are two approaches — via meta tags or via JavaScript. By and large, both options require one thing - when rendering pages on a site, add either a meta tag to the head of the page, or execute a script to complete its loading.
Widgets
Whatever approach we take, the first thing to do is to find out what tools Orchard provides to extend the functionality of the site. I will skip throwing and searching and will offer an answer right away - these are widgets. By and large, this is just another type of content that is only marked when created, that it can be added to any page as a widget. And if this is a type of content, then it has its own driver, which defines rendering in HTML - accordingly, there we will be able to add code to generate JavaScript / set meta tag values. Moreover, the widget can be added not only to all pages at once, but also to each one individually, which means that with a strong desire we can control the behavior of even each page of the site.
So, it's time to add a widget to the project. The first solution that comes to mind is that if a widget is a type of content, why not just use an existing JumpListItem? Fortunately, in its driver, we did not handle the Display method. The problem is that when the widget is added to the page, it will display its own set of editable fields and parts - i.e. will display the fields for the new JumpList element and, moreover, by clicking on Save, at the stage of adding a widget, it will add the created content to the general list. Of course, we do not need anything like this - not only that, the widget and its settings will not be any other than the standard ones - on which page and in which block it should be displayed. Those. we will go to the content type without any properties and parts at all, and even not tied to any data in the database (i.e., no record). All that is required is a driver created with the Display method written and a separate View that will render the content we need.
Content part
The widget will require a simple piece of content - JumpListPart (not to be confused with JumpListItemPart). The code is quite simple:
public class JumpListPart : ContentPart<br> {<br> }<br> <br> * This source code was highlighted with Source Code Highlighter .In the driver for this part, we define the Display method:
public class JumpListPartDriver : ContentPartDriver<Models.JumpListPart><br> {<br> IContentManager contentManager;<br> IJumpListService jumpListService;<br> public JumpListPartDriver(IContentManager contentManager, IJumpListService jumpListService)<br> {<br> this .contentManager = contentManager;<br> this .jumpListService = jumpListService;<br> }<br> <br> <br> protected override DriverResult Display(Models.JumpListPart part, string displayType, dynamic shapeHelper)<br> {<br> return ContentShape( "Parts_JumpList" , () => shapeHelper.Parts_JumpList(<br> AllItems: jumpListService.Get()));<br> }<br> }<br> <br> * This source code was highlighted with Source Code Highlighter .And, finally, let's add something for which everything was started - View, which will add items to the Jump List of the assigned site. First of all, let's see what can be done in View with meta tags in the head of the page - the SetMeta method looks quite suitable. But, unfortunately, after a detailed study it becomes clear that it will not work. All menu items have the same key, but different values, and by making several calls to SetMeta, we get only one value for the last item - not suitable. Not a problem, we will make simple JavaScript code (we will not even make it, but take from the article kichik , that’s just what you need). Only here we will generate the initial array on the server side, give it to the model for presentation - and get exactly what we need. The generation of arrays is as follows:
string items = string .Empty;<br> var itemsArray = (jumpListService.Get() as IEnumerable <JumpListItemPart>).ToArray();<br>items = "[" + string .Join( "," , itemsArray.Select(i => "{name: '" + i.Name + "',url: '" + i.Url + "', iconUrl: '" + i.IconUrl + "'}" )) + "]" ; <br> <br> * This source code was highlighted with Source Code Highlighter .<script type= "text/javascript" ><br> var items = @( new MvcHtmlString(Model.JsArray))<br> var isPinnedSiteMode = window.external && "msIsSiteMode" in window.external<br> && window.external.msIsSiteMode(); <br> if (isPinnedSiteMode) {<br> window.external.msSiteModeCreateJumplist( 'Tasks' );<br> window.external.msSiteModeClearJumplist();<br> for (i = items.length - 1; i >= 0; i--) {<br> window.external.msSiteModeAddJumpListItem(items[i].name,<br> items[i].url, items[i].iconUrl);<br> }<br> window.external.msSiteModeShowJumplist();<br> }<br></script> <br><br> * This source code was highlighted with Source Code Highlighter .Migration
So, the basis for the widget is created, it's time to start creating a new type of content. It happens, as usual, in Migration.cs. However, this time it is meaningless to add code to the Create method, it only works when the module is initially activated. And now we will see how migrations work and apply in practice. So, as you can see, the Create method returns an int value of 1 - this is the version number. Because our module has just been installed, then the current version will be equal to 1. Add a very simple code:
public int UpdateFrom1()<br> {<br> ContentDefinitionManager.AlterTypeDefinition( "InternetExplorerPins" , cfg => cfg<br> .WithPart( "JumpListPart" )<br> .WithPart( "WidgetPart" )<br> .WithPart( "CommonPart" )<br> .WithSetting( "Stereotype" , "Widget" ));<br> <br> return 2;<br> }<br> <br> * This source code was highlighted with Source Code Highlighter .Module update
Everything is ready - Build all, Successfully. Now we open the admin panel of the site - and Orchard greets us with a notification that updates are available for the IE9Pins module.
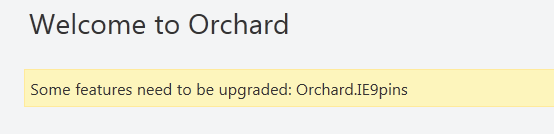
Go to Modules:
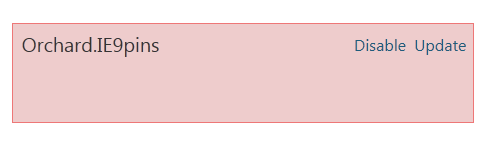
We select Update, of course, and after a couple of seconds of waiting, we see a message that everything has been successfully updated, hurray.
')
Widget placement
But while the widget is only registered in the system, it has not been added to the pages yet. In the admin go to the point Widgets, add a new one - and here it is, our InternetExplorerPins.
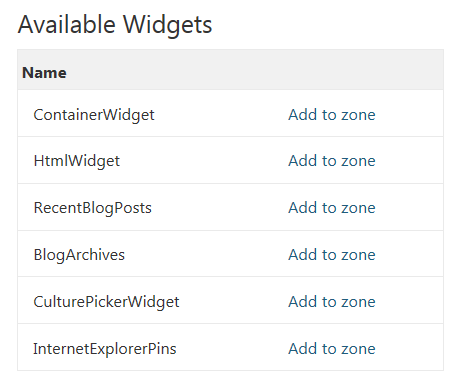
Select Add to zone:
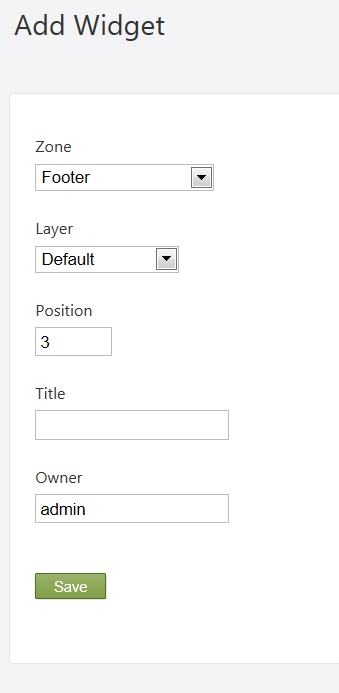
We specify Footer as the zone, and Layer (Default). This type of placement will add at the end of the page - in the footer - on each page, since Default layer is selected. You can select the HomePage layer - to place only on the home page, for example.
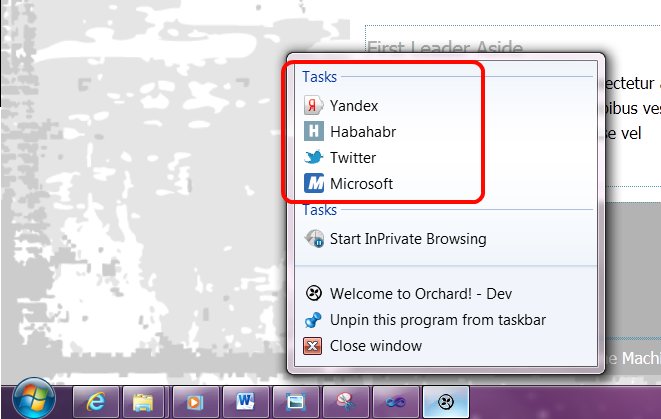
And the most exciting moment - add to check a few items in the list and open the main page of the site. Dragging it onto the taskbar ... and finally seeing the result of the work.
Links
1) The first part of the article (there you can find a lot of useful links)
2) BitBucket source code
Source: https://habr.com/ru/post/118957/
All Articles