We disassemble ThinkPad T410s
 What happens if the ThinkPad laptop keyboard is filled with water? Most likely, nothing will happen, and in the worst case, if you shed coffee instead of water, you will have to replace only the keyboard itself. Lenovo is not trying to make the ThinkPad series notebooks bulletproof and waterproof, otherwise you would have to deal with super-expensive 4 kilo suitcases. We are just trying to protect the laptop as much as possible from small and not very domestic troubles. In case of bigger troubles, for example, if your ThinkPad accidentally gets under the car , its design will allow you to save data to your hard drive. After all, as a rule, they are much more valuable than the piece of hardware itself.
With this ThinkPad T410s there was just a big trouble: it was thoroughly flooded with water. Not like I flooded the ThinkPad X201 (see the video ). Let's face it, it was dropped in a puddle. The body apparently did not hurt, but the water just got inside, and the keyboard began to live its life. Replacing it, we were surprised to find that the laptop is working properly. Nevertheless, it was decided to use this laptop as a guinea pig, and to subject it to a complete disassembly. We wanted to take a closer look at the damage, and find out what was inside. To do this, we turned to the service center specialists. Photos and videos of what came out of this venture, you can look under the cut.
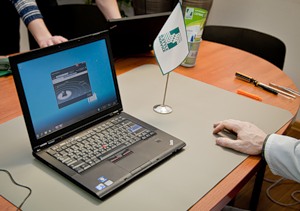
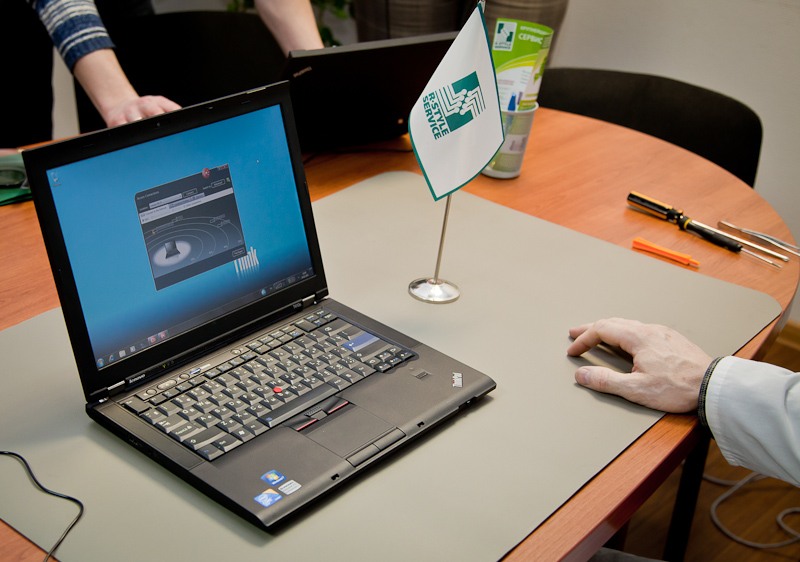
The ThinkPad T410s is a full-size notebook at the same time, rather thin and very light for a 14-inch model. Read more about it in this article on Habré. The device that has passed the water procedures is rather unusual: it is equipped with a touch screen: this display adds a couple of millimeters of thickness to the laptop, but you can use 4-point “multi-touch” in work or entertainment. This is a very unusual approach, since the laptop is not a transformer. However, after a couple of days of dating you get used to it, you can, for example, simply click "OK" in some dialog box, or pause the video by touching the screen.
')
This video shows the entire process of disassembling the bottom of the laptop. I recommend to open it on the link and see in HD.
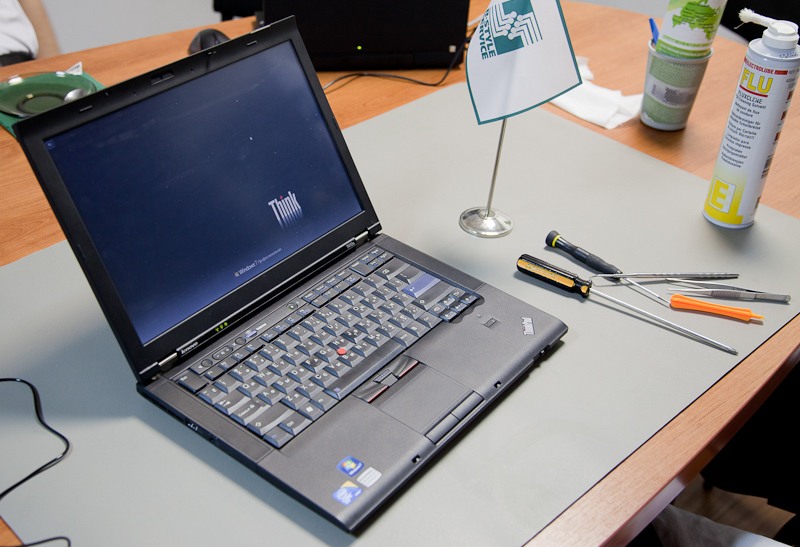
The laptop was disassembled on a special antistatic mat, with a fairly small set of tools: a screwdriver, a plastic spatula to carefully remove the connectors and plastic parts of the case, and a sharp awl to remove the stickers on the screws. Later I had to use a hard brush and a special tool to eliminate the effects of flooding.
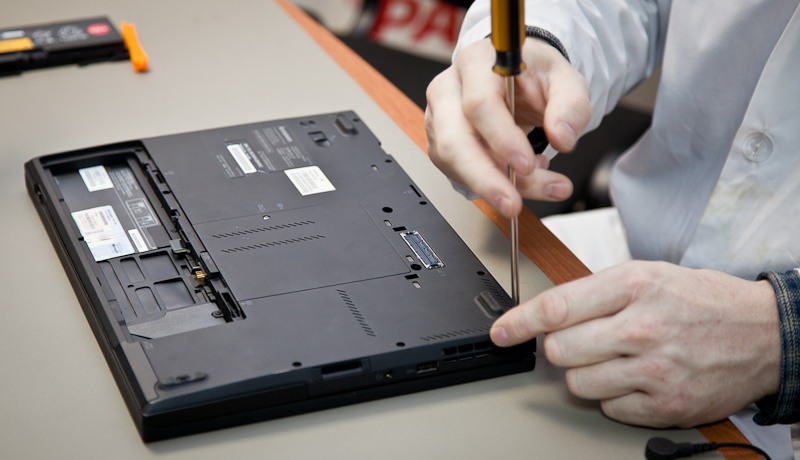
First of all, we remove the battery: it is flat in the T410s, unlike the larger ThinkPad T410, and takes up minimal space. Next, unscrew a large number of screws on the bottom.
Remove the cover that covers the wireless modules and memory modules, and unscrew the screws that secure the keyboard. It should be noted that the T410s is one of the easiest laptops to upgrade. You can install a 3G modem or add memory by unscrewing one screw and removing the cover on the bottom. Another screw - and you get access to the hard drive. Two more - you can remove the keyboard, although there are no expansion modules under it.

Hard drive bay ...
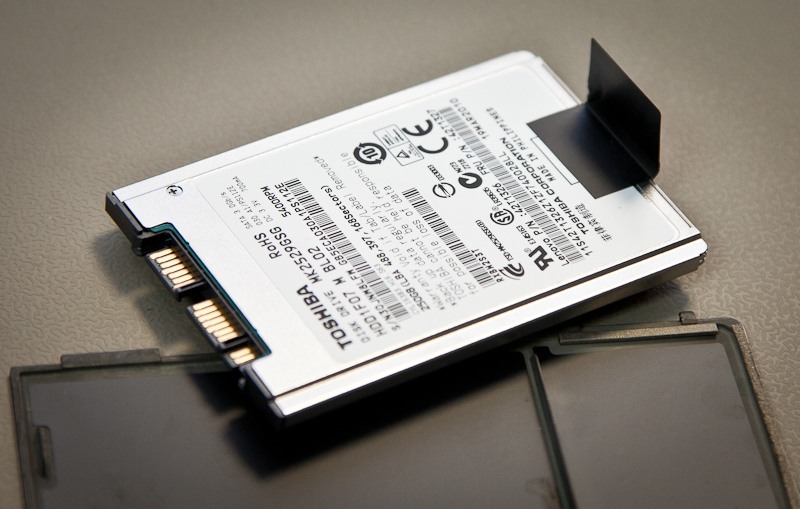
And the hard drive itself: a 1.8-inch 250-gigabyte Toshiba drive. It should be noted that the T410s, until recently, was the only ThinkPad with a drive of this format. If you are considering the possibility of buying such a laptop - look for a modification with SSD, they give a very serious performance boost. Or, wait until the new model of the ThinkPad T420s is on sale: they use 2.5-inch drives up to 7 mm high.
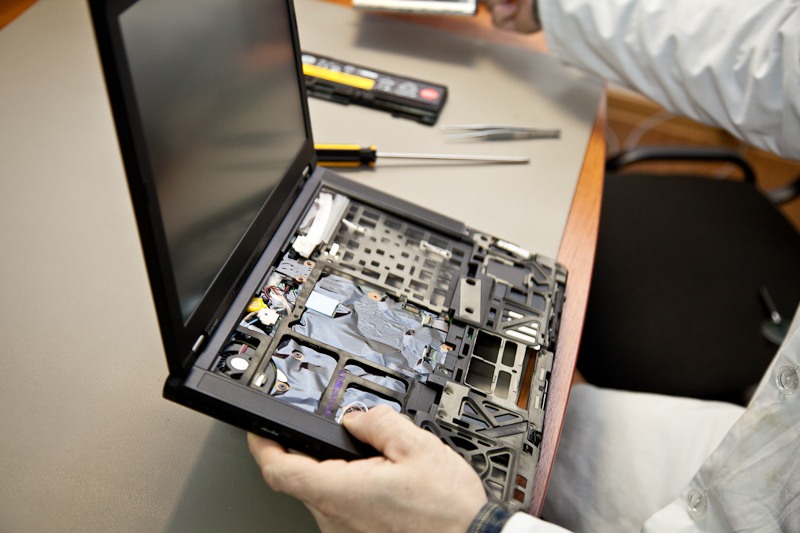
Having unscrewed all the screws, we remove the keyboard first, not forgetting to separate its cable from the motherboard. Then - touchpad panel (another loop). And we see one of the tricky developments of Lenovo - rollcage frame: a powerful spatial frame made of magnesium alloy with numerous stiffeners that protects the motherboard, hard drive and optical drive.

Disconnect the two cables connecting the motherboard to the display and the touch panel.
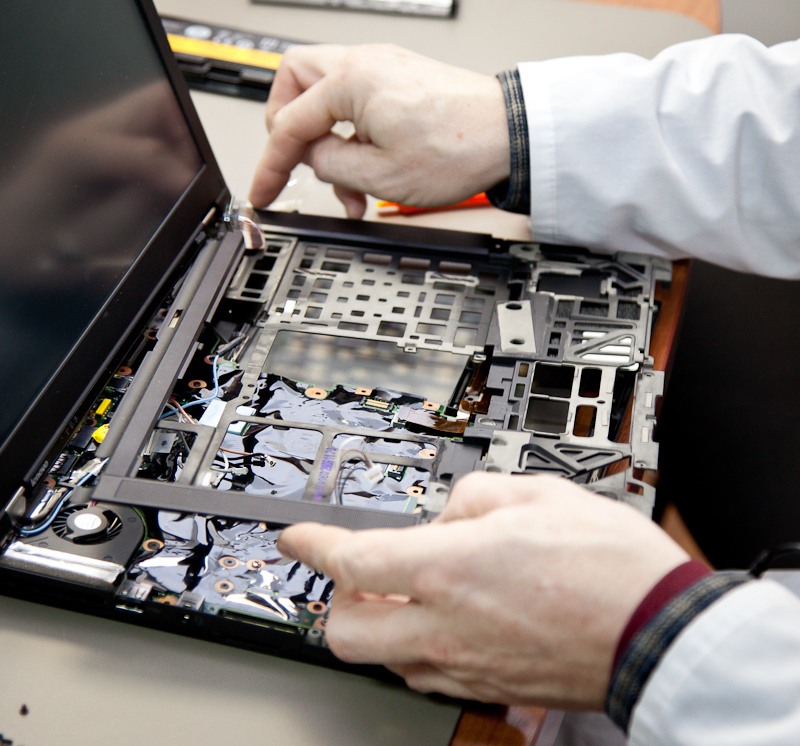
Turn off a few more screws connecting the two halves of the frame and remove the top panel.

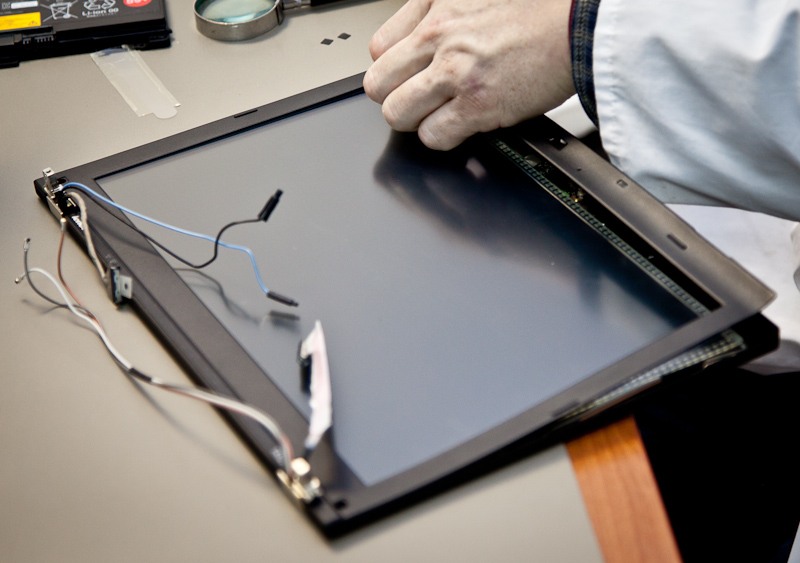
Each of the two hinges connecting the display and the base is bolted to the metal frame with three screws. One of them is located at the end, to unscrew it, you must first remove the sticker.

Unscrew all the screws, just remove the display and while removing to the side.
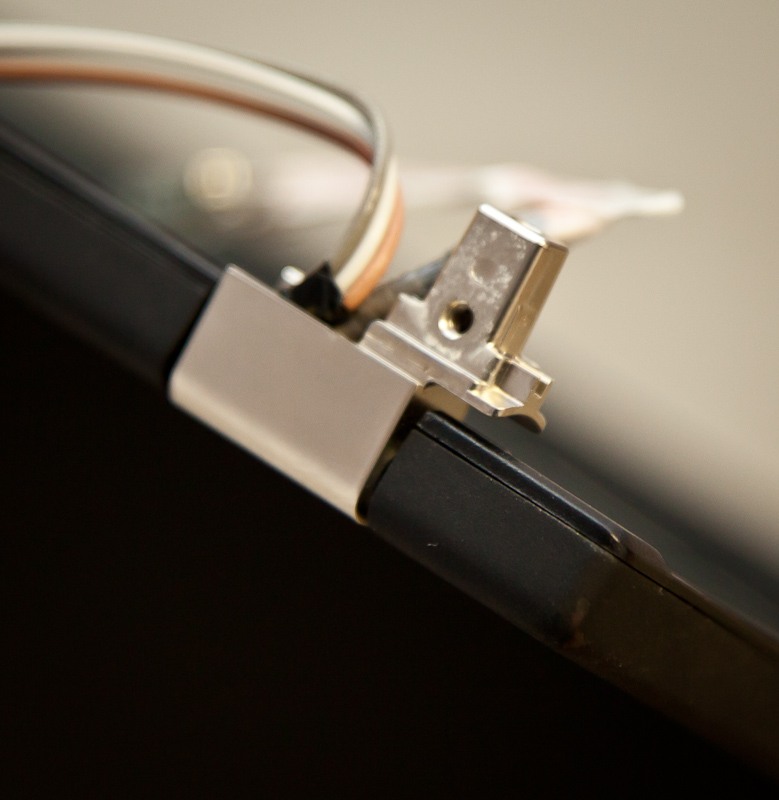
The hinge is a large and thick piece of iron, the same sturdy construction used in all ThinkPad, even in the available X100e and Edge. The wires in the photo are antennas for connecting WiFi and 3G modules.
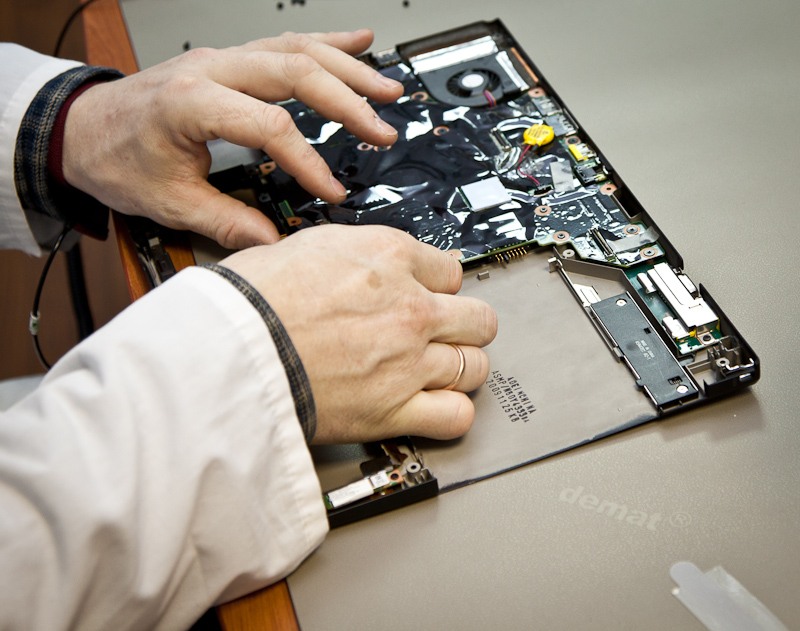
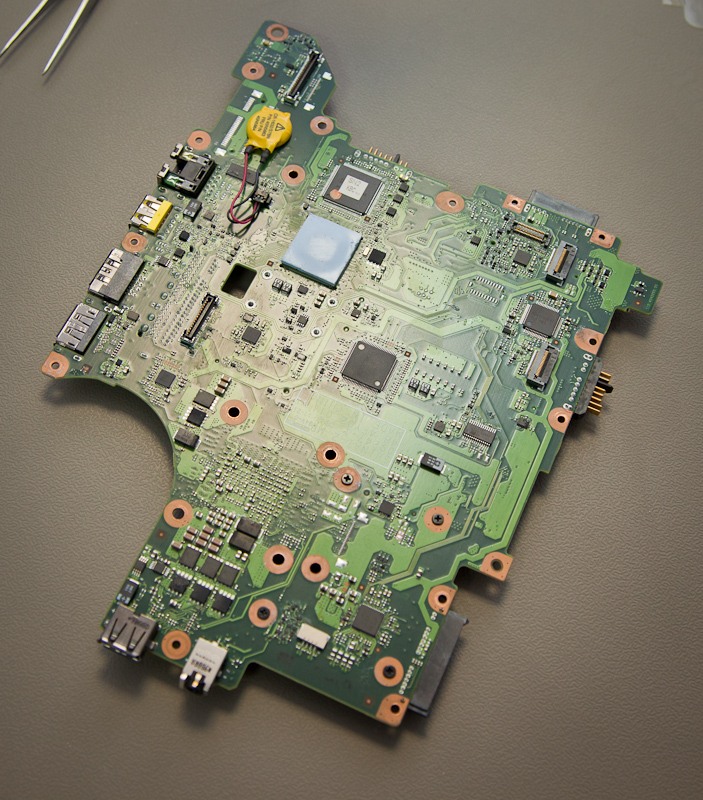
It remains quite a bit: unscrew a few screws that secure the motherboard to the case.
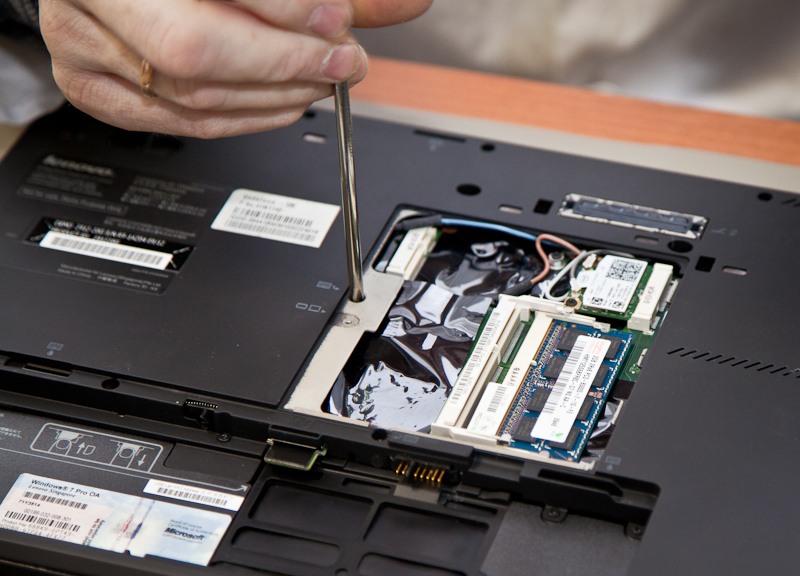
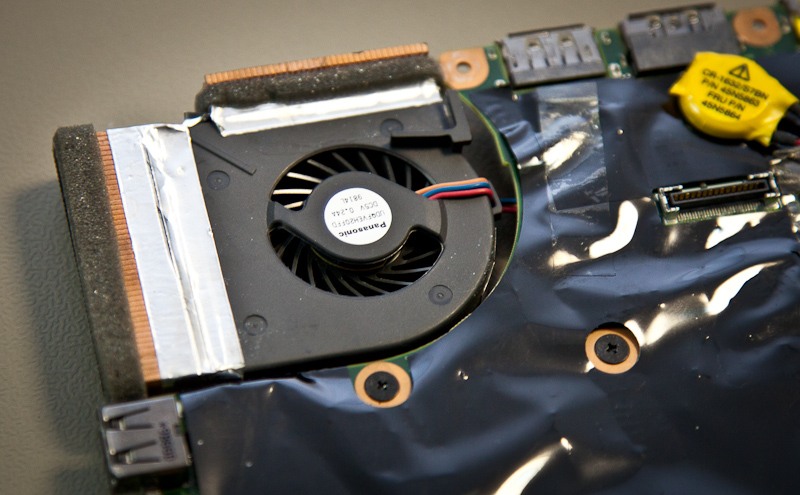
We remove the fee and finally see the consequences of the water bay. The liquid got inside through the heatsink and memory card slot.
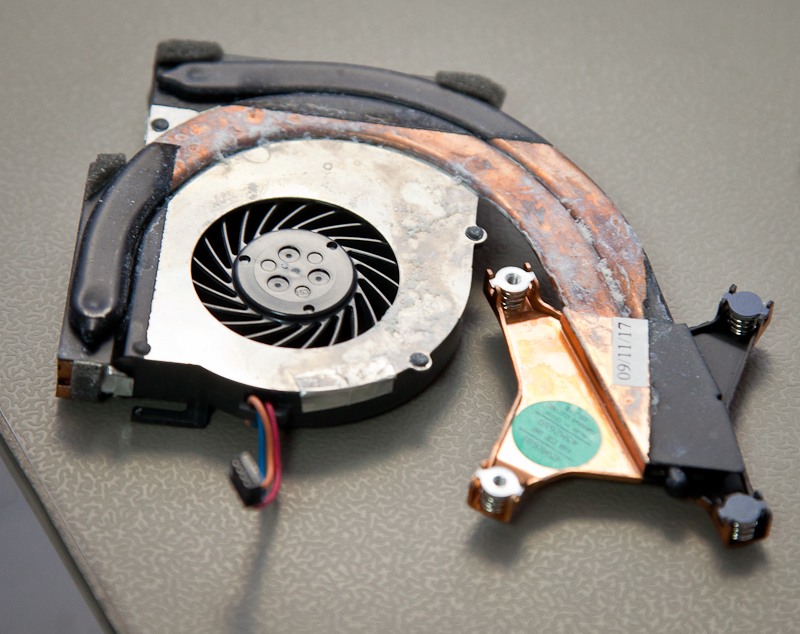
CPU cooling unit. As you can see, the consequences are very serious. It's amazing that the laptop works after that.
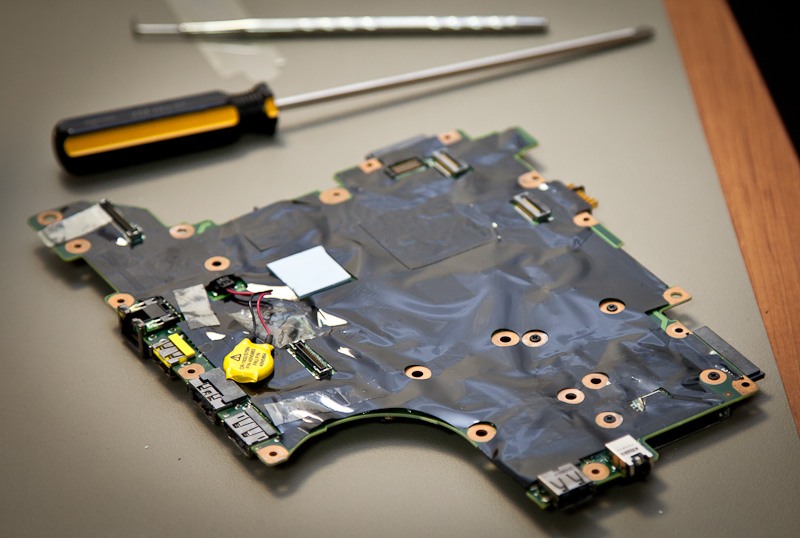
The entire motherboard is covered with a protective film on both sides. This is an additional level of protection that may have played a role in this case. The service center told us that, as a rule, this film is not removed in the warranty laptop. Even if the problem is in one USB connector, the entire motherboard changes completely. With non-warranty copies, especially with such as ours, options are possible. But there is a whole point in replacing the board: there is no guarantee that the laptop will work normally even after cleaning the motherboard.
We proceed to disassemble the display. Everything is quite simple here: you need to unscrew a couple of screws, after removing the stickers, and carefully remove the display frame. We made sure that the laptop screen was not damaged.
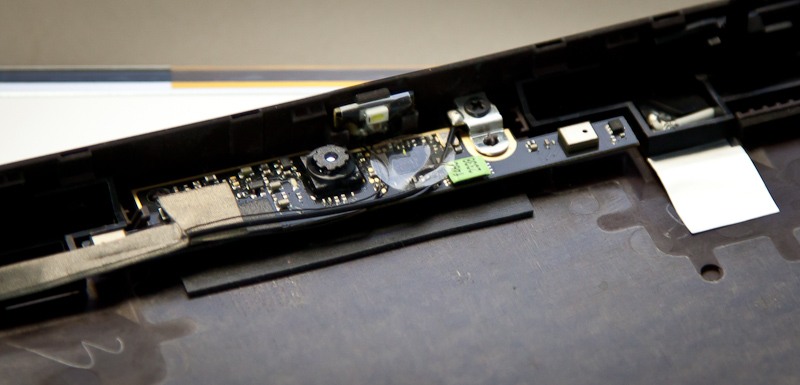
It looks like the "inside" built-in webcam. Above it is a ThinkLight LED for keyboard backlighting.
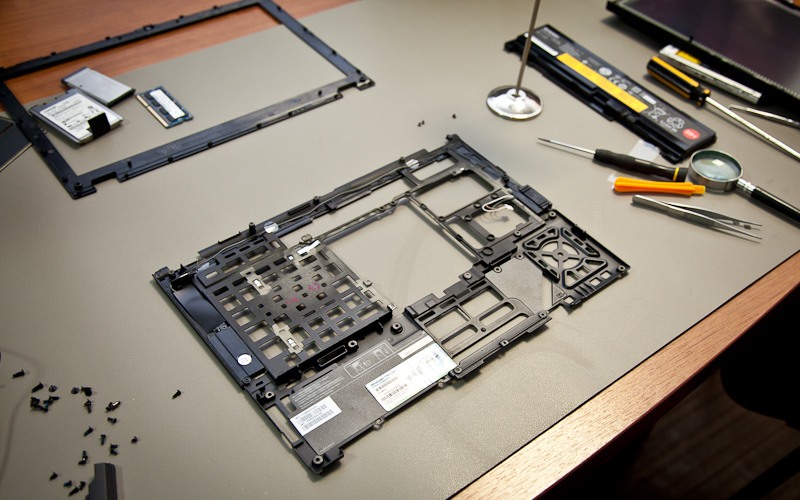
Disassembly is complete, now you can see the details.
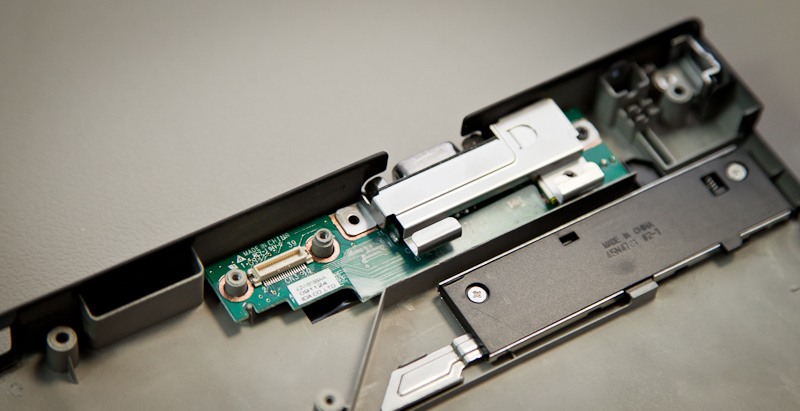
VGA connector is located on a separate board.
It looks like a cooling system installed on the motherboard.

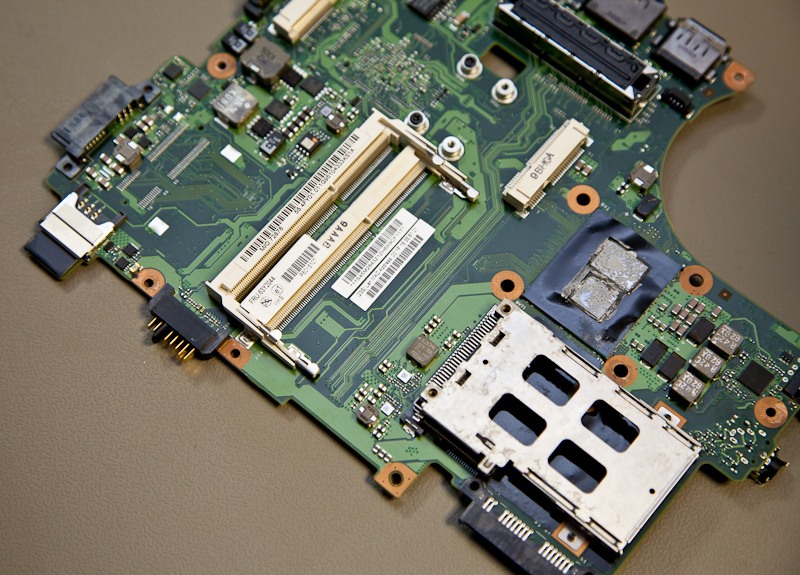
Memory modules and connectors for wireless modules. Note the two battery connectors on the left and bottom. The main battery is connected to one of them (below), and the additional battery can be connected to the other, which is installed in the UltraBay slot instead of an optical drive.

Most of the connectors in the T410s are brought to the rear edge. From left to right - Ethernet, USB, USB / eSata, DisplayPort. In the center - a connector for connecting to the docking station, under it - a wireless module WiFi / WiMAX.
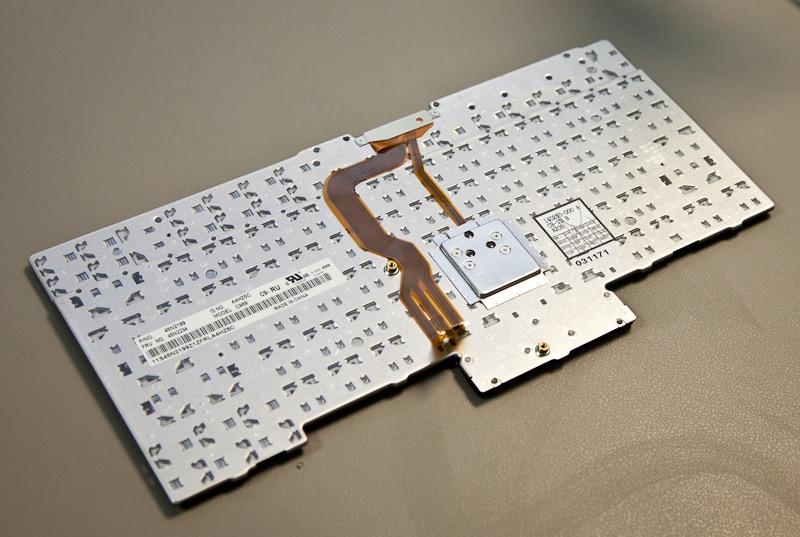
Keyboard, bottom view. It is completely glued with a film and if liquid is spilled on it, it will be passed through special channels and will flow out on the bottom of the laptop without affecting the electronics. In the center - branded TrackPoint.
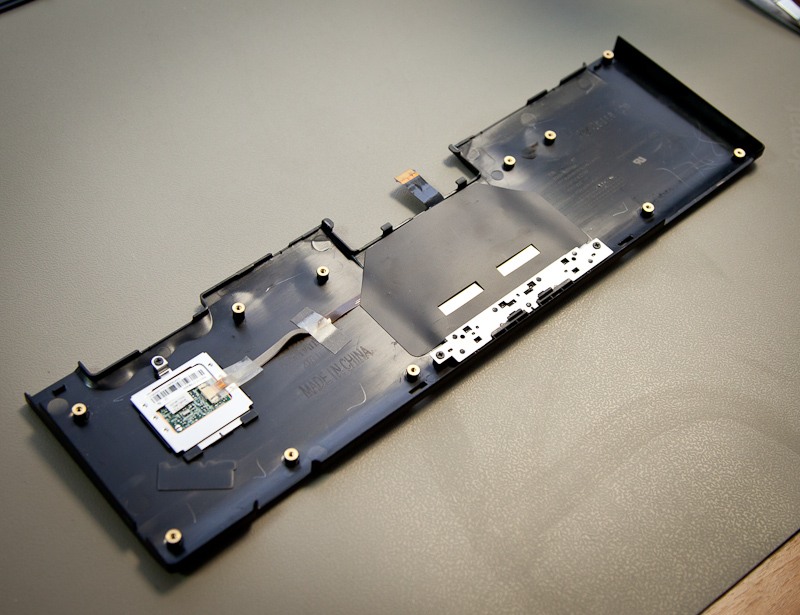
Touchpad panel, bottom view. Both the touchpad and the fingerprint scanner are connected to the motherboard with a cable. In this model, it is equipped with its own memory, so you can turn on the laptop by sliding your finger over the scanner. In the operating system, after that, you will not have to re-enter the password or use the scanner again.
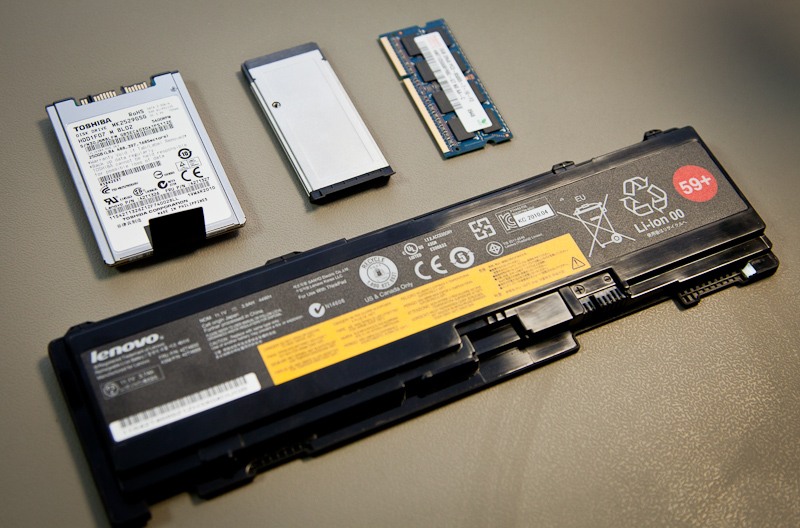
Details. At the bottom there is a battery, at the top is a hard drive, a card reader (in fact, it is inserted into an ExpressCard / 34 slot) and a two-gigabyte memory module.
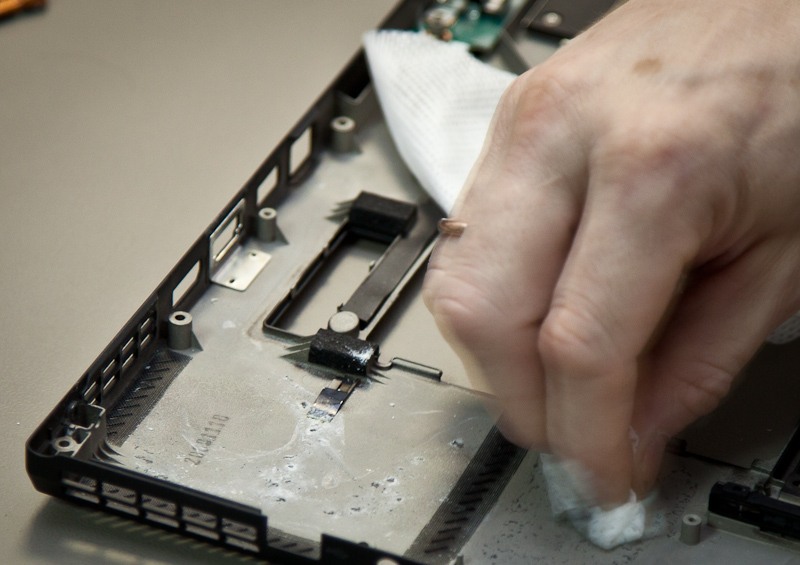
Since we already have “nothing to lose”, remove the film from the motherboard.
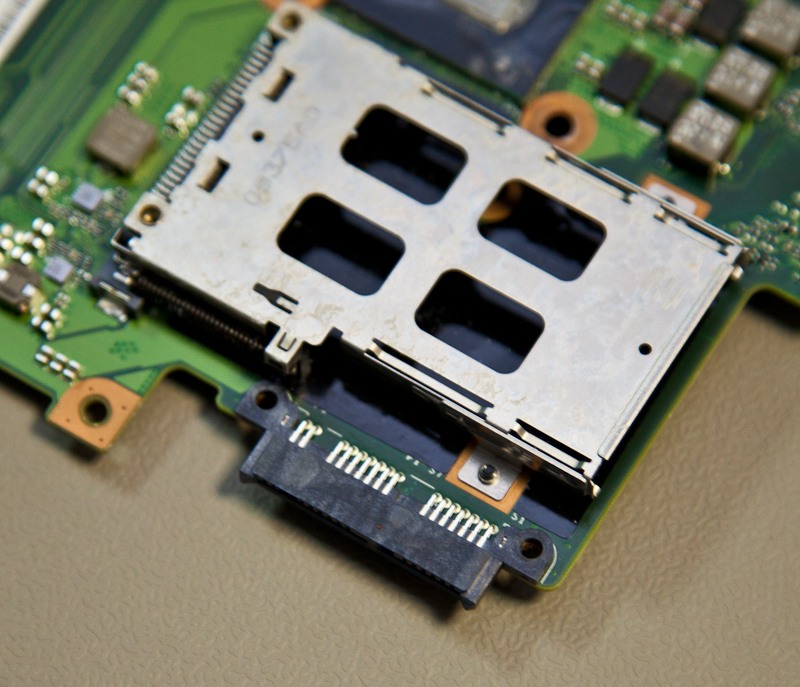
The same ExpressCard / 34 slot. He was also severely affected by water. Next - connector for connecting a hard disk. It “swings” a little - this is done on purpose so that the rigid coupling of the two components does not lead to a failure in operation. In addition, the hard disk itself is well isolated from everything else: no water has entered the compartment with it.
General view with the radiator removed. The laptop is equipped with the first generation Intel Core i5, with two separate crystals for the processor and the graphics accelerator.
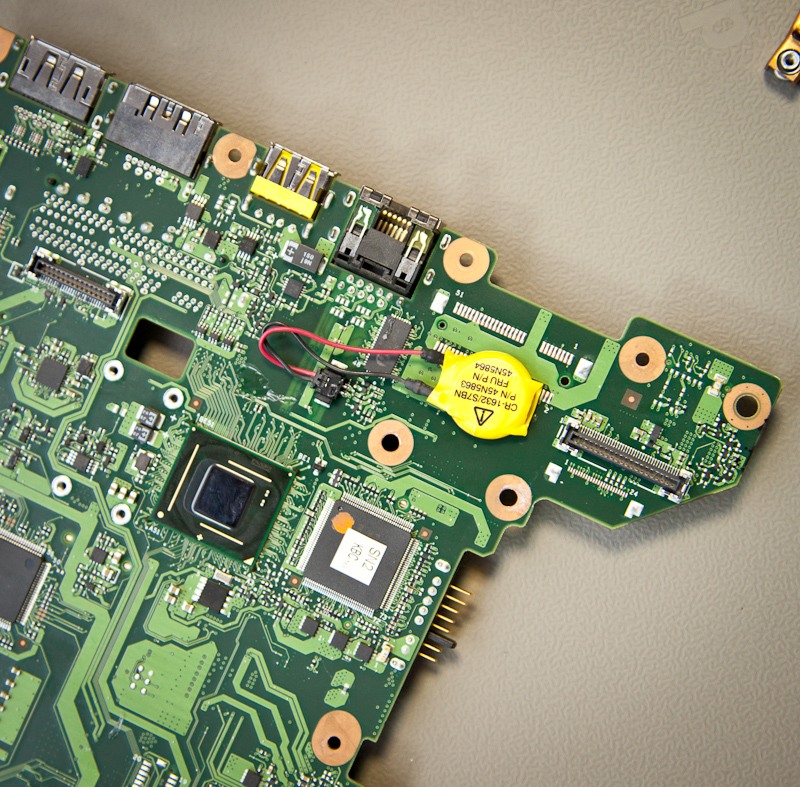
Some more connectors and a battery for the BIOS.
Inspection is completed, it remains to clean the motherboard and quickly assemble everything:
When assembling the master did not guarantee us that the laptop will work. In such serious incidents, you still need to change the motherboard. However, the laptop turned on:
And even passed all the tests in the Lenovo ThinkVantage Toolbox, determining the performance of each component of the laptop. T410s is still working, but based on the results of acquaintance with its insides, I would like to draw the following conclusions:
1. Every ThinkPad has done everything to guarantee its work even in difficult conditions. In the T410s, additional protection is provided by the spatial metal frame, as well as many other technologies and solutions. But even in ThinkPad Edge, where there is no such frame, the case has a serious margin of safety.
2. Even getting a significant amount of liquid inside does not necessarily mean the demise of the ThinkPad (although it will necessarily void your warranty :). The hard disk in most cases just will not suffer.
3. In any case, it’s better not to drop the laptop in the puddle / bath / pool or lake :)
Source: https://habr.com/ru/post/117470/
All Articles