Orchard CMS for developer

At the MIX11 conference held in Las Vegas right now, a new version of Orchard CMS was introduced - Microsoft's open-source CMS that includes all the most delicious and useful MSFT technologies, which can be said to be on the edge. After the first glance, CMS quite liked it (I compare it mainly with Umbraco) - and there was a desire to find out how the development for Orchard actually happens. If this is where your wishes coincide with mine, read on.
Training
So, we will prepare an excellent cocktail from pleasant, useful and interesting - and we will make a module for Orchard CMS, which will allow for any site to add goodies to Internet Explorer 9 - namely, to fix the site in the taskbar (pin) and add quick jump lists there (jump lists ).
Let's start with the preparation of the workplace. From the tools you will need:
1) Orchard CMS - orchard.codeplex.com
2) Internet Explorer 9 - www.beautyoftheweb.com
3) Windows 7
4) Visual Studio 2010
Orchard can be picked up either as a compiled package or as source codes. I recommend the latter, because while the documentation is very modest and often you have to read the code. To get involved in Orchard faster, you just need to read the article from XaocCPS [1], as a bonus, you can read articles on development from the official website [2]. For a closer look at what Pinned sites in Internet explorer 9 are, you can refer to MSDN [3] or good articles [4].
Module creation
So, first create a blank module. After a quick and convenient installation of the CMS via the Web Platform Installer [5] or builds from the source code, open cmd.exe, go to <orchard_folder> \ bin and run orchard.exe. After a couple of seconds of initialization, the system kindly invites us to action (“orchard>“). The command line functionality is quite wide and includes - module and feature management, content management, code generation and migration, package management, and much more. To assess the possibilities, you can enter help commands at the prompt and marvel at the power of orchard.exe. But the moment of delight is over, it's time to start hard work. We will start the development of the module by creating its structure, so in the prompt you enter
orchard> codegen module Orchard.IE9Pins /IncludeInSolution:true.In response, the CMS will create an empty project of the new module and include it (or not, depends on IncludeInSolution) in the overall Solution of the entire CMS, in the Modules folder (of course, if you are using the version from source). In general, the project of the empty Orchard module is terribly like the ASP.NET MVC project (which, in essence, is). To finally convince Visual Studio that we are working with MVC, you can replace Orchard.IE9pins.csproj in the file
{349c5851-65df-11da-9384-00065b846f21};{fae04ec0-301f-11d3-bf4b-00c04f79efbc}on:
{E53F8FEA-EAE0-44A6-8774-FFD645390401};{349c5851-65df-11da-9384-00065b846f21};{fae04ec0-301f-11d3-bf4b-00c04f79efbc}.
This will make it possible to use the pleasant features of the studio for working with MVC — commands like Add view, Go to view, Add controller, etc. [6].Types of content
The project is created and ready to work, it's time to develop the structure of the entities for our module Pinned sites. As you have (hopefully) learned from the XaocCPS articles the basic concept of Orchard - Content Type and Content Item. Each Item may include several parts. To store data about the parts records are used, so everything is simple. Let's define the data structure for jump lists. What is this quick jump list? Actually, this is a set of records of the form Name - Link - Icon. So, we need: an entry in the DB with three fields for storing information, the Content Part and the Content Type. A record is a class inherited from ContenPartRecord, and all properties that are declared must be virtual. So, in the project's Models folder, create the JumpListItemRecord.cs file and put the class there for recording:
public class JumpListItemRecord : ContentPartRecord
{
public virtual string Name { get ; set ; }
public virtual string Url { get ; set ; }
public virtual string IconUrl { get ; set ; }
}

* This source code was highlighted with Source Code Highlighter .
Now, based on the record, you can determine the part:
public class JumpListItemPart : ContentPart<JumpListItemRecord>
{
[Required]
public string Name
{
get { return Record.Name; }
set { Record.Name = value ; }
}

[Required]
public string Url
{
get { return Record.Url; }
set { Record.Url = value ; }
}

public string IconUrl
{
get { return Record.IconUrl; }
set { Record.IconUrl = value ; }
}
}

* This source code was highlighted with Source Code Highlighter .
Attributes for description of data validation (Required, StringLength, etc.) are available for the design of the part and, as you have already noticed, the values in the part are simply the data of the underlying record. Build the project, make sure that the module is compiled without errors. And now it's time to move on to the goodies of CMS.
Migrations
Return to orchard.exe and execute the command:
orchard> codegen datamigration Orchard.IE9pinsYes, you can already noisily express delight and joy - the concept of migrations has been introduced and implemented in Orchard. And do not say, “But we have already been in RoR for a long time,” there are a lot of nishtyaks in RoR, do not break the buzz. So, the command will generate the file Migration.cs with the following content:
public class Migrations : DataMigrationImpl {

public int Create() {
// Creating table JumpListItemRecord
SchemaBuilder.CreateTable( "JumpListItemRecord" , table => table
.ContentPartRecord()
.Column( "Name" , DbType. String )
.Column( "Url" , DbType. String )
.Column( "IconUrl" , DbType. String )
);

return 1;
}
}

* This source code was highlighted with Source Code Highlighter .
As you can see, everything is very simple - for the record defined above, a table is created in the database - and this completes the migration work. The most observant will see that the function returns 1 - and this is not an error code at all. This is the version number. Your wildest dreams come true - Orchard can automatically determine the installed version, check the module for updates - and update. How it works - we will see a little further until it is time to think about the last part of our data structure for the Jump list - the content type. Determining its time (and place) at the stage of migration is the creation or update of a module. Feel free to add the following lines to create a type before return 1:
ContentDefinitionManager.AlterTypeDefinition( "JumpListItem" ,
cfg => cfg
.WithPart( "JumpListItemPart" )
);

* This source code was highlighted with Source Code Highlighter .
Everything is read simply enough - this is a command for the system to create a JumpListItem content type with the only part of the JumpListItemPart.
Handler and driver
Before we go to the interface to control the part, it is necessary to add two necessary spare parts “under the hood” - handler and driver. A handler is needed so that our part can respond to content events — such as publishing, deleting, versioning — and, if necessary, taking some action. The handler (ideologically) serves to work with the model and does not concern the presentation. In the meantime, from working with the model, we need one thing - to link the part and the record together. To do this, in the handler's constructor, let us say that the IRepository JumpListItemRecord will be used as a storage (which, in turn, the system will tie the database to the database via IoC), but our intervention is not required here:
public class JumpListPartHandler : ContentHandler
{
public JumpListPartHandler(IRepository<JumpListItemRecord> repo)
{
Filters.Add(StorageFilter.For(repo));
}
}

* This source code was highlighted with Source Code Highlighter .
In contrast to the handler, the driver (driver) does not work with the model, but with the view, i.e. manages the rendering part. In our class inherited from ContentPartDriver, you can override a number of functions, we are interested in two of them - the Editor’s overload functions (one of which serves to process a GET request, that is, to output, the other to POST, that is, to process the entered data ). As, in fact, it is obvious from the name - the methods determine the rules for rendering and processing the part in edit mode.
public class JumpListItemPartDriver : ContentPartDriver<Models.JumpListItemPart>
{
protected override DriverResult Editor(Models.JumpListItemPart part, dynamic shapeHelper)
{
return ContentShape( "Parts_JumpListItem_Edit" ,
() => shapeHelper.EditorTemplate(
TemplateName: "Parts/JumpListItem" ,
Model: part,
Prefix: Prefix));

}

protected override DriverResult Editor(Models.JumpListItemPart part, ContentManagement.IUpdateModel updater, dynamic shapeHelper)
{
updater.TryUpdateModel(part, Prefix, null , null );
return Editor(part, shapeHelper);
}
}

* This source code was highlighted with Source Code Highlighter .
I can understand your first reaction - “OMG, what is it?”. In fact, everything is not so scary. The key concept here is ContentShape.
Shapes
ContentShape is the link between the data of the part and its presentation for the user, the main intermediary on the way to the View. To clarify the details, I recommend referring to the article XaocCPS . So, the part is exchanged, in fact, with the presentation layer giving Shape. In this case, we will build the form for the editor using the JumpListItem.cshtml from the Parts folder as the template (TemplateName: “Parts / JumpListItem”) and pass our part to the JumpListItemPart as a model. The update is still simpler, we use only the IUpdateModel object passed as a parameter, which is taken care of as needed to update the part. Now the system knows which template to display when editing a part and how to update its (part) content. The JumpListItem.cshtml template itself must be placed in the Views / EditorTemplates / Parts / folder. The content of the template will be very trivial:
@model Orchard.IE9pins.Models.JumpListItemPart
< fieldset >
@Html.LabelFor(m = > m.Name)
@Html.TextBoxFor(m = > m.Name, T("Description"))
@Html.LabelFor(m = > m.Url)
@Html.TextBoxFor(m = > m.Url, T("Url"))
@Html.LabelFor(m = > m.IconUrl)
@Html.TextBoxFor(m = > m.IconUrl, T("IconUrl"))
</ fieldset >

* This source code was highlighted with Source Code Highlighter .
As you can see, this is a regular Razor markup file using the typed JumpListItemPart model. It would seem, well, everything is already, well, I want to see what happened! Just a minute of patience - for each form you need to determine how and where it will be displayed. Used for this file Placement.info in the root of the project. For us, it will be very trivial:
< Placement >
< Place Parts_JumpListItem_Edit ="Content:1" />
</ Placement >

* This source code was highlighted with Source Code Highlighter .
For the form defined in the driver method for our part (O_o), we determine that it will be located in the Content section at position 1 (the sequence numbers here, by the way, are not integers, so that you can attach your part somewhere between the existing ones). In our case, when the content type still contains only one part, we can output anywhere.
Main menu
Everything, the parts created, the type of content created - seems to be already a “hurray”? Not yet, the last spurt. I understand that this seems to be an unrealistically long and complicated process - but so far most of the operations could be done even with a project template in the Studio, this is basically a routine and fully automated - but for learning the routine is the most. Everything, the encouragements on this are finished, we return to the Studio and make the last spurt. Of course, we want our module to appear as a separate item in the main admin menu - and be edited like regular content inside the CMS. To inform the system that we want to inherit in the main menu, we just need to add the implementation of the INavigationProvider interface. The most important method is GetNavigation, where, in fact, the creation of a menu item will be described. One of the parameters is the function (god bless functional programming!) BuildMenu which will build a submenu for the menu item - we have far-reaching plans - infusions of the Pinned site look and, in fact, Jump list elements. I think you have already noticed the subtlety in creating item submenus item.Action to horror resembles the Action method from MVC - generating a reference to the action of a given controller. So, actually, there is - and once there is a URL, it means to provide the system with routing routes and controllers.
Routes
Routes are added by the implementation of the IrouteProvider class - you can see it in Route.cs. The route is described as:
Route = new Route(
"Admin/IE9JumpList/Create" ,
new RouteValueDictionary {
{ "area" , "Orchard.IE9pins" },
{ "controller" , "JumpLists" },
{ "action" , "Create" }
},
new RouteValueDictionary(),
new RouteValueDictionary {
{ "area" , "Orchard.IE9pins" }
},
new MvcRouteHandler())
}

* This source code was highlighted with Source Code Highlighter .
Everything is easy to read without explanation, it should only be noted that we use everywhere the parameter area = Orchard.IE9pins, a kind of namespace for all the URLs of our module. JumpLists are set as a controller - it's time to implement it.
Controller
There is nothing new here compared to MVC - a regular controller and a set of action methods that return an ActionResult. Of the goodies, only the way how the connections are passed to the controller on the CMS components - Dependecy Injection way, specify the necessary interfaces as the constructor parameters - and voila, when the controller is instantiated, the registered CMS components will arrive in the parameters. Simple and beautiful. Returning to the transfer method given in the presentation layer, I will also draw attention to the line
dynamic model = ContentManager.BuildEditor(item);

* This source code was highlighted with Source Code Highlighter .
Here we describe the model that will be passed to the view — the BuildEditor method will form using the Driver Editor method for each part of the Shape content — which will become the model. To display shape in view, the Display method is sufficient:
@{ Layout.Title = T("Create jump list item").ToString(); }

@using (Html.BeginFormAntiForgeryPost()) {
@Html.ValidationSummary()
@Display(Model)
}

* This source code was highlighted with Source Code Highlighter .
When creating content itself, you can observe such an ambiguous line:
var item = Services.ContentManager.New<Models.JumpListItemPart>( "JumpListItem" );

* This source code was highlighted with Source Code Highlighter .
In fact, this should read "Create a new item of the JumpListItem content type, find in it a part with the JumpListItemPart type and return as a result." Thus, in the created content we get for editing only the part created by us (although there are no others there, to be honest).
Last build, successfully and go to the admin area. There we are looking for Modules / Features and with a sinking heart we are looking for something similar to IE9Pins. Now “Hurray!”
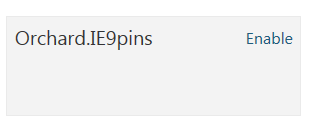
Enable (Enable) feature and ... oh, yes - Internet Explorer 9 punt appears in the main menu!
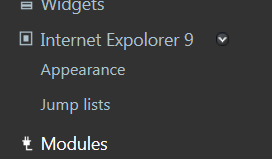
And there is quite a nice interface for editing the JumpList list. Great, now we need to put it on the site ... But this is already in the next series. So, there was too much text (in my attempts to explain everything, in theory, it would be possible to shorten it by 2 times).
Results
So let's summarize:
1) In the admin panel, a new item has been added in which the list of items of the quick jump list we need is managed.
2) All the necessary data structures and content type are automatically generated.
It turned out slightly prolonged, but I tried to explain everything in as much detail as possible, in order not only to look at the code, but to understand how and what works inside the CMS. In the next part (it will be less), let's see how Layouts, widgets work, how to display content on a website page, and how migration practices work.
The full source code (including the code for the second article, of course) can be found on BitBucket . It is not too clean, many of my throwings and searches are reflected there, but I was not distracted by refactoring, because did everything for study purposes.
PS You just don’t need to conclude “How complicated everything is there!” - while the creation of the project structure is simply not sufficiently automated, I hope that in the future it will be possible to do all this quickly and easily - but knowing the insides is still useful.
Links
[1] Articles Architecture Orchard CMS. Security and Development Concepts , Orchard CMS Architecture. Layout Concepts , Orchard CMS Architecture. Basic concepts
[2] Section Extending Orchard on the official site
[3] Pinned sites on MSDN
[4] Pinned sites in the article kichik
[5] How to create your website from scratch using Orchard CMS. Part 1. Introduction to Orchard CMS
[6] Enable MVC 3 “Add | View ... ”to Orchard Code Generated Module projects
')
Source: https://habr.com/ru/post/117373/
All Articles