Automate Windows Phone 7 Emulator
Hello,
In this article we will look at how to automate the Windows Phone 7 emulator and how it will benefit us in real life.


This article is the second in a series of unrelated articles on the advanced features of Windows Phone 7.
The previous article in this series was called " Windows Phone 7 - Unlocked ROMs ".
Currently, the Windows Phone 7 emulator can run developer packages (XAPs) only from Visual Studio 2010.
That is, if we have XAP we cannot force the emulator to load it without Visual Studio.
As we saw in the previous article, the emulator can be run and even installed on machines that do not have Visual Studio. Read more about it here .
Imagine that at this point in order to load XAPs into the emulator, we must use Visual Studio.

The problem is this: how do we load XAPs into the emulator or devices from WP7, without using Visual Studio?
And yet, how will our Build server run the night tests? Or how our customers will see our applications?

Clients and Build servers do not have Visual Studio 2010 installed.
So how can we deploy XAPs in an emulator running on these machines?
')
Let's create a new solution consisting of a console application and an application for Windows Phone 7.
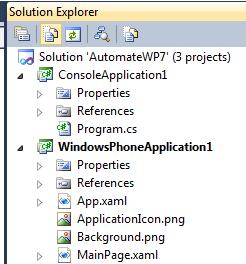
We will use the console application as an automation tool that can work on any computer with. NET Framework.
The application for WindowsPhone is the application, the deployment of which we will automate.
WP7 Automation Secret Sauce is the CoreCon API .
CoreCon libraries have been in a deep hibernation since 2007, when they last received a major update.
But for WP7, the CoreCon API has been updated and is now used in Visual Studio 2010 when deploying applications on WP7 devices and emulators.
Let's add a link to Microsoft.SmartDevice.Connectivity.dll from the CoreCon API.
On the 64-bit system, the DLL can be found at: C: \ Program Files (x86) \ Common Files \ Microsoft Shared \ Phone Tools \ CoreCon \ 10.0 \ Bin \ Microsoft.Smartdevice.Connectivity.dll
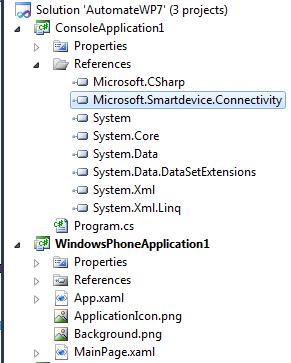
Now that we have a link to the CoreCon DLL, we can begin to automate WP7.
This is what we should end up with:


We must perform the following sequence of actions:
We'll start by getting an instance of the WP7 CoreCon SDK to work with it:
Then we need to get a link either to a physical device with WP7, or to an emulator with WP7.
This example will use the emulator, but if you install the fragment " useEmulator = false ", then the same example will try to connect to the physical device with WP7.
Now we run the emulator / device with WP7.
Please note that we will run the standard WP7 Emulator Image, in a previous article I explained how to use Unlocked ROM as the default ROM.
Next, we need to check that our application is already installed, and if so, we will remove it.
Since the UpdateApplication method in the current CoreCon API does not work, this is the easiest way to update installed applications.
In order to install or remove our application, we need its Application Product Identifier (GUID).
We can get the application GUID from the Properties / WMAppManifest.xml file .

The following code checks if the application is installed, and if so, removes it.
Now we will install our XAP.
In order to do this, we need information about the following:
And the last step: the launch of our application.
We are done. And indeed, when we run our example, the application works as it should:

There are so many good use cases: automatic unit tests, loading nightly builds into an emulator, and even the ability for customers to use a WP7 emulator.
In fact, there are many reasons and situations where the automation of the WP7 emulator can be useful, and you yourself can figure out how to use it in your projects.
For example, in Vertigo , we use automation to run the WP7 emulator on multi-touch, laptops that our customers have.
Thus, clients get access to our current builds without having to install Visual Studio 2010.
One way of using it is especially interesting to me: automatic running of all unit tests in a project for nightly builds.


To automate the WP7 emulator, we can limit ourselves to the actions that we performed before, but how do we get the results? Or get instructions?
The easiest method I could think of was to contact via cold storage - to read and write files in isolated storage.


We will start by writing the file to our WP7 Application IsoStore.
Remember that this code is executed on a WP7 emulator / device.
In principle, we have already added the foo.txt file to our IsoStore and added some text to it.
Next, we would use the RemoteIsolatedStorage class and get access to the IsoStore emulator, but it is not yet included in CoreCon10.
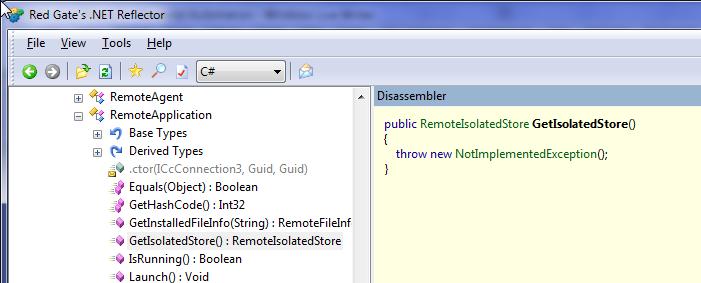 

We would use RemoteApplication.GetIsolatedStorage (), but it is also not yet implemented.
Instead, we will use the FileDeployer class.
There is some kind of reflective magic associated with getting a copy of the FileDeployer class that can be used in our application.
Next, we copy the foo.txt file from the application’s isolated storage to our local binary folder and put it into the console:
When you run this example, we will be able to see in the console the text obtained from IsoStore.

And we are done. We have established a two-way channel between the emulator / WP7 device and the managed .net code.
Here is the code that we wrote in this project:
In this post, we talked about why the automation of the deployment process on the emulator / WP7 device is needed and how to achieve this.
I hope that now you know how to automate the deployment of XAP in WP7.
In the next article in this series we will talk about configuring continuous integration for WP7.
In this article we will look at how to automate the Windows Phone 7 emulator and how it will benefit us in real life.

This article is the second in a series of unrelated articles on the advanced features of Windows Phone 7.
The previous article in this series was called " Windows Phone 7 - Unlocked ROMs ".
Why automate Windows Phone 7 emulator?
Currently, the Windows Phone 7 emulator can run developer packages (XAPs) only from Visual Studio 2010.
That is, if we have XAP we cannot force the emulator to load it without Visual Studio.
As we saw in the previous article, the emulator can be run and even installed on machines that do not have Visual Studio. Read more about it here .
Imagine that at this point in order to load XAPs into the emulator, we must use Visual Studio.

The problem is this: how do we load XAPs into the emulator or devices from WP7, without using Visual Studio?
And yet, how will our Build server run the night tests? Or how our customers will see our applications?

Clients and Build servers do not have Visual Studio 2010 installed.
So how can we deploy XAPs in an emulator running on these machines?
')
Stop talking, go to the automation of the WP7 emulator!
Let's create a new solution consisting of a console application and an application for Windows Phone 7.

We will use the console application as an automation tool that can work on any computer with. NET Framework.
The application for WindowsPhone is the application, the deployment of which we will automate.
CoreCon 10 WP7 API
WP7 Automation Secret Sauce is the CoreCon API .
CoreCon libraries have been in a deep hibernation since 2007, when they last received a major update.
But for WP7, the CoreCon API has been updated and is now used in Visual Studio 2010 when deploying applications on WP7 devices and emulators.
Let's add a link to Microsoft.SmartDevice.Connectivity.dll from the CoreCon API.
On the 64-bit system, the DLL can be found at: C: \ Program Files (x86) \ Common Files \ Microsoft Shared \ Phone Tools \ CoreCon \ 10.0 \ Bin \ Microsoft.Smartdevice.Connectivity.dll

Now that we have a link to the CoreCon DLL, we can begin to automate WP7.
This is what we should end up with:

We must perform the following sequence of actions:
- Get an instance of WP7 CoreCon SDK
- Get link to emulator / device
- Connect to emulator / device
- Delete previous version
- Install XAP
- Launch the application
Getting an instance of WP7 CoreCon SDK
We'll start by getting an instance of the WP7 CoreCon SDK to work with it:
// Get CoreCon WP7 SDK DatastoreManager dsmgrObj = new DatastoreManager(1033); Platform WP7SDK = dsmgrObj.GetPlatforms().Single(p => p.Name == "New Windows Mobile 7 SDK" ); * This source code was highlighted with Source Code Highlighter .
// Get CoreCon WP7 SDK DatastoreManager dsmgrObj = new DatastoreManager(1033); Platform WP7SDK = dsmgrObj.GetPlatforms().Single(p => p.Name == "New Windows Mobile 7 SDK" ); * This source code was highlighted with Source Code Highlighter .// Get CoreCon WP7 SDK DatastoreManager dsmgrObj = new DatastoreManager(1033); Platform WP7SDK = dsmgrObj.GetPlatforms().Single(p => p.Name == "New Windows Mobile 7 SDK" ); * This source code was highlighted with Source Code Highlighter .// Get CoreCon WP7 SDK DatastoreManager dsmgrObj = new DatastoreManager(1033); Platform WP7SDK = dsmgrObj.GetPlatforms().Single(p => p.Name == "New Windows Mobile 7 SDK" ); * This source code was highlighted with Source Code Highlighter .// Get CoreCon WP7 SDK DatastoreManager dsmgrObj = new DatastoreManager(1033); Platform WP7SDK = dsmgrObj.GetPlatforms().Single(p => p.Name == "New Windows Mobile 7 SDK" ); * This source code was highlighted with Source Code Highlighter .
Getting a link to an emulator / device
Then we need to get a link either to a physical device with WP7, or to an emulator with WP7.
This example will use the emulator, but if you install the fragment " useEmulator = false ", then the same example will try to connect to the physical device with WP7.
* This source code was highlighted with Source Code Highlighter .
- // Get Emulator / Device
- bool useEmulator = true ;
- Device WP7Device = null ;
- if (useEmulator)
- WP7Device = WP7SDK.GetDevices (). Single (d => d.Name == "Windows Phone 7 Emulator" );
- else
- WP7Device = WP7SDK.GetDevices (). Single (d => d.Name == "Windows Phone 7 Device" );
Connect to emulator / device
Now we run the emulator / device with WP7.
Please note that we will run the standard WP7 Emulator Image, in a previous article I explained how to use Unlocked ROM as the default ROM.
* This source code was highlighted with Source Code Highlighter .
- // Connect to WP7 Emulator / Device
- Console .WriteLine ( "Connecting to Windows Phone 7 Emulator / Device ..." );
- WP7Device.Connect ();
- Console .WriteLine ( "Windows Phone 7 Emulator / Device Connected ..." );
Uninstall previous version
Next, we need to check that our application is already installed, and if so, we will remove it.
Since the UpdateApplication method in the current CoreCon API does not work, this is the easiest way to update installed applications.
In order to install or remove our application, we need its Application Product Identifier (GUID).
We can get the application GUID from the Properties / WMAppManifest.xml file .

The following code checks if the application is installed, and if so, removes it.
* This source code was highlighted with Source Code Highlighter .
- Guid appID = new Guid ( "{5e75bba1-fbf6-463c-94ac-fa4a78f8fd12}" );
- RemoteApplication app;
- if (WP7Device.IsApplicationInstalled (appID))
- {
- Console .WriteLine ( "Uninstalling sample XAP to Windows Phone 7 Emulator / Device ..." );
- app = WP7Device.GetApplication (appID);
- app.Uninstall ();
- Console .WriteLine ( "Sample XAP Uninstalled from Windows Phone 7 Emulator / Device ..." );
- }
XAP installation
Now we will install our XAP.
In order to do this, we need information about the following:
- The location of our XAP.
- GUID of the application.
- Location of the application icon.
* This source code was highlighted with Source Code Highlighter .
- // Install XAP
- Console .WriteLine ( "Installing sample XAP to Windows Phone 7 Emulator / Device ..." );
- app = WP7Device.InstallApplication (
- appID,
- appID,
- "NormalApp" ,
- @ "D: \ visual studio 2010 \ Projects \ ConsoleApplication1 \ WindowsPhoneApplication1 \ ApplicationIcon.png" ,
- @ "D: \ visual studio 2010 \ Projects \ ConsoleApplication1 \ WindowsPhoneApplication1 \ Bin \ Debug \ WindowsPhoneApplication1.xap" );
- Console .WriteLine ( "Sample XAP installed to Windows Phone 7 Emulator ..." );
Application launch
And the last step: the launch of our application.
* This source code was highlighted with Source Code Highlighter .
- // Launch Application
- Console .WriteLine ( "Launching sample app on Windows Phone 7 Emulator ..." );
- app.Launch ();
- Console .WriteLine ( "Launched sample app on Windows Phone 7 Emulator ..." );
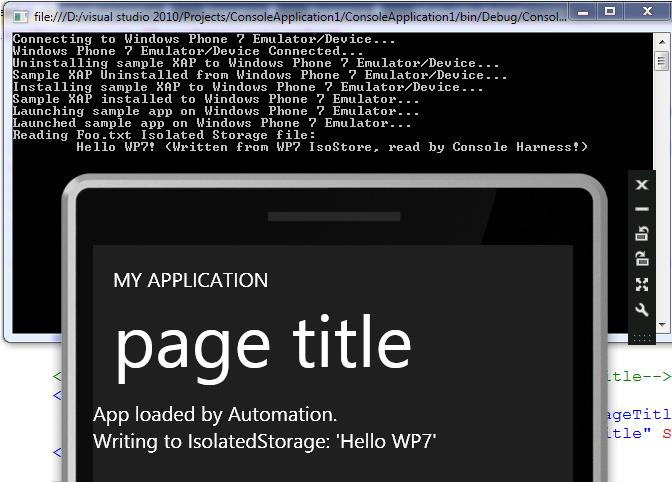
We are done. And indeed, when we run our example, the application works as it should:

So, why is the WP7 emulator automation useful?
There are so many good use cases: automatic unit tests, loading nightly builds into an emulator, and even the ability for customers to use a WP7 emulator.
In fact, there are many reasons and situations where the automation of the WP7 emulator can be useful, and you yourself can figure out how to use it in your projects.
For example, in Vertigo , we use automation to run the WP7 emulator on multi-touch, laptops that our customers have.
Thus, clients get access to our current builds without having to install Visual Studio 2010.
Access to isolated storage
One way of using it is especially interesting to me: automatic running of all unit tests in a project for nightly builds.

To automate the WP7 emulator, we can limit ourselves to the actions that we performed before, but how do we get the results? Or get instructions?
The easiest method I could think of was to contact via cold storage - to read and write files in isolated storage.

We will start by writing the file to our WP7 Application IsoStore.
Remember that this code is executed on a WP7 emulator / device.
* This source code was highlighted with Source Code Highlighter .
- public MainPage ()
- {
- Initializecomponent ();
- SupportedOrientations = SupportedPageOrientation.Portrait | SupportedPageOrientation.Landscape;
- using ( var isoStore = IsolatedStorageFile.GetUserStoreForApplication ())
- using ( var sw = new StreamWriter (isoStore.OpenFile ( "Foo.txt" , FileMode .OpenOrCreate, FileAccess.Write)))
- {
- sw.Write ( "Hello WP7! (Written from WP7 IsoStore, read by Console Harness!)" );
- }
- }
In principle, we have already added the foo.txt file to our IsoStore and added some text to it.
Next, we would use the RemoteIsolatedStorage class and get access to the IsoStore emulator, but it is not yet included in CoreCon10.
We would use RemoteApplication.GetIsolatedStorage (), but it is also not yet implemented.
Instead, we will use the FileDeployer class.
There is some kind of reflective magic associated with getting a copy of the FileDeployer class that can be used in our application.
* This source code was highlighted with Source Code Highlighter .
- Thread.Sleep (10,000);
- //app.GetIsolatedStore (); <- Throws NotImplementedException
- object ConManServer = WP7Device.GetType (). GetField ( "mConmanServer" , BindingFlags.NonPublic | BindingFlags.Instance) .GetValue (WP7Device);
- FileDeployer f = (FileDeployer) typeof (FileDeployer) .GetConstructors (BindingFlags. Instance | BindingFlags. NonPublic) [0] .Invoke ( new object [] {ConManServer});
Next, we copy the foo.txt file from the application’s isolated storage to our local binary folder and put it into the console:
* This source code was highlighted with Source Code Highlighter .
- f.ReceiveFile ( @ "\ Applications \ Data \" + appID + @ " \ data \ isolatedstore \ Foo.txt ", @ " \ Foo.txt "); Console.WriteLine ("\ t " + File.ReadAllText (@ " foo.txt"));
When you run this example, we will be able to see in the console the text obtained from IsoStore.

And we are done. We have established a two-way channel between the emulator / WP7 device and the managed .net code.
Code
Here is the code that we wrote in this project:
* This source code was highlighted with Source Code Highlighter .
- // Get CoreCon WP7 SDK
- DatastoreManager dsmgrObj = new DatastoreManager (1033);
- Platform WP7SDK = dsmgrObj.GetPlatforms (). Single (p => p.Name == "New Windows Mobile 7 SDK" );
- // Get Emulator / Device
- bool useEmulator = true ;
- Device WP7Device = null ;
- if (useEmulator)
- WP7Device = WP7SDK.GetDevices (). Single (d => d.Name == "Windows Phone 7 Emulator" );
- else
- WP7Device = WP7SDK.GetDevices (). Single (d => d.Name == "Windows Phone 7 Device" );
- // Connect to WP7 Emulator / Device
- Console .WriteLine ( "Connecting to Windows Phone 7 Emulator / Device ..." );
- WP7Device.Connect ();
- Console .WriteLine ( "Windows Phone 7 Emulator / Device Connected ..." );
- Guid appID = new Guid ( "{5e75bba1-fbf6-463c-94ac-fa4a78f8fd12}" );
- RemoteApplication app;
- if (WP7Device.IsApplicationInstalled (appID))
- {
- Console .WriteLine ( "Uninstalling sample XAP to Windows Phone 7 Emulator / Device ..." );
- app = WP7Device.GetApplication (appID);
- app.Uninstall ();
- Console .WriteLine ( "Sample XAP Uninstalled from Windows Phone 7 Emulator / Device ..." );
- }
- // Install XAP
- Console .WriteLine ( "Installing sample XAP to Windows Phone 7 Emulator / Device ..." );
- app = WP7Device.InstallApplication (
- appID,
- appID,
- "NormalApp" ,
- @ "D: \ visual studio 2010 \ Projects \ ConsoleApplication1 \ WindowsPhoneApplication1 \ ApplicationIcon.png" ,
- @ "D: \ visual studio 2010 \ Projects \ ConsoleApplication1 \ WindowsPhoneApplication1 \ Bin \ Debug \ WindowsPhoneApplication1.xap" );
- Console .WriteLine ( "Sample XAP installed to Windows Phone 7 Emulator ..." );
- // Launch Application
- Console .WriteLine ( "Launching sample app on Windows Phone 7 Emulator ..." );
- app.Launch ();
- Console .WriteLine ( "Launched sample app on Windows Phone 7 Emulator ..." );
- Console .WriteLine ( "Reading Foo.txt Isolated Storage file:" );
- Thread.Sleep (10,000);
- //app.GetIsolatedStore (); <- Throws NotImplementedException
- object ConManServer = WP7Device.GetType (). GetField ( "mConmanServer" , BindingFlags.NonPublic | BindingFlags.Instance) .GetValue (WP7Device);
- FileDeployer f = (FileDeployer) typeof (FileDeployer) .GetConstructors (BindingFlags. Instance | BindingFlags. NonPublic) [0] .Invoke ( new object [] {ConManServer});
- f.ReceiveFile ( @ "\ Applications \ Data \" + appID + @ " \ data \ isolatedstore \ Foo.txt ", @ " \ Foo.txt "); Console.WriteLine ("\ t " + File.ReadAllText (@ " foo.txt"));
- Console .ReadLine ();
the end
In this post, we talked about why the automation of the deployment process on the emulator / WP7 device is needed and how to achieve this.
I hope that now you know how to automate the deployment of XAP in WP7.
In the next article in this series we will talk about configuring continuous integration for WP7.
Source: https://habr.com/ru/post/117294/
All Articles