We make high-quality binding for your favorite book.
Introduction
Greetings to all.
People love to read. But not all, and not all. And that love is not always possible to find in stores. And if you can find, it is not always affordable. One elementary fact follows from this: something must be done about it. Of course, you can read from the screen of the monitor / laptop / phone. Or print and read in separate, albeit ordered, leaves. In addition (this is a more costly option, but for the reader it’s better), you can buy a specialized electronic ink reader. Yes, it solves the problem, but ... After some time, you start to miss the weight of this book, the rustling of turning over paper pages, and the pile of other similar unimportant, but such pleasant to heart things.
And out of this trouble, too, have their way out. Just need to make the right book yourself.
Carefully, there are a lot of photos under the cut.
Searching on the Internet and showing obstinacy in digging up obstructions of the nepo-nymi, I, through third-party websites, came across two habrastats: First and Second (the layout is taken in chronological order). So I will call them in the future. This article will combine my first experience in creating a book and analyzing two other articles, my explanation of all the pros and cons.
Stage 1. Creating a * .pdf file
Point 1. * .pdf of * .txt, * .rtf, * .doc
First you need to create a document in Wicrosoft Word and make an A5 sheet. To do this, set the following page options:
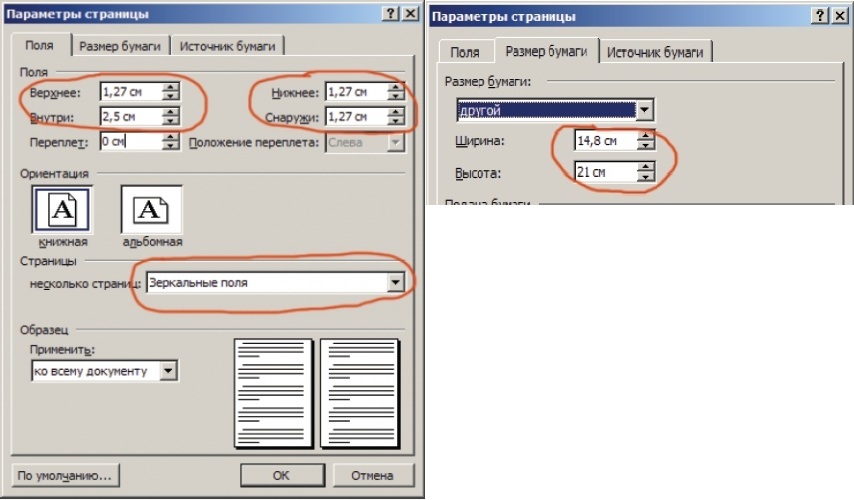
Fields can be varied, but for the best view it should be within: upper, lower, outside - from 10 to 16 mm, inside - from 25 to 30 mm.
Choose your favorite font and font, but do not forget to insert letters for beauty.
The owners of Open Office, I think, will also figure out how to set up such settings.
')
Item 2. * .pdf of * .djvu
To fit the sheet to the A5 format, you need to send a print to WinDjView and select Adobe PDF from the list of printers. Next, in the properties, designate the following parameters:

And then "print."
Clause 3. * .pdf from * .pdf
Nothing to do this is not necessary. Whatever the size, they fit. The main thing that the text was visible.
At this stage , this site helped me.
Stage 2. Listing
At this stage, I always envy those who have a printer at home, especially if it is two-sided.
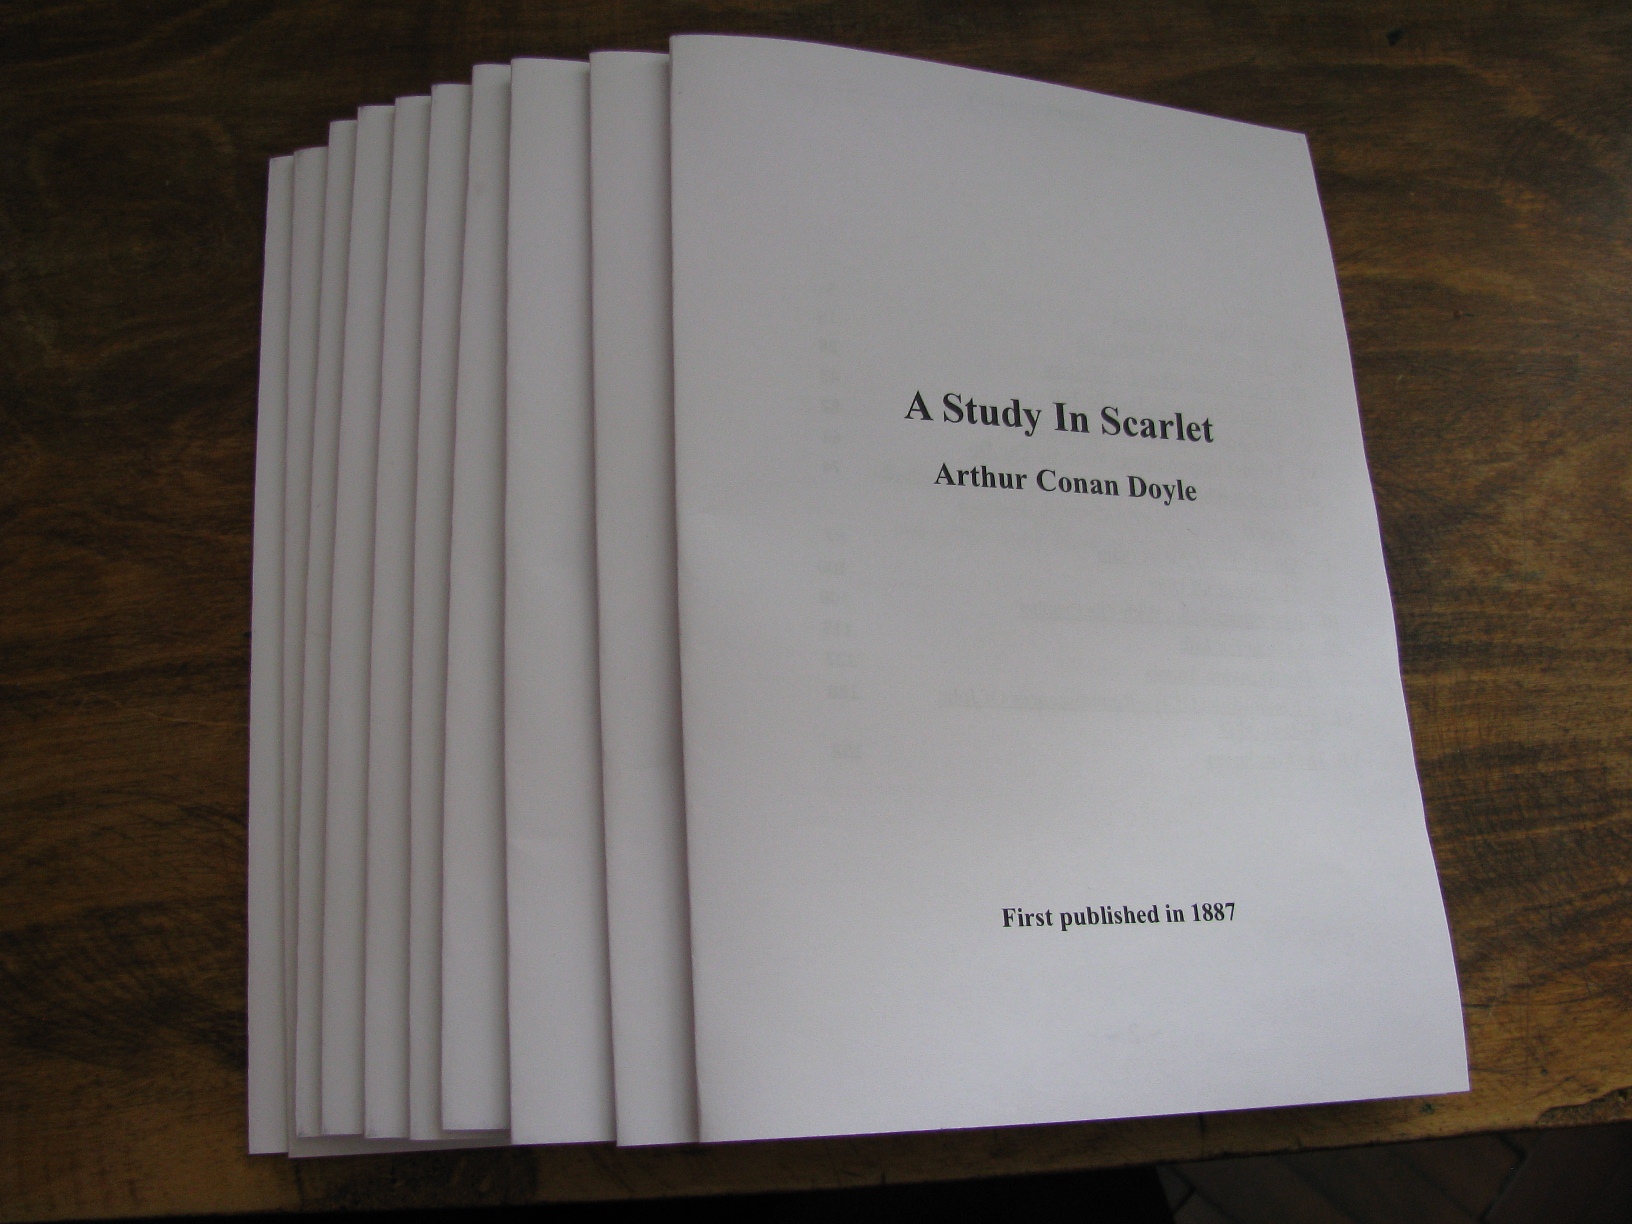
But let's not talk about it. First you need to decide how many sheets will be in the brochures, because if you print the whole book in one brochure, and then bend it, then you’ll get the utter nonsense. In the first article 10 sheets were made, in the second - 4 sheets. I got into the books, figured it out, and deduced that the most common number was 8. I did so much.
8 sheets are 32 pages. In my case, there are 305 pages (by the way, I printed the first two short stories about Sherlock Holmes by Arthur Conan Doyle in the original language).

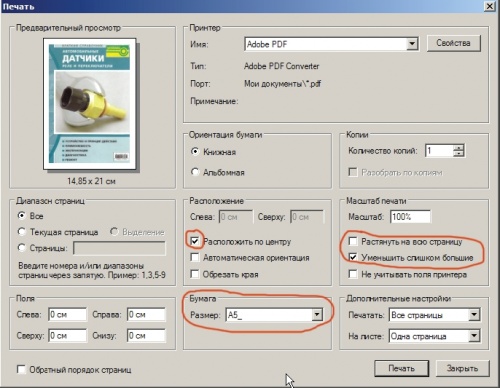
In the first paragraph we enter the numbers of the pages that we want to print. We make sure that there are exactly 32 of them - then there will be no unnecessary spaces (this means that the second number must be a multiple of 32, and the first = the second minus 31). In the second we choose “brochure printing”. If you have a two-sided printer, then in the third paragraph we choose both sides, otherwise - there are also two items “only the front side” and “only the back side”, so printing a brochure is also not a problem. We make sure that clause 4 is strictly “1 to 8”.
The final deviation. If you do not have a printer - do not worry. I used the free virtual printer doPDF , which created pdf files from what I wanted to print. The result carried in the center of the printout, and there already used a two-sided printer. And still it turned out not very expensive.
Stage 3. Gluing the book block
For this we need:
- Printout itself
- A pair of clamps with boards (press, vice)
- Brush and PVA glue, preferably building (it is thicker)
- Pricker and carton longer than 210 mm
- A piece of fabric less than 210x300 mm (approximately 170x200 will do)
- two sheets of hard paper on the flyleaf
- List of actions (for this stage and all further ones, it’s more convenient)
Start of action - 14:20.
We take the printout and sort by notebooks.
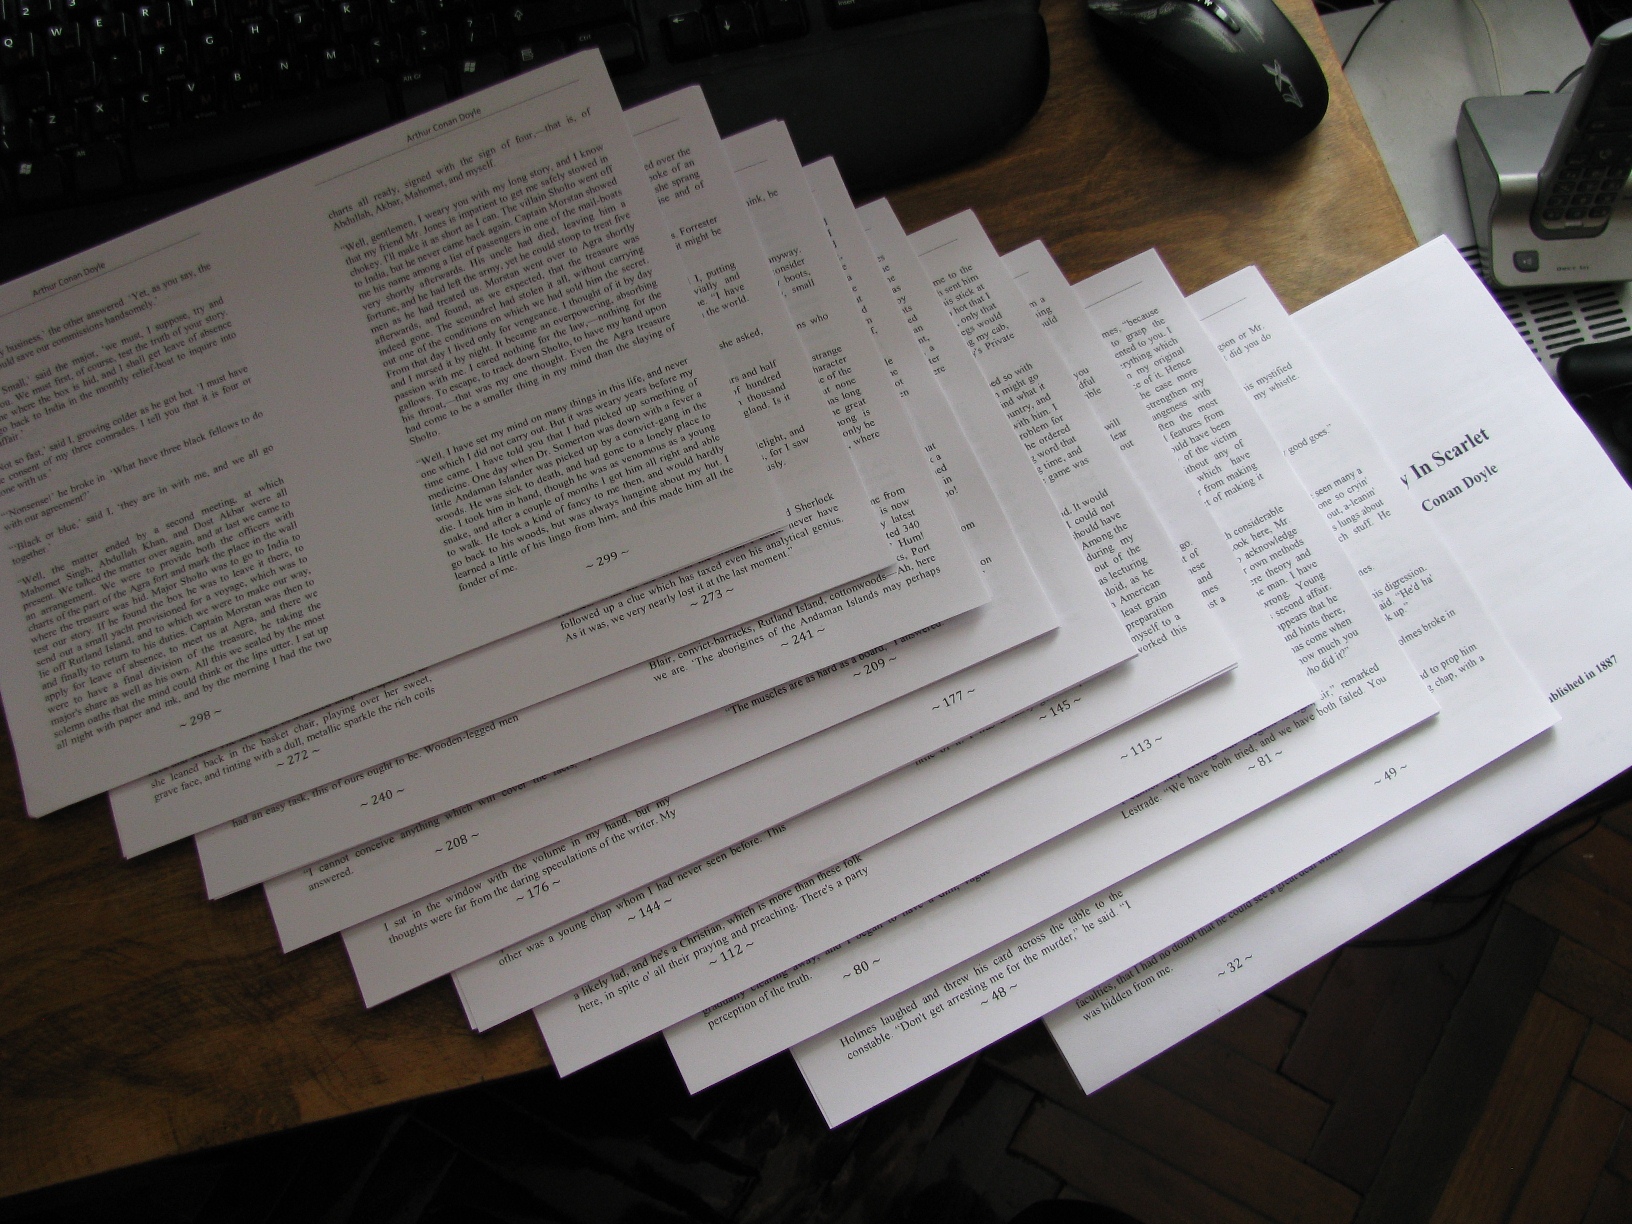
Then we bend each notebook in half, using something with a sufficiently smooth angle (so as not to leave traces).
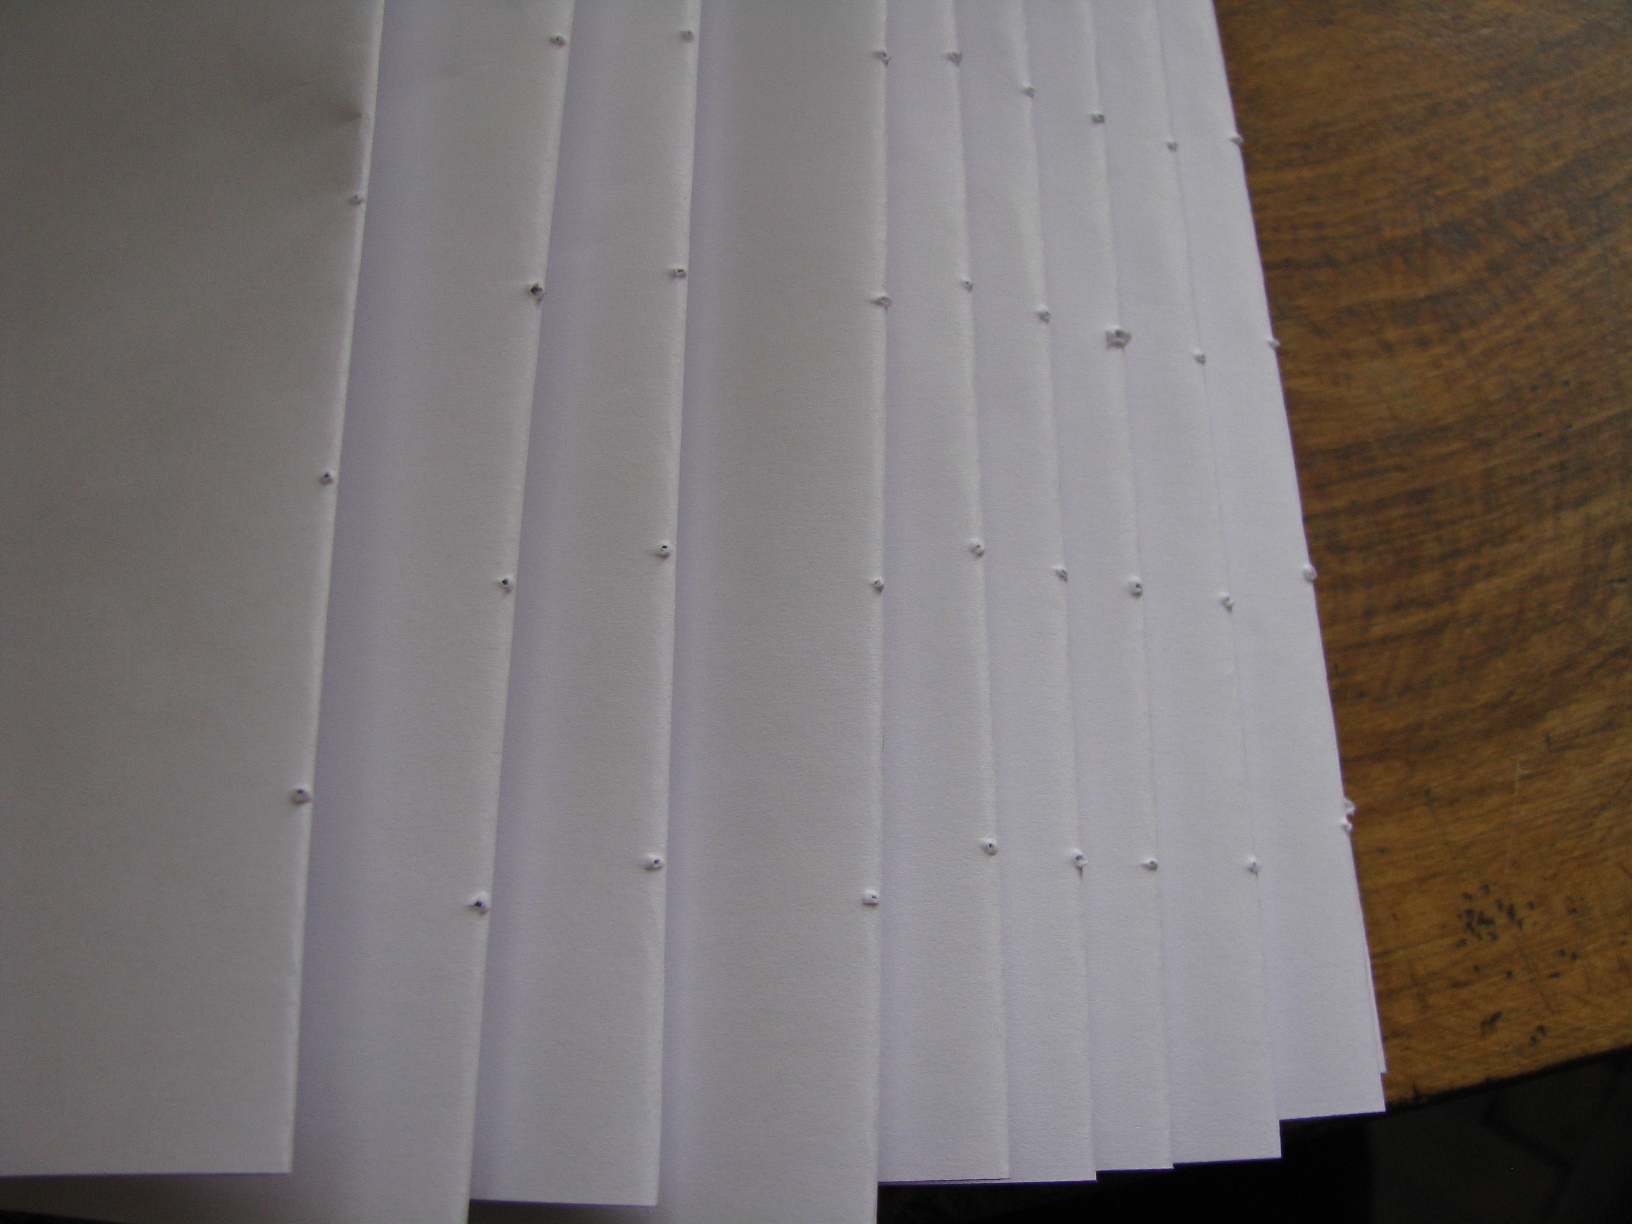
Already by 14:31 such a stack was received:
Next, take a carton and mark it. I made marks every 30 mm, calculating that there would be exactly 6 holes, and therefore, each notebook would have exactly three stitches inside. But this, strictly speaking, is purely my choice.

Speaking of choice. Now I will explain why I chose this way of sewing. The first article made cuts, but I reasoned that the glue in them would interfere with the book to unfold normally. It seems that he judged correctly, because even the glue that penetrated the holes from the awl was enough to (quite a bit) worsen the opening. In the second article, we sewed on cords, but I thought that the book would be much stronger if these “cords” run along the entire spine, so I chose sewing on a piece of fabric. Yes, and I took a piece of cloth wider so that I could glue more to the cover, and, as a result, I got a more solid book.
So, while I was chatting, all the holes were made (under the paper I advise you to put several layers of cloth, then it will be much easier to perforate the notebooks) and by 14:47 we got this picture:
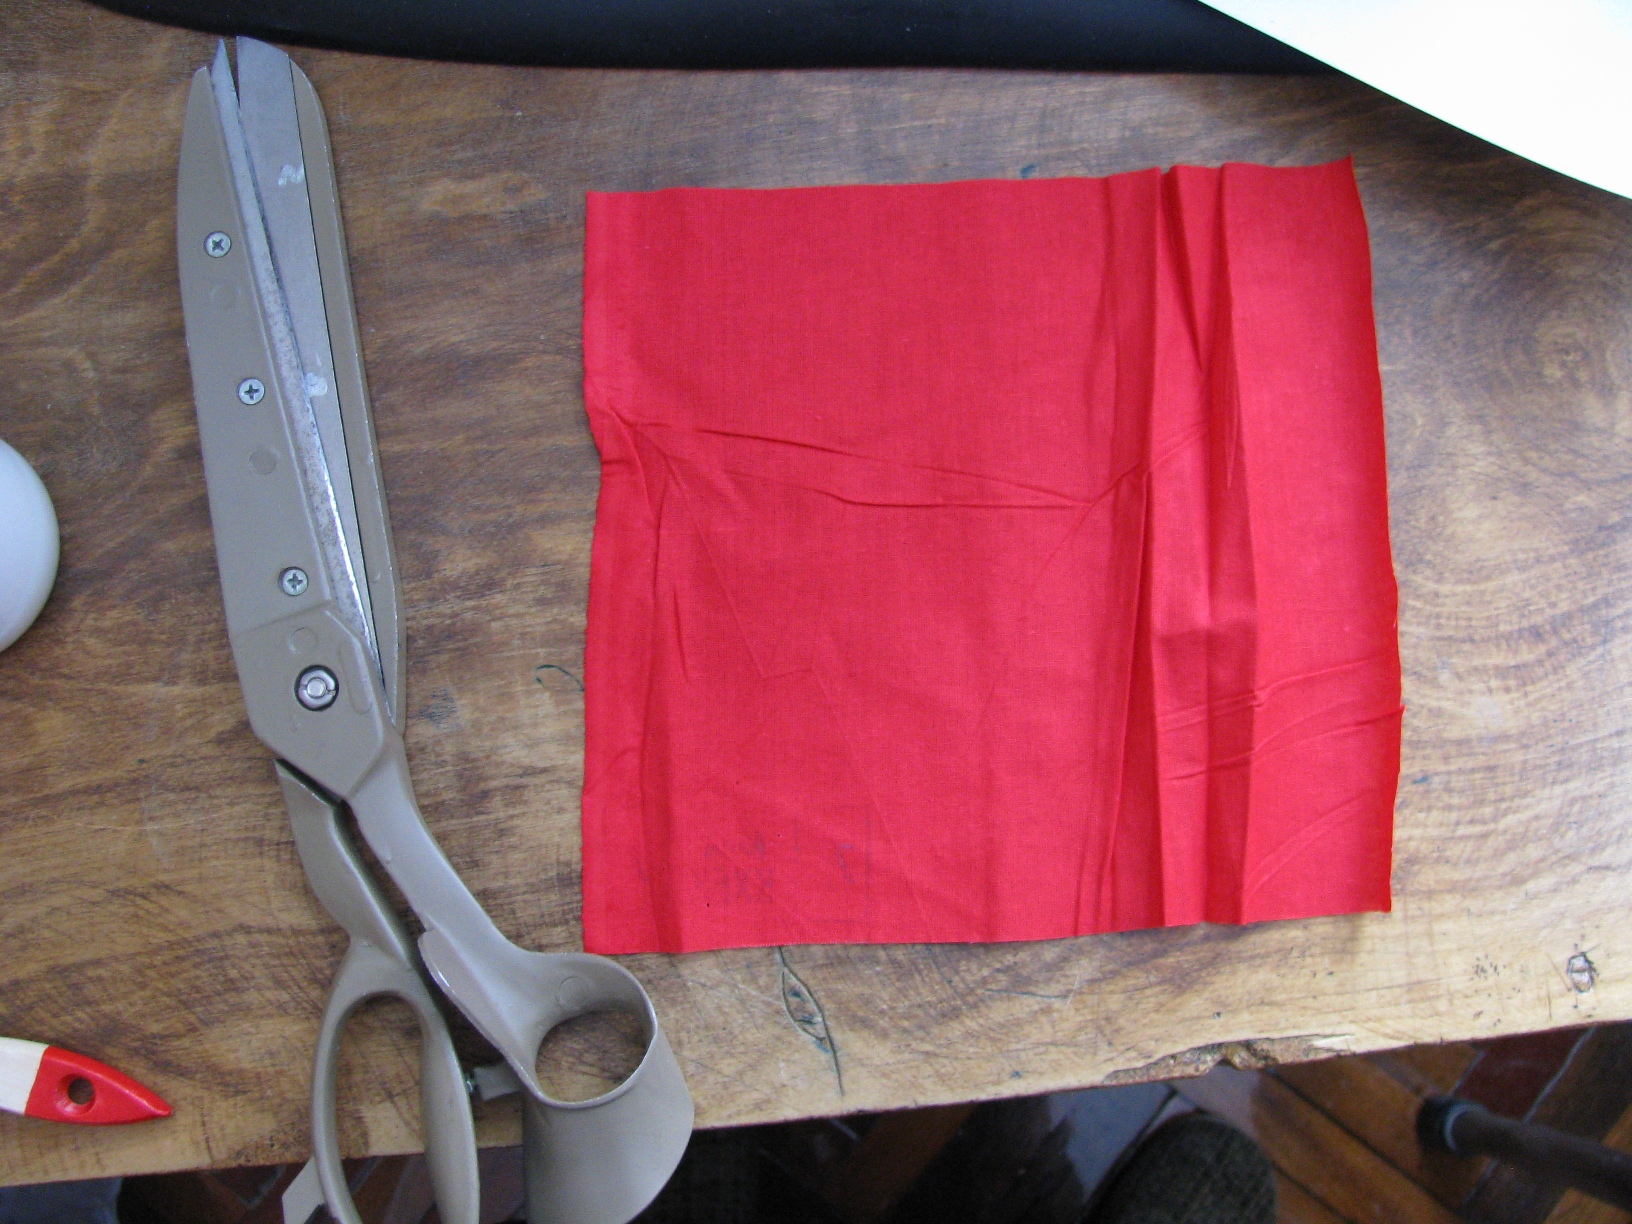
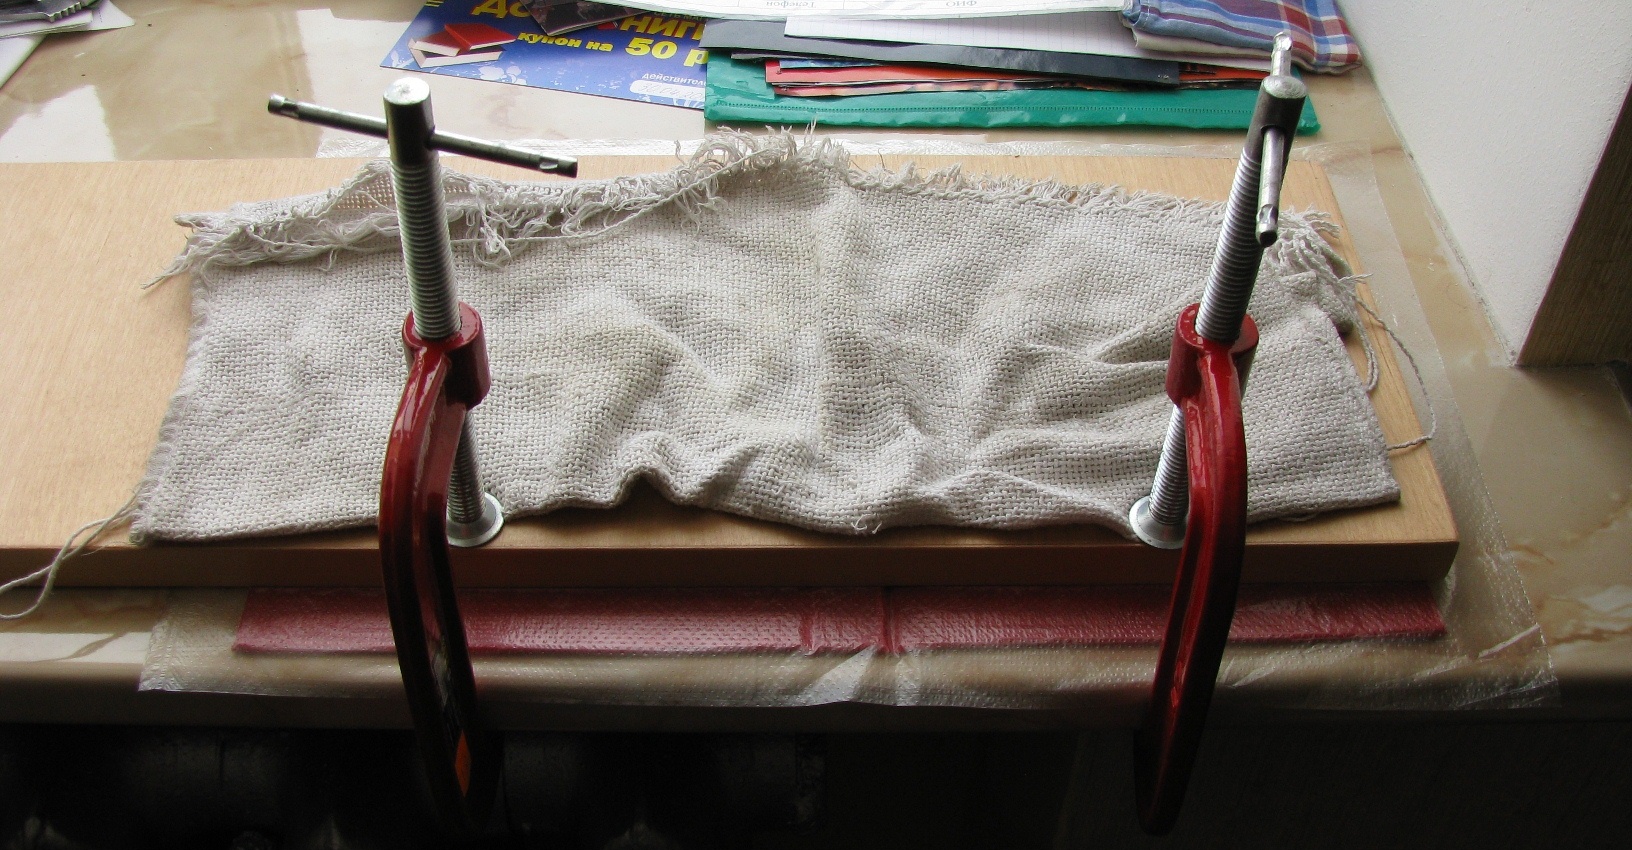
Then we clamp the resulting book block (IMPORTANT! Do not forget to check the sequence of notebooks!) In a vise to improve the quality of the central folds, while for the time being we will deal with bookends. I sometimes mess around with paper, so I already have whatman paper sheets cut into 30cm strips. One of these strips I used:

Marked it up and cut it with your favorite tailoring scissors. They cut out the necessary piece of cloth (which he immediately patted).
By the time the sizing started, it was already 15:18.
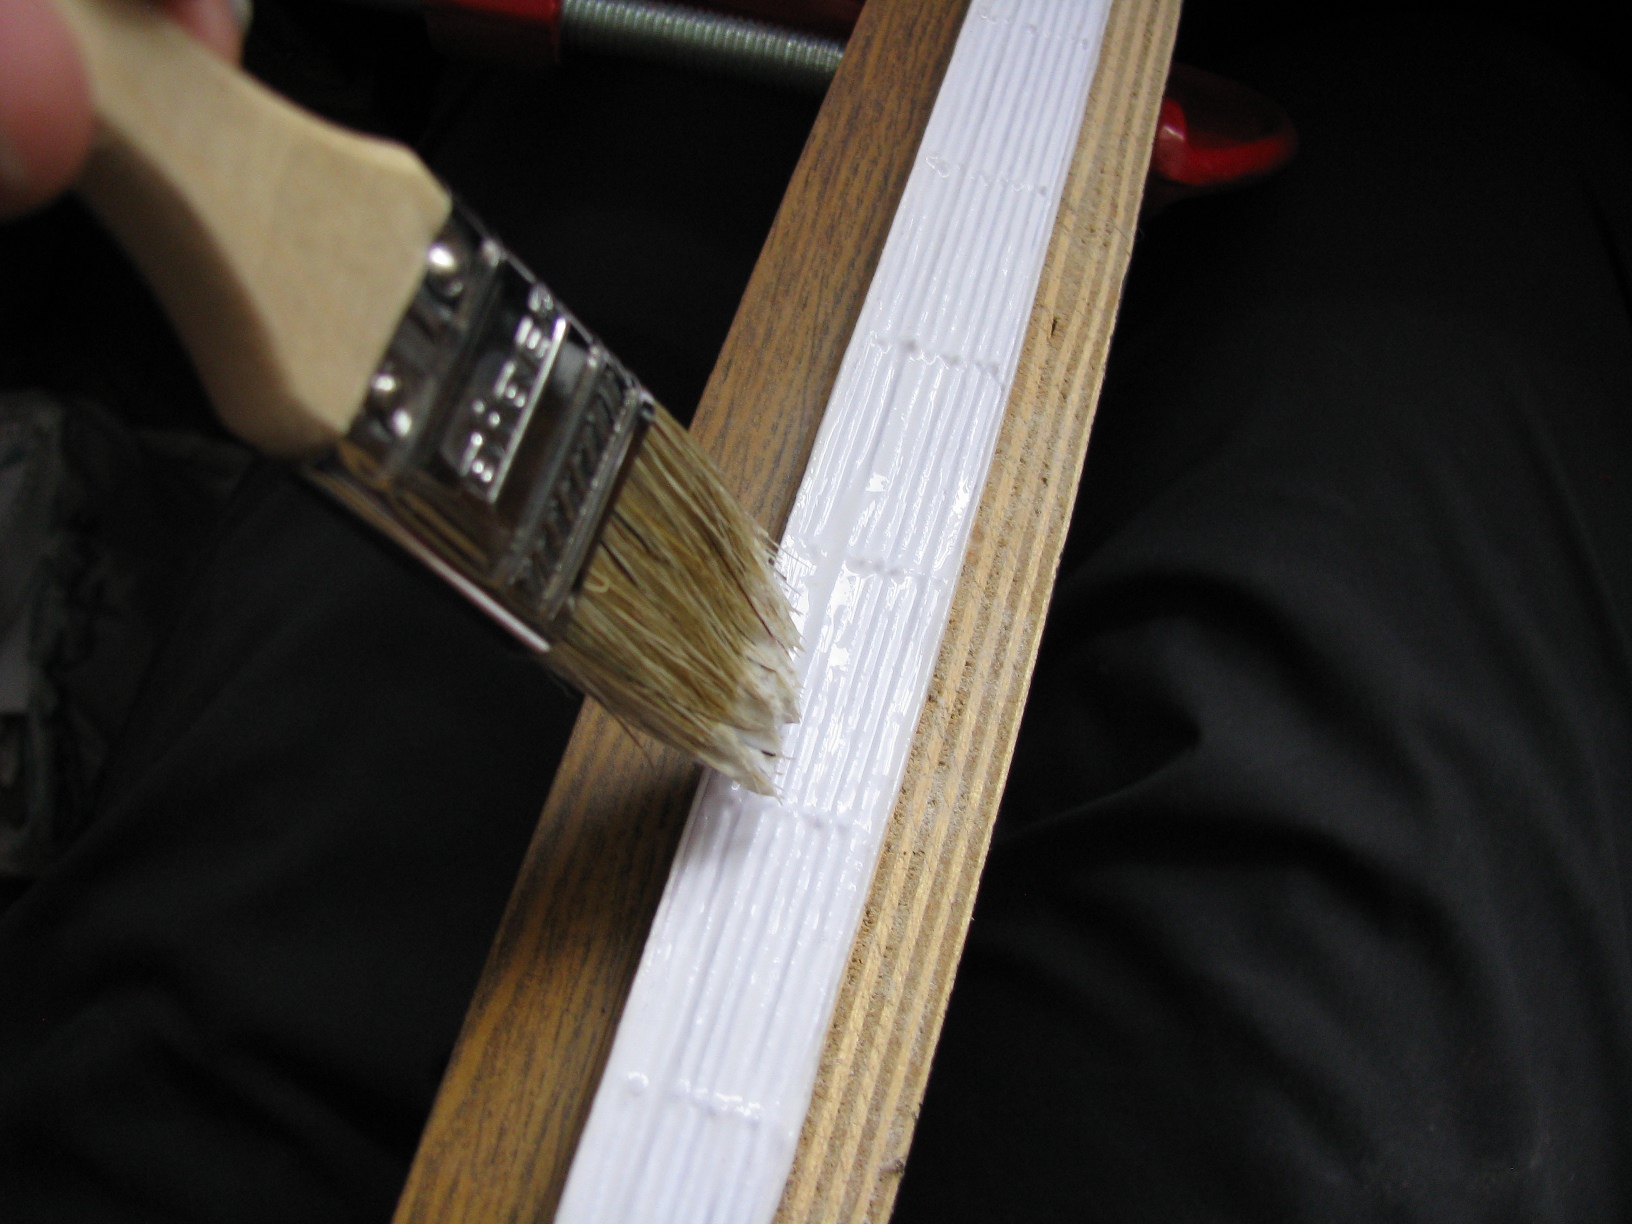
Slightly protruding from the grip back of the block we coat the PVA, and glue the fabric on top (it absorbs well, so we coat it on top too).
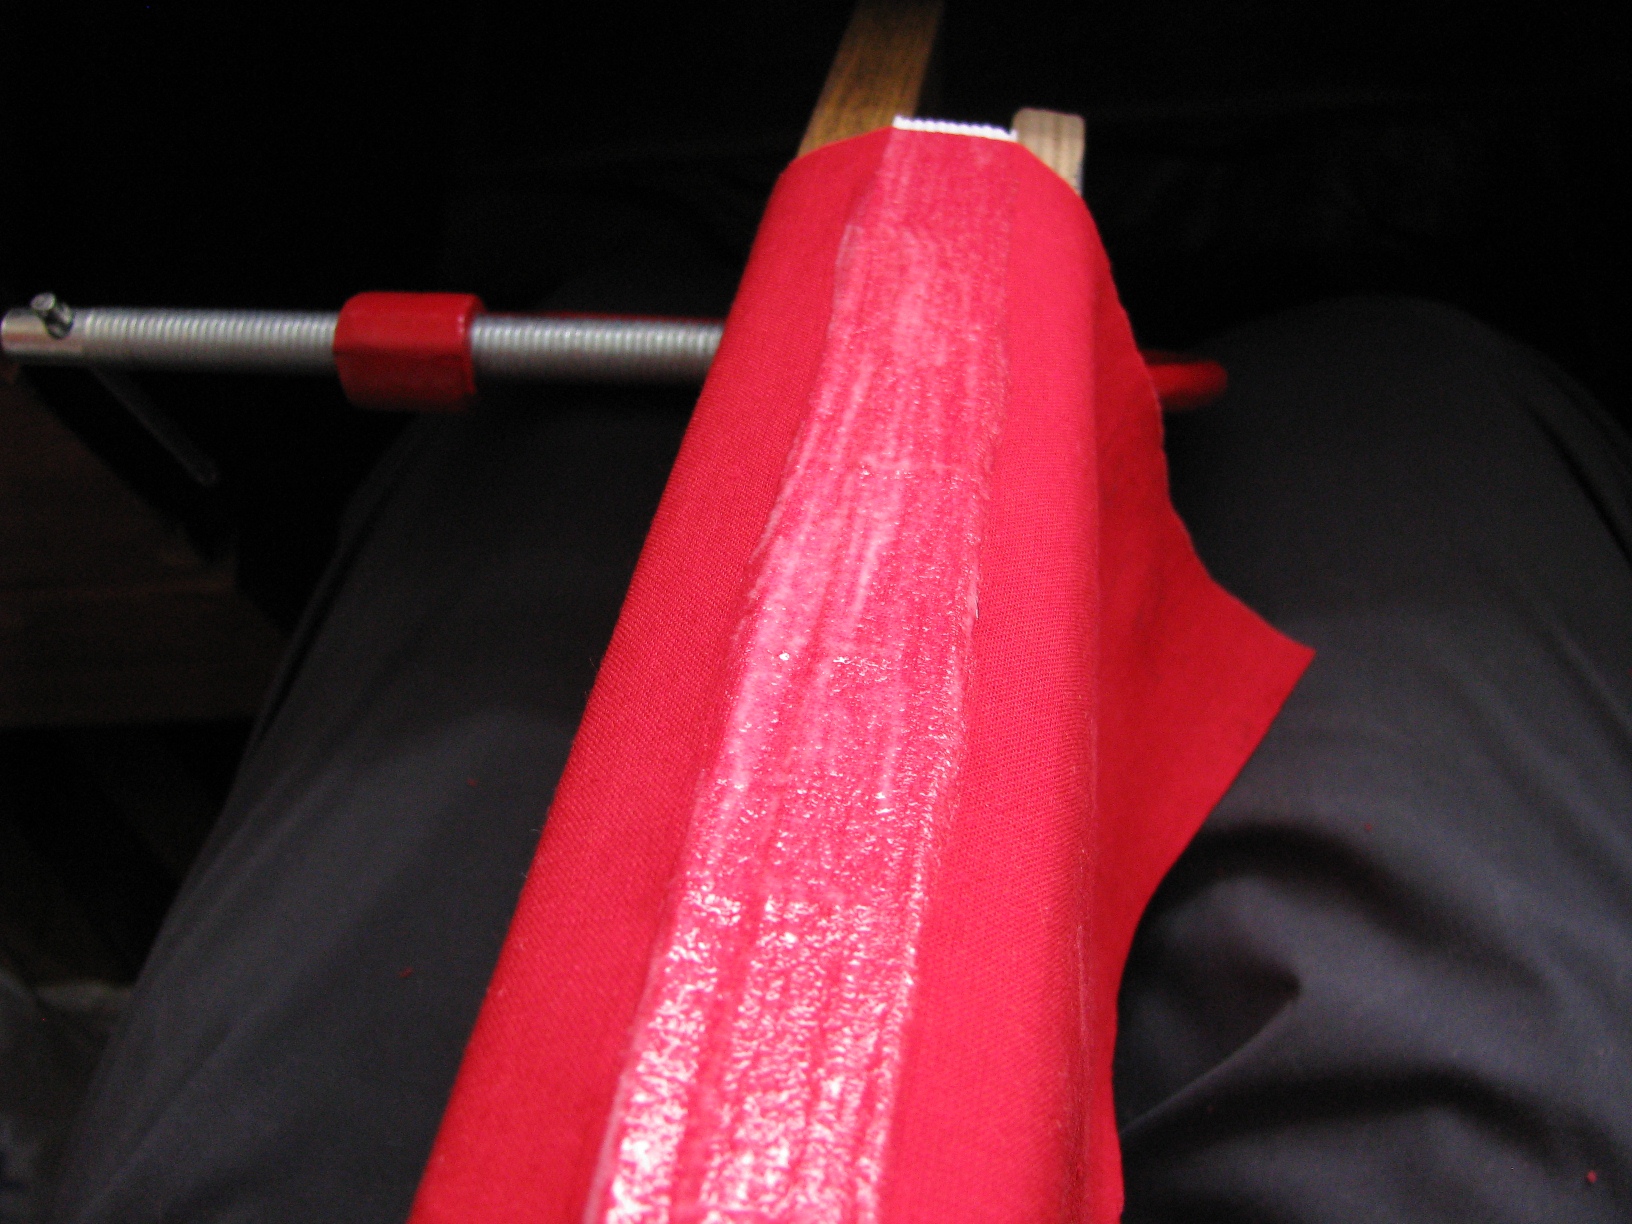
Everything, the sequence of notebooks no longer change. And having ceased to twitch we (at least I) go on a break, small, from 15:48 to 15:58.
Stage 4. Gluing the cover
For this we need:
- Any thick cardboard (I used cardboard for crafts, 1.75mm thick, can be found in stationery stores)
- A piece of cloth for the cover (I took the cloth 375x260mm, although some stubbornly offered to use leatherette)
- The same brush with glue
- And again a list of actions (optimally - the continuation of the same)
Start of action - 15:58.
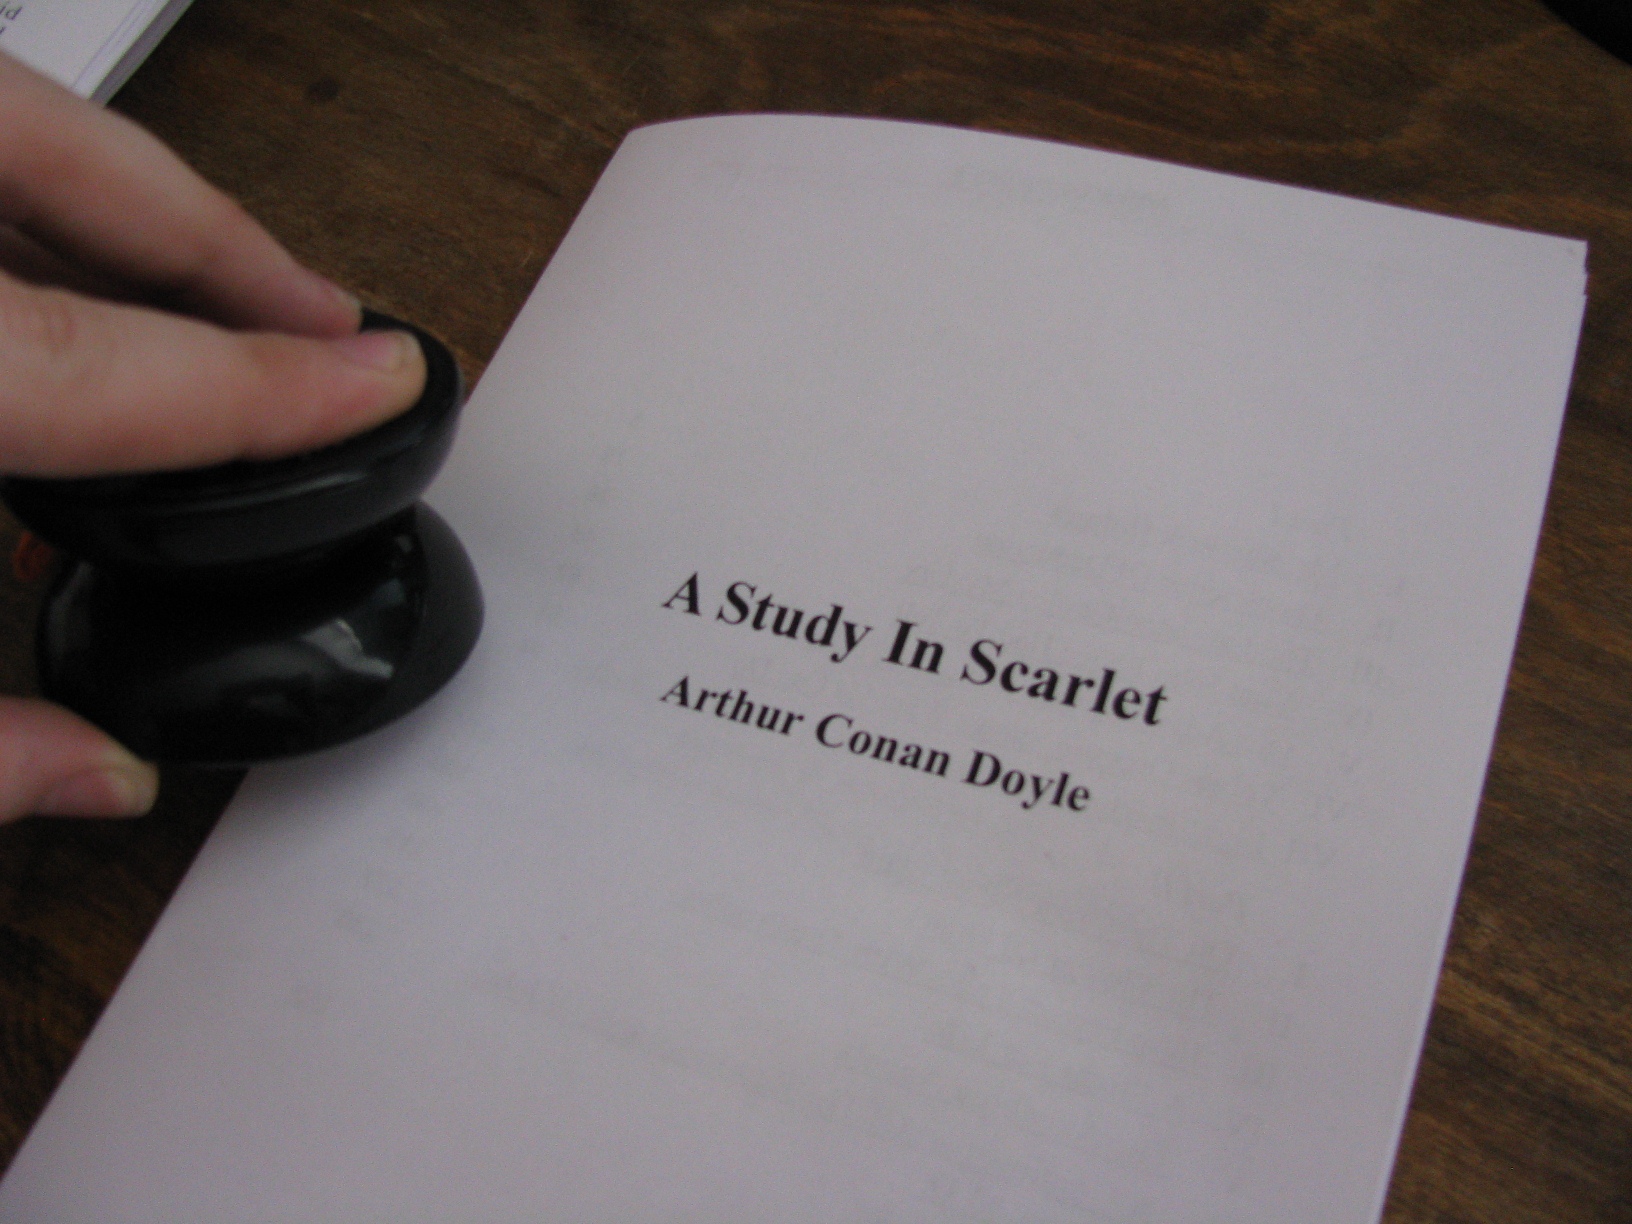
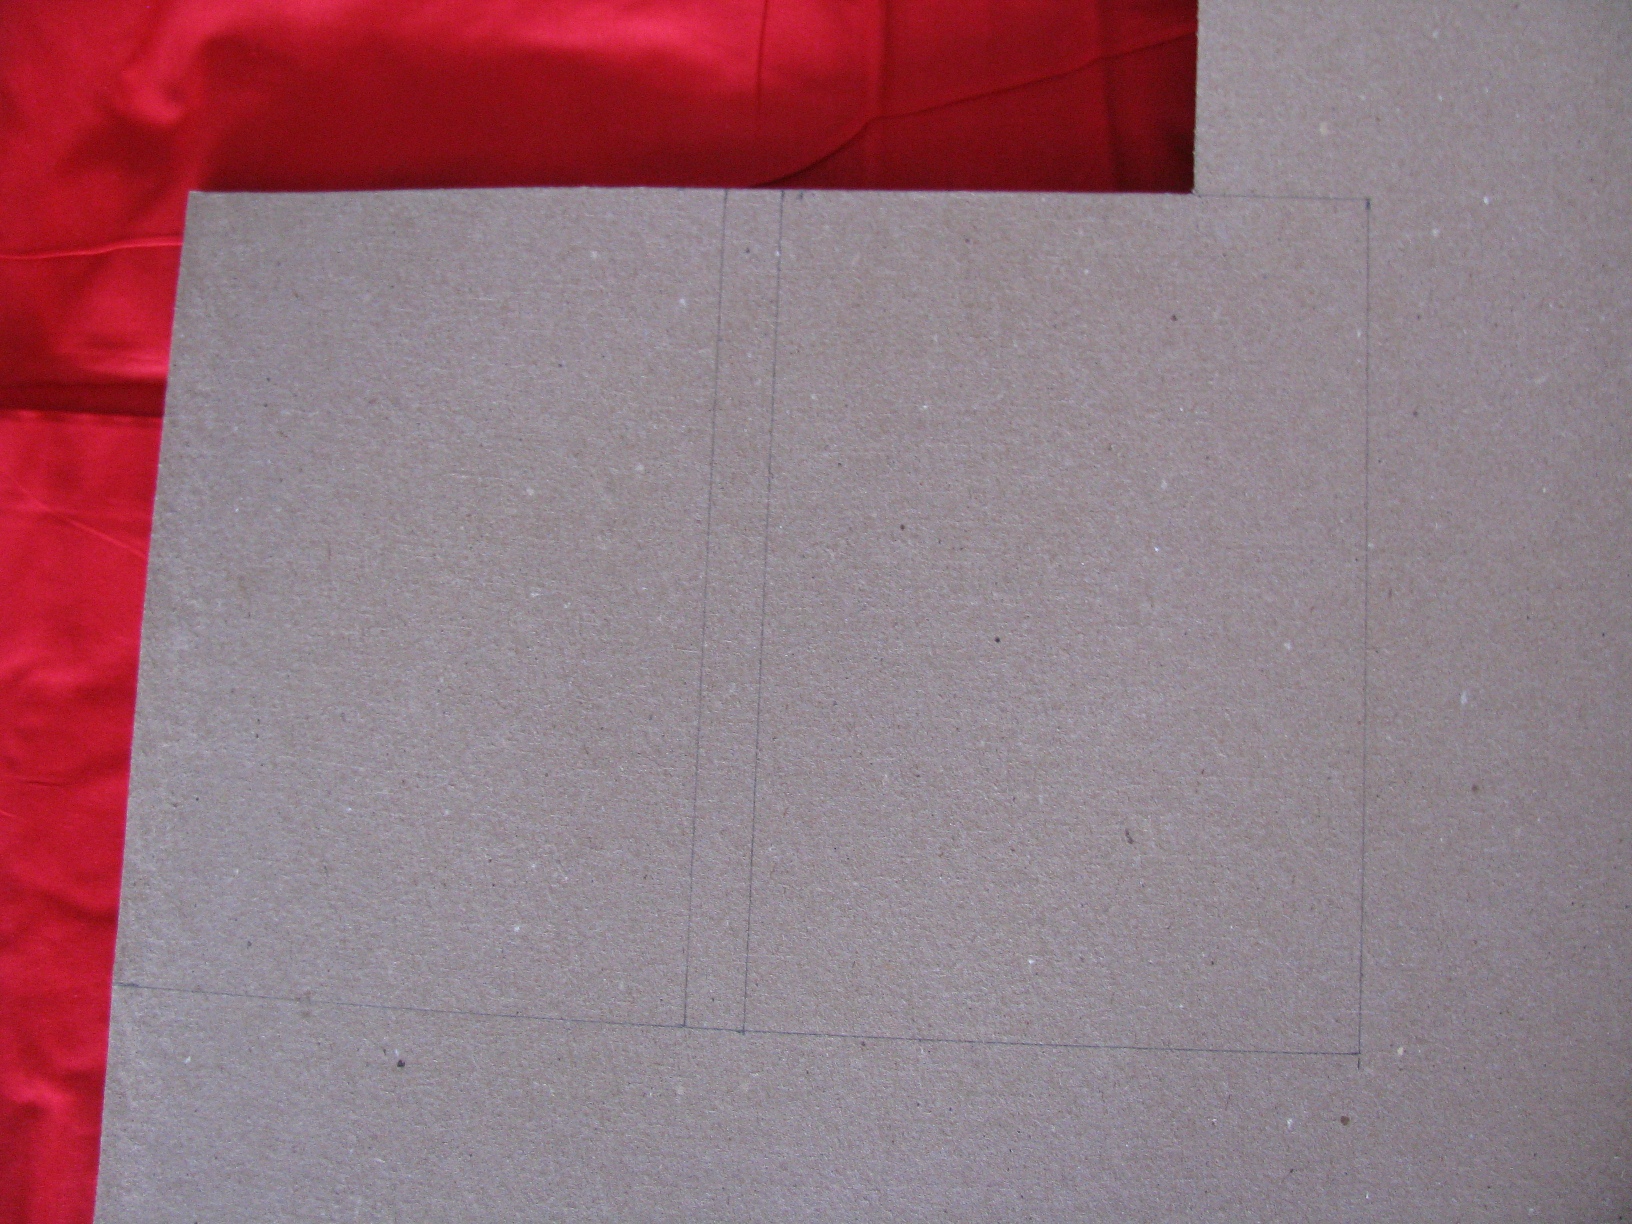
Again, back to the choice. Why such a cover? But just wanted. A logical chain immediately comes to mind: red-blood-crime-detective-Sherlock Holmes. No more arguments, except: I do not advise you to make a paper cover - it gets dirty. It is necessary to laminate at least. Well, now back to work. A plan for the future cover is made:

Transferred to cardboard:
And immediately cut (guess what? Of course, tailoring scissors!). Well, naturally, the fabric for the cover is cut out (and ironed).

Quickly? And already 16:35. This is how I love these kinds of activities: I thought a little, twitched a little bit with my hands, and the time had passed, imperceptibly and pleasantly. But now this is not what interests you, but what to do next. And then the cardboard is glued to the fabric. Rather, the fabric to the cardboard. First of all, from the front side, then turn over and fold the fabric in the manner of typographic books, first along the short sides, then along the long ones. And glue. The cover is almost ready, it remains only to hold it under the press (note that you need to arrange the cover so that it does not stick to anything, otherwise it will be insulting).
So it turns out that the clamps are not inactive, at first they kept the book block on the glue, and at 17:18 switched to the future cover.
Step 5. Book stitching
For this we need:
- Pre-glued book block (which we did in the 3rd stage before)
- Gypsy needle (just a big needle with a big eye)
- A thread of sufficient length (I used floss, I calculated the length using the formula: R * N + 50 [cm], where R is the thread length for one notebook {conventionally 21 cm}, N is the number of notebooks. Fifty - stock)
- And again the list of actions (unexpectedly, yes? Although I myself do not understand why he is here)
Start of action - 17:25.
And again about the choice. The thread is white. No, I do not think that the colorful thread will be distracting while reading. I just looked at the result from violet and thought that white would be more aesthetic.

But now it goes around comes around that I didn’t make the cuts, because it will have to fall exactly into the holes from the sewing. This “problem” is avoided elementary: first, with a needle, we pierce a hole from inside the notebook, exactly at the place of the old one, and only then push the needle outside. I will say without reserve that for this process I needed pliers, I did not master pulling the needle's needle (with the thread of course) through the cloth and paper. But it went, and now it is necessary to show what to do to stitch two adjacent notebooks (this moment is perfectly shown in the Second article, only I made a knot at the very beginning, and with it a standard stitching):

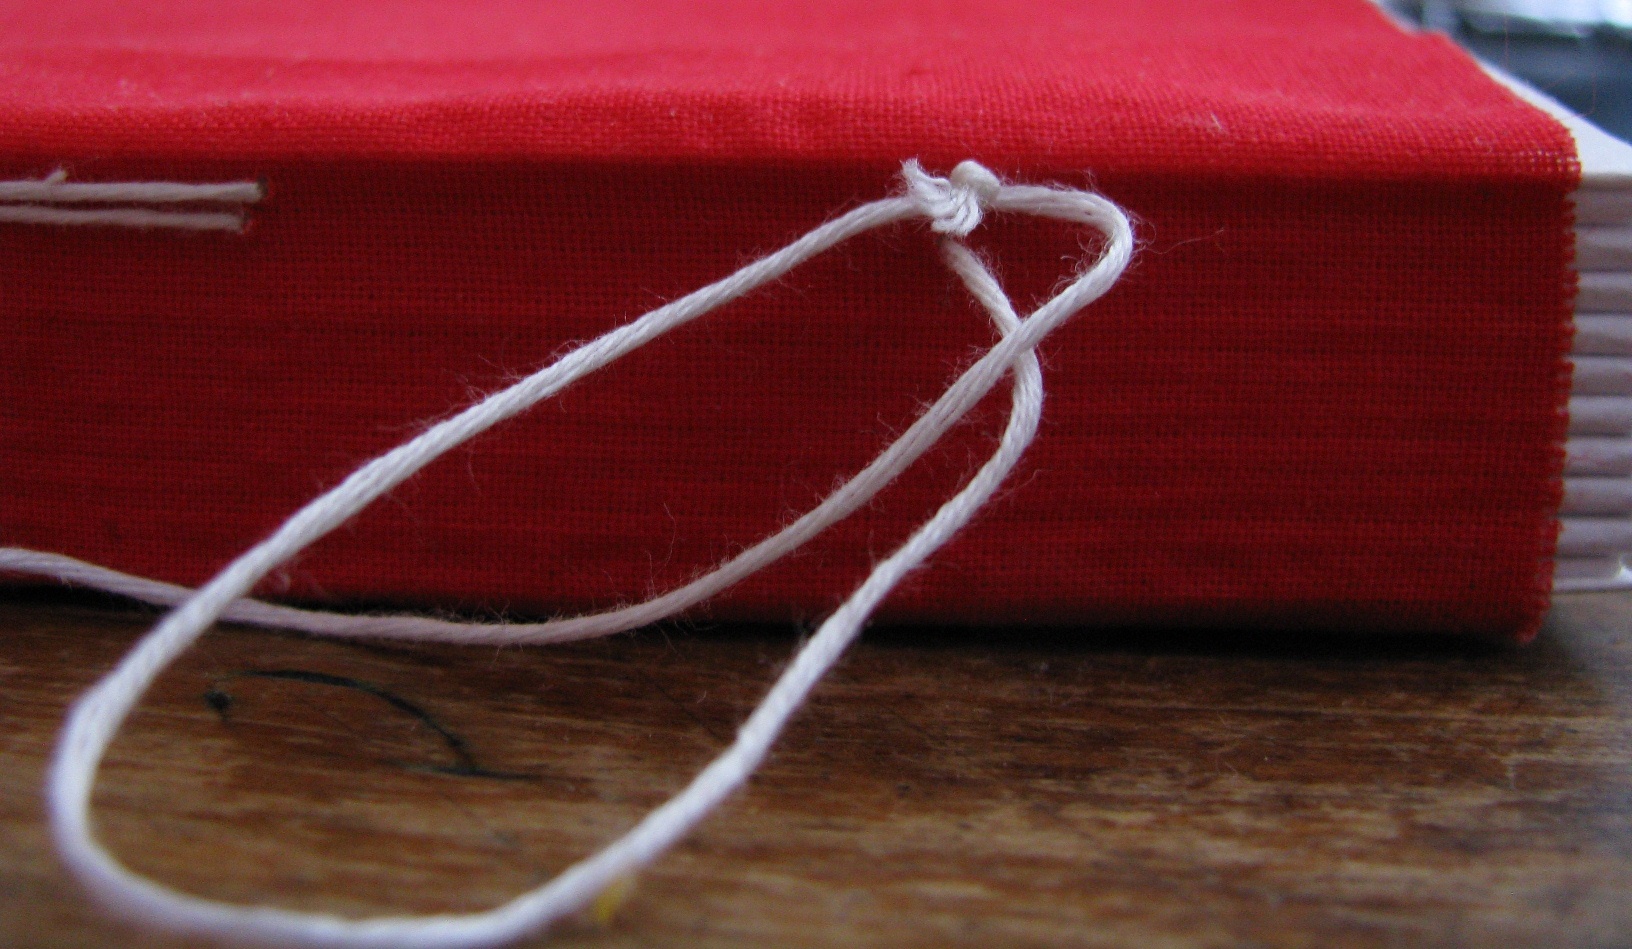

In this way, in addition to glue, the book block also starts to hold the thread! After taking one twenty minute break, I ended at 19:41. As a result of my diligence and slowness, a neatly stitched block turned out:

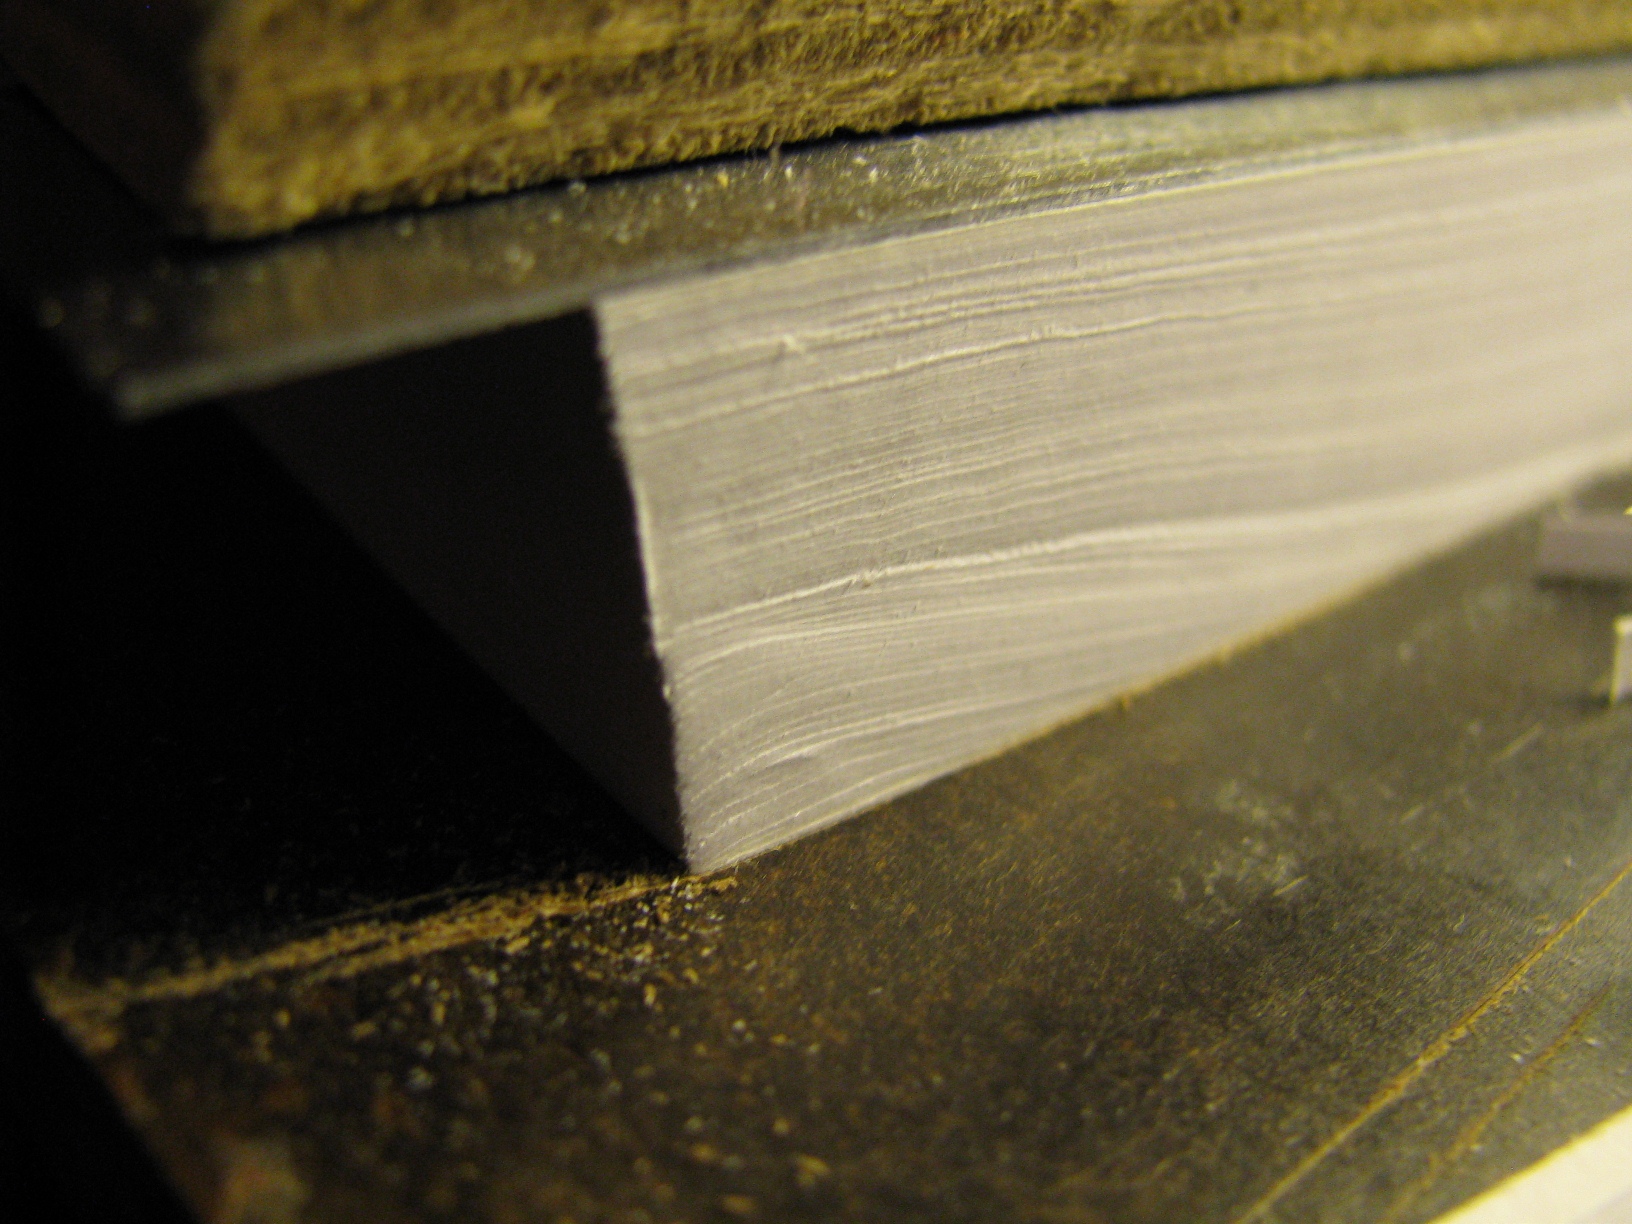
Stage 6. Crop book block
For this we need:
- Clamp (removed one, the second left to put pressure on the cover)
- Stationery knife with a new chipped blade (or just a very sharp knife)
- Metal ruler (for selecting the cut line)
- Iiii ... The list of actions is not needed, but lies somewhere nearby
Beginning of action - 19:50.
You can also use the guillotine for trimming, but according to previous authors, it will not give a normal cut of such a number of pages (at least one that can be put at home). And I don’t have it at all, so I built the following structure:
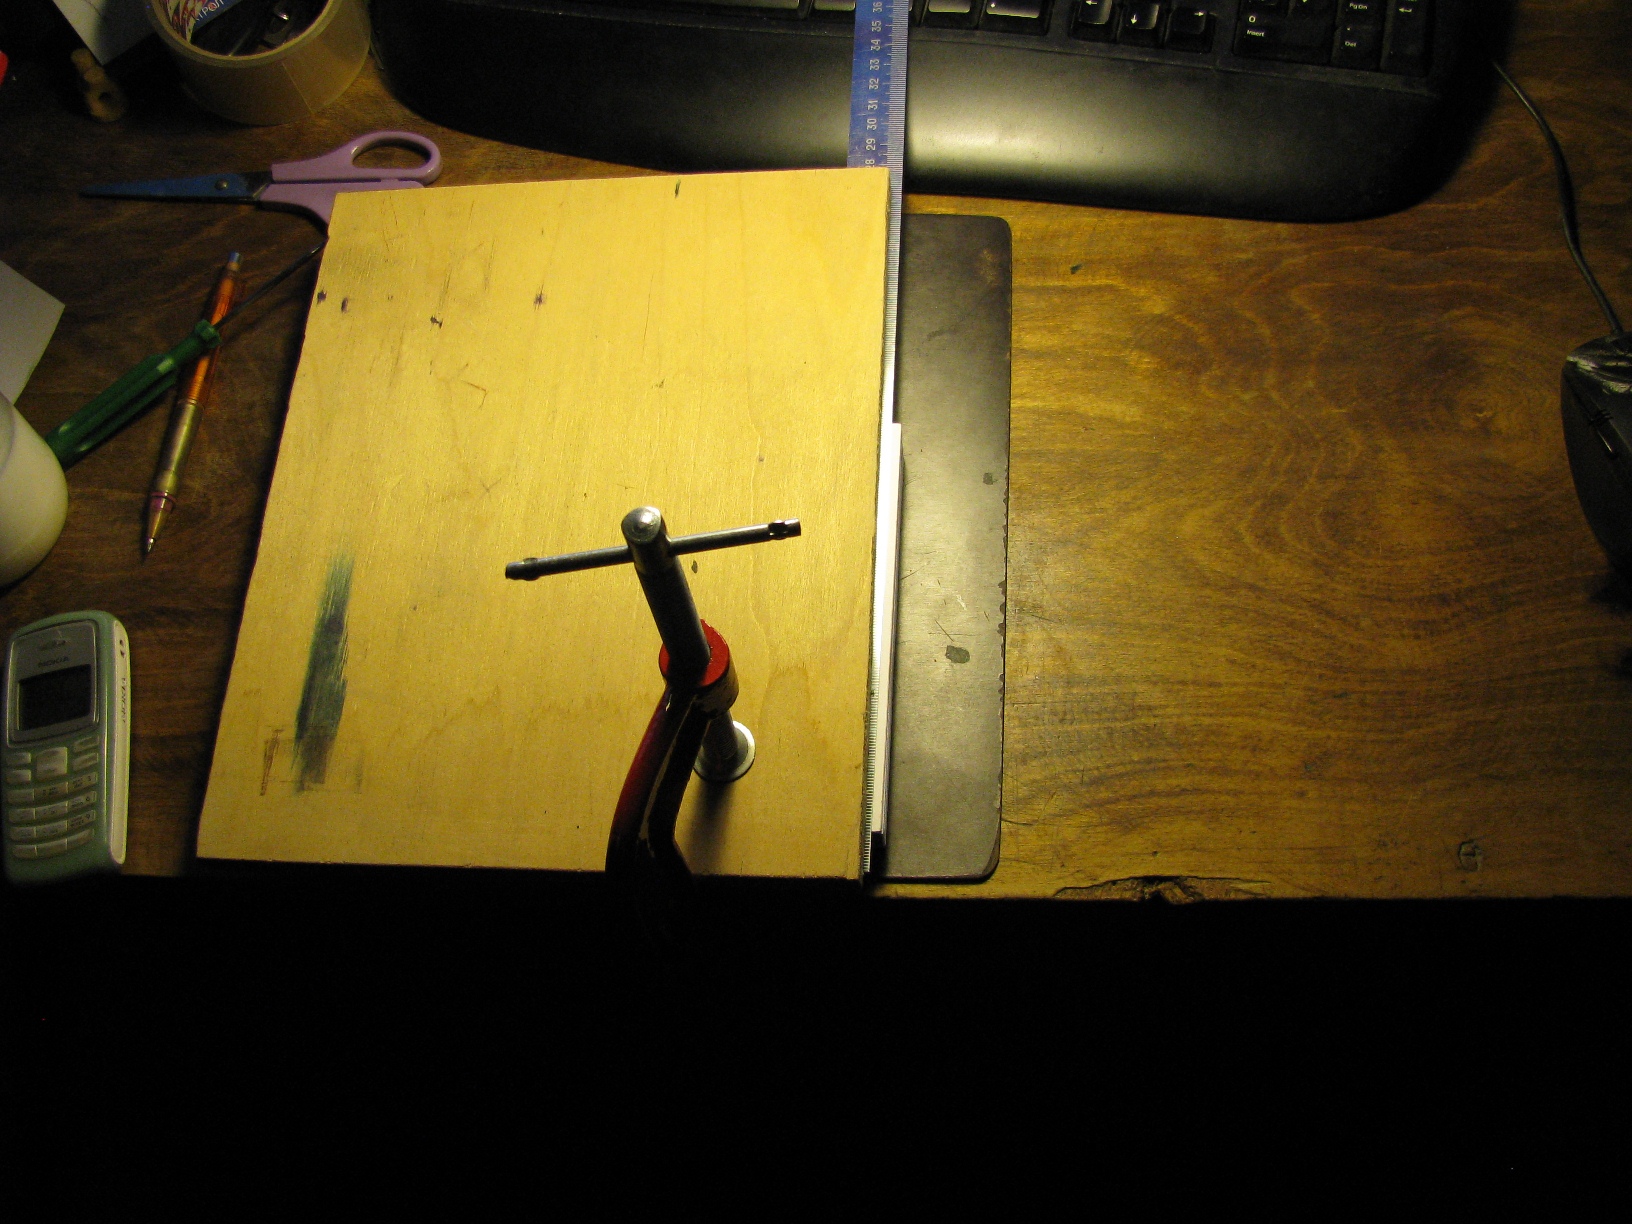
Then, cutting through several pages, gradually make a complete cut of the block.

And so from all three sides. It sounds long, and it was completed by 20:17.
Stage 7, skipped. Additional processing of the book block
For this we need:
- Clipped book block
- Captal
- Silk tape for a bookmark (5 mm wide)
- List of actions (not to forget what I forgot)
The beginning of the action did not occur.
A silk tape is stuck on the book block to the spine centimeters by ten, and is left so that when using it as bookmarks it sticks out a couple of centimeters below. Captals are glued on top, above and below the spine. Kaptal - a tape of fabric, has a thickening on the one hand. You can make it yourself: cut a tape centimeters wide at 8, make a fold along the center along it, put a rope in place of the fold, fold and glue it. Homemade kaptal ready. The captain keeps the corners of the book block, and the bookmark is the dream of any book lover.
Stage 8, the final. Gluing the cover
For this we need:
- Clipped book block
- Cover
- List of actions (he suggested what to do next)
Start of action - 20:31.
There are no tricks here, just do not get distracted (and therefore there are no photos). First, the book block fabric is coated with glue, then the cover is from the inside. While the cover on the book block is being coated, the glue will dry out, but it doesn’t matter, because we’ve achieved it - we glued the fabric from the inside to the flyleaf. Then we join it. Then the same, but on the other hand. The thicker the paper of the bookends, the more glue you can use without fear that it will go in waves. Everything, the cover is glued. Now in a vice. There is nothing more to do, time 20:48.
Errors
These two, fortunately, purely theoretical, I walked around them.
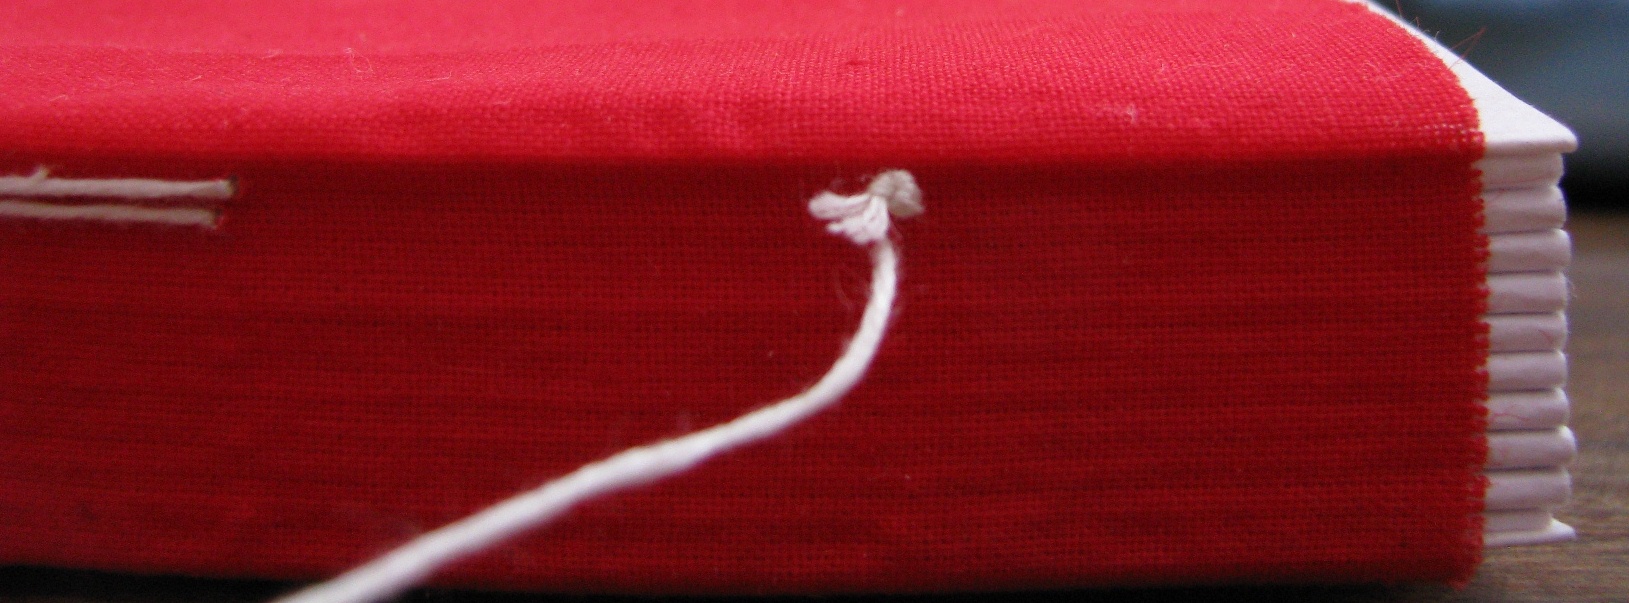
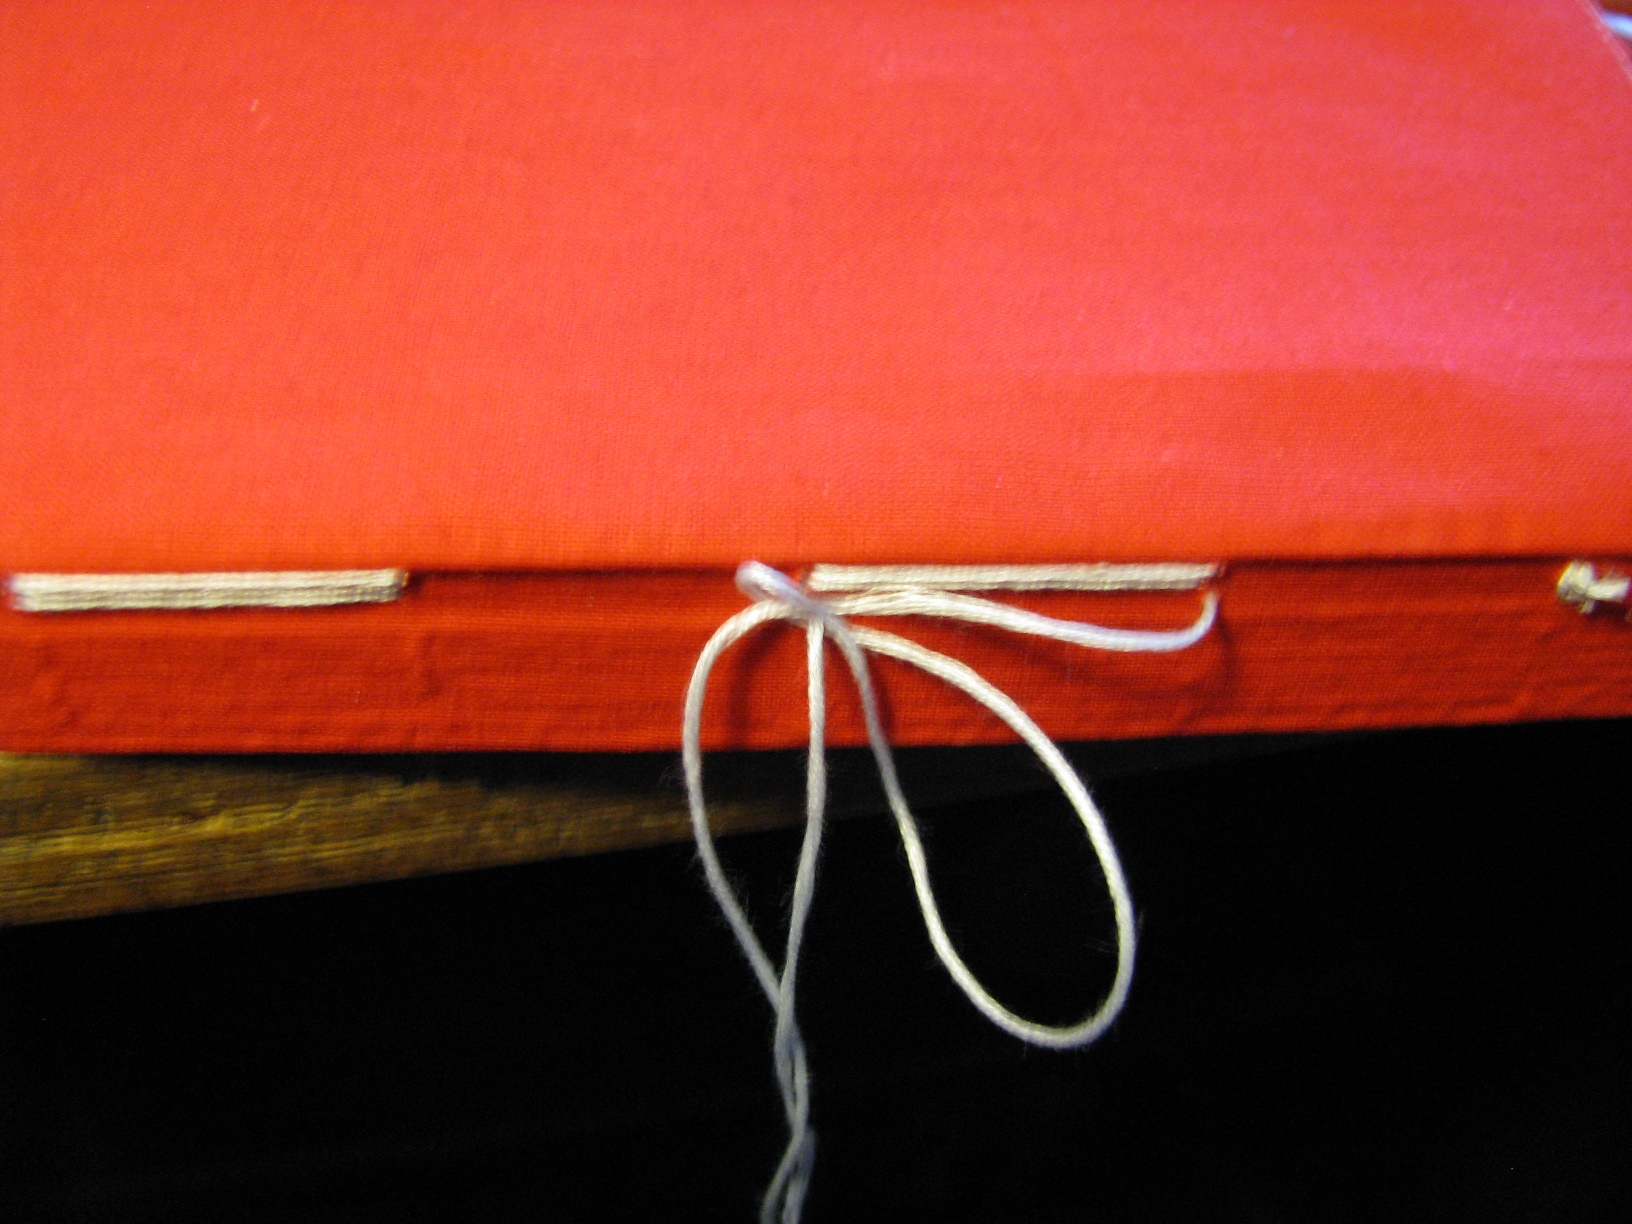
1) During the block firmware, do not allow the stitch inside the notebook to be loosely tightened!

2) During the flashing of the block, it is better to hold the thread while it is being pulled out, such knots can be difficult to untie:
Further worse. Mistakes occurred.
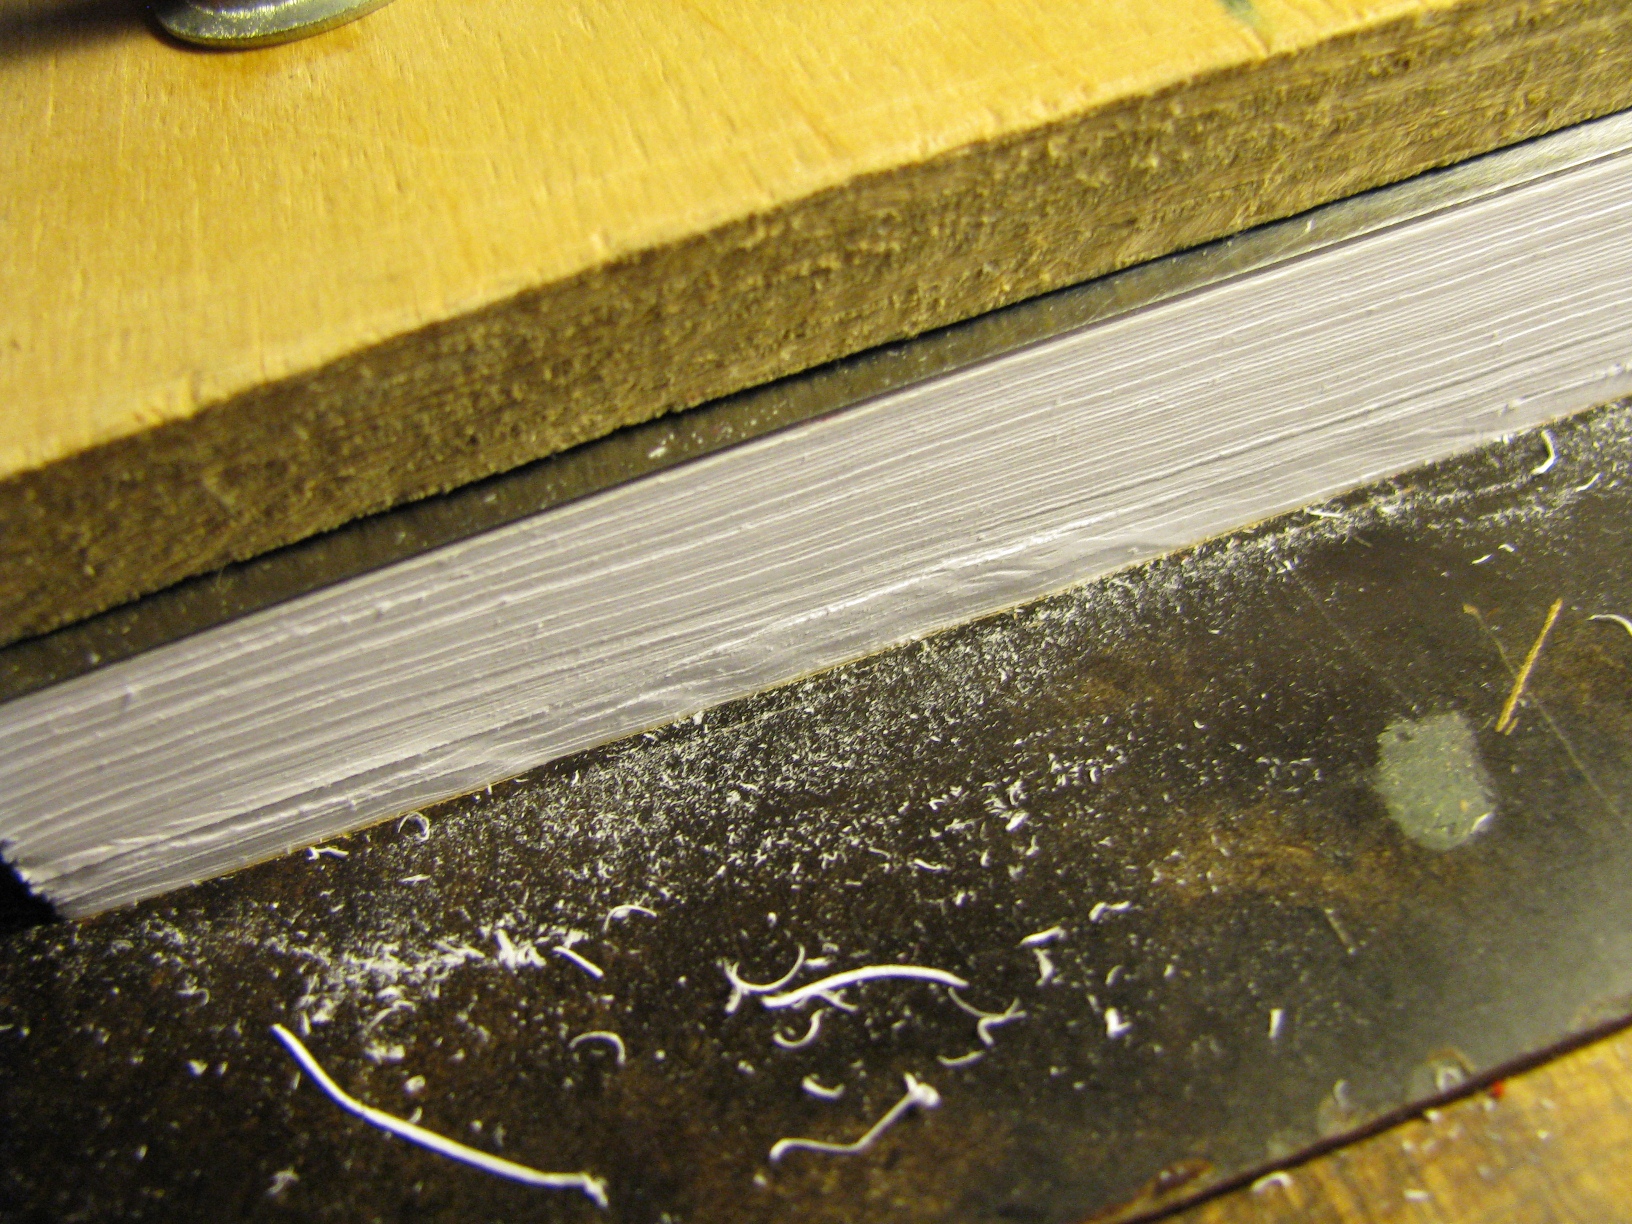
3) When trimming a block, do not try to cut off “as little as possible”, make a margin of a couple of mm, otherwise the same may happen:
4) When trimming a block, try to press the knife as evenly as possible on all parts of the book, otherwise a similar wave may occur:
5) Do not forget about the capt. With them much better.
Conclusion
Total, the book is made in 6.5 hours. And this is only the first attempt, further decently reduce this result. According to forecasts - two times. Wow, just a few hours of systematic leisurely work - and the book can be put on the shelf and read when it pleases, you just imagine! It seems that I have a new hobby ...

Source: https://habr.com/ru/post/116720/
All Articles