Quick start in MODX Revolution
Revolution has grown to version 2.0.8, but most developers are in no hurry to use it, since the documentation is not complete, and there are very few articles in Russian.
Personally, I did not find any step-by-step instructions “for dummies”, and therefore I decided to write it myself.
Of course, this is a topic for not “absolutely dummies”, but for people who are at least a little familiar with Evolution and during the transition to Revolution have broken off everything unusual, like me. There will be no secrets and clever methods. The usual how-to with pictures (there are quite a few).
Personally, for a new site, I am creating a new account at% My Favorite Khost. It has default access to ssh, which is what I use.
So, we go to the server, to the site directory (public_html or something like that) and type in the console
So we download the latest release of Revolution for today, unpack it and move it immediately to the root of the site.
You also need to activate htaccess to use friendly url.
If it is easier for you to do this through the control panel of the hoster - to your health.
MODX is unpacked, you need to create a database for it. This is done from the admin host. Create another user and assign him full rights to the database and password more abruptly. Y% My Favorite Khost% is all done in 6 mouse clicks.
True, I then climb through phpmyadmin and manually set the database type to utf-8, since by default there is cp1251. utf-8 is a very good thing, I highly recommend using it.
')
Now you can install MODX. Go to% sitename% / setup (yes, not / install!)
If you have PHP 5.3 and error 503 comes out, then most likely you need to register your time zone in .htaccess, for example:
Click on the buttons.

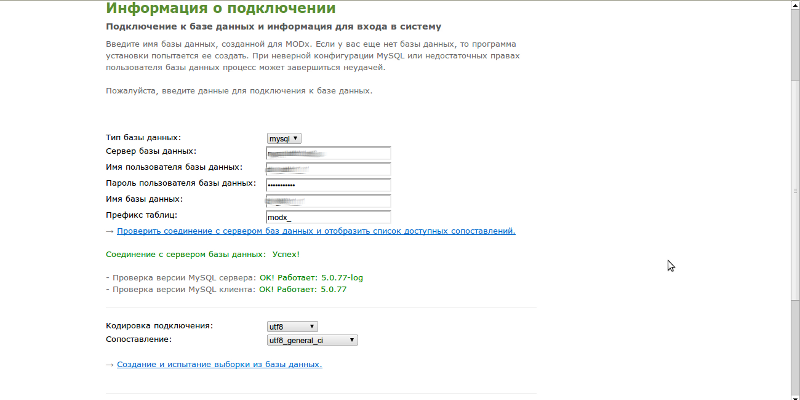
Enter the data to connect to the database
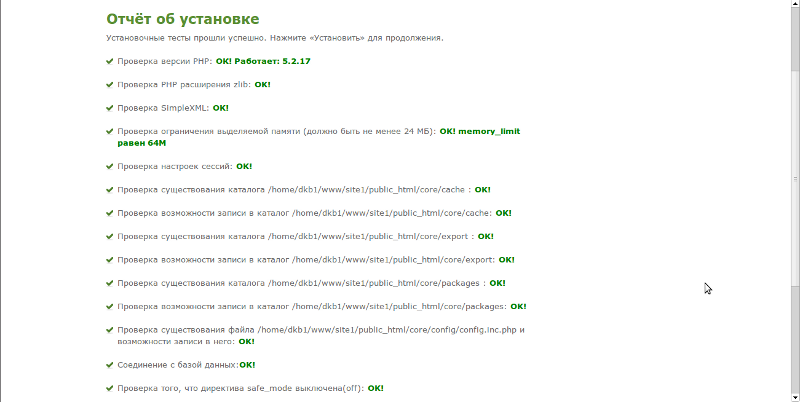
Environment check
Installation is complete + removal of installation files for security reasons
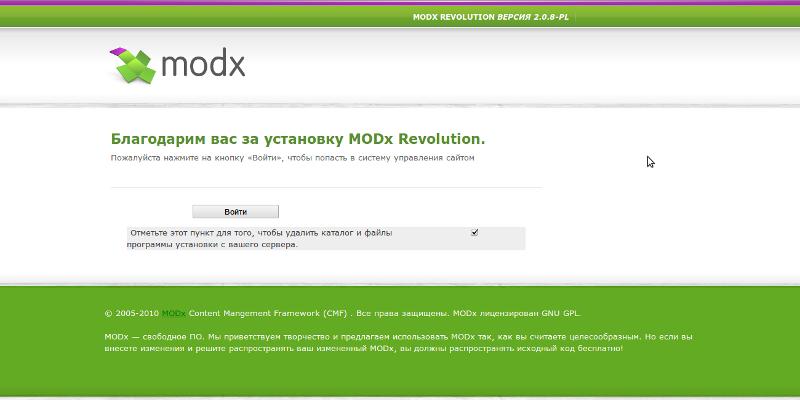
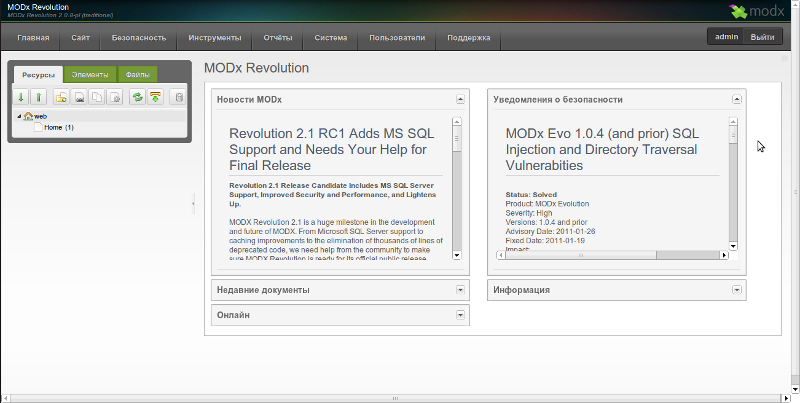
You can enter the control panel with the previously specified login and password.

Congratulations, MODX is installed!
By default, Revolution comes absolutely naked. That is, there is not a single chunk, plugin or snippet. But, there is a repository system. Therefore, the first thing we put the right packages.
Go to the menu System-> package management
Be sure to put:
Wayfinder - menu generation.
getResources - replacement of Ditto, work with resources.
CodeMirror is an editor with syntax highlighting.
Still I highly recommend to put
TinyMCE - WYSIWYG editor for the little ones. It is useful if you do not remember the html.
phpThumbOf - resize images when displayed on the screen. Works like a PHx filter.
Breadcrumbs is a menu chain to display navigation of the type “Home-> section-> subsection”.
translit - automatic transliteration of resource aliases for friendly url.
Here is another table of correspondences for Evo and Revo snippets .
Please note that after downloading the packages, they also need to be installed.

And after installation, it is advisable to also put updates on the packages, if any.
Poke System-> System Setup
Setting up the system is quite different from the Evo appearance, but the essence is the same. Find the desired parameter and change.
There is a filter by category + search by name. Also, separately configured engine (core) and snippets.

It should be noted that it is now possible to independently create system parameters in order to access them from our snippets and plug-ins.
The settings take effect immediately, there is no “save” button.
We need to set the site name and friendly url.

In order to automatically generate the pseudonym of a friendly url depending on the pagetitle, we have already installed the translit package, an analogue of transalias from Evo. Now set up everything as shown in the screenshot.
Similarly, all other settings are changed.
In principle, typical installation and configuration is complete. You can create resources, draw templates and delight households with a satisfied rumbling. Revolution was not so scary.
In conclusion, a few points:
Nameplate label tag Evo and Revo
Now all tags are enclosed in [[]]:
Cached and chunks and snippets, and even, probably, placeholders. To call them without a cache, we add an exclamation mark as before.
It was what everyone who knew dreamed about! Now PHx is built into the kernel and can be used everywhere!
For those who do not know that this is a wikibook . It is written for Evolution, but in general - everything is the same.
Differences from Evo:
Called on any placeholder or parameter like this:
The filter can be ANY snippet, which takes the parameters $ output and $ options and returns the result with echo.
The simplest example of use is:
When creating a TV, you can specify the type of output.
Example:
Create a TV with the name img, specify the type of output for it, image, fill in the default parameters and when outputting to the page as [[* img]], you will see the picture! That is, straight with tags img title, etc., that indicated. And if you set the type of output text - displays only the path to the image, as before.
This chip, by the way, is understood by getResources.
This snippet is the main tool for working with resources. He replaced Ditto2 (Ditto3 for Revo is also there, but it is beta and will not be updated anymore).
Snippet has several differences from Ditto.
1. It does not include TV processing by default. You need & includeTVs = `1` to immediately process TVs you need & processTVs =` 1`
2. Does not include the default content output! Yuzat & includeContent = `1` .
3. The limit on the withdrawal of resources by default - 5. I first stupid, why display only 5 documents from any container, since Ditto derived everything.
4. There is no default template, if you call getResources without & tpl = `` , it will display a list of resources with all properties as an array - very convenient, by the way.
5. There is no startID parameter, there are parents, it works like the same parameter with Ditto.
Resources, as before, can be scattered into categories, but now, categories are invested in each other and you can sort all your snippets and chunks as you please. Yes, now they are also dragged with the mouse and created by the right button, without reloading the page, if necessary.

In general, if you get used to a new resource tree, you just don’t want to go back to Evolution. Very comfortable, very.
I hope this article will help you a little bit in mastering the MODX Revolution. I would be happy to answer questions in the comments and update the topic, as needed.
Basic information on the Revolution can be found here .
Personally, I did not find any step-by-step instructions “for dummies”, and therefore I decided to write it myself.
Of course, this is a topic for not “absolutely dummies”, but for people who are at least a little familiar with Evolution and during the transition to Revolution have broken off everything unusual, like me. There will be no secrets and clever methods. The usual how-to with pictures (there are quite a few).
Installation
Personally, for a new site, I am creating a new account at% My Favorite Khost. It has default access to ssh, which is what I use.
So, we go to the server, to the site directory (public_html or something like that) and type in the console
wget modx.com/download/direct/modx-2.0.8-pl.zip
unzip ./modx-2.0.8-pl.zip
mv ./modx-2.0.8-pl/* ./
rm -rf ./modx-2.0.8-pl
mv ./ht.access ./.htaccess
So we download the latest release of Revolution for today, unpack it and move it immediately to the root of the site.
You also need to activate htaccess to use friendly url.
If it is easier for you to do this through the control panel of the hoster - to your health.
MODX is unpacked, you need to create a database for it. This is done from the admin host. Create another user and assign him full rights to the database and password more abruptly. Y% My Favorite Khost% is all done in 6 mouse clicks.
True, I then climb through phpmyadmin and manually set the database type to utf-8, since by default there is cp1251. utf-8 is a very good thing, I highly recommend using it.
')
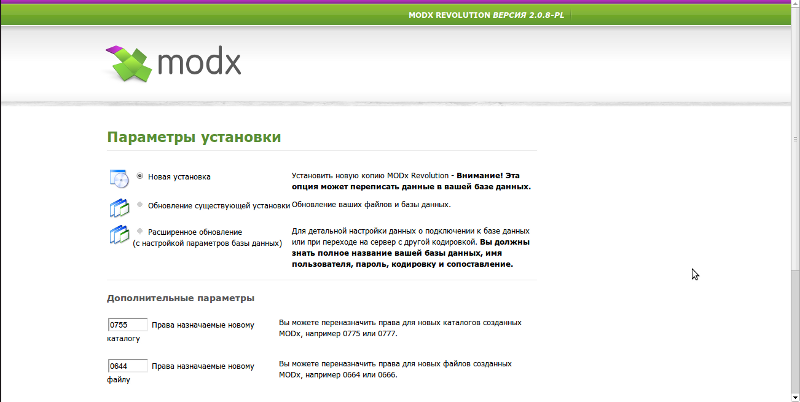
Now you can install MODX. Go to% sitename% / setup (yes, not / install!)
If you have PHP 5.3 and error 503 comes out, then most likely you need to register your time zone in .htaccess, for example:
php_value date.timezone "Asia/Novosibirsk"
Click on the buttons.
Enter the data to connect to the database
Environment check
Installation is complete + removal of installation files for security reasons
You can enter the control panel with the previously specified login and password.
Congratulations, MODX is installed!
Package installation
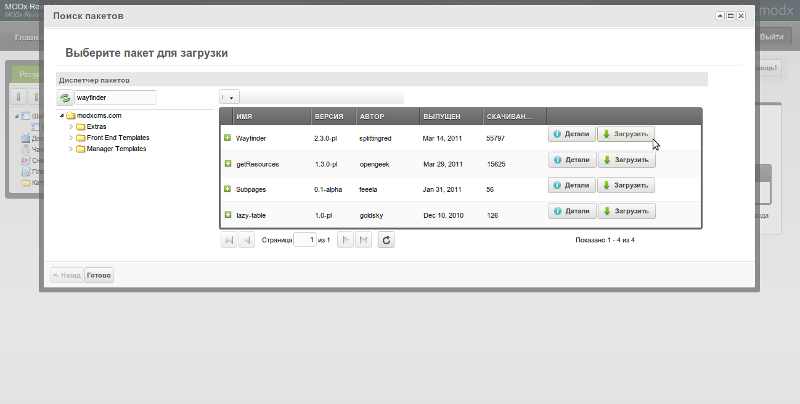
By default, Revolution comes absolutely naked. That is, there is not a single chunk, plugin or snippet. But, there is a repository system. Therefore, the first thing we put the right packages.
Go to the menu System-> package management
Be sure to put:
Wayfinder - menu generation.
getResources - replacement of Ditto, work with resources.
CodeMirror is an editor with syntax highlighting.
Still I highly recommend to put
TinyMCE - WYSIWYG editor for the little ones. It is useful if you do not remember the html.
phpThumbOf - resize images when displayed on the screen. Works like a PHx filter.
Breadcrumbs is a menu chain to display navigation of the type “Home-> section-> subsection”.
translit - automatic transliteration of resource aliases for friendly url.
Here is another table of correspondences for Evo and Revo snippets .
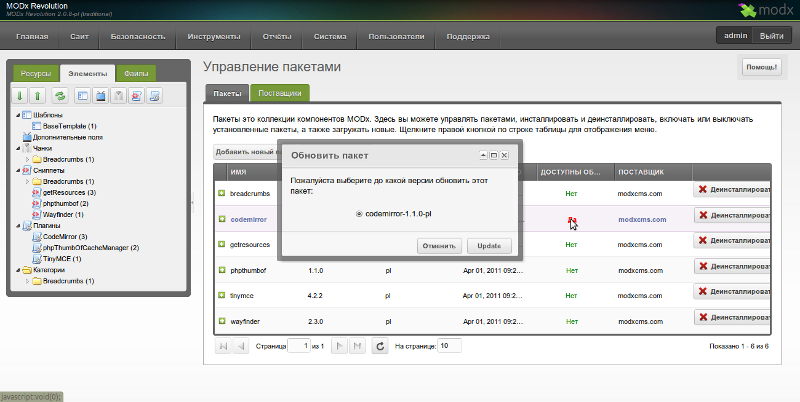
Please note that after downloading the packages, they also need to be installed.
And after installation, it is advisable to also put updates on the packages, if any.
Setup Workspace
Poke System-> System Setup
Setting up the system is quite different from the Evo appearance, but the essence is the same. Find the desired parameter and change.
There is a filter by category + search by name. Also, separately configured engine (core) and snippets.
It should be noted that it is now possible to independently create system parameters in order to access them from our snippets and plug-ins.
The settings take effect immediately, there is no “save” button.
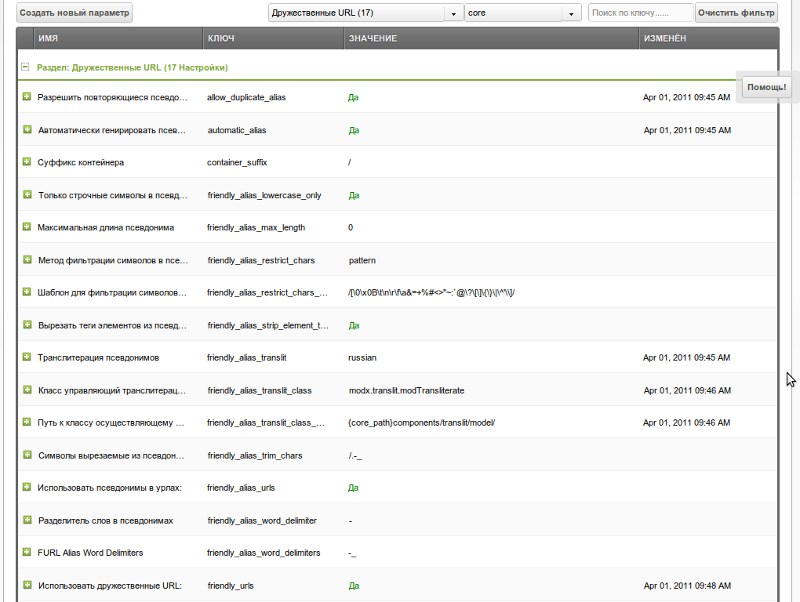
We need to set the site name and friendly url.
In order to automatically generate the pseudonym of a friendly url depending on the pagetitle, we have already installed the translit package, an analogue of transalias from Evo. Now set up everything as shown in the screenshot.
Similarly, all other settings are changed.
Almost all
In principle, typical installation and configuration is complete. You can create resources, draw templates and delight households with a satisfied rumbling. Revolution was not so scary.
In conclusion, a few points:
Difference in tags
Nameplate label tag Evo and Revo
Now all tags are enclosed in [[]]:
[[*templatevar]]
[[$chunk]]
[[snippet]]
[[+placeholder]]
[[~link]]
[[++system_setting]]
Cached and chunks and snippets, and even, probably, placeholders. To call them without a cache, we add an exclamation mark as before.
[[!$chunk]]
[[!snippet]]
Built-in PHx
It was what everyone who knew dreamed about! Now PHx is built into the kernel and can be used everywhere!
For those who do not know that this is a wikibook . It is written for Evolution, but in general - everything is the same.
Differences from Evo:
Called on any placeholder or parameter like this:
[[*templatevar:filter=``]]
[[+placeholder:filter=``]]
The filter can be ANY snippet, which takes the parameters $ output and $ options and returns the result with echo.
The simplest example of use is:
[[*longtitle:is=``:then=` `:else=`: [[*longtitle]]`]]
Processing TVs
When creating a TV, you can specify the type of output.
Example:
Create a TV with the name img, specify the type of output for it, image, fill in the default parameters and when outputting to the page as [[* img]], you will see the picture! That is, straight with tags img title, etc., that indicated. And if you set the type of output text - displays only the path to the image, as before.
This chip, by the way, is understood by getResources.
Snippet getResources
This snippet is the main tool for working with resources. He replaced Ditto2 (Ditto3 for Revo is also there, but it is beta and will not be updated anymore).
Snippet has several differences from Ditto.
1. It does not include TV processing by default. You need & includeTVs = `1` to immediately process TVs you need & processTVs =` 1`
2. Does not include the default content output! Yuzat & includeContent = `1` .
3. The limit on the withdrawal of resources by default - 5. I first stupid, why display only 5 documents from any container, since Ditto derived everything.
4. There is no default template, if you call getResources without & tpl = `` , it will display a list of resources with all properties as an array - very convenient, by the way.
5. There is no startID parameter, there are parents, it works like the same parameter with Ditto.
Resource tree
Resources, as before, can be scattered into categories, but now, categories are invested in each other and you can sort all your snippets and chunks as you please. Yes, now they are also dragged with the mouse and created by the right button, without reloading the page, if necessary.
In general, if you get used to a new resource tree, you just don’t want to go back to Evolution. Very comfortable, very.
Conclusion
I hope this article will help you a little bit in mastering the MODX Revolution. I would be happy to answer questions in the comments and update the topic, as needed.
Basic information on the Revolution can be found here .
Source: https://habr.com/ru/post/116614/
All Articles