Door bell boom
As such a post should begin - it was evening, there was nothing to do. The idea came to my head several times, but various circumstances did not allow me to realize it. But I still decided.

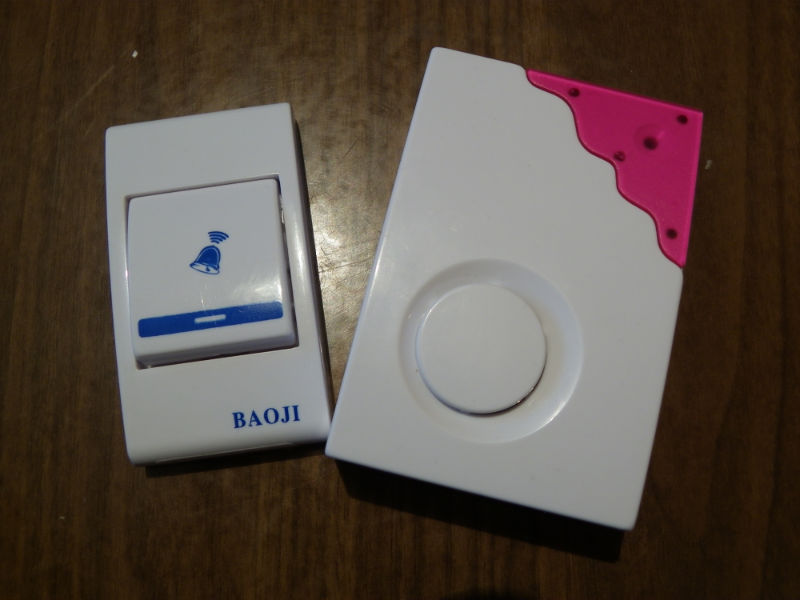
The first thing was to search for the call itself. Since now there is a huge selection of various calls, the first available wireless call was chosen for the experiment:
Next came the search for the mouse itself. I had to ring around friends for the presence of an excess tailing device, and as a result I even had a choice of several options. I chose the most suitable, in my opinion, option:

')
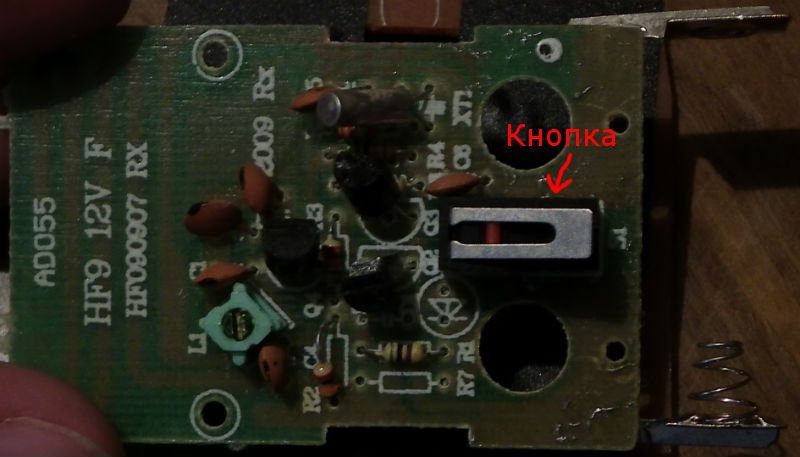
You don’t have to do anything with the call itself, the main thing is to check that it contains new batteries. But from the button we take out all the insides. Usually this is not difficult at all, and you don’t even need any tools. Next, look for the button on the board:
After we disassemble the mouse, cut off the wire and clean the board from everything superfluous, leave only the buttons. In parallel, we connect the buttons (two blue wires), having previously erased the extra tracks on the microcircuit, we connect the mouse buttons to the contacts of the bell button (two red wires):

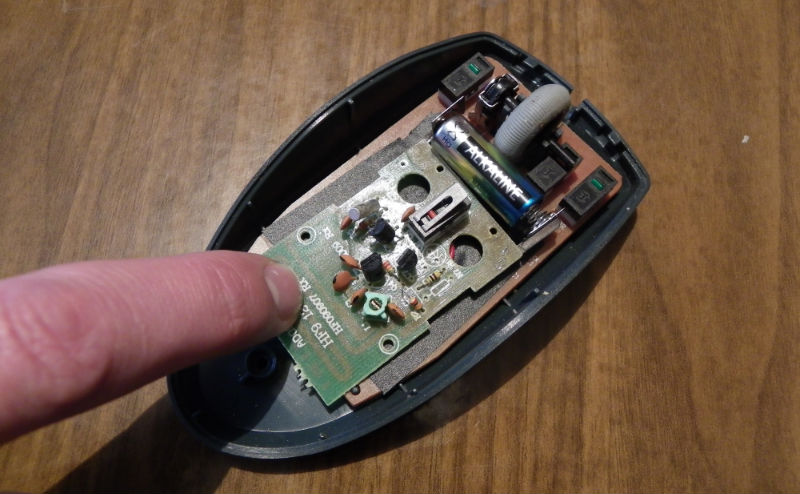
Carefully pack the whole thing in the mouse body. I was lucky that there was enough space in the case of the mouse to accommodate two boards:
On wireless calls behind the button there is always a sticky base for sticking it to the wall so as not to drill extra holes. This base is easy to tear off the button, and can be used as double-sided tape to glue the mouse itself to the wall.

The result of all this simple work can be seen in the very first photo. When testing the device, there were problems that eventually decided to replace the batteries in the bell and the button itself, which is why it is so important to have new batteries. The “bell” was successfully hung for about 3 days and was not stolen yet :)
Preparation stage
The first thing was to search for the call itself. Since now there is a huge selection of various calls, the first available wireless call was chosen for the experiment:
Next came the search for the mouse itself. I had to ring around friends for the presence of an excess tailing device, and as a result I even had a choice of several options. I chose the most suitable, in my opinion, option:
')
Stage of creation
You don’t have to do anything with the call itself, the main thing is to check that it contains new batteries. But from the button we take out all the insides. Usually this is not difficult at all, and you don’t even need any tools. Next, look for the button on the board:
After we disassemble the mouse, cut off the wire and clean the board from everything superfluous, leave only the buttons. In parallel, we connect the buttons (two blue wires), having previously erased the extra tracks on the microcircuit, we connect the mouse buttons to the contacts of the bell button (two red wires):
Final stage
Carefully pack the whole thing in the mouse body. I was lucky that there was enough space in the case of the mouse to accommodate two boards:
On wireless calls behind the button there is always a sticky base for sticking it to the wall so as not to drill extra holes. This base is easy to tear off the button, and can be used as double-sided tape to glue the mouse itself to the wall.
The result of all this simple work can be seen in the very first photo. When testing the device, there were problems that eventually decided to replace the batteries in the bell and the button itself, which is why it is so important to have new batteries. The “bell” was successfully hung for about 3 days and was not stolen yet :)
Source: https://habr.com/ru/post/115741/
All Articles