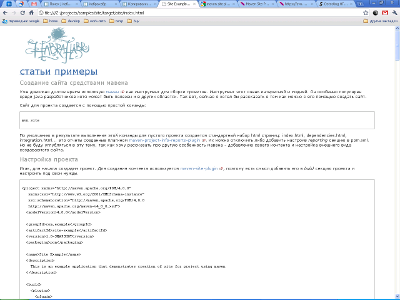
Website creation by means of maven
For quite a long time I have been using maven as a tool for building projects. This tool is very interesting and fashionable. It is especially popular with java developers, although it may be useful in other areas. So, now I would like to talk about how you can create a website with it. I do not know why this may be useful to you, I use it to create documentation for projects. In this article I will try to create an html page containing the text from this article and looking like a regular article in Habré.
The site for the project is created using a simple command:
By default, as a result of executing this command, a standard set of html pages is created for an empty project: index.html, dependencies.html, integration.html ... These are reports created by the plugin maven-project-info-reports-plugin . They can be disabled or added by setting the reporting section in pom.xml. But I will not delve into this topic, because I want to tell you about another feature of mavena - adding your own content and customizing the look and feel of the site being created.
')
So, first create a project. To create content, use maven-site-plugin , so it makes sense to add it to the build section of the project and configure it to suit your needs.
In this example, the source encoding ( inputEncoding ) and the resulting page ( outputEncoding ) are explicitly set, and the generation of reports ( generateReports ) is also disabled. Full list of settings can be found here . Now you can go to the main part.
By default, the source texts for creating the site are stored in src / site divided into folders with matching format, of which there are as many as 3 pieces in the maven:
In general, the initial project structure should look something like this:
The result will look like this:
As you can see, in addition to the source code, the site.xml file is also present here - the site descriptor and the resource folder are static resources of the site, about all of this later, but for now let us return to creating content.
Describes the structure of the document using simple textual structures for this, very much resembles the wiki style. The source text looks like a plain text file. To show how it works, consider the description of this article using this format.
To begin, add a header. This is an optional element, if present must be at the beginning of the document. It is indicated by at least the three preceding ---, followed by the text corresponding to the title of the document. It can be closed as follows - with the addition of additional information about the author and the date. In our case it will look like this:
I would add that it is recommended to use the date in ISO-8601 format, i.e. YYYY-MM-DD .
Now we divide the document into smaller logically related components, sections. Section headings are designated as plain text starting at the beginning of the line, without preceding spaces, tab characters, etc. They support several levels of nesting, each following should begin with one, two, etc. characters *. For simple documents, it is recommended to use paragraphs instead of sections.
Sections are created, now you need to add text to them. Any text contained in the document can be divided into paragraphs, whether it is plain text of the document, section text, or a list item. Paragraphs are designated as a set of lines of text separated by an empty line. Also, the first line of the paragraph must be preceded by a number of spaces. The number of spaces is not significant, however, it is customary to use 2, and to begin each line of the paragraph with these two spaces.
Sometimes there is a need to use lists. To designate them, the names of elements must begin with the symbol * and be separated by an empty line, the elements of the nested list must be preceded by a larger number of spaces. In our case, the part that describes the formats can be arranged as a list:
Elements of a higher level list and section names automatically complete the current list. If you need to close the list "manually" you can use the symbol [].
It may also be necessary to somehow highlight some text or leave it without formatting. In the programming area, this can be useful for extracting source code. At least 3 characters are used for designation - without preceding spaces.
If you add the + symbol, then such text will be framed.
Well, what kind of document without pictures? To designate a picture, the path to the file must be enclosed in [] characters, which should not be preceded by spaces, after which the name of the picture may follow.
If we needed a table, we could use the following syntax:
Or so:
The table must begin with the line * - without preceding spaces, the rows of the table must be separated by the same line * -. Also, the following characters can be used to align text:
The column headings can be denoted with a double | character.
Now let's add links to other resources / pages / sections of this page to our text. To add the ability to create links to sections, anchors are used. For their designation single symbols {} are used. According to what is concluded between them, an anchor will be generated. I note that the generation occurs with the replacement of spaces with underscores. The same symbols are used to refer to the links, but {{}} twice. Between them may be the name of the anchor, a relative link to another page of this resource, or a familiar link to another resource. You can also change the name of the link by taking everything in double {{}} + and take the link without a name in another {}.
Well, in conclusion, you can change the font. Single characters <> denote italics, double << >> - bold, threefold <<< >>> - monospaced.
As a result, we get something like this:

Add a few more pages and you can proceed to customize the appearance.
For details here .
In order to customize the look, you can do 3 things:
The simplest thing you can do is override the CSS styles you need. All you need to do is create a site.css file, and then who is ready for it. In his example, he took as a basis styles similar to those in the habr.
Add a site descriptor file (site.xml) to the project.
In this example, the side menu is configured, which consists of the Articles section, which in turn consists of the elements Article and Example 0-4. You can break it into several sections:
In addition to the menu, it is also possible to control other elements, such as version, publication date, banners, navigation bar, etc.
If you add these lines, the project version will not be visible, and the publication date will be located under the menu with the specified format. In addition to all the above, you can apply another skin to the site:
As a result, the appearance of the site will change to this:

For details of the settings here .
A site template is a velocity script that is responsible for converting text into the resulting format, in our case in html. There are a lot of nuances here, so I will not consider it in this article, I will show only the result of what I did:

Source codes can be found on github .
The site for the project is created using a simple command:
mvn site
By default, as a result of executing this command, a standard set of html pages is created for an empty project: index.html, dependencies.html, integration.html ... These are reports created by the plugin maven-project-info-reports-plugin . They can be disabled or added by setting the reporting section in pom.xml. But I will not delve into this topic, because I want to tell you about another feature of mavena - adding your own content and customizing the look and feel of the site being created.
')
Project Setup
So, first create a project. To create content, use maven-site-plugin , so it makes sense to add it to the build section of the project and configure it to suit your needs.
<project xmlns="http://maven.apache.org/POM/4.0.0" xmlns:xsi="http://www.w3.org/2001/XMLSchema-instance" xsi:schemaLocation="http://maven.apache.org/POM/4.0.0 http://maven.apache.org/maven-v4_0_0.xsd"> <modelVersion>4.0.0</modelVersion> <groupId>com.example</groupId> <artifactId>site-example</artifactId> <version>1.0-SNAPSHOT</version> <packaging>pom</packaging> <name>Site Example</name> <description> This is an example application that demonstrates creation of site for project using maven </description> <build> <plugins> <plugin> <groupId>org.apache.maven.plugins</groupId> <artifactId>maven-site-plugin</artifactId> <version>2.1</version> <configuration> <inputEncoding>UTF-8</inputEncoding> <outputEncoding>UTF-8</outputEncoding> <generateReports>false</generateReports> </configuration> </plugin> </plugins> </build> </project>
In this example, the source encoding ( inputEncoding ) and the resulting page ( outputEncoding ) are explicitly set, and the generation of reports ( generateReports ) is also disabled. Full list of settings can be found here . Now you can go to the main part.
Add content
By default, the source texts for creating the site are stored in src / site divided into folders with matching format, of which there are as many as 3 pieces in the maven:
- APT Format ("Almost Plain Text"). The format is somewhat similar to the well-known wiki format. Most cute to me, so later in the article most attention will be focused on it.
- FML Format ("FAQ Markup Language"). As the name implies is created specifically to create FAQ documentation. Came from the first maven.
- XDoc format . Came from the first maven, where was the main / only format.
In general, the initial project structure should look something like this:
+- src/ +- site/ +- resources/ | +- css/ | | +- site.css | | | +- images/ | +- pic1.jpg | +- apt/ | +- index.apt | +- fml/ | +- general.fml | +- faq.fml | +- xdoc/ | +- other.xml | +- site.xml
The result will look like this:
+- target/ +- site/ +- css/ | +- images/ | +- index.html +- general.html +- faq.html +- other.html
As you can see, in addition to the source code, the site.xml file is also present here - the site descriptor and the resource folder are static resources of the site, about all of this later, but for now let us return to creating content.
Apt format
Describes the structure of the document using simple textual structures for this, very much resembles the wiki style. The source text looks like a plain text file. To show how it works, consider the description of this article using this format.
To begin, add a header. This is an optional element, if present must be at the beginning of the document. It is indicated by at least the three preceding ---, followed by the text corresponding to the title of the document. It can be closed as follows - with the addition of additional information about the author and the date. In our case it will look like this:
---- ---- sody ---- 2011-03-15
I would add that it is recommended to use the date in ISO-8601 format, i.e. YYYY-MM-DD .
Now we divide the document into smaller logically related components, sections. Section headings are designated as plain text starting at the beginning of the line, without preceding spaces, tab characters, etc. They support several levels of nesting, each following should begin with one, two, etc. characters *. For simple documents, it is recommended to use paragraphs instead of sections.
---- ---- sody ---- 2011-03-15 * APT * * *
Sections are created, now you need to add text to them. Any text contained in the document can be divided into paragraphs, whether it is plain text of the document, section text, or a list item. Paragraphs are designated as a set of lines of text separated by an empty line. Also, the first line of the paragraph must be preceded by a number of spaces. The number of spaces is not significant, however, it is customary to use 2, and to begin each line of the paragraph with these two spaces.
---- ---- sody ---- 2011-03-15 . . java . , . : mvn site
Sometimes there is a need to use lists. To designate them, the names of elements must begin with the symbol * and be separated by an empty line, the elements of the nested list must be preceded by a larger number of spaces. In our case, the part that describes the formats can be arranged as a list:
src/site , 3 : * APT Format ("Almost Plain Text"). - . , . * FML Format ("FAQ Markup Language"). FAQ . . * XDoc format. , / . []
Elements of a higher level list and section names automatically complete the current list. If you need to close the list "manually" you can use the symbol [].
It may also be necessary to somehow highlight some text or leave it without formatting. In the programming area, this can be useful for extracting source code. At least 3 characters are used for designation - without preceding spaces.
: +----+ +- target/ +- site/ +- css/ | +- images/ | +- index.html +- general.html +- faq.html +- other.html +----+
If you add the + symbol, then such text will be framed.
Well, what kind of document without pictures? To designate a picture, the path to the file must be enclosed in [] characters, which should not be preceded by spaces, after which the name of the picture may follow.
[images/sample-site.jpg] Example Site
If we needed a table, we could use the following syntax:
*----------*--------------*----------------* || || || | *----------*--------------*----------------* | | | | *----------*--------------*----------------* | | | | *----------*--------------*----------------* | | | | *----------*--------------*----------------*
Or so:
*----------------:--------------+ || | .. | *----------------:--------------+ || | 26.03.1989 | *----------------:--------------+ || | 651003 | *----------------:--------------+
The table must begin with the line * - without preceding spaces, the rows of the table must be separated by the same line * -. Also, the following characters can be used to align text:
- * for centering
- + for left justification
- : for right justification
The column headings can be denoted with a double | character.
Now let's add links to other resources / pages / sections of this page to our text. To add the ability to create links to sections, anchors are used. For their designation single symbols {} are used. According to what is concluded between them, an anchor will be generated. I note that the generation occurs with the replacement of spaces with underscores. The same symbols are used to refer to the links, but {{}} twice. Between them may be the name of the anchor, a relative link to another page of this resource, or a familiar link to another resource. You can also change the name of the link by taking everything in double {{}} + and take the link without a name in another {}.
src/site , 3 : * {{{http://maven.apache.org/doxia/references/apt-format.html}APT Format}} ("Almost Plain Text"). - . , . * {{{http://maven.apache.org/doxia/references/fml-format.html}FML Format}} ("FAQ Markup Language"). FAQ . . * {{{http://maven.apache.org/doxia/references/xdoc-format.html}XDoc format}}. , / . []
Well, in conclusion, you can change the font. Single characters <> denote italics, double << >> - bold, threefold <<< >>> - monospaced.
, ISO-8601, .. <<YYYY-MM-DD>>.
As a result, we get something like this:
Add a few more pages and you can proceed to customize the appearance.
For details here .
Appearance customization
In order to customize the look, you can do 3 things:
- Redefine CSS styles in site.css to suit your needs.
- Add site descriptor (site.xml). You can set / add the main elements of the page layout, you can also customize the navigation menu.
- Customize the page template, in this case, you can completely change the resulting page.
Customize styles
The simplest thing you can do is override the CSS styles you need. All you need to do is create a site.css file, and then who is ready for it. In his example, he took as a basis styles similar to those in the habr.
Site Descriptor Setup
Add a site descriptor file (site.xml) to the project.
<project xmlns="http://maven.apache.org/DECORATION/1.0.0" xmlns:xsi="http://www.w3.org/2001/XMLSchema-instance" xsi:schemaLocation="http://maven.apache.org/DECORATION/1.0.0 http://maven.apache.org/xsd/decoration-1.0.0.xsd"> <body> <menu name=""> <item name="" href="index.html"/> <item name=" 0" href="sample0.html"/> <item name=" 1" href="sample1.html"/> <item name=" 2" href="sample2.html"/> <item name=" 4" href="sample3.html"/> </menu> </body> </project>
In this example, the side menu is configured, which consists of the Articles section, which in turn consists of the elements Article and Example 0-4. You can break it into several sections:
<project xmlns="http://maven.apache.org/DECORATION/1.0.0" xmlns:xsi="http://www.w3.org/2001/XMLSchema-instance" xsi:schemaLocation="http://maven.apache.org/DECORATION/1.0.0 http://maven.apache.org/xsd/decoration-1.0.0.xsd"> <body> <menu name=""> <item name="" href="index.html"/> </menu> <menu name=""> <item name=" 0" href="sample0.html"/> <item name=" 1" href="sample1.html"/> <item name=" 2" href="sample2.html"/> <item name=" 4" href="sample3.html"/> </menu> </body> </project>
In addition to the menu, it is also possible to control other elements, such as version, publication date, banners, navigation bar, etc.
<version position="none"/> <publishDate position="navigation-bottom" format="yyyy-MM-dd"/>
If you add these lines, the project version will not be visible, and the publication date will be located under the menu with the specified format. In addition to all the above, you can apply another skin to the site:
<skin> <groupId>org.apache.maven.skins</groupId> <artifactId>maven-classic-skin</artifactId> <version>1.0</version> </skin>
As a result, the appearance of the site will change to this:
For details of the settings here .
Site template customization
A site template is a velocity script that is responsible for converting text into the resulting format, in our case in html. There are a lot of nuances here, so I will not consider it in this article, I will show only the result of what I did:
Source codes can be found on github .
Source: https://habr.com/ru/post/115657/
All Articles